Spray Gun - Testing methods of application with the aim of refining skill
To begin unit X, I wanted to carry over things from beta project that I thought needed refining. Once I started this year, I quickly realised that my glazing wasn't quite up to scratch so I wanted to try using the spray gun. To complete this sample batch, I used some previous samples from the initial week that I had lying around. See Below for glazing videos and outcomes of samples:
*Initial 2 glazing videos*
Analysis of testing:
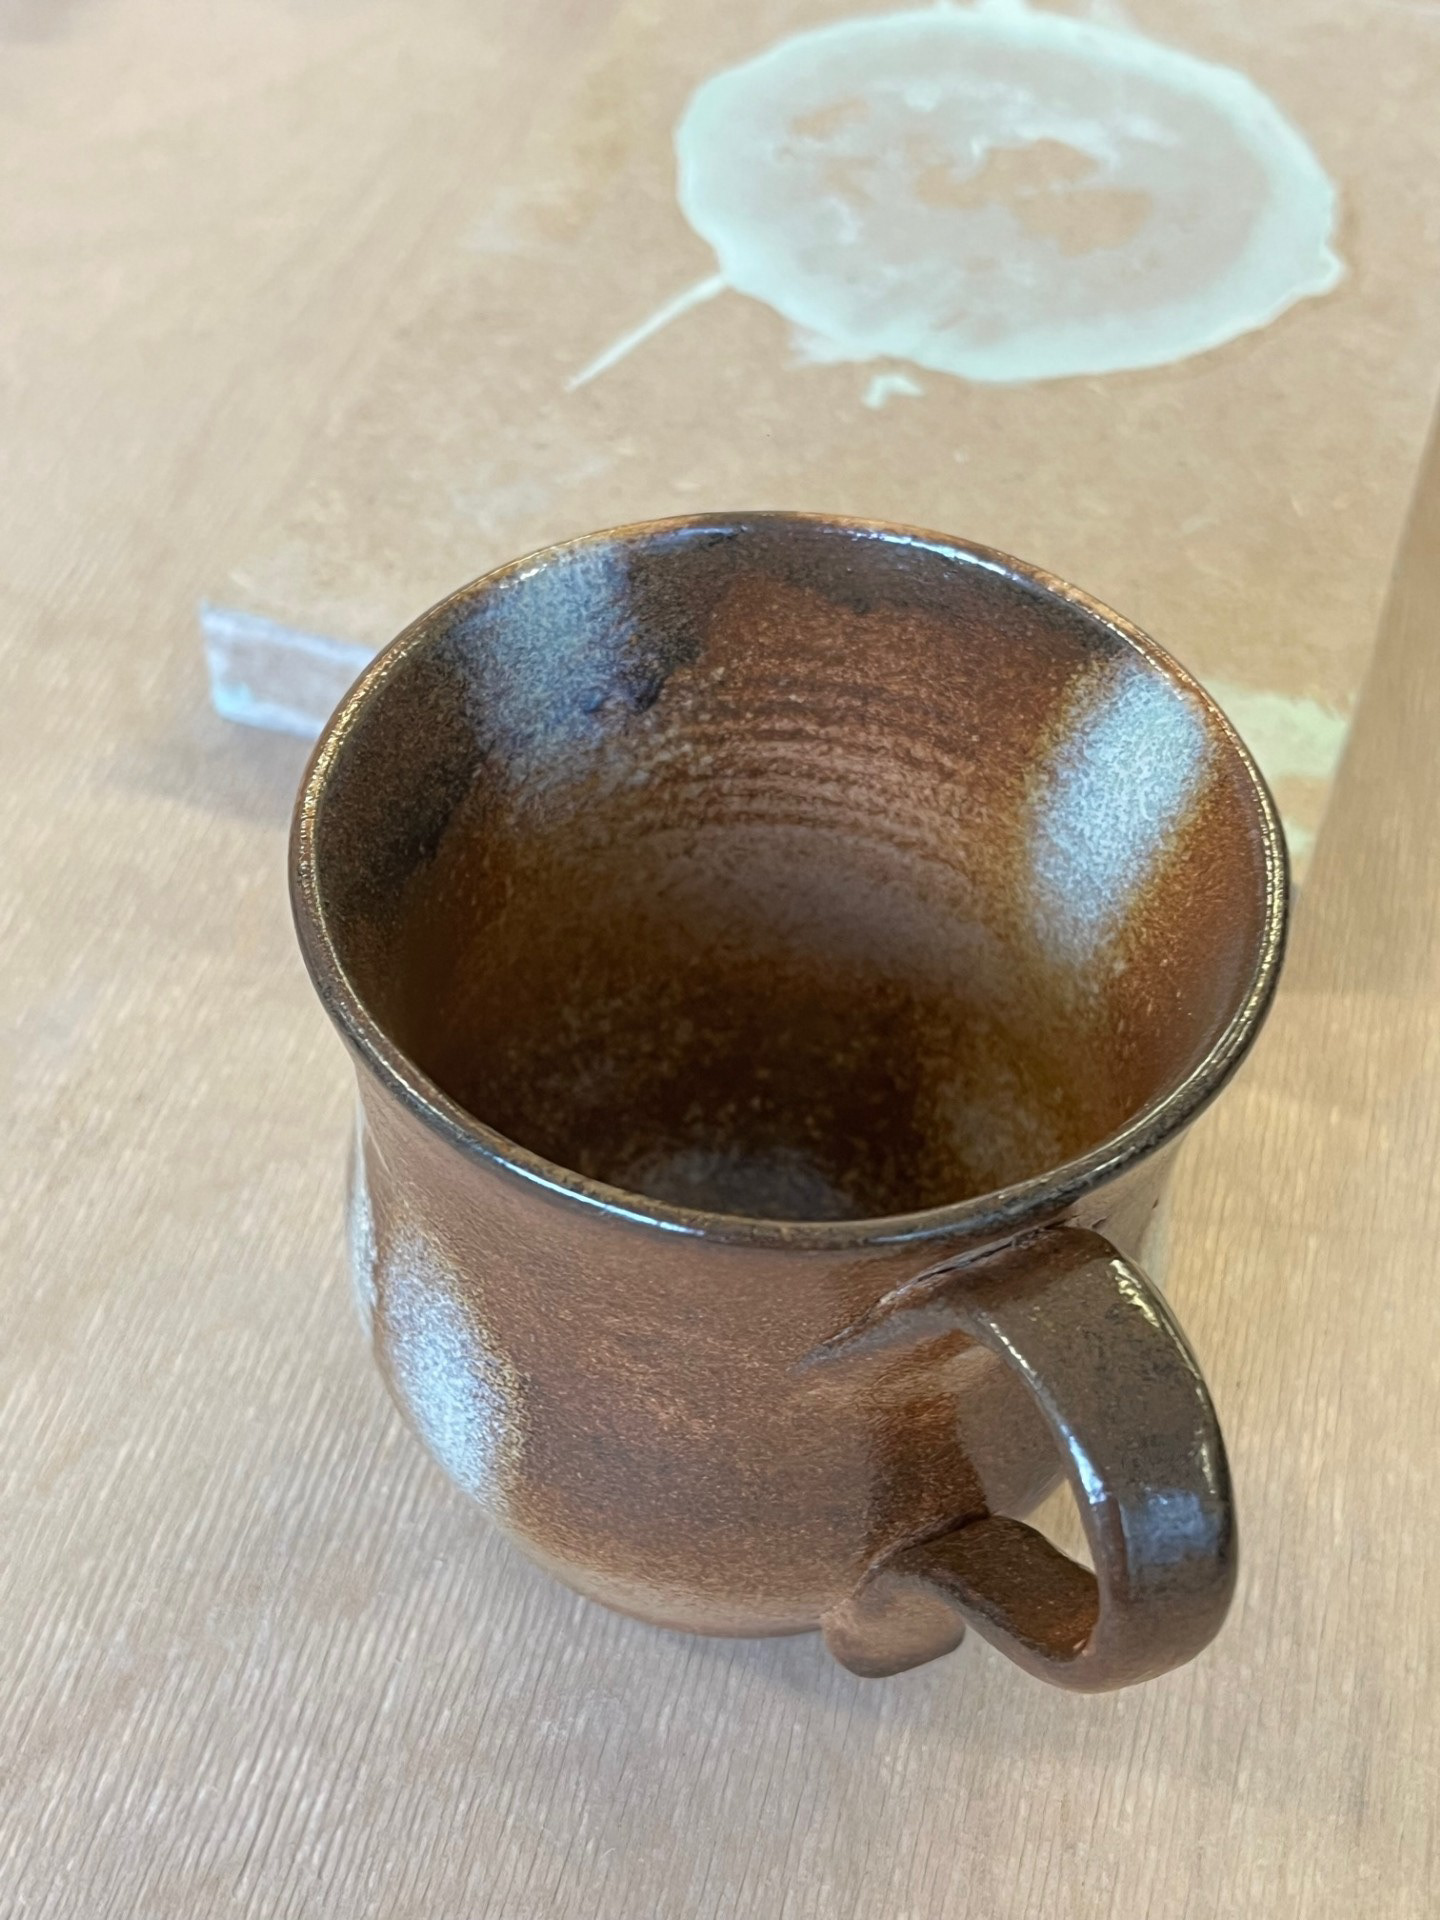
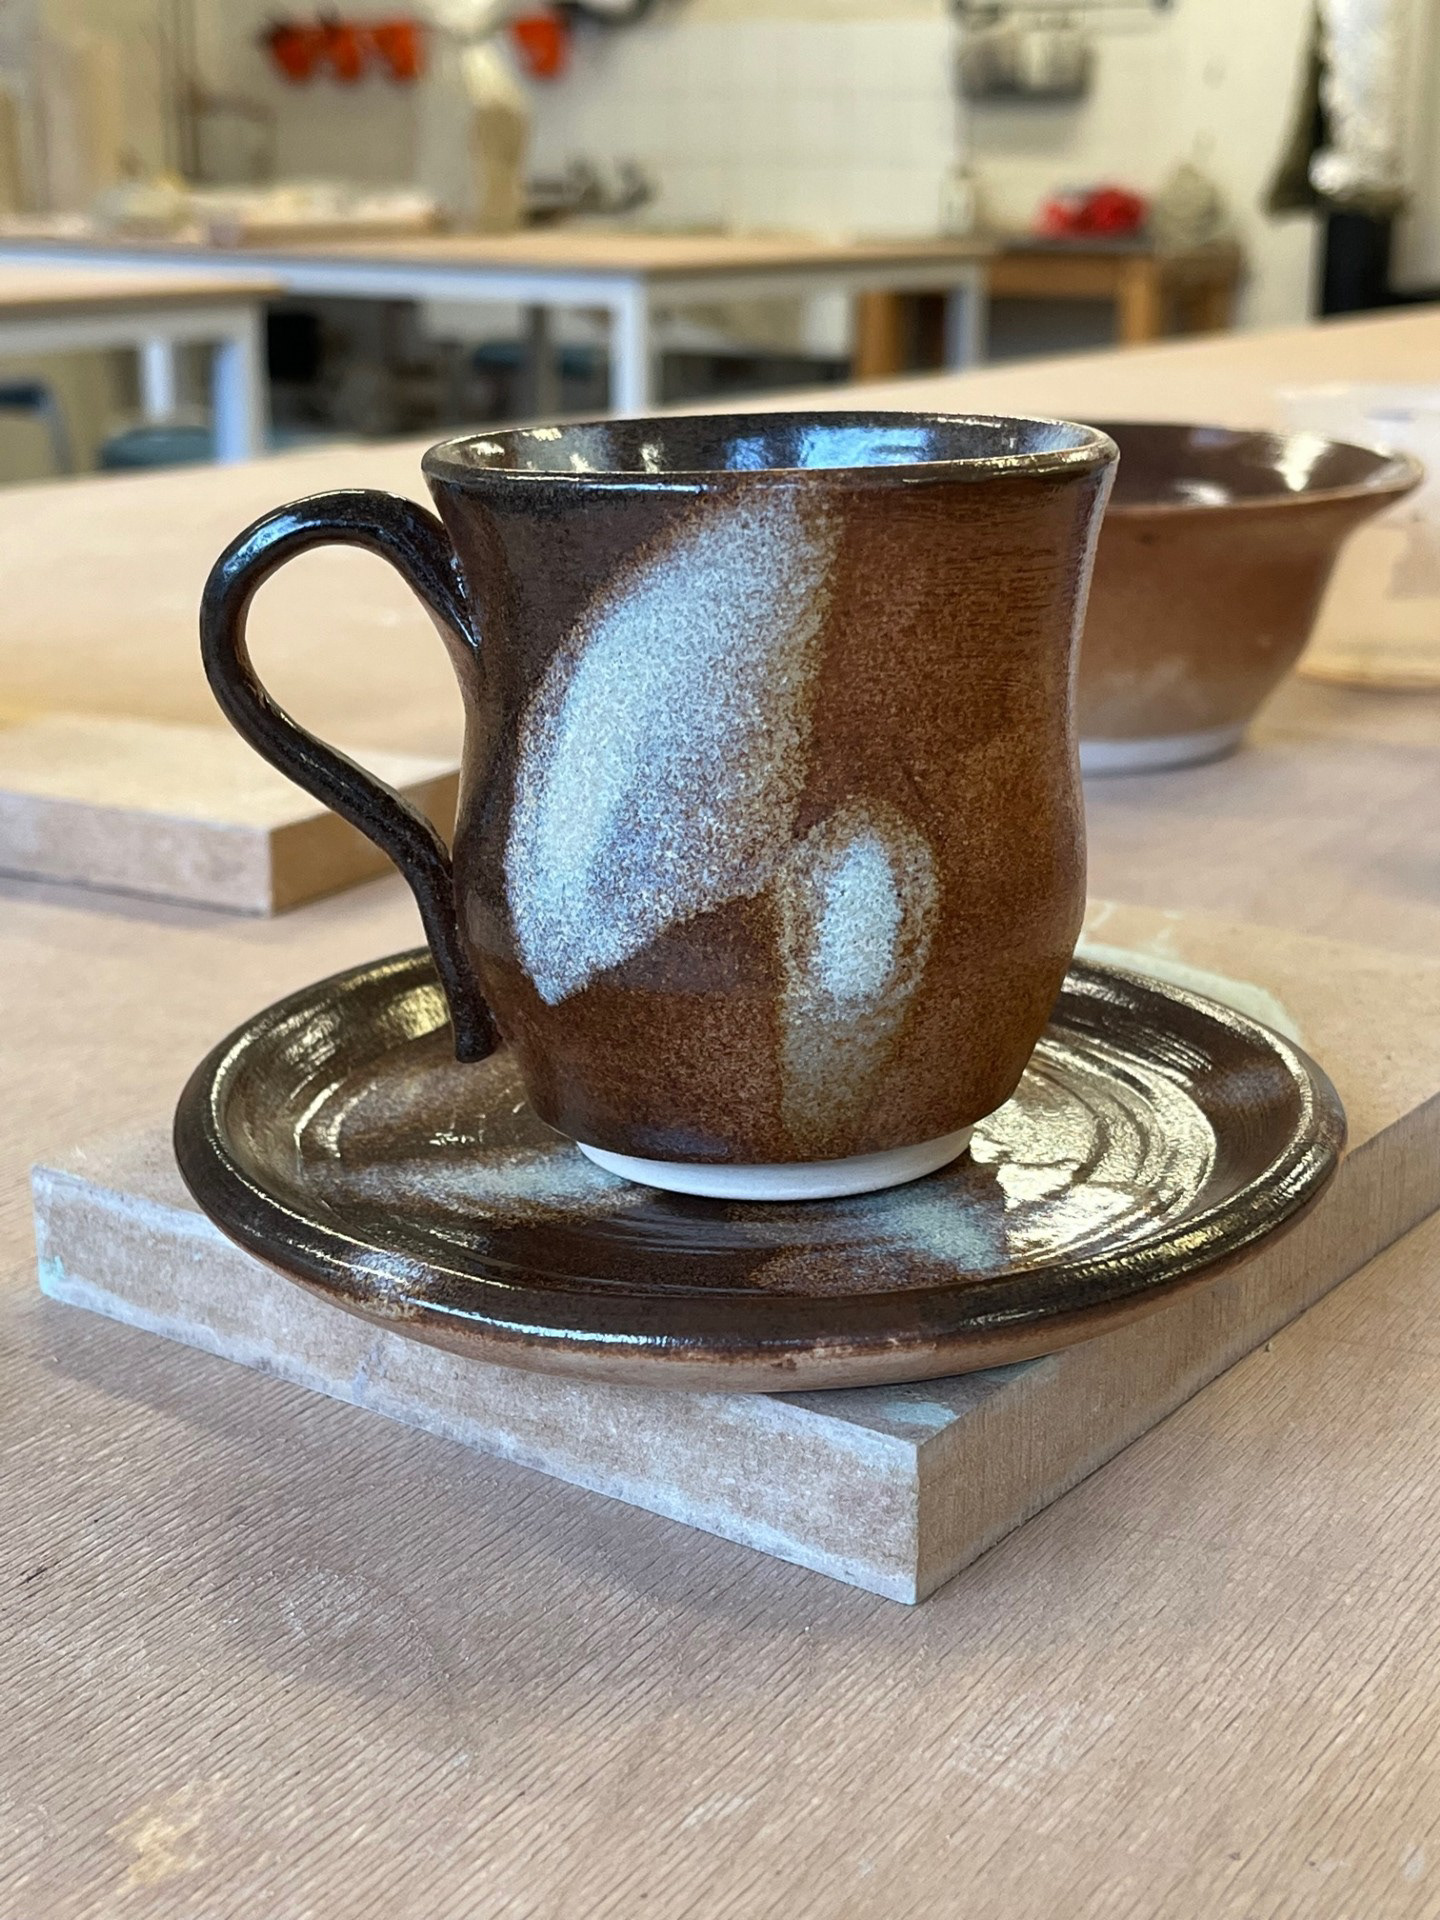
I think that the spray gun is a very useful method of creating and for me, I think that it really works because it allows my to get the clean and refined look that I'm going for. In relation to the actual glazing, I think that it did go well however the thickness is something that I really need to consider for next time as I wasn't as happy with the outcome as hoped. I realised that I didn't do enough coats of the spray gun for either glaze so the colours came out quite washed. One thing that I did like was my style of spray application as I focused on some areas heavily with one glaze which gave it quite a cool and fun finish. For the sample at the bottom, I tried a new application method as I thought that it would be quite fun to try it. Using the spray gun, I sprayed one side with one glaze and held the gun almost parallel to the piece so that if you turn the piece 180 degrees you would be able to see the other colour. I really liked this method and I think that I would like to try it again in the future however the one thing I would need to work on is the quality of my application.
Overall, I think that these samples went quite well however I think that I definitely need to work on my application as I'm currently struggling to get an even thickness on the pots. I think that next time I'm going to focus on building up quite a thick layer of glaze as well as counting how many passes I do on each side of the pieces so that I have a concrete and reliable reference when glazing next time. However, I have come to the realisation that I want to use self bought brush on glazes later on in my making process. So in terms of the spray gun, I think that I will only be using it when I'm using the premixed glazes provided by university and when related to the brush on glazes I think that I would only use the spray gun for base layers and top coats.
Personal Skill Development: Scale
One of the main aims that I set myself for this project was that I wanted to improve on scale. I thought that one of the only ways to do this was to practice so that's what I have decided to do. In terms of actual throwing, this is the only thing that I am aiming for currently because it is at the top of my priority list as a maker. Going into this I knew that the main thing that I was going to focus on was building up my piece. Pulling the piece up and building it is something that I have struggled with in the past but I'm using this process as a way of building not just that skill but all throwing skills in general. See below for process videos and Outcomes:
On the left, for the two samples at the bottom, I wanted to experiment with adding a layer of white slip when on the wheel. My thoughts behind this was that I was curious to see how the glaze would sit and change colour on the piece, for example whether it would hang on the slip. I think that overall I just wanted to use these as true test samples and build up a style range in samples ready for my personal glaze to arrive. Upon reflection, I actually really like the idea of using slip on these pieces as it adds that extra level of depth to the designing. I also quite like completing the process itself so if the result turns out well when glazed then I would definitely consider taking it forward for further development.
See below for one of the pieces finished:
The piece below is the one that I chose to finish because the shape was one of my favourites. I really really like the tapered bottom because I love how it looks quite lustrous and exaggerated. Another feature that I love is the belly of the pot as it makes a good place for it to hold so your hands can nicely grip the pot.


Reflection:
I think that this line of inquiry is a perfect example of how I investigate and ideate through making as it shows how through trying to improve on my scale, I was able to realise how I love a certain shape and form. Throughout my making, I love finding things out through happy accidents because it feels like I am embracing my own organic flow when I do so. When I imagine my style of making in my head I imagine it like a tree; every idea is a like a branch that continues to grow and develop into more branches that are all interconnected and a development of one another. Overall, I think that scale is something that I will be taking forward a it is a skill that I naturally have the urge to develop. I have the urge to throw bigger pots because to me, I like the notion that the bigger it is, the more there is for the pot to hold. I think this is because my whole philosophy of making is held by the idea that I like making objects for objects. Linking back to my need to not restrict my pieces with a specific label of purpose.
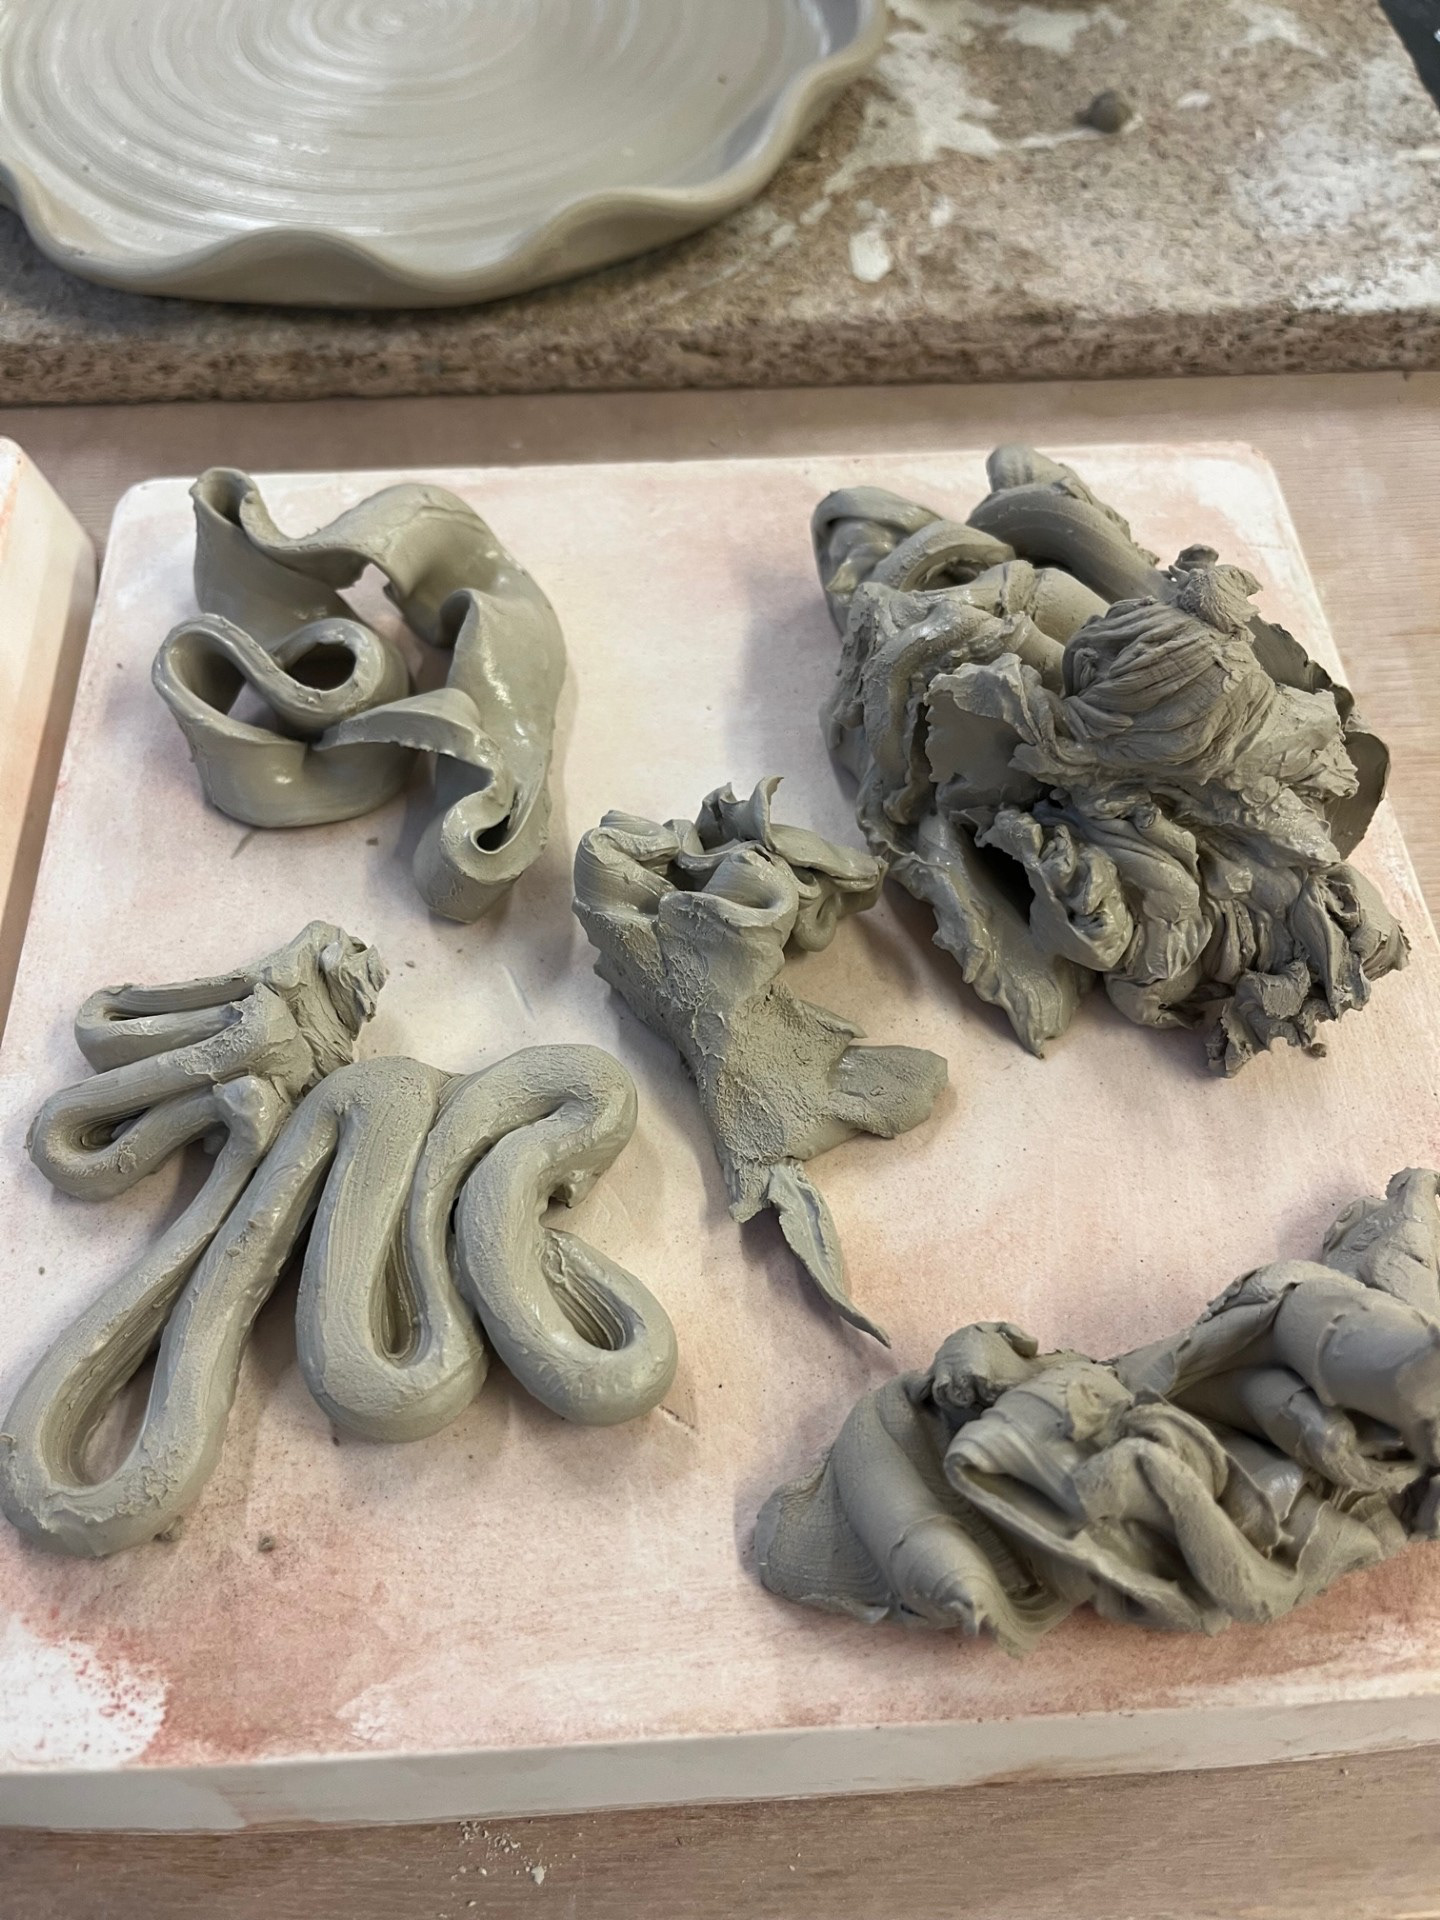
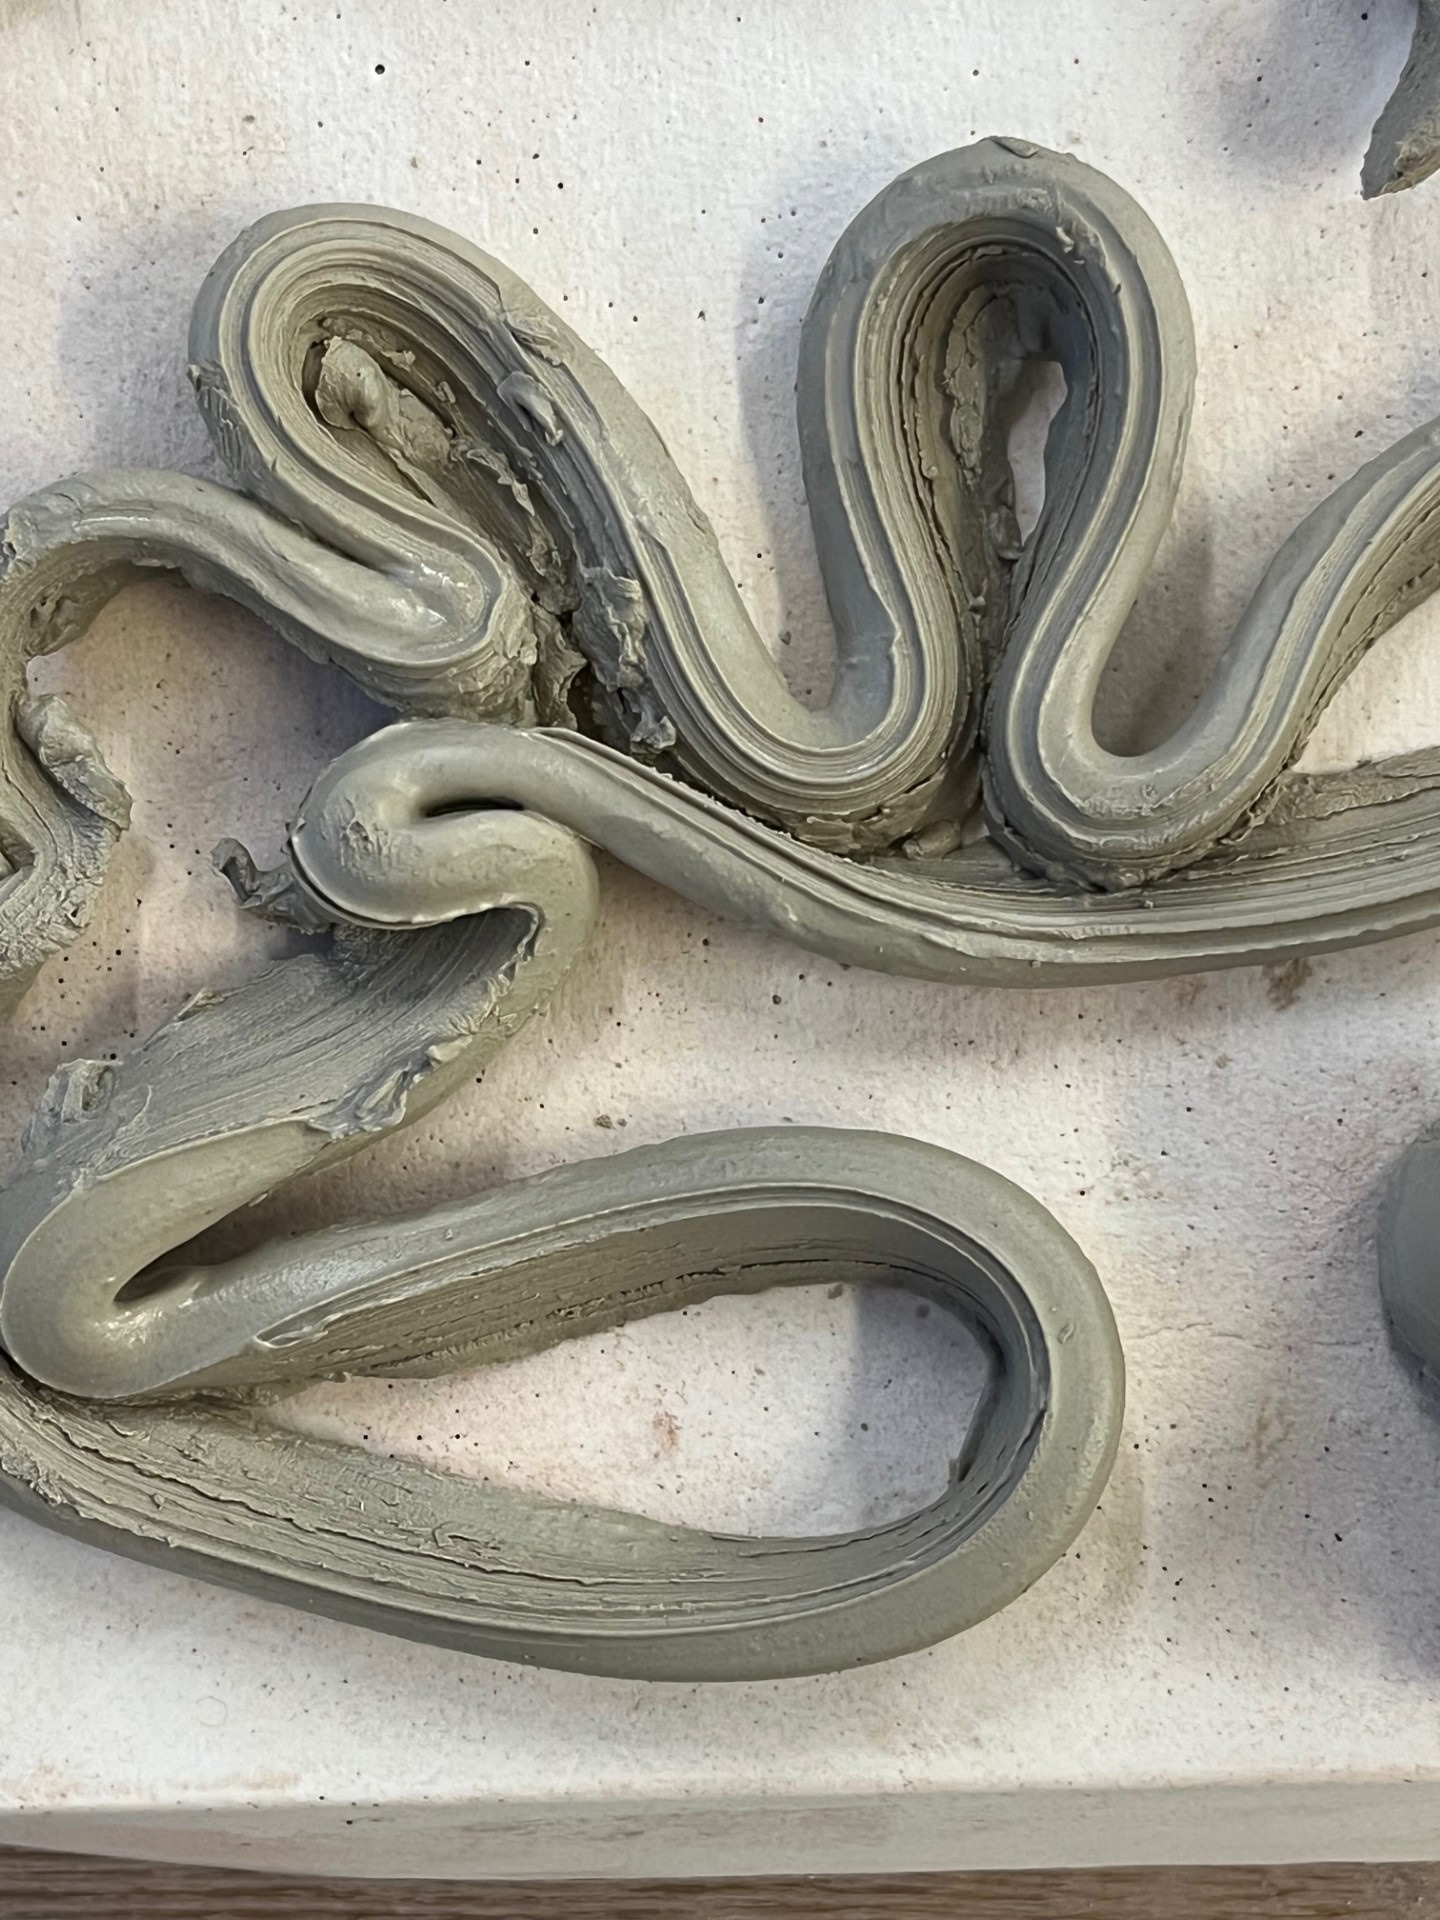
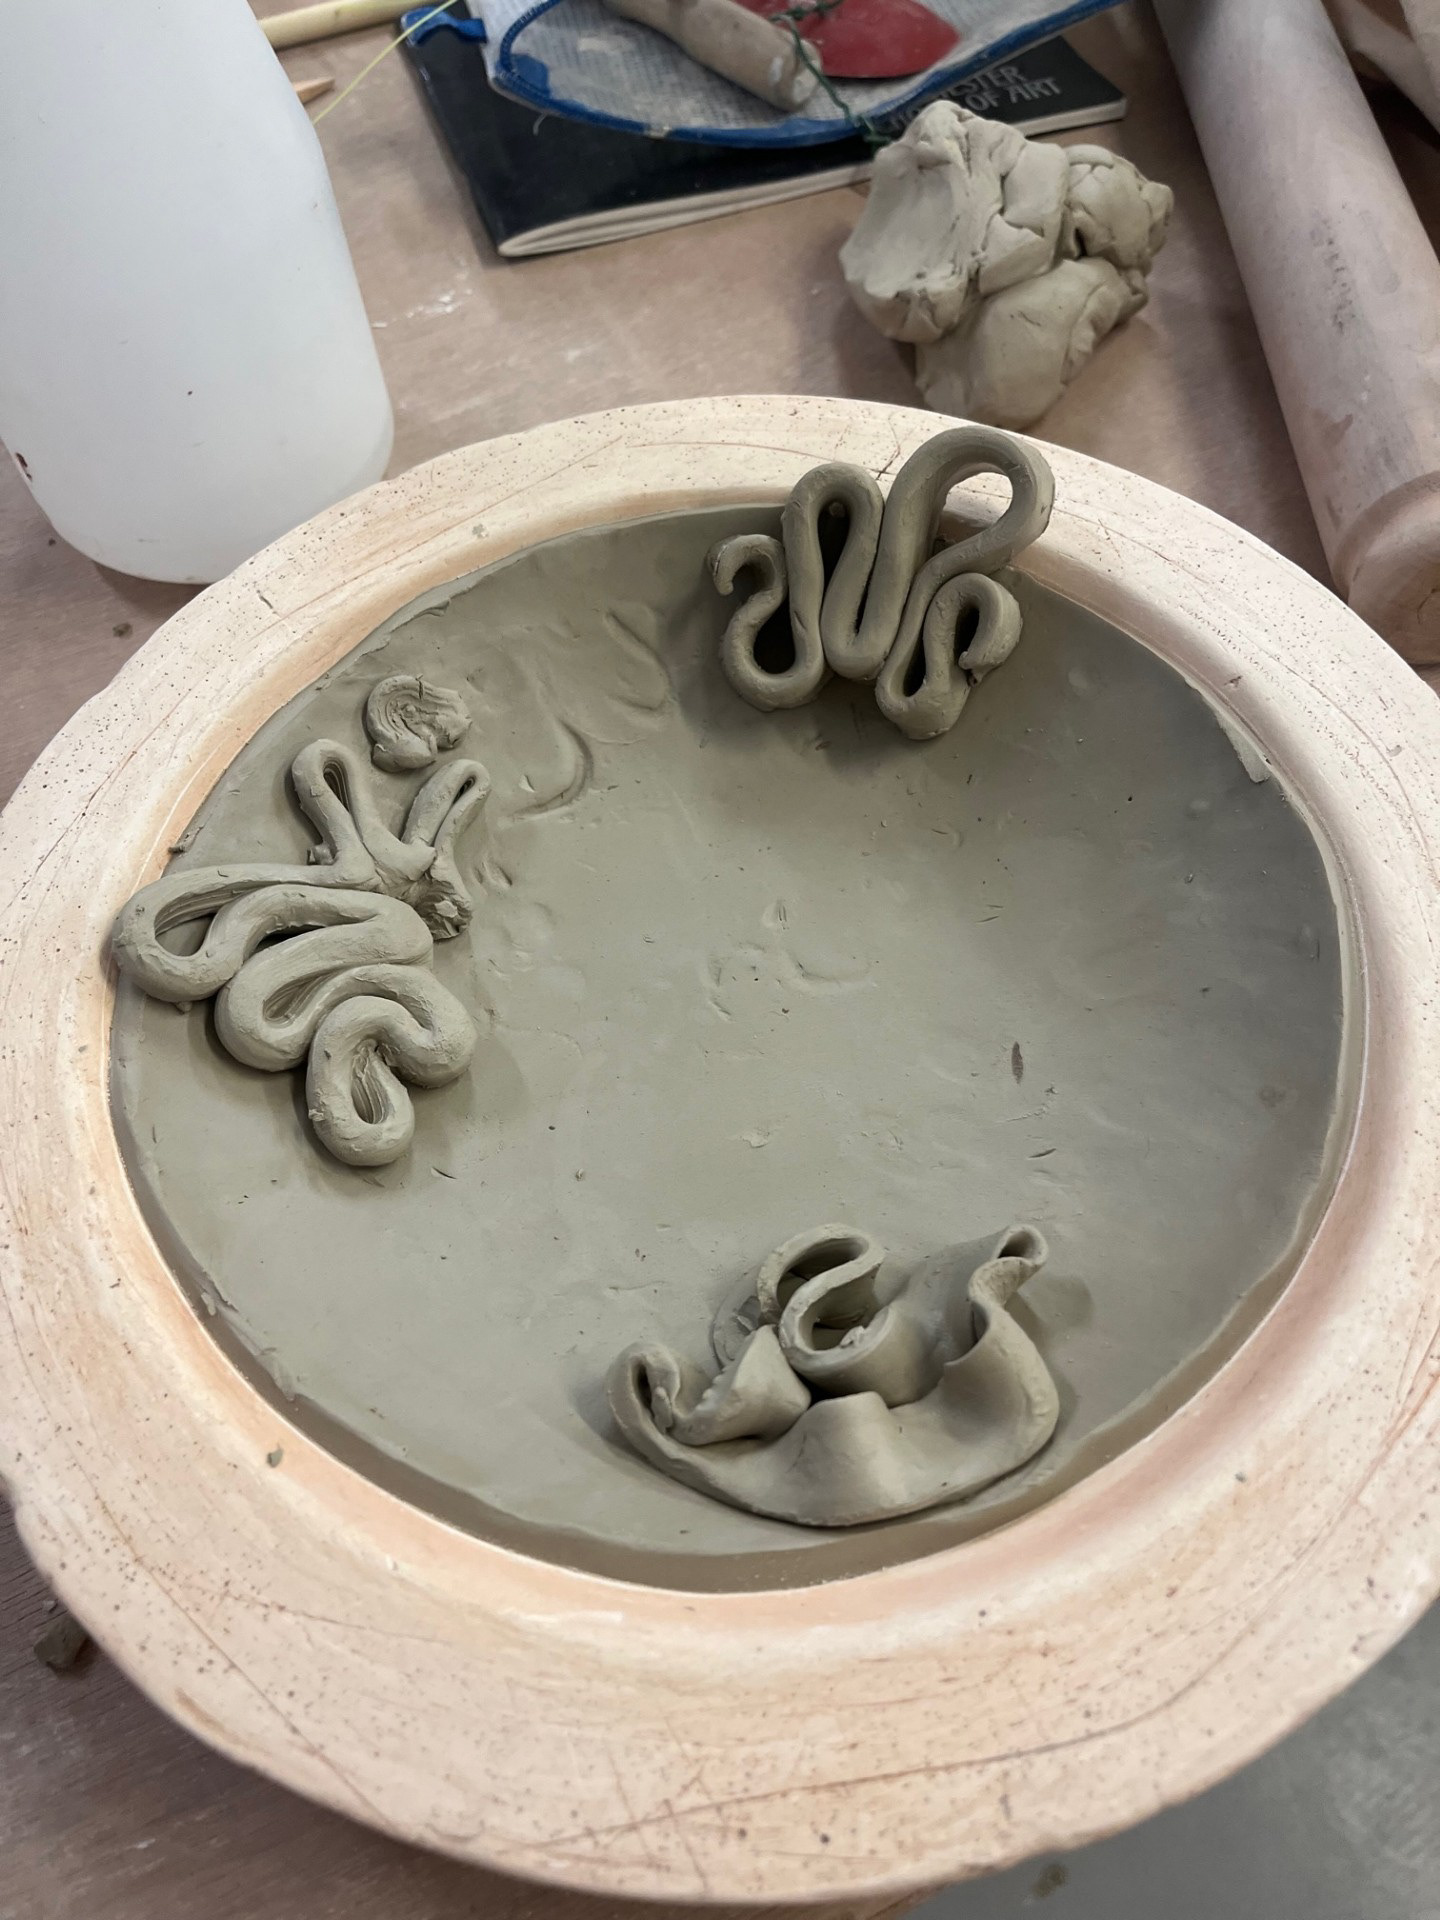
Initial Test Samples Considering Symbiosis:
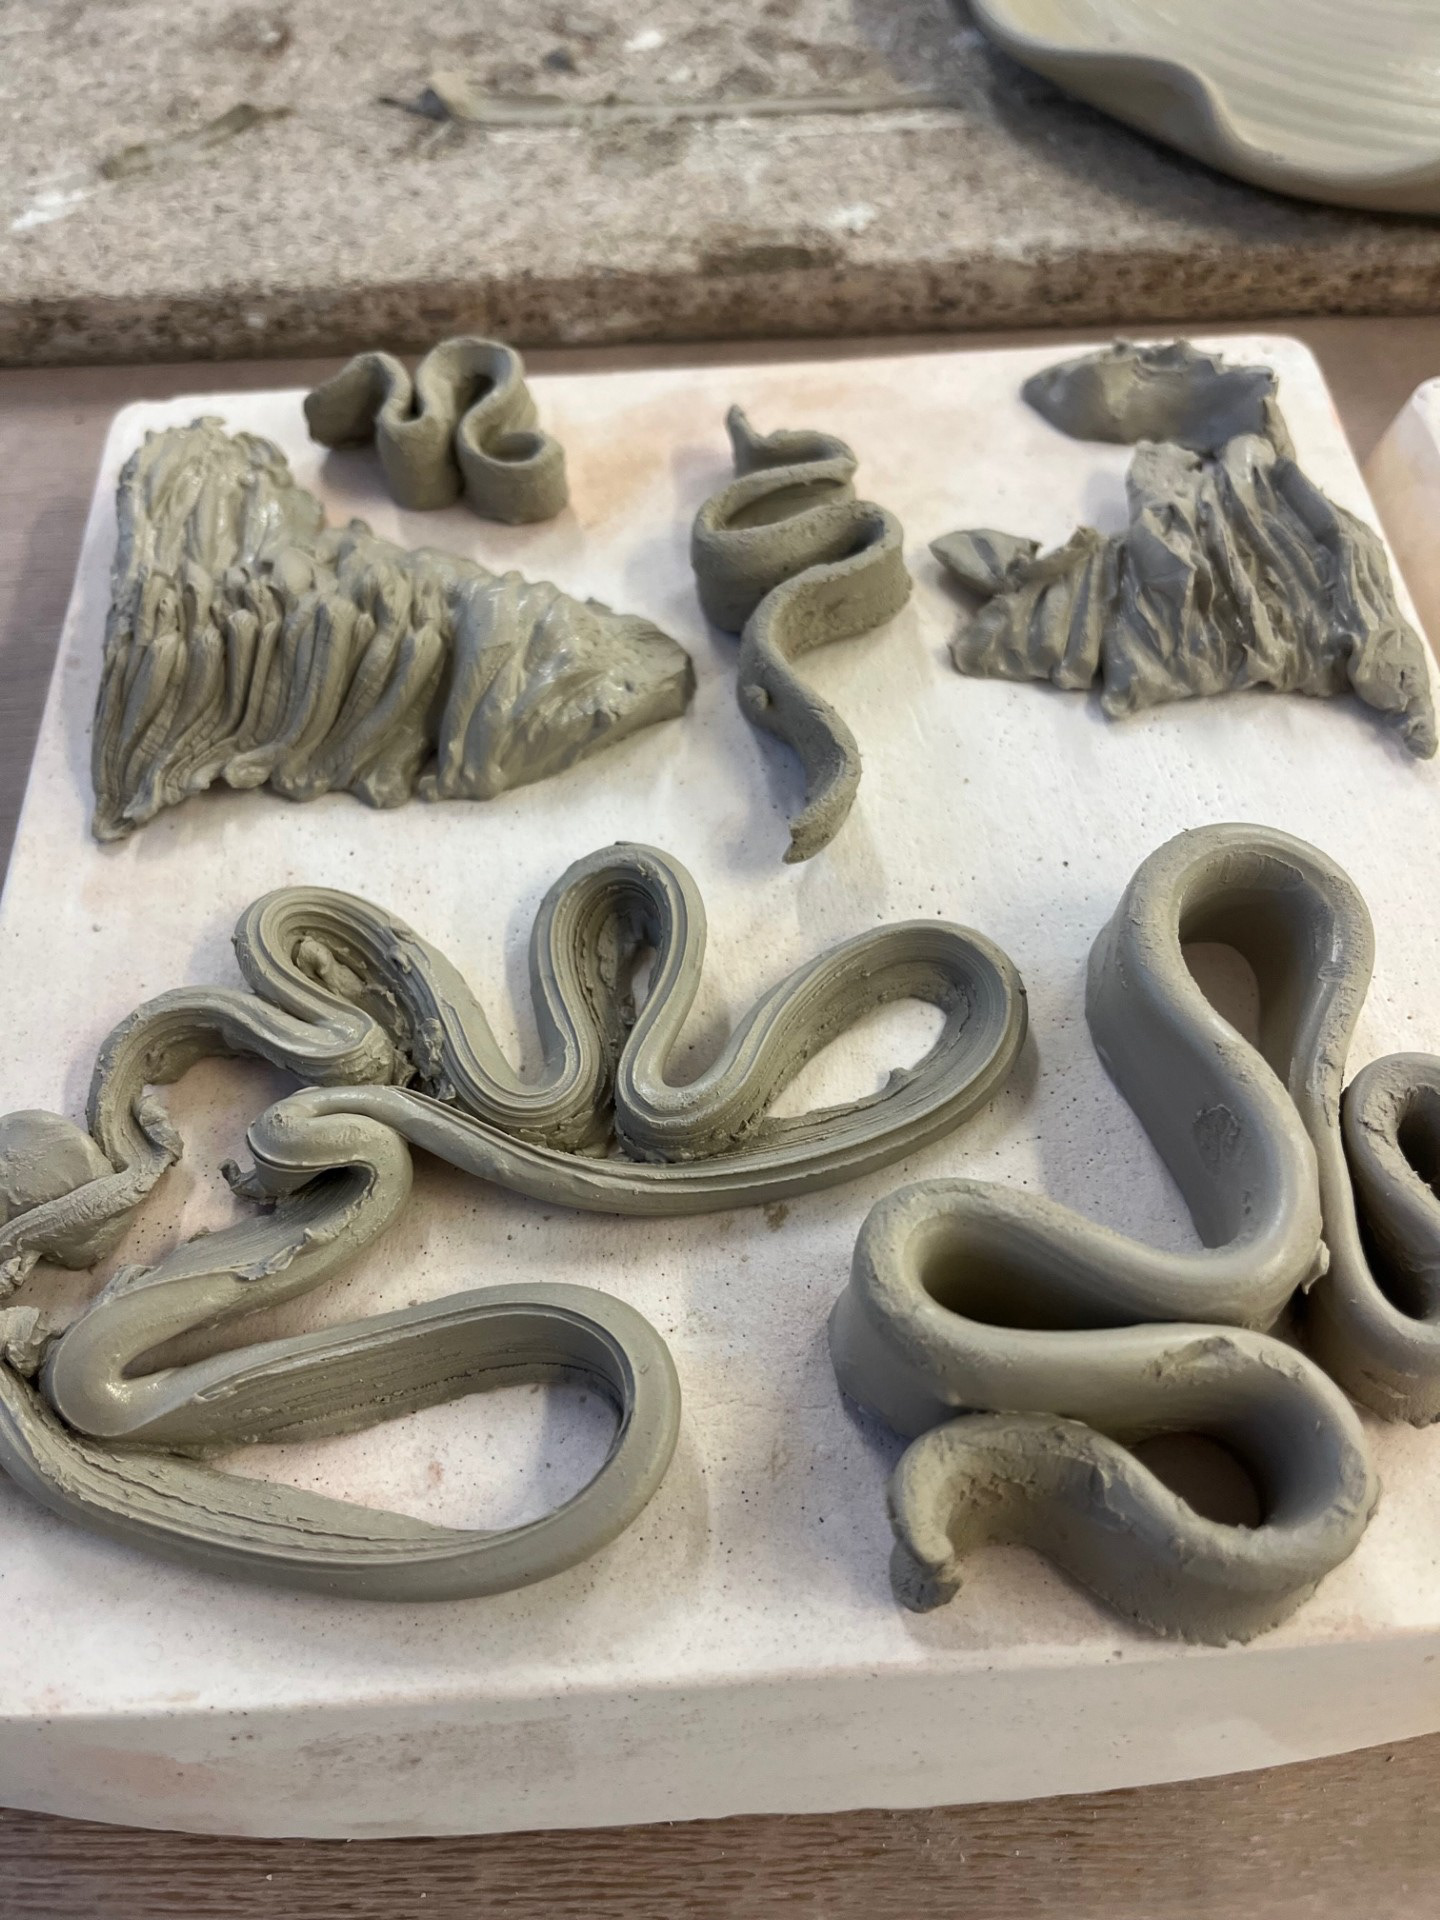
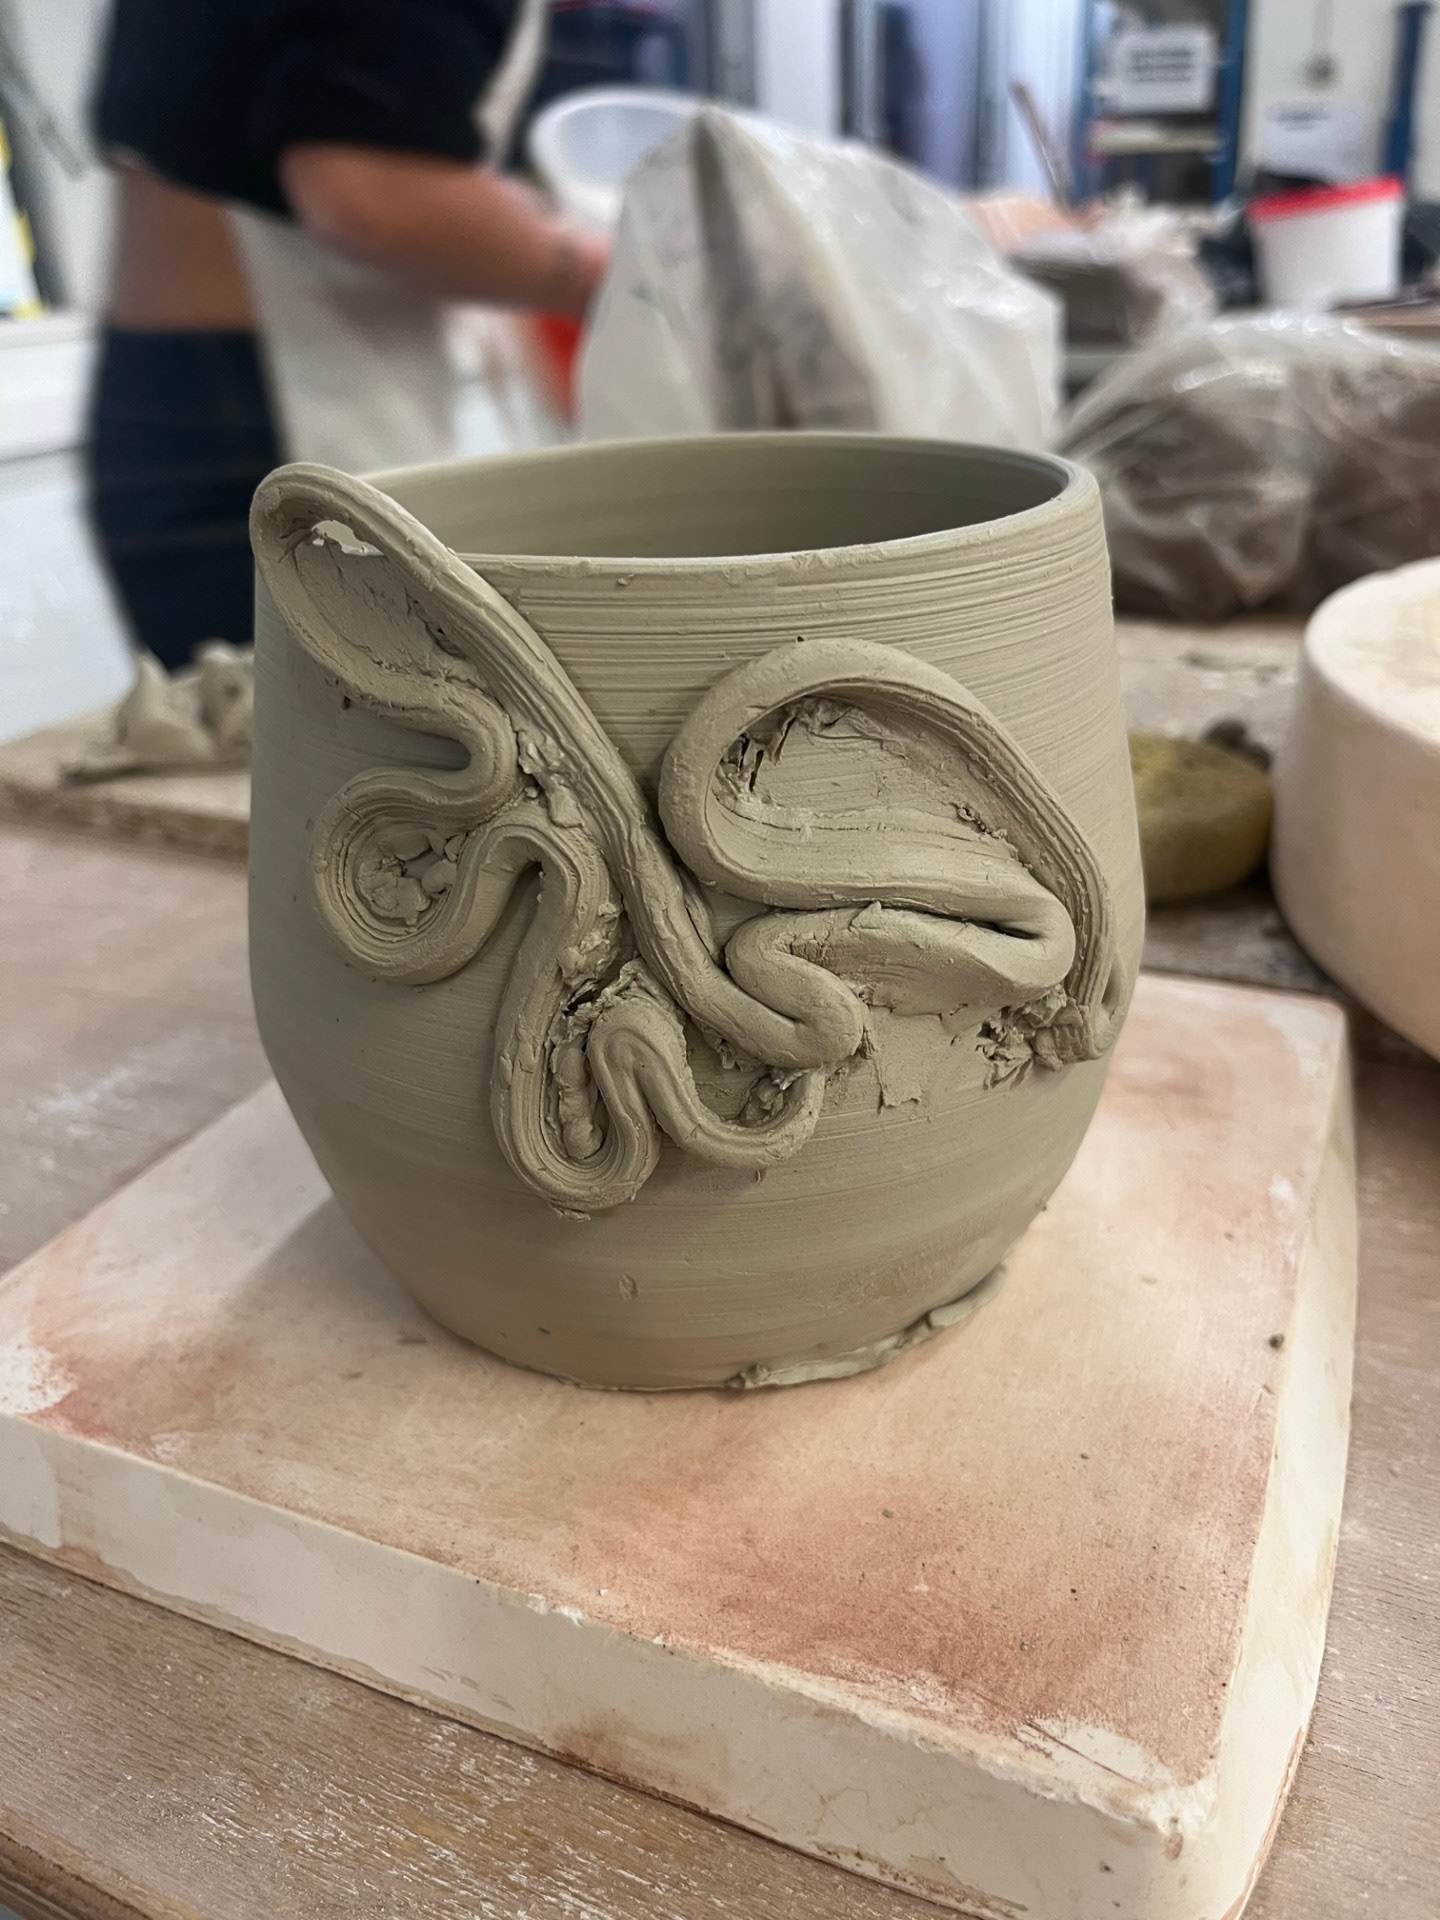
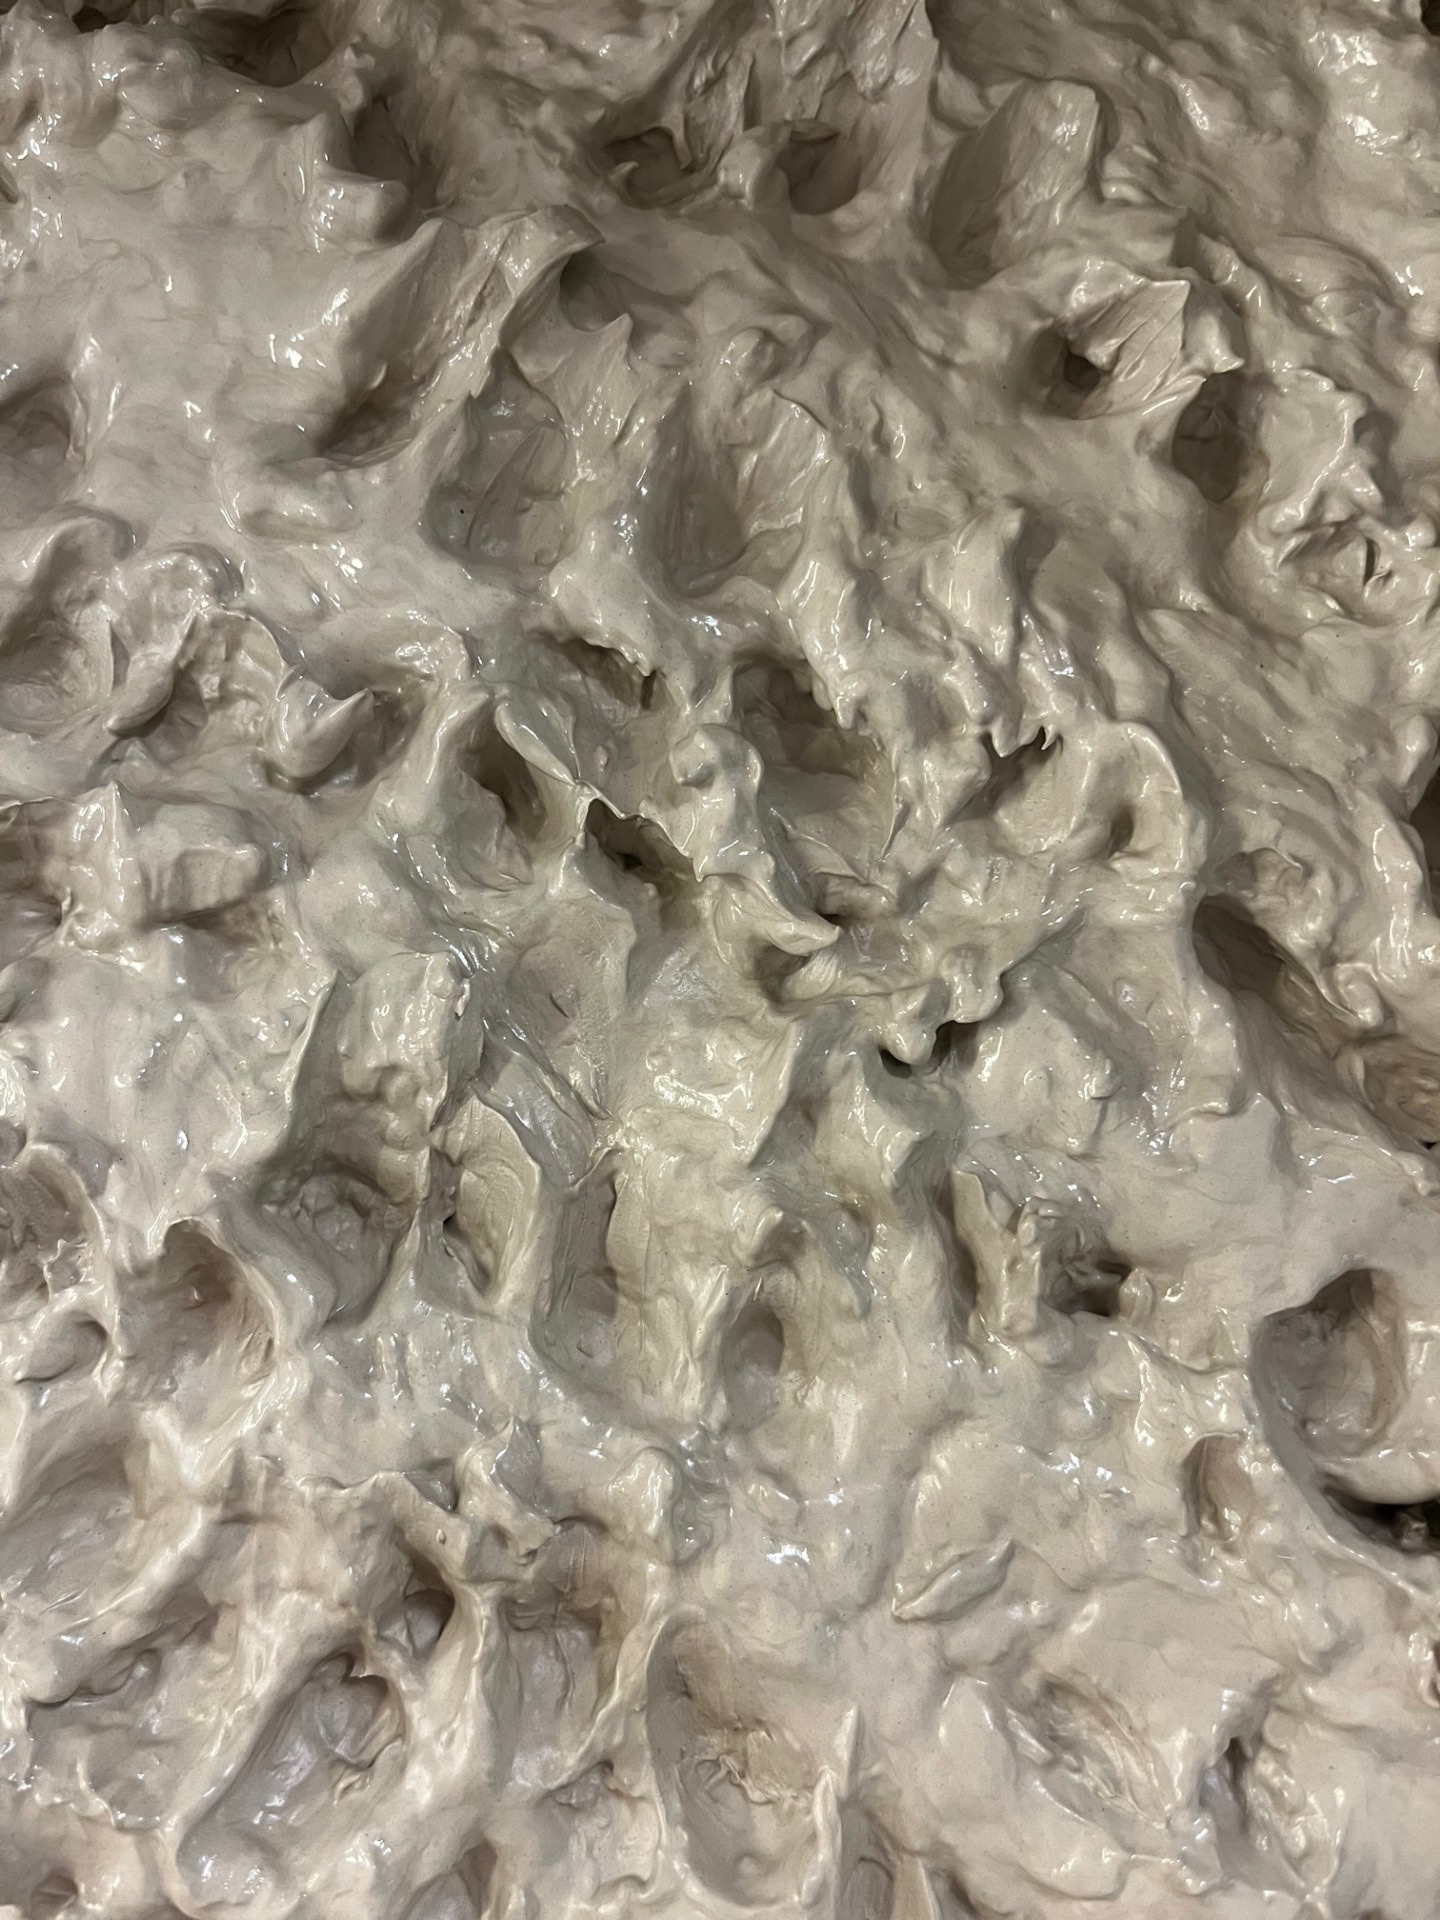
At the beginning of unit X, I decided on elements that I was going to take forward from practical done during beta project. Through investigation while making, I started to look at natural forms created with the scraps when I trimmed the wheel. This process happens during the throwing process and can happen at any time during the trimming process. I had previously tried attaching those pieces to a pot but I really wanted to try and expand on that for unit X. For the samples below, I wanted to use these pieces to try and create samples that emulated my interpretation of symbiosis. Going into this, I didn't have a real plan because I just wanted to let my creativity flow in the moment so that I could create something that is a true reflection of process.
See below for sample:
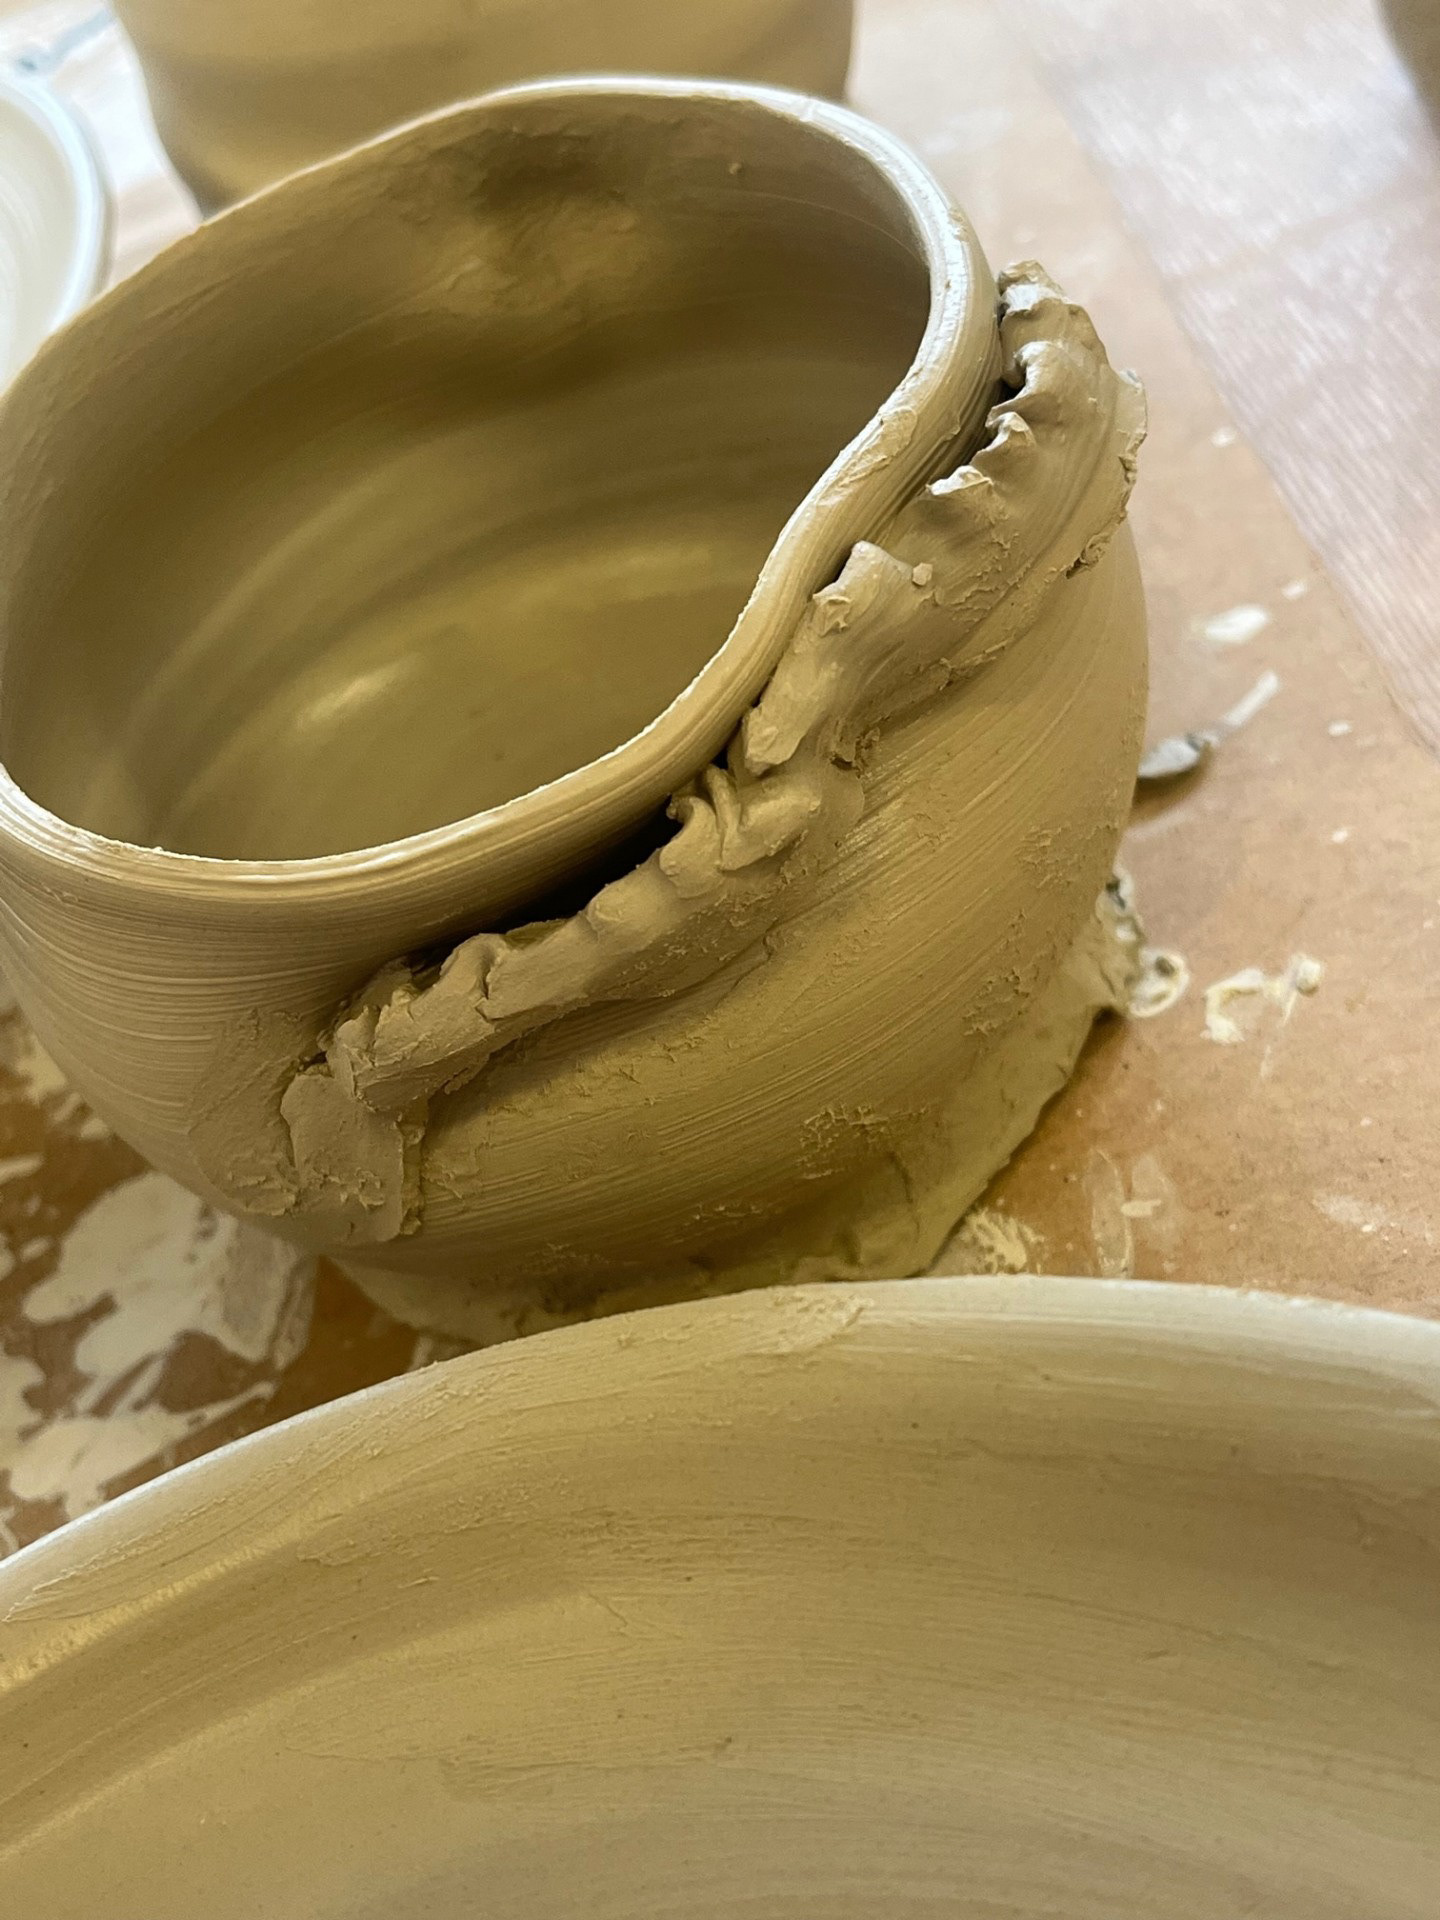

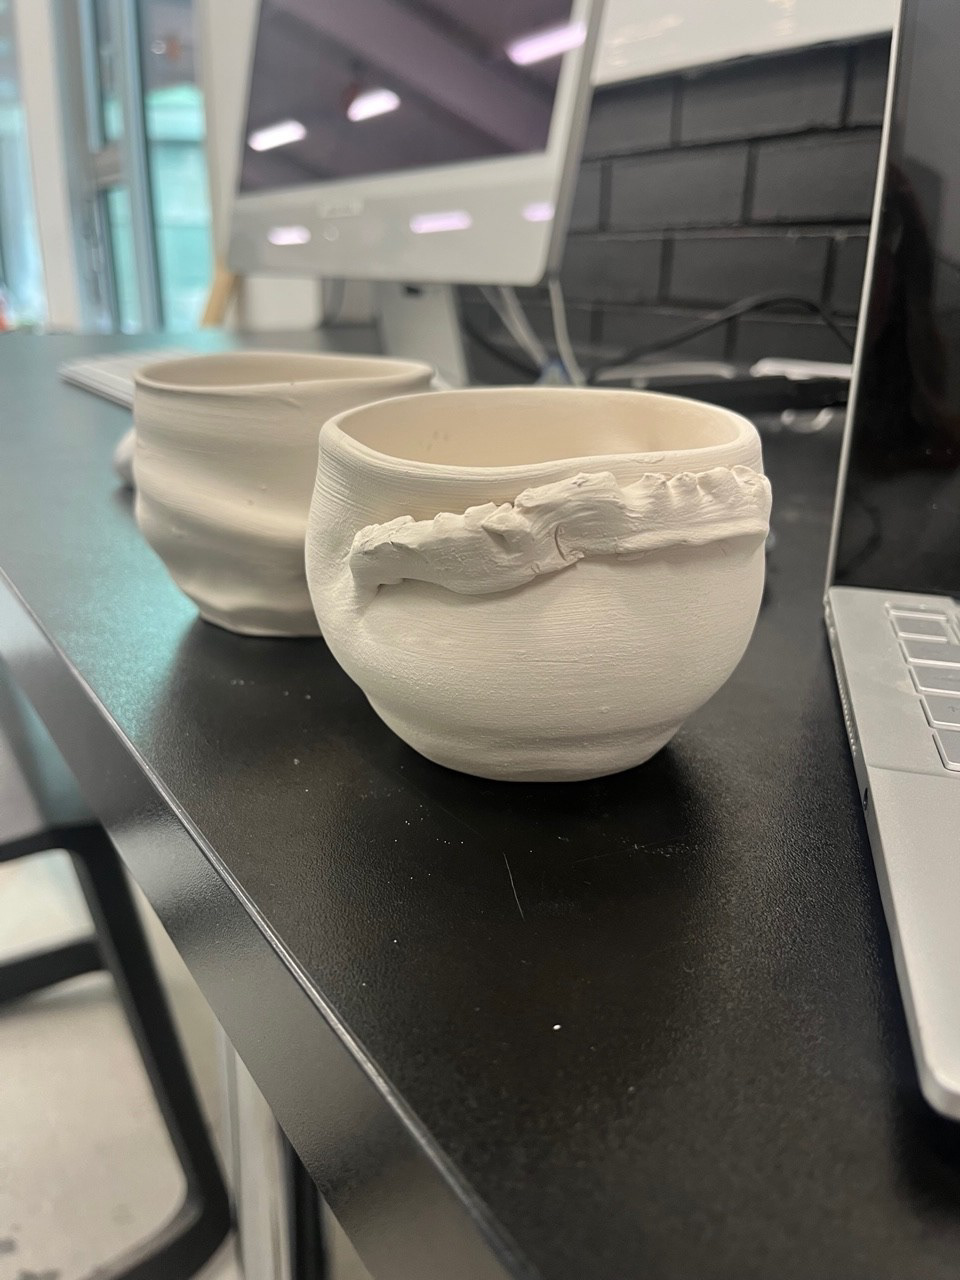
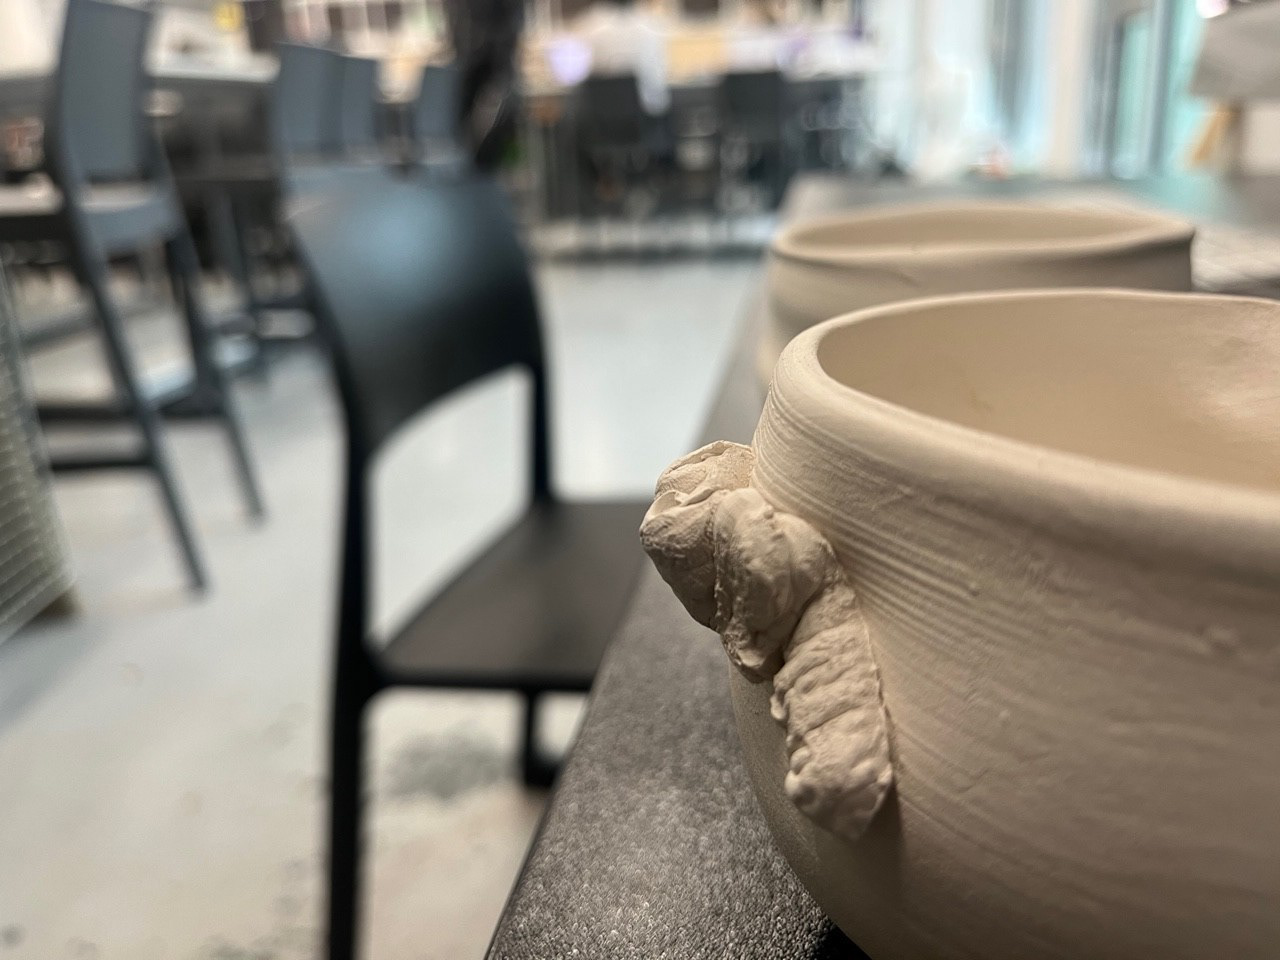
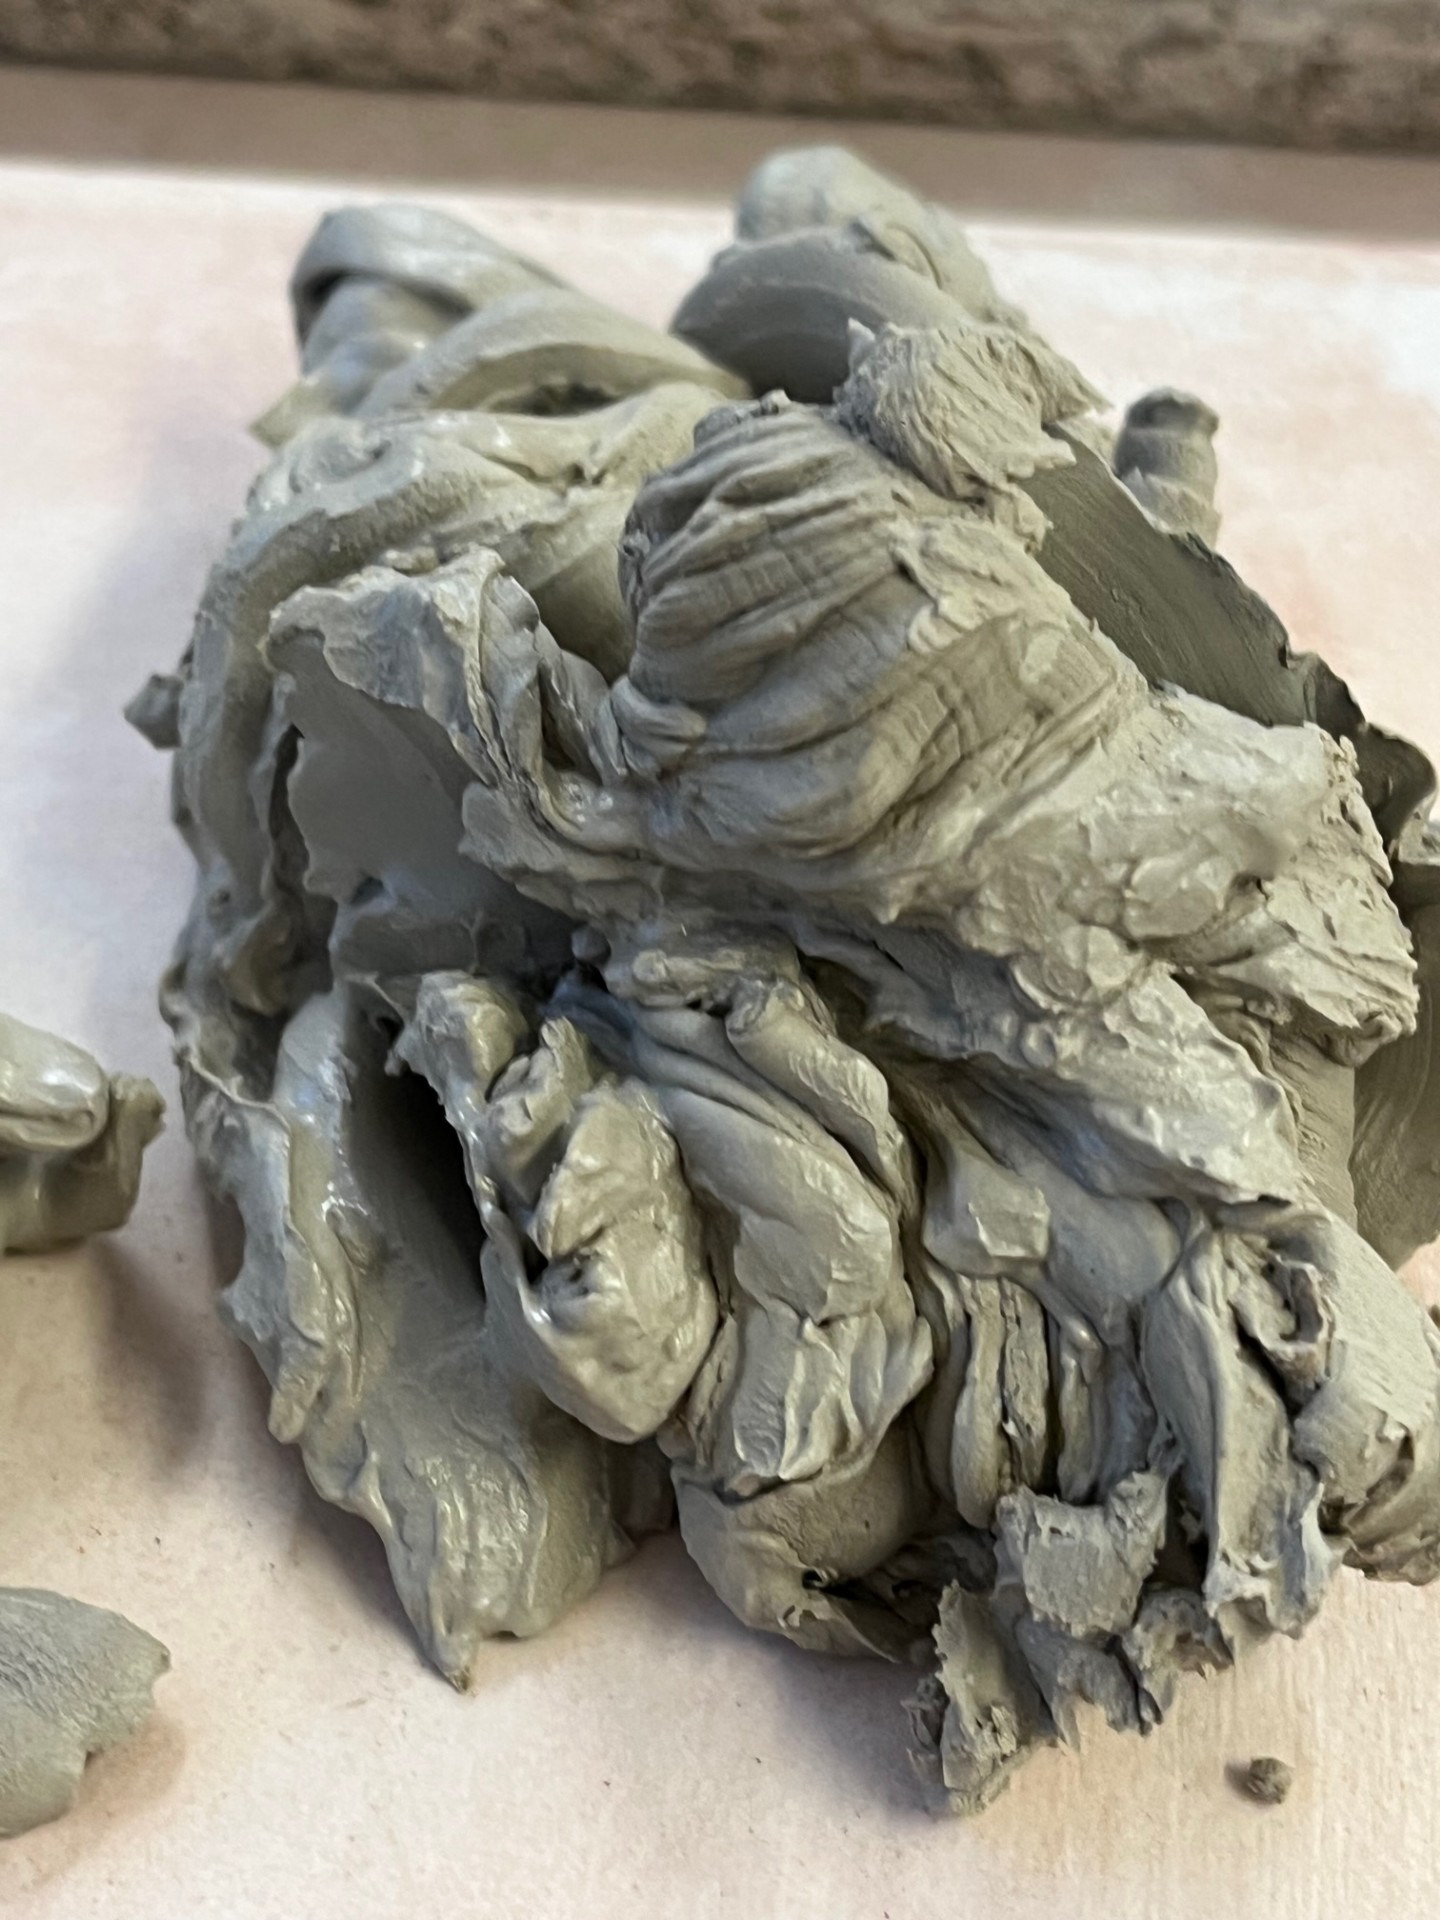
Once I had thrown the piece, I then had a couple of discarded pieces from the process so I decided to try and add it to the piece. Because it was still very soft, when I added the piece it warped the pot, however I actually really liked this! When I looked at it, I instantly had ideas rushing to my head because it looks like it has almost latched onto the pot. It made me think, is the relationship between it and the pot a positive or negative one, is it benefiting or leeching?
Further Development:
To develop on this idea further, I wanted to do a throwing session where I focused on making vessels but really put a focus on using tools to trim the pots during the throwing process. I have chosen to develop this process because I think that for me, it represents movement and organic flow because I cannot control what happens within this organic process. The beauty comes through not being able to control the outcome. I think I am drawn to this as well because of how naturally these beautiful forms are created throughout the movement of the wheel. when I look at these style of form, i cant help but let my imagination wander and when it does i always seem to think about the same concept: What if they were the size of mountains and canyons? how would I explore them?
See below for further investigation:
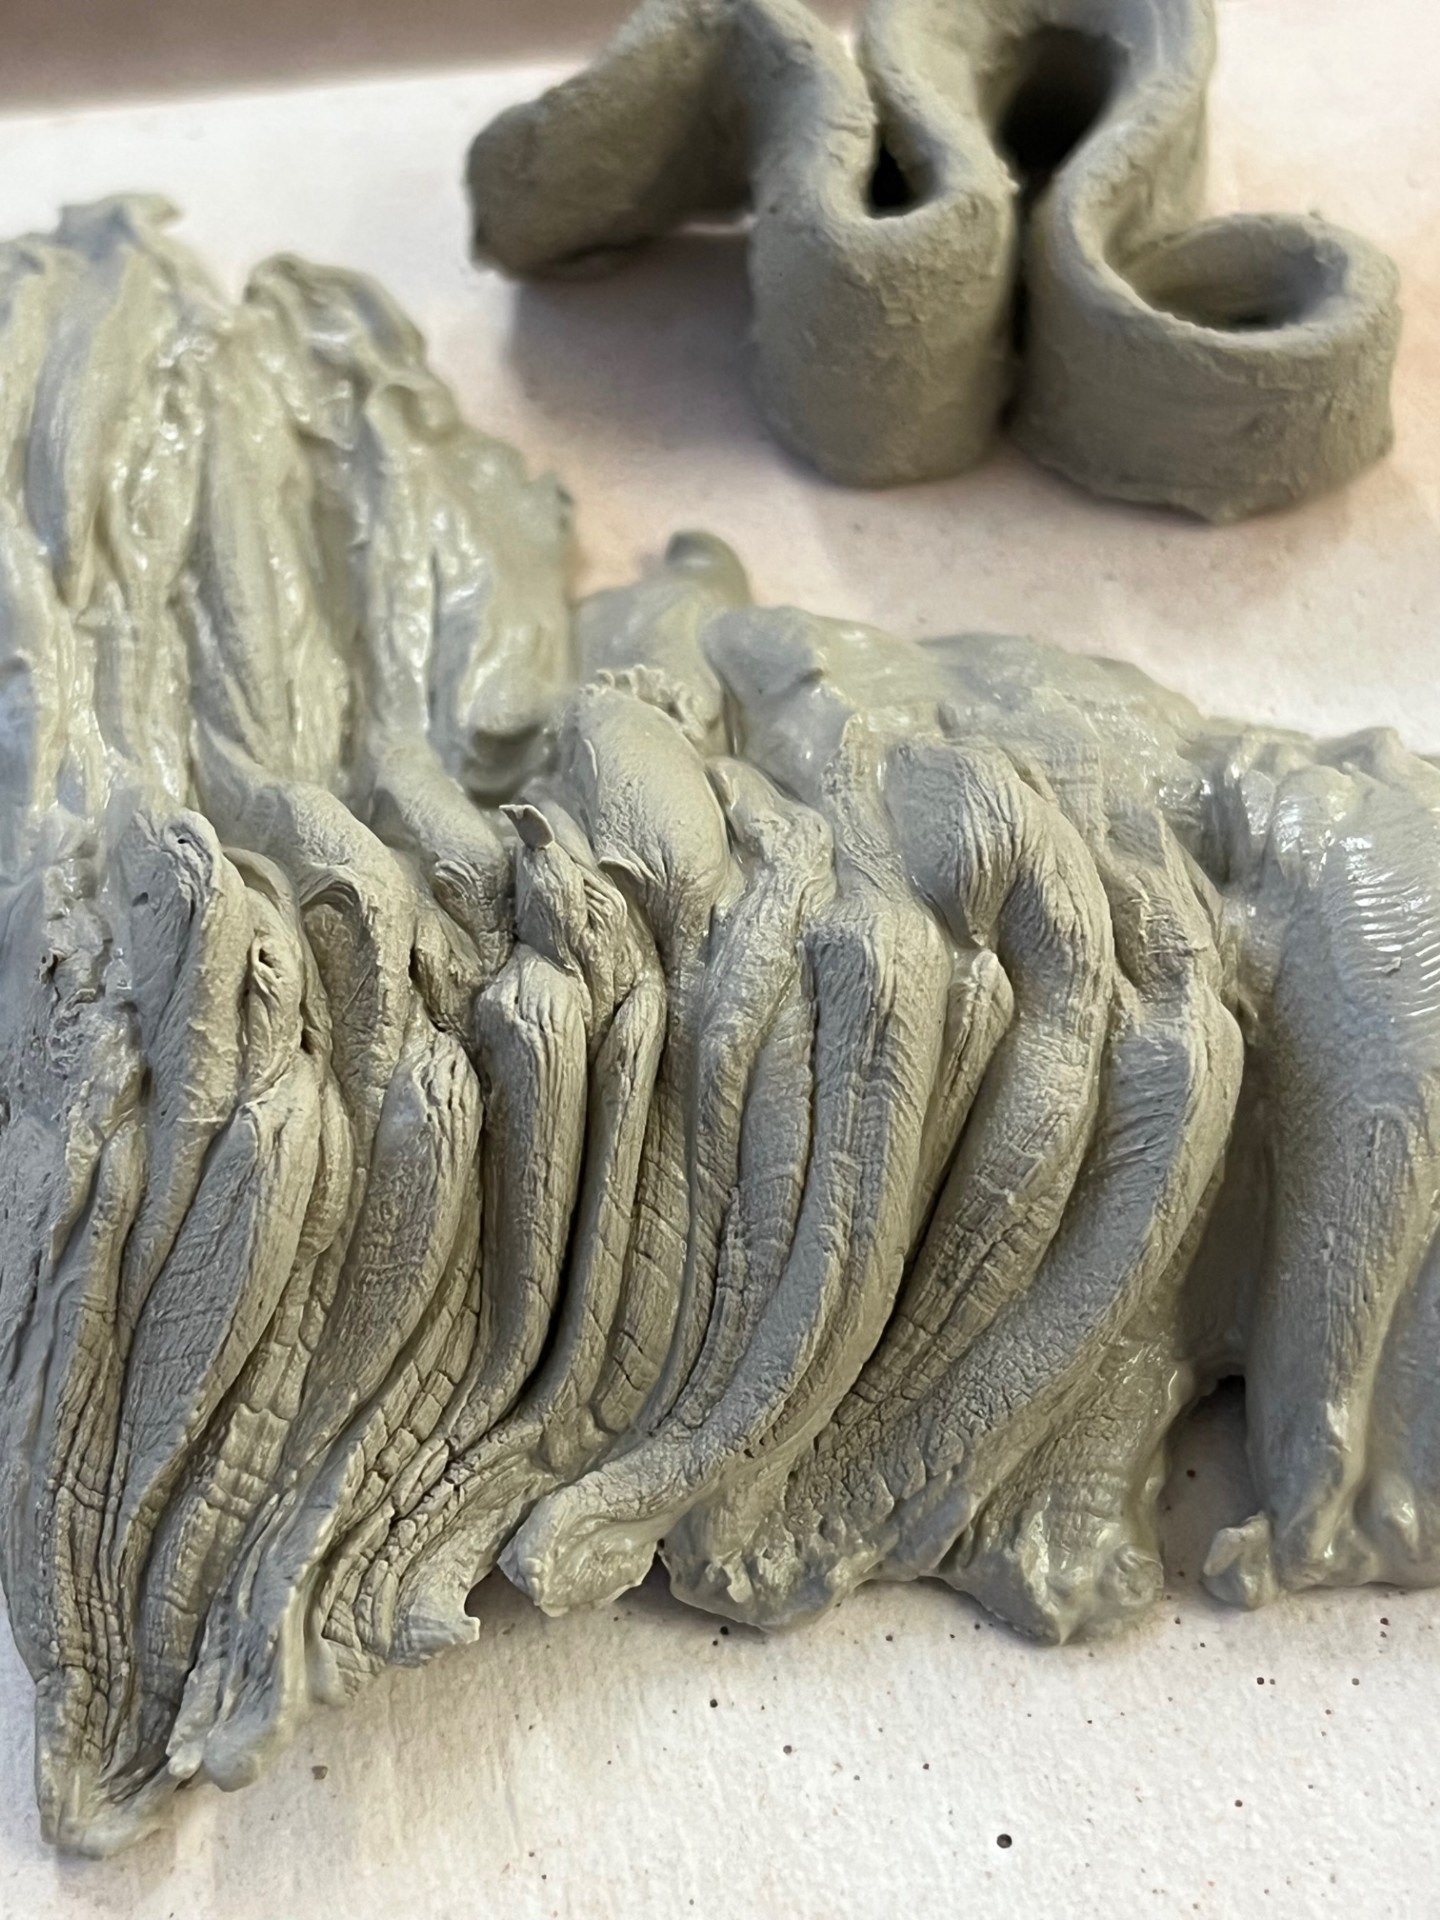
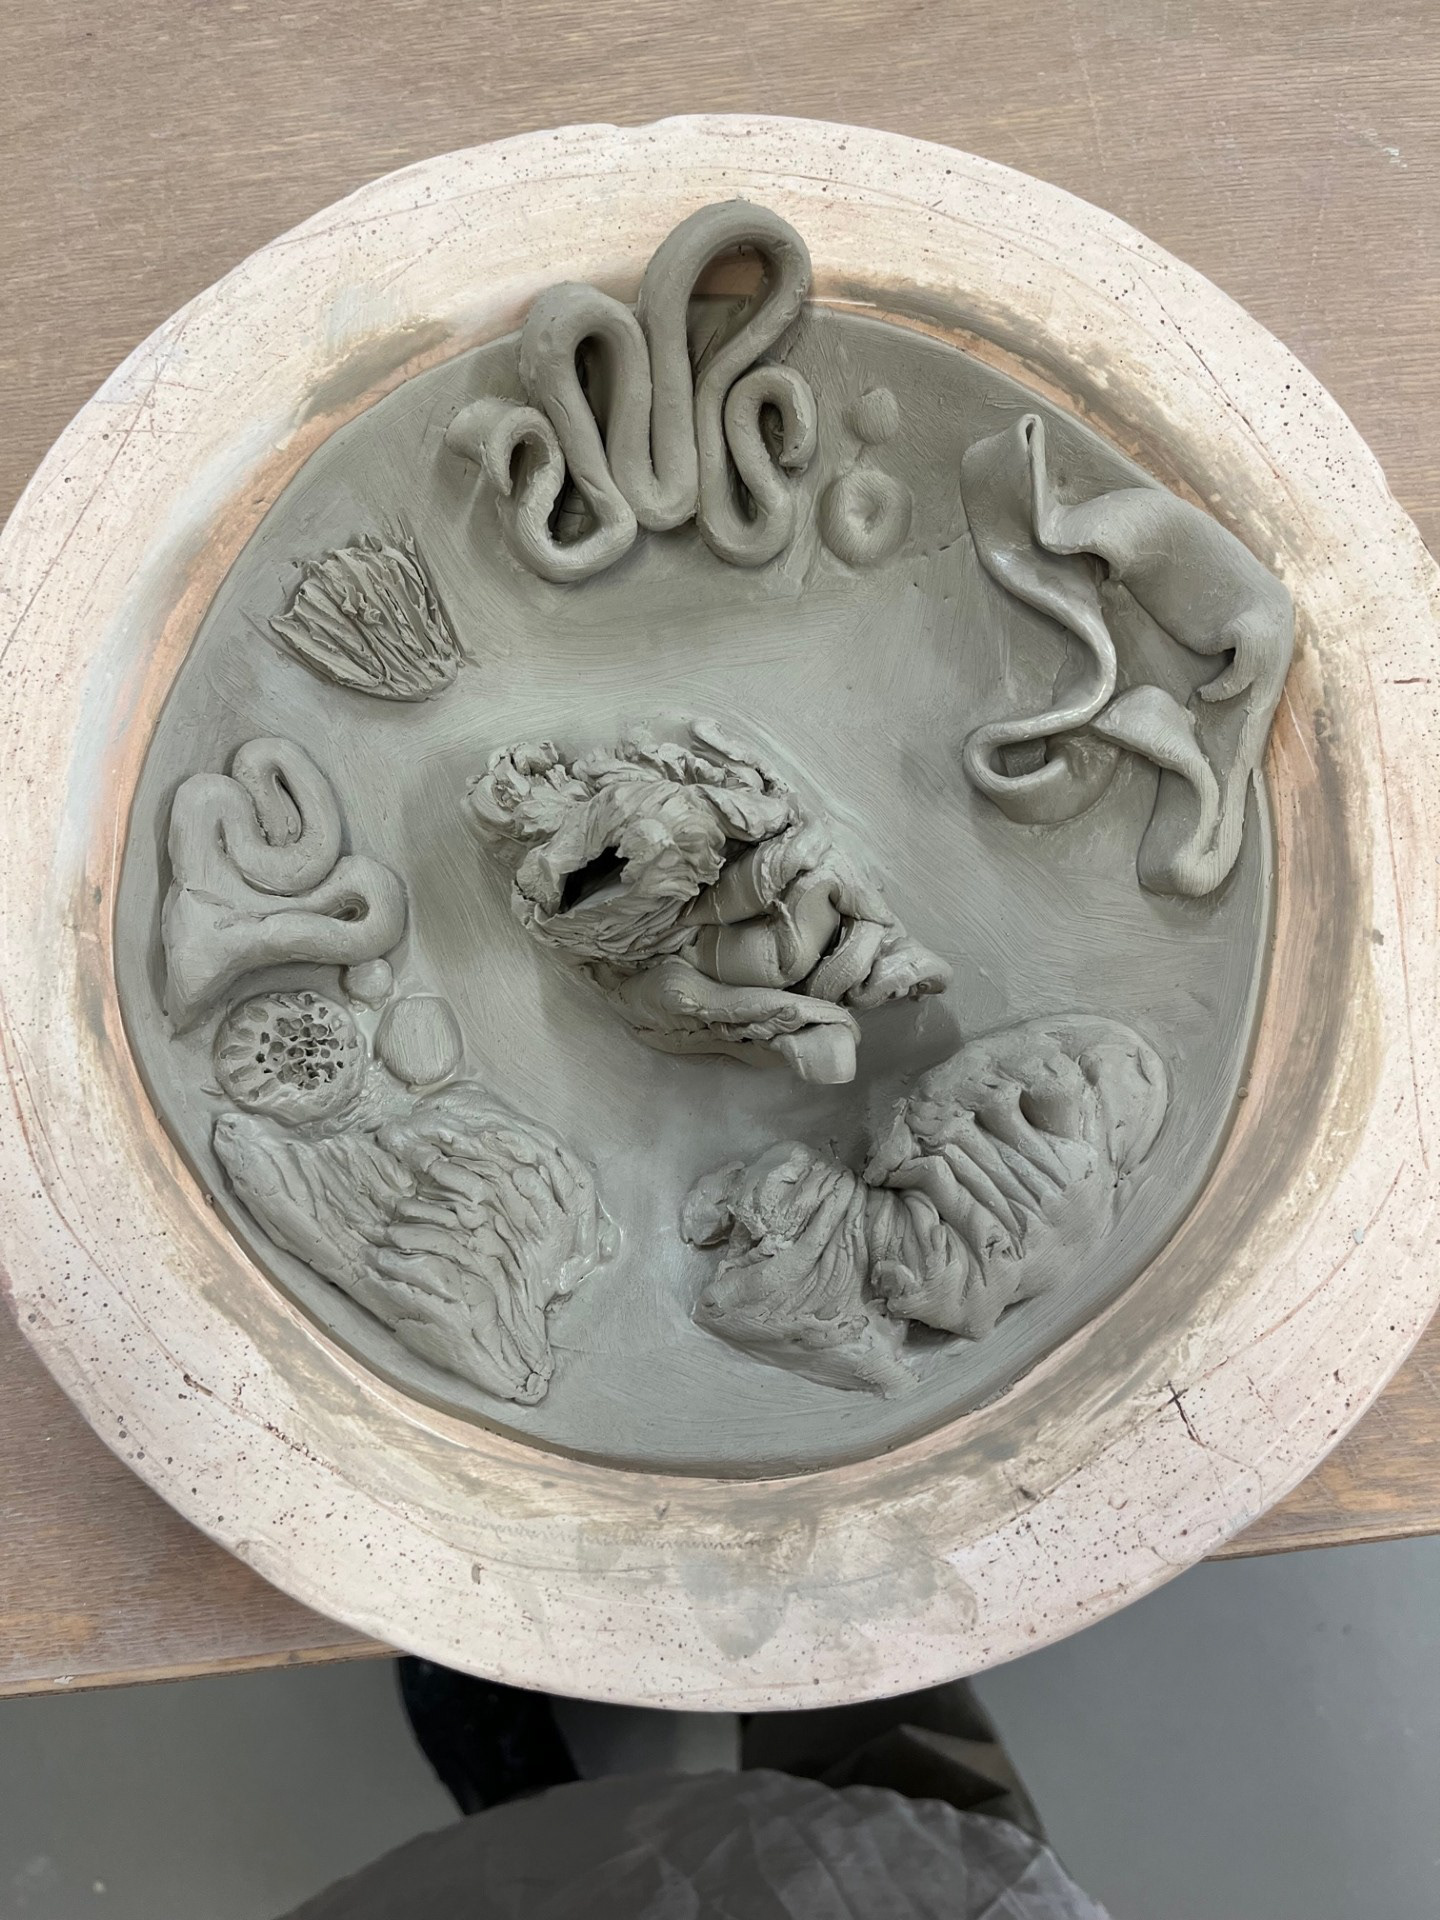
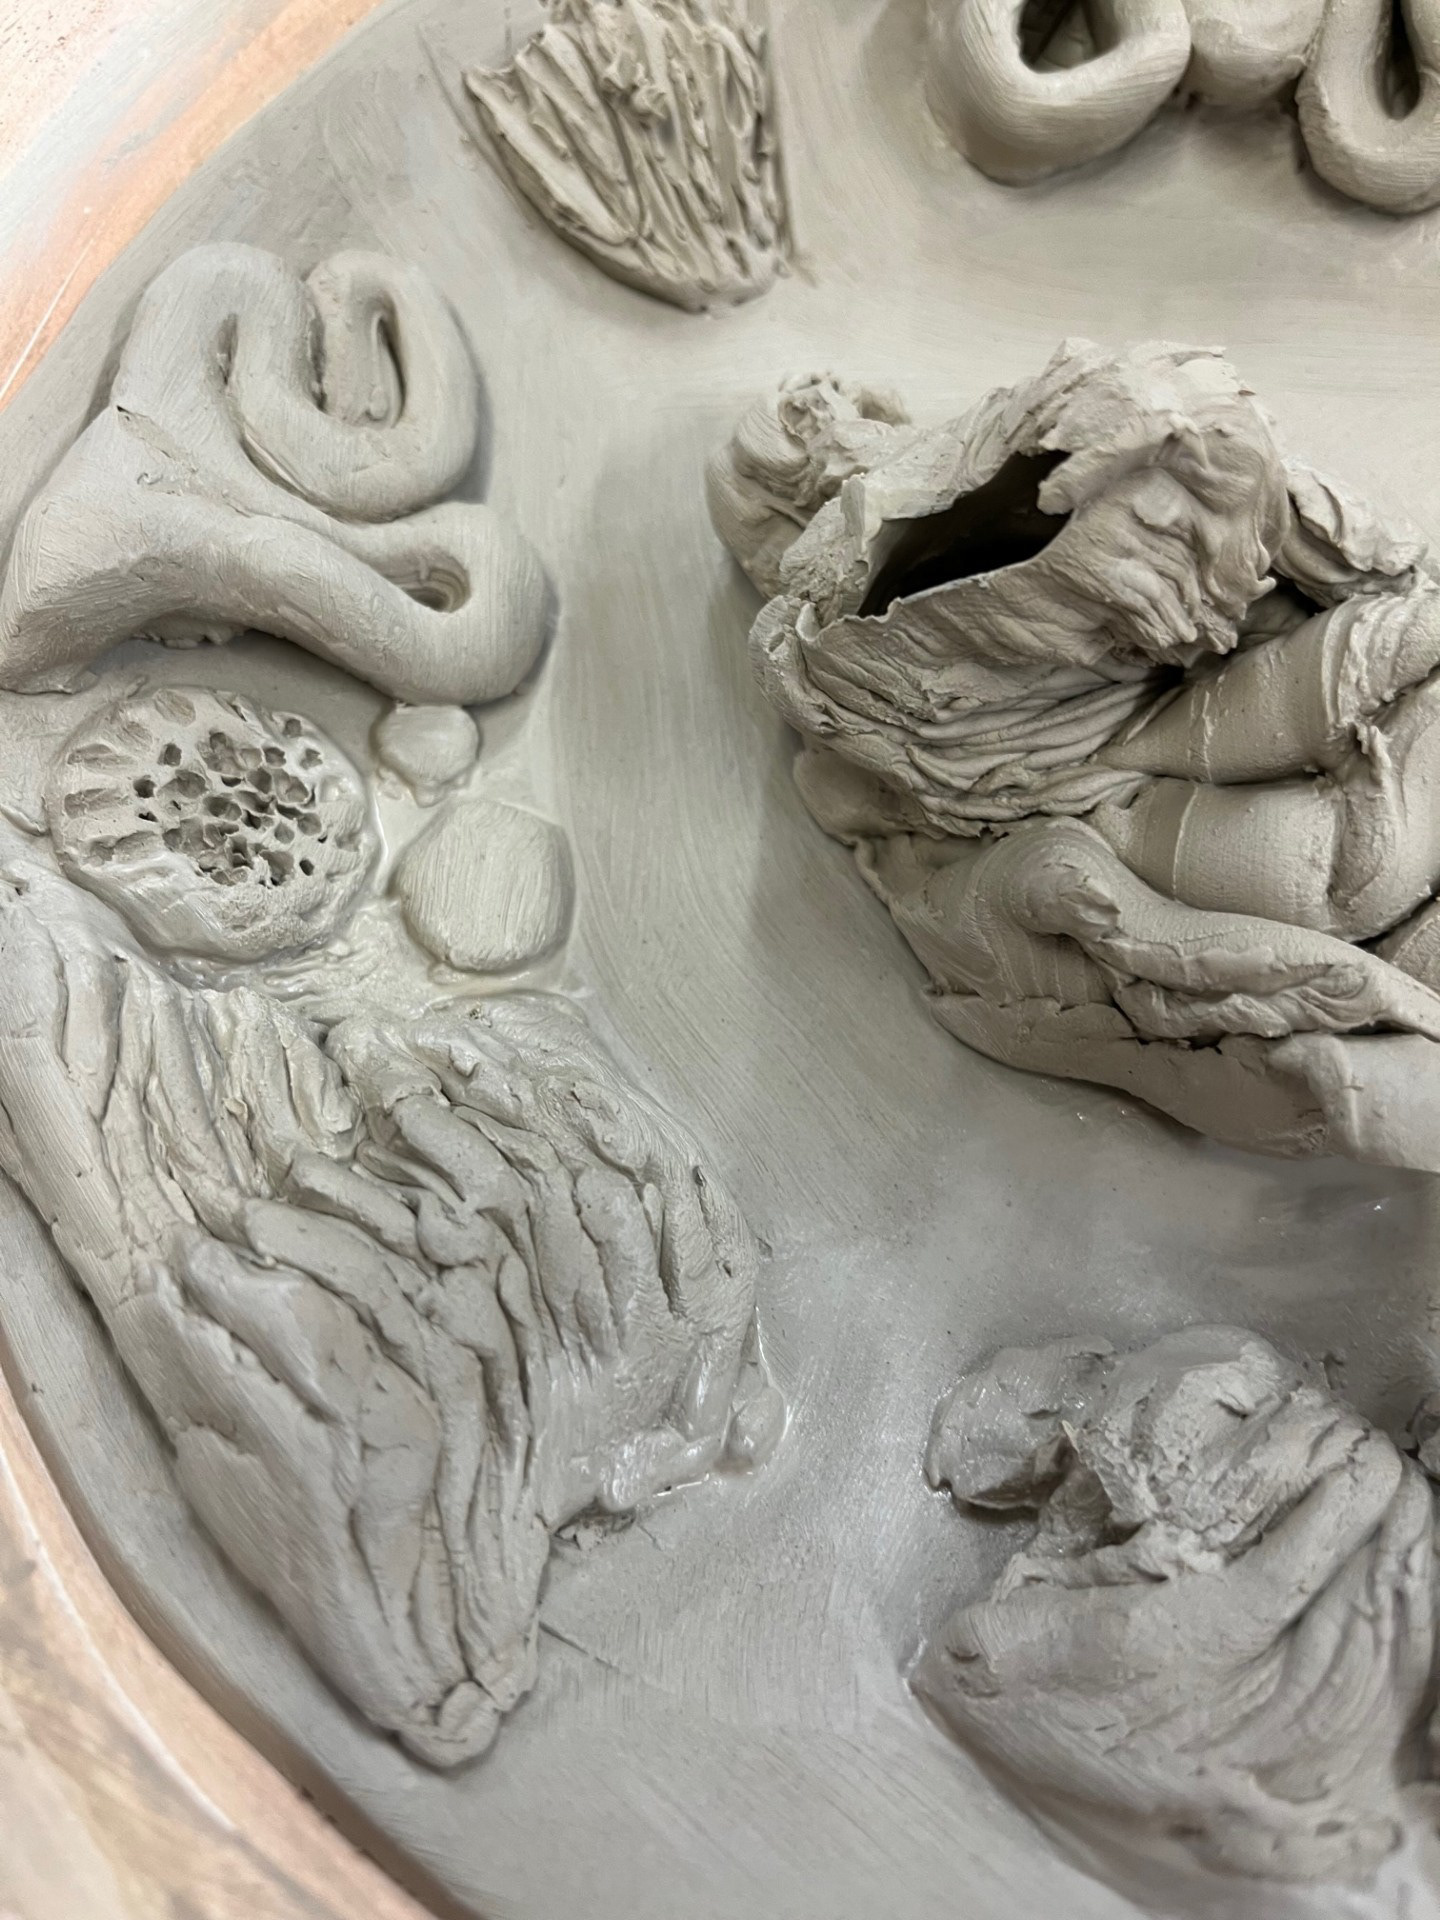
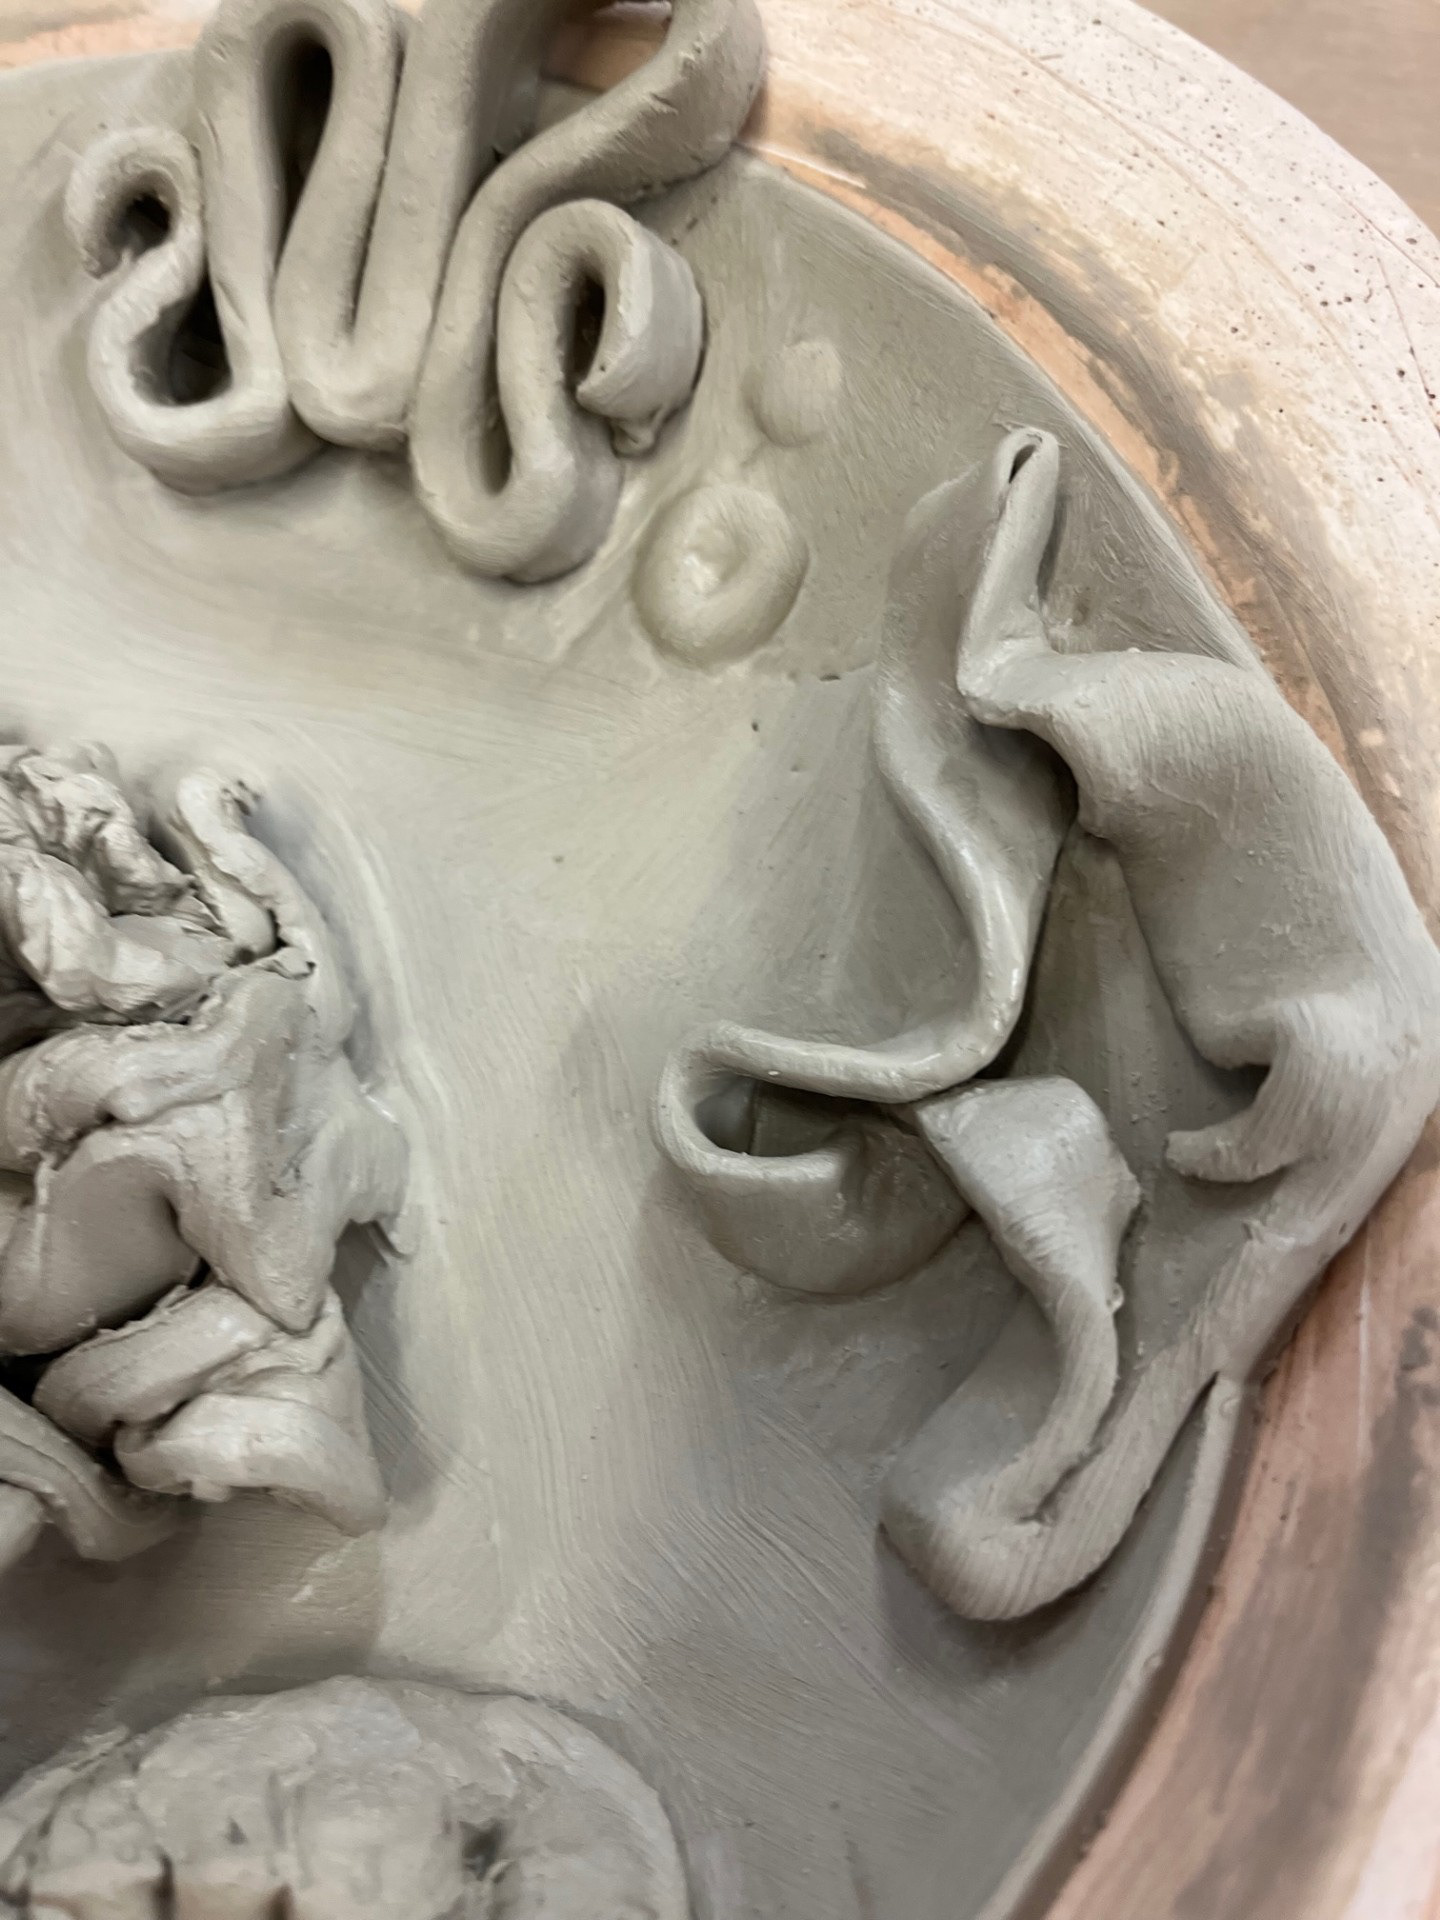
Choosing forms and attaching them to a vessel:
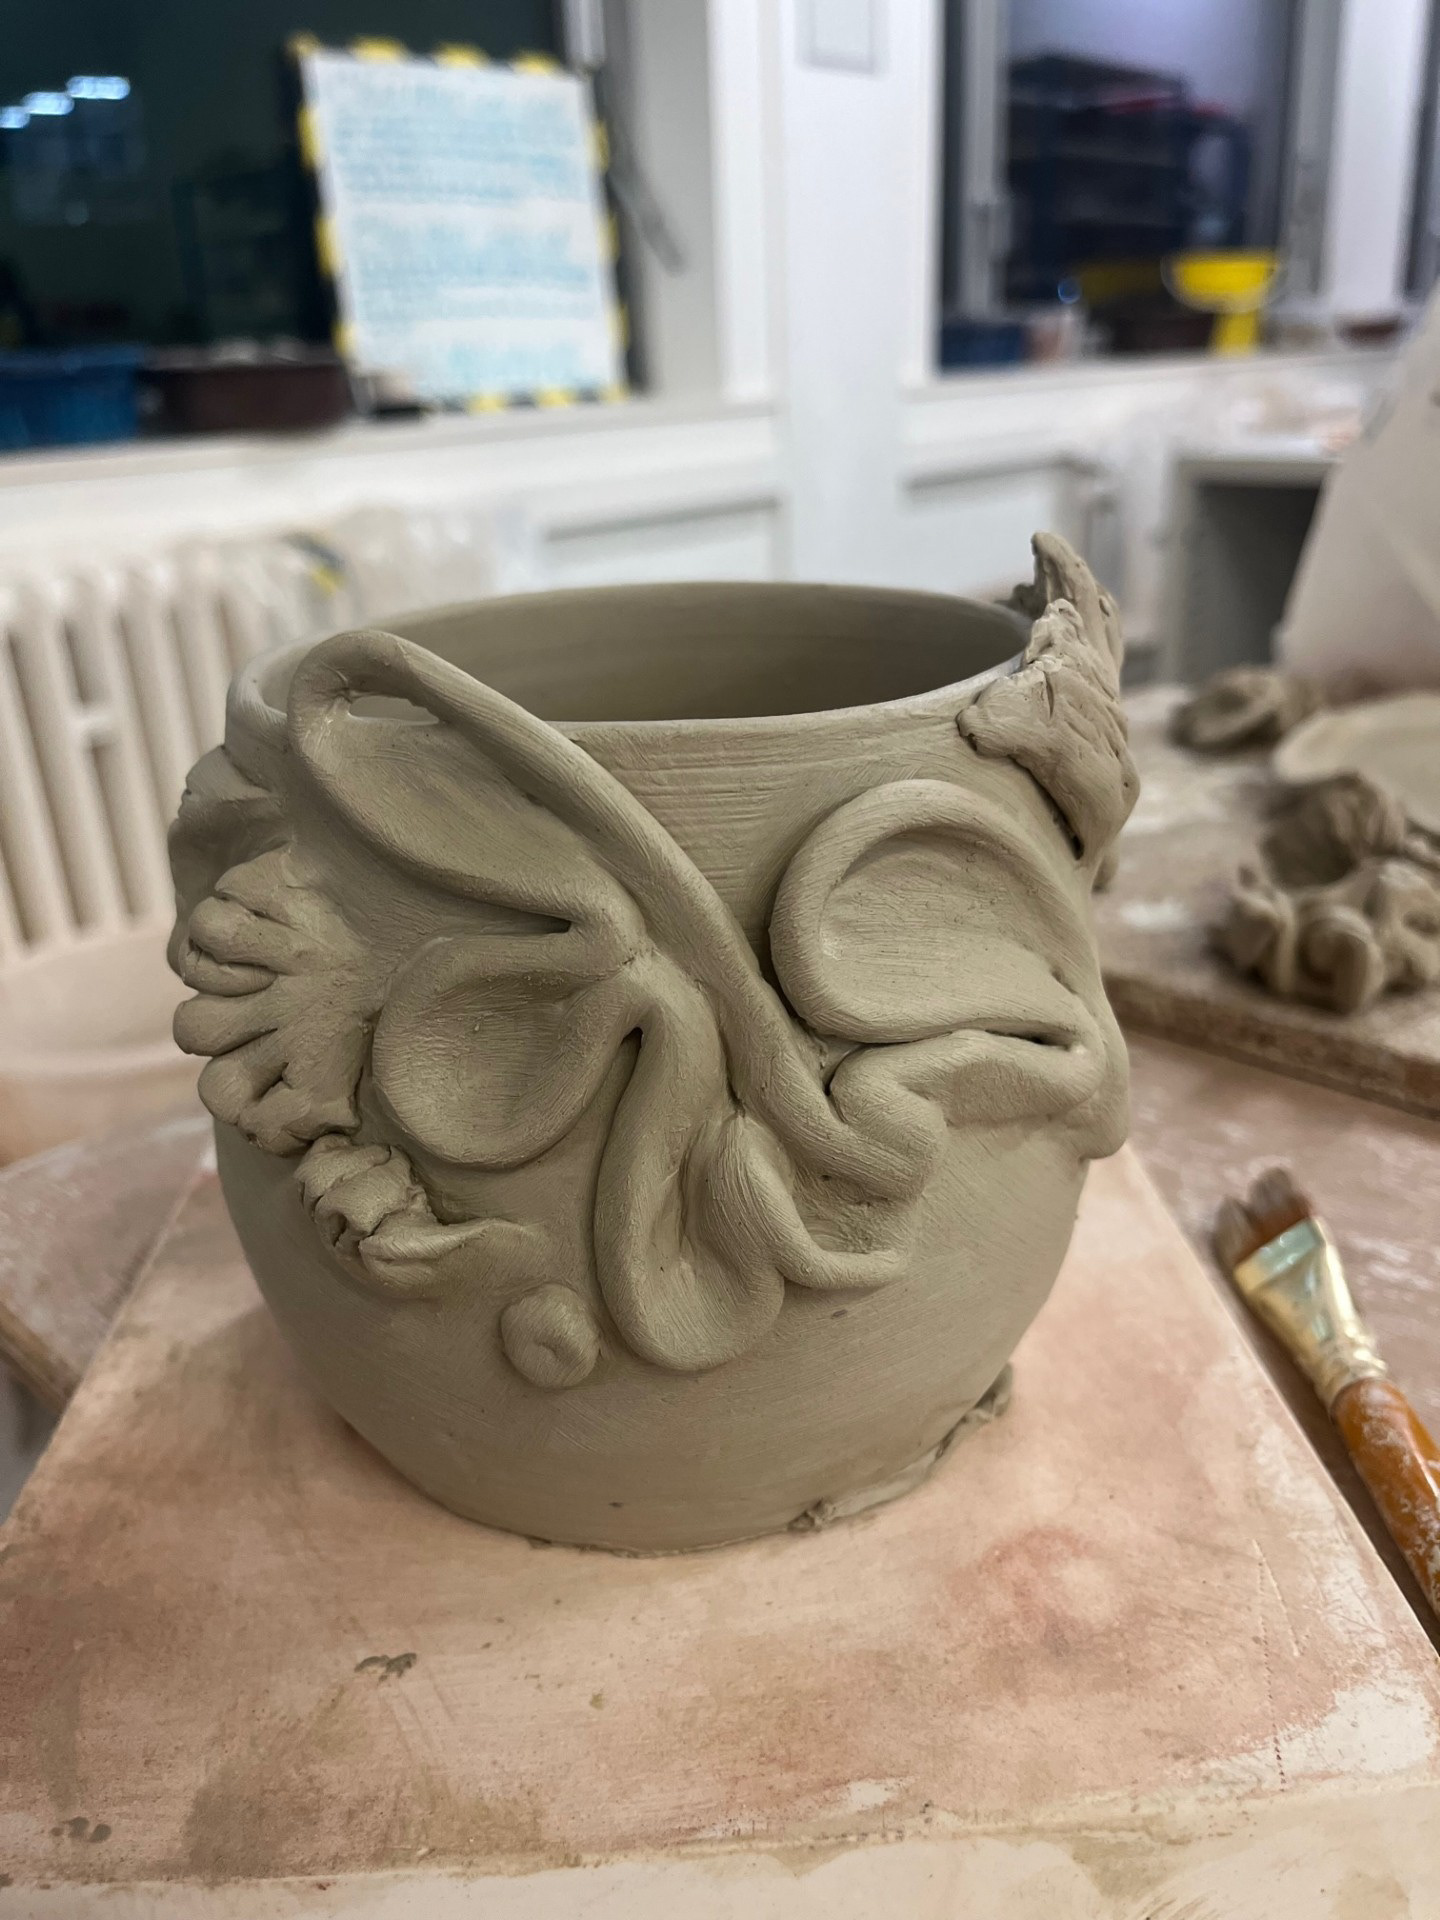
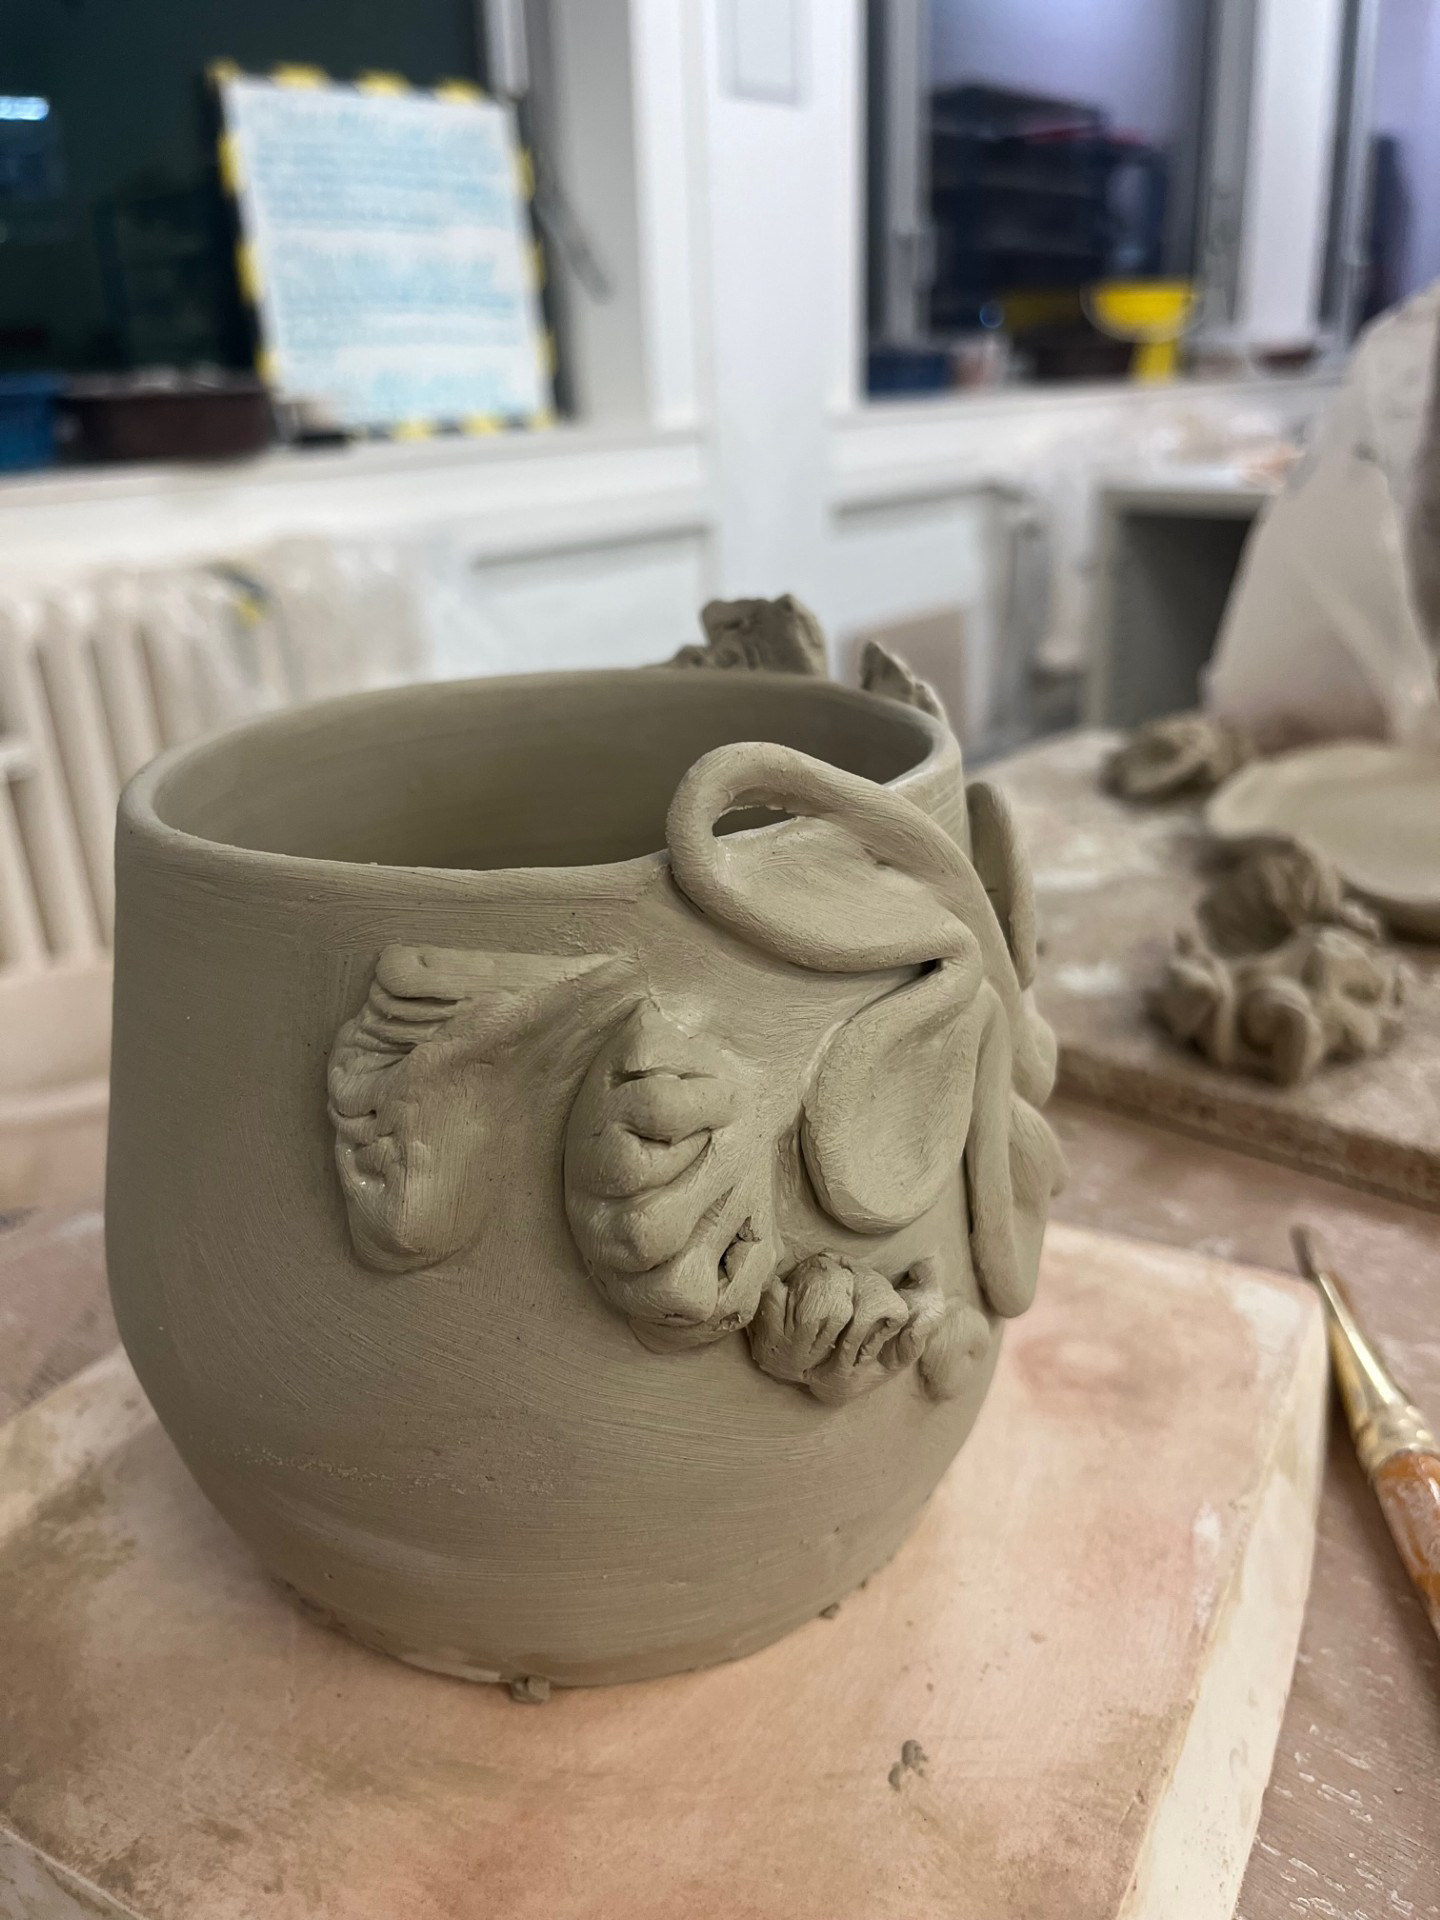
Here you can see one of the vessels that I threw during the testing process. once I had selected the pieces I tried attaching them on where I ran into a bit of an issue. I realised that it was quite hard to attach them while still preserving all of the natural lines as they needed to be pressed into the vessel. I wanted to preserve as much of the natural lines as possible because it would be the most authentic representation of process however that just wasn't possible because if I didn't press it in and then smooth it over, it wouldn't have stayed on the piece. I think that if I were to develop this further, i would like to find a way to make the final outcome more like the image on the left as the ones on the right, to me, look so forced and unnatural.
In summary, I really enjoyed this practical line of inquiry because it really allowed my embrace the idea through the medium of play and really just let my mind run free. I was fun at the time because the whole session was almost like sketching. To develop this further, I think that I could potentially make it into a full conceptual piece by making a vessel and then only attaching the offcuts from that singular piece to the vessel. I like this idea however it would need a bit more development as right now there would be a few holes in the logic; for example, there might not be usable offcuts created for every piece. Although this line of inquiry was very fun, I don't think that its what I want to continue with for the following weeks. Its definitely not something that I would like to continue working on because I think that I'm more exited by refining my throwing and glaze aspects being my main focal point.
Glaze Choice:
throughout this project, I have realised that I really love Glazing and I really think that focusing on this could be the true direction of my craft. I love the idea of communicating through glaze to create a feast for the eyes and facilitate thought and intrigue.
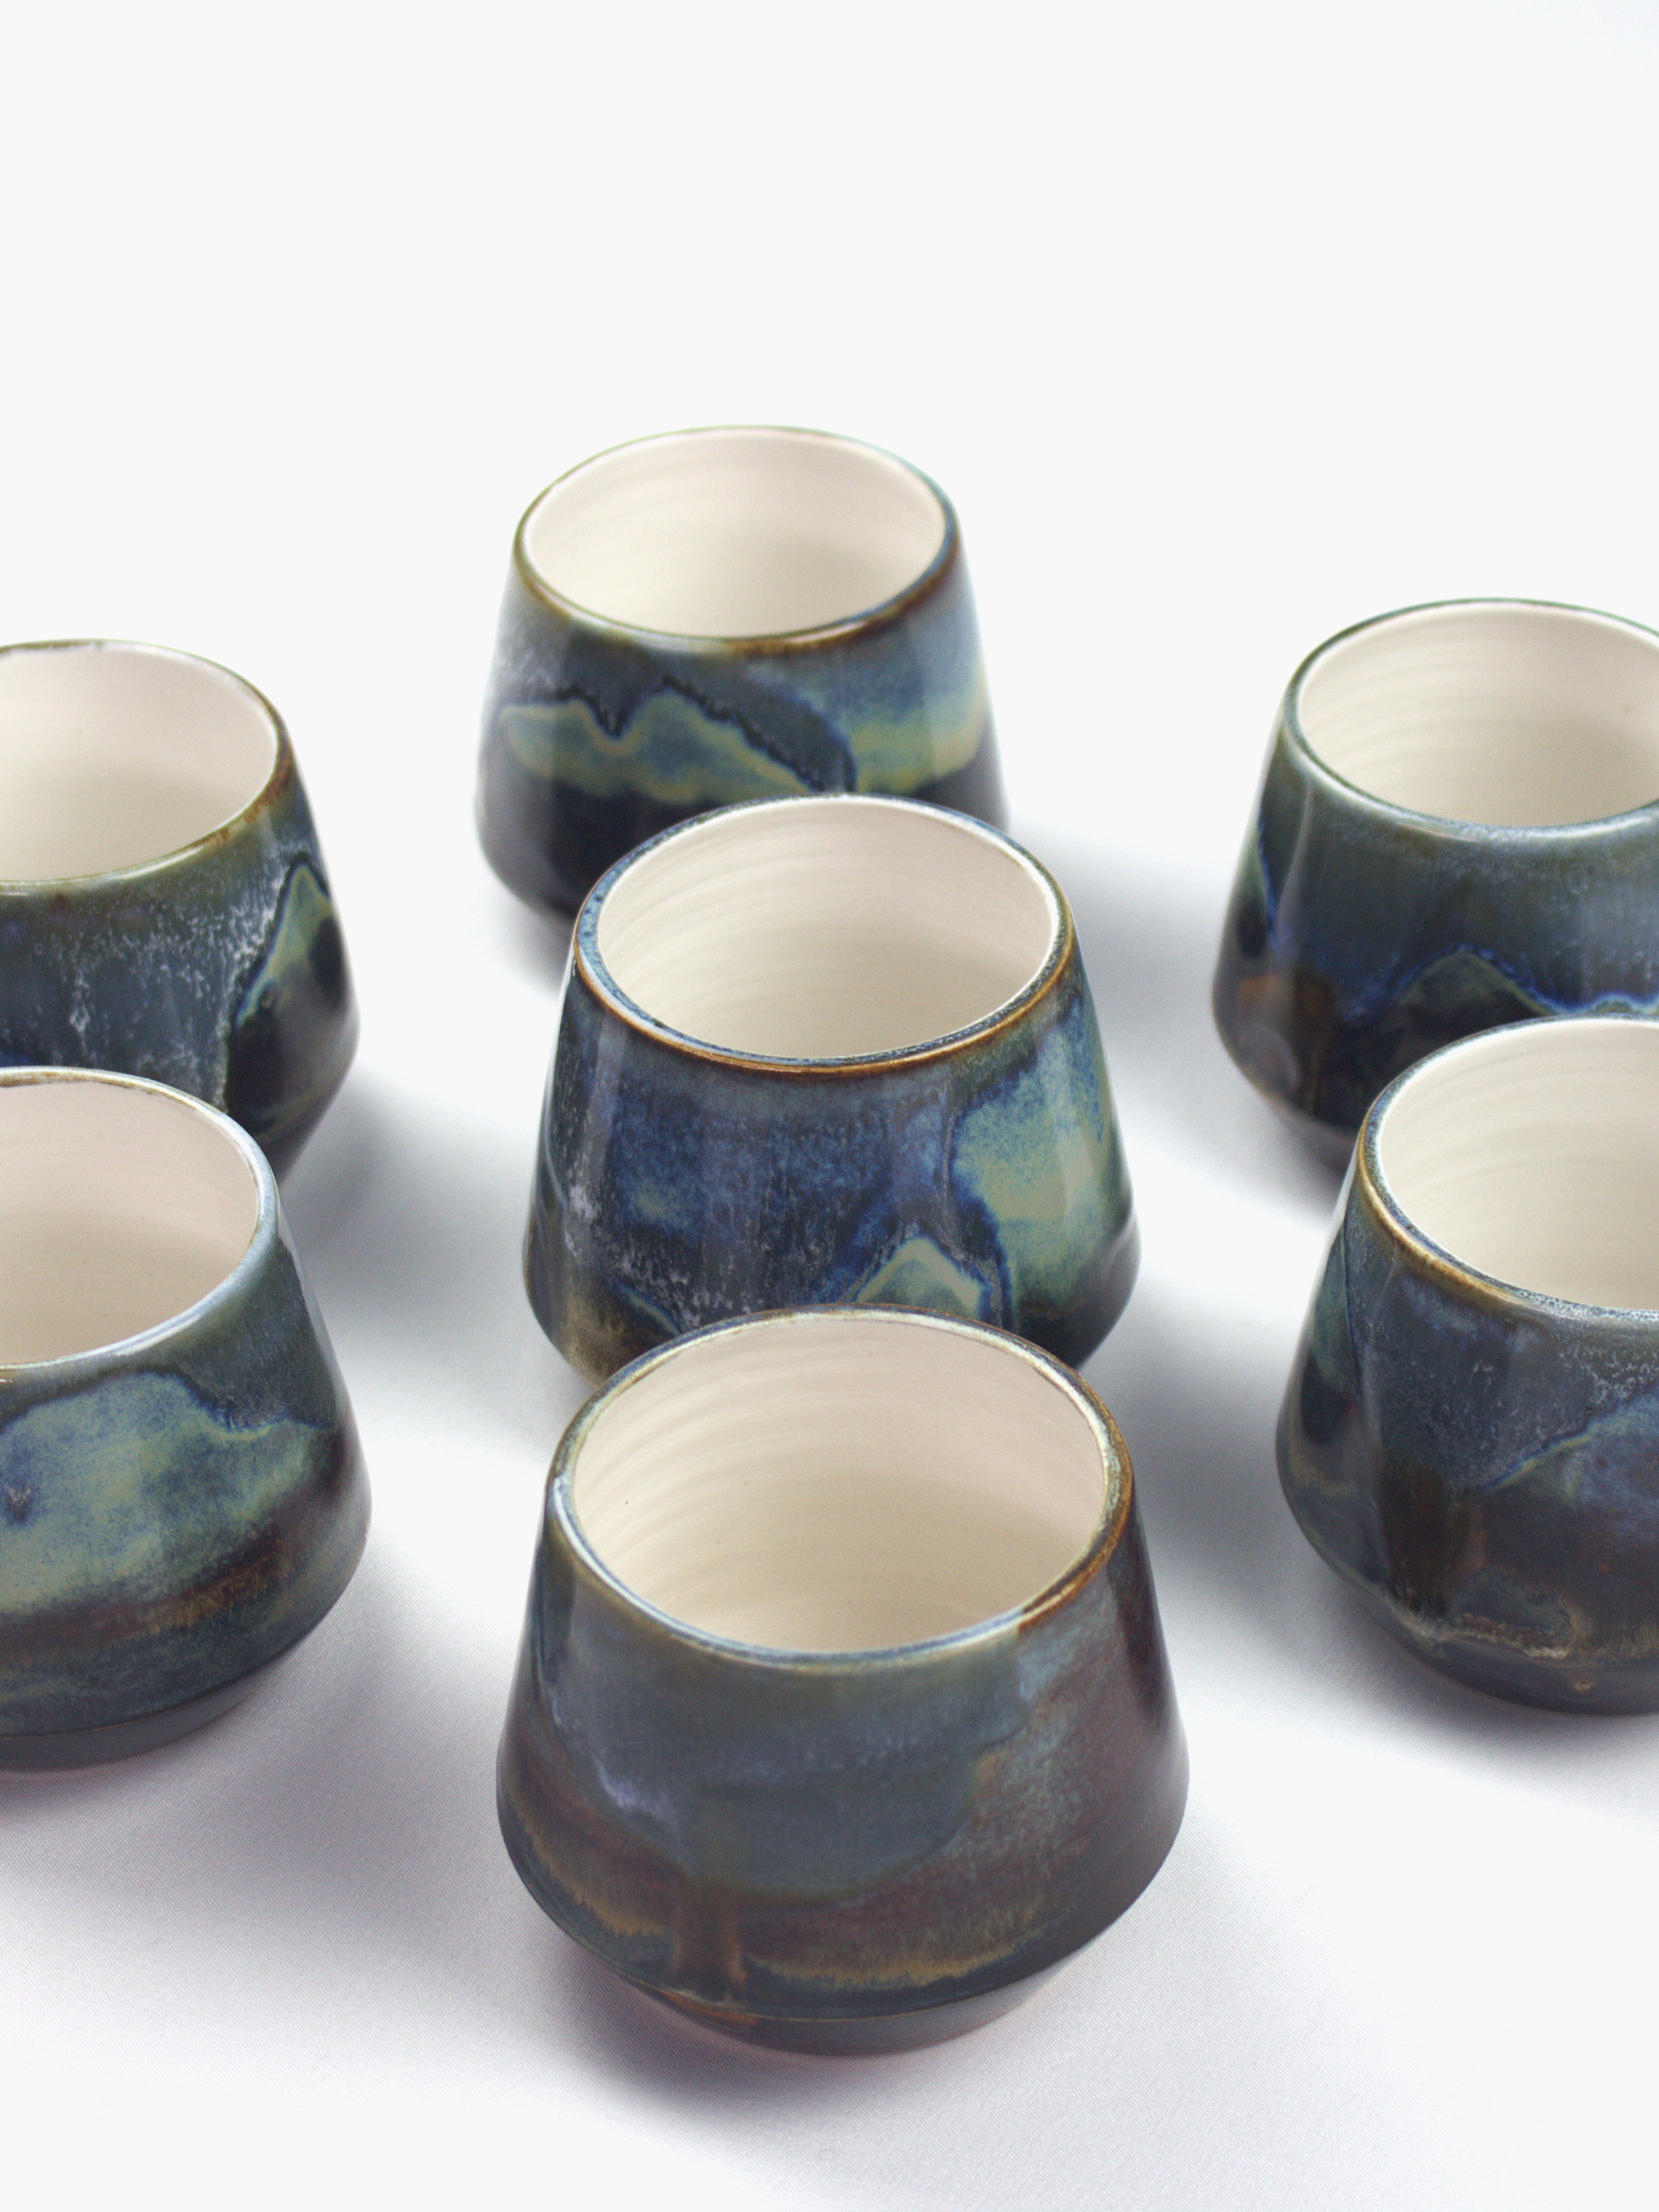
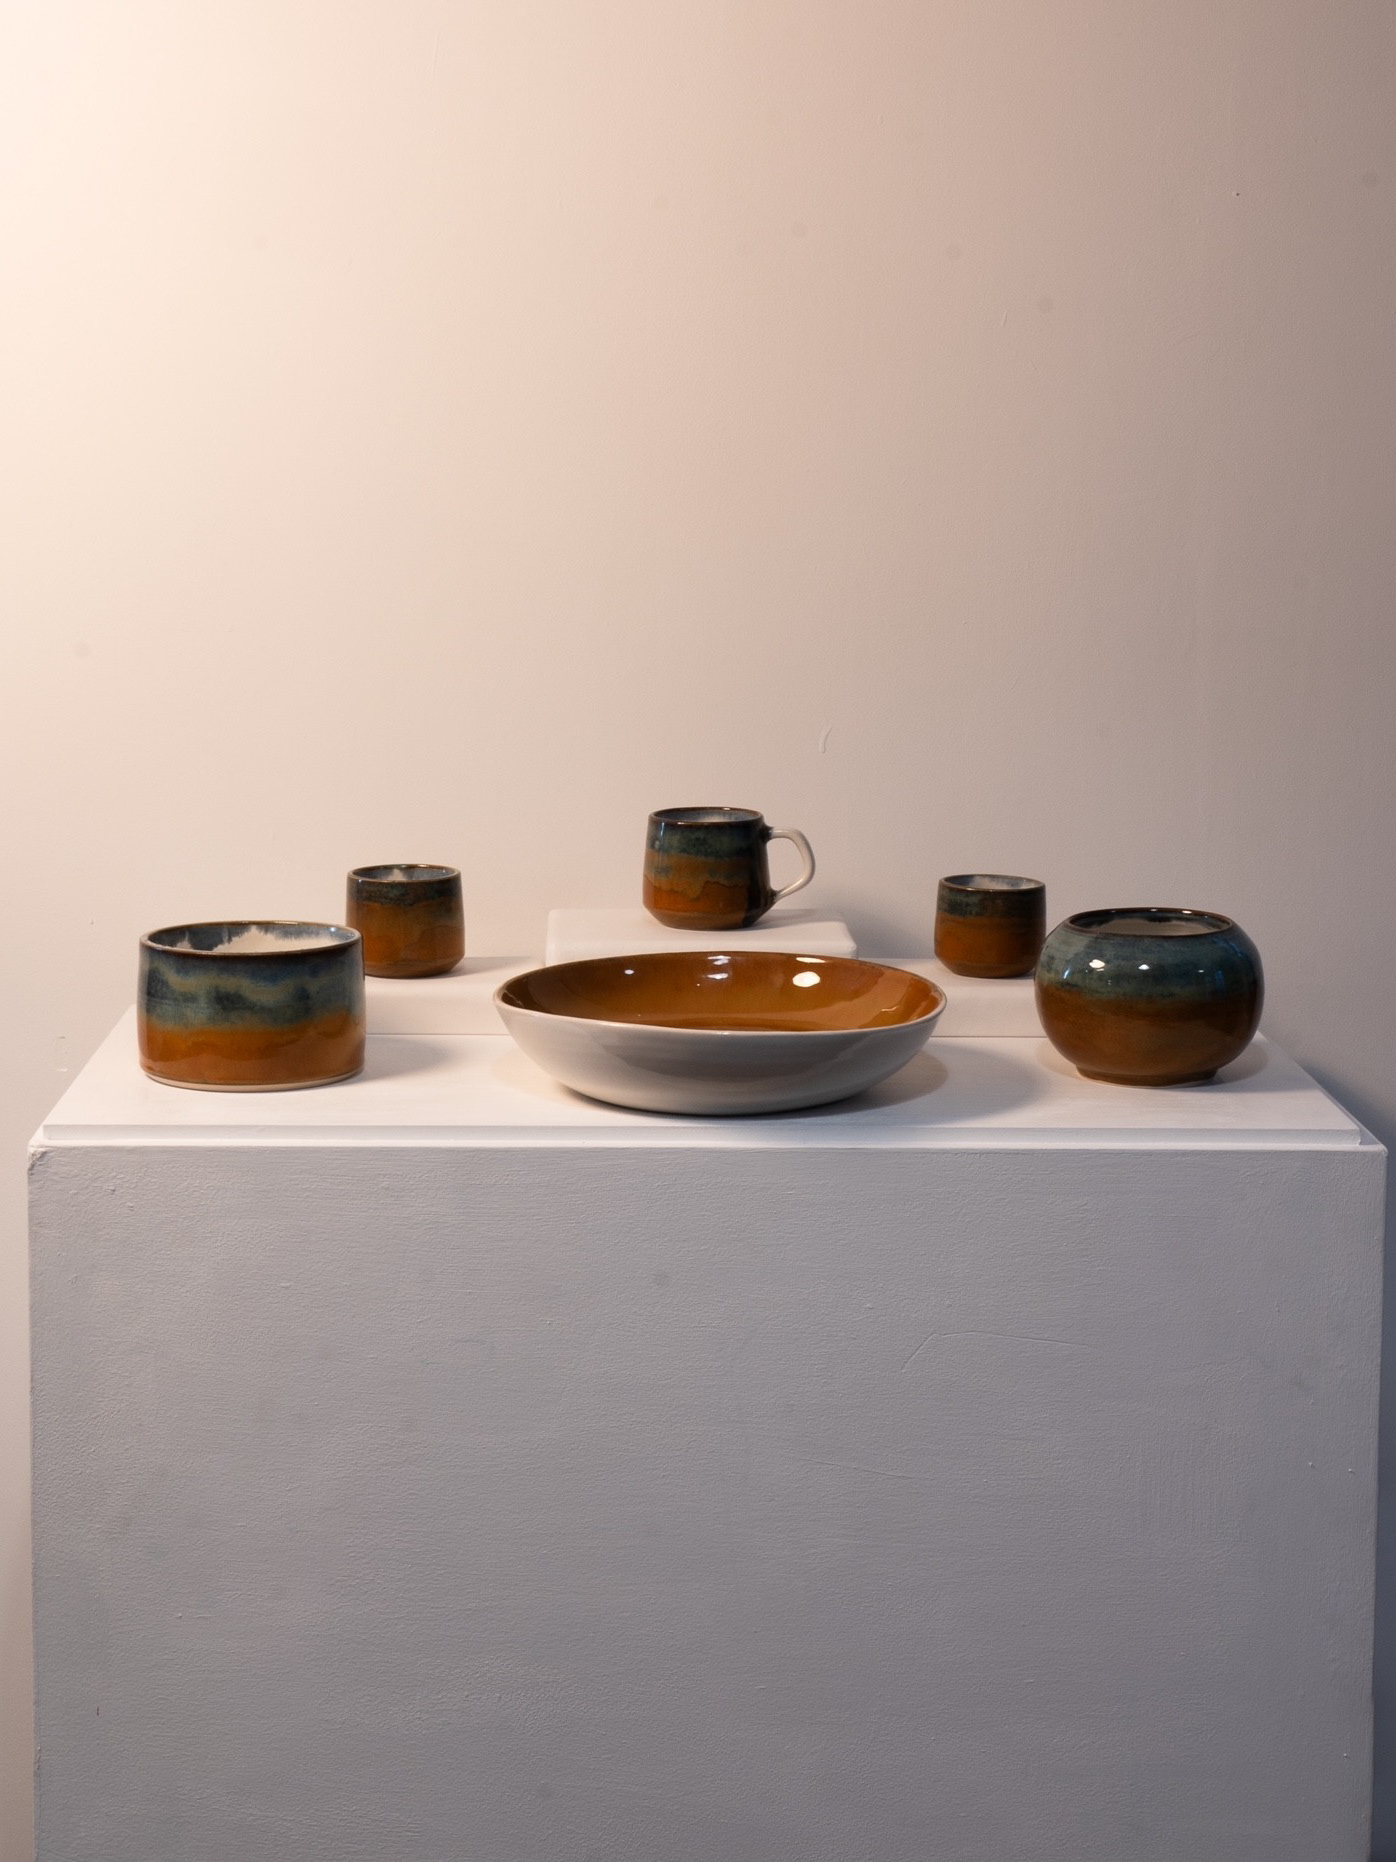
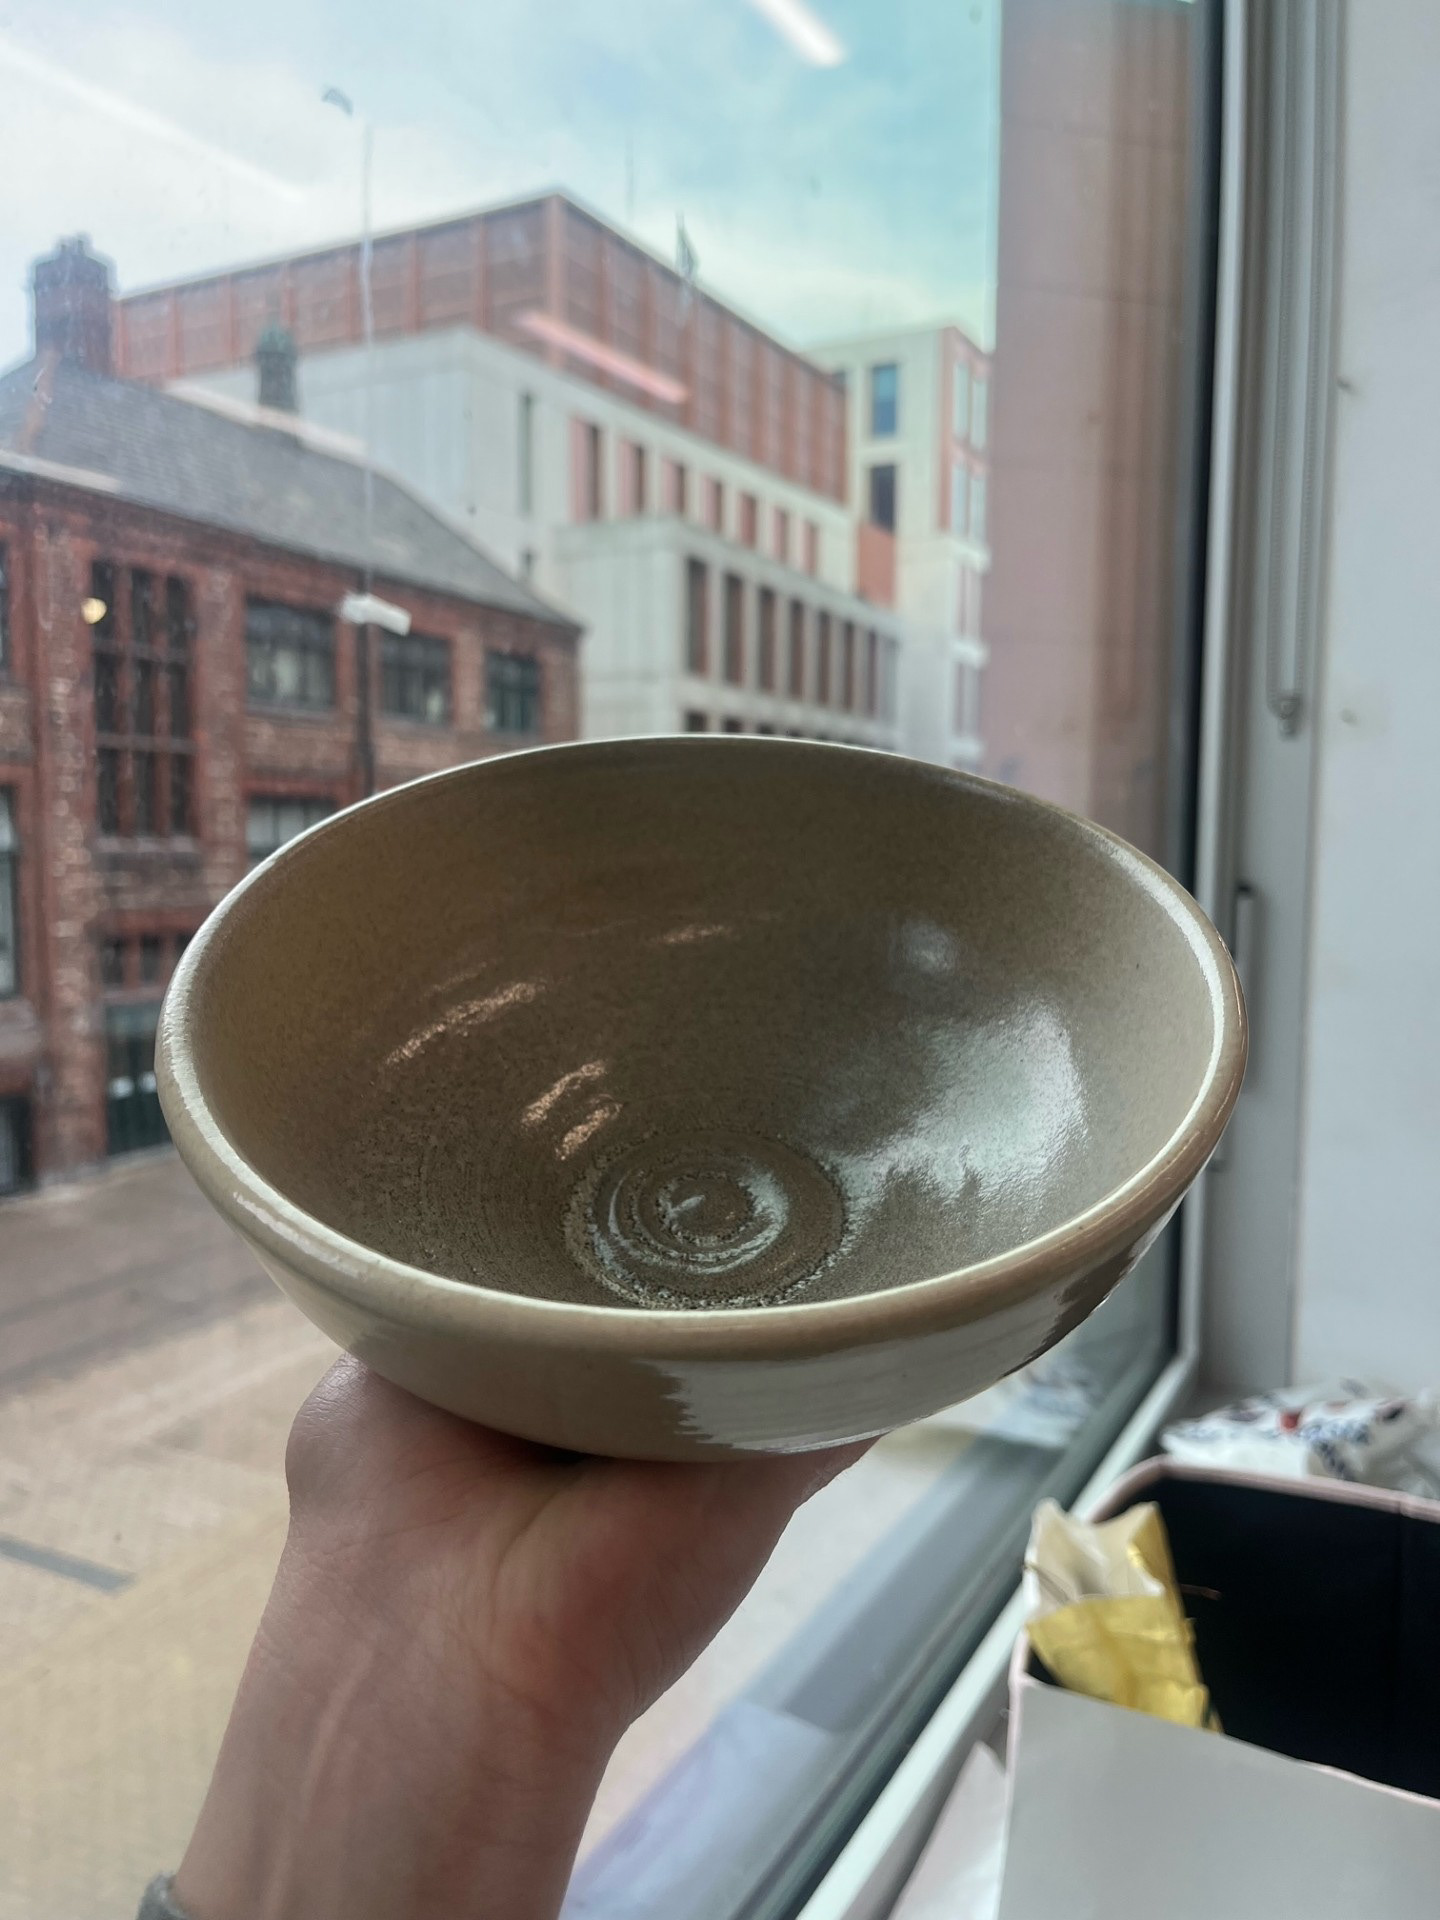
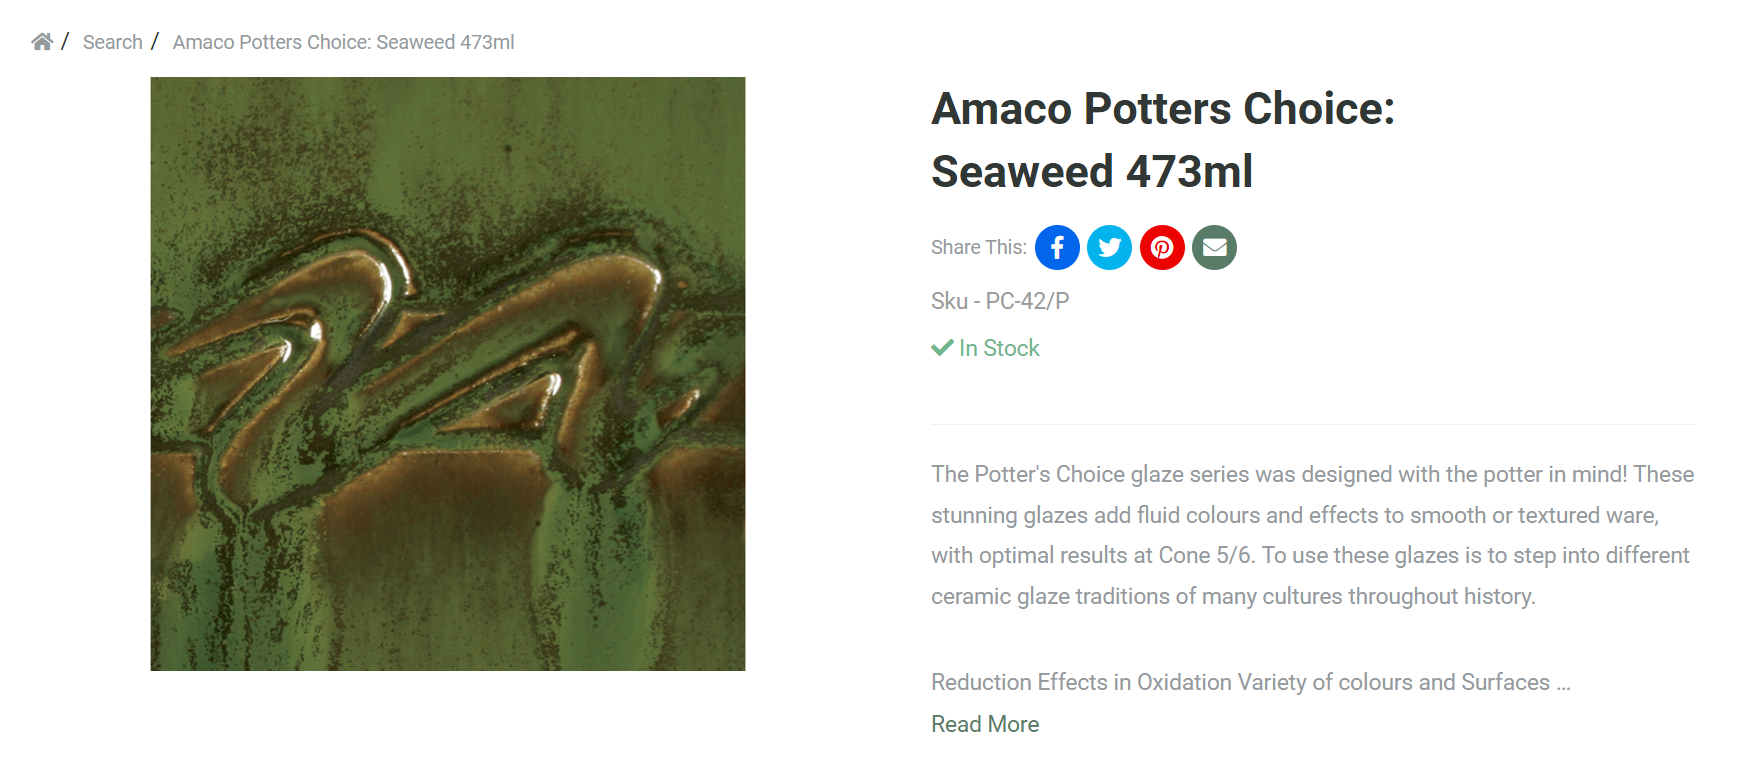
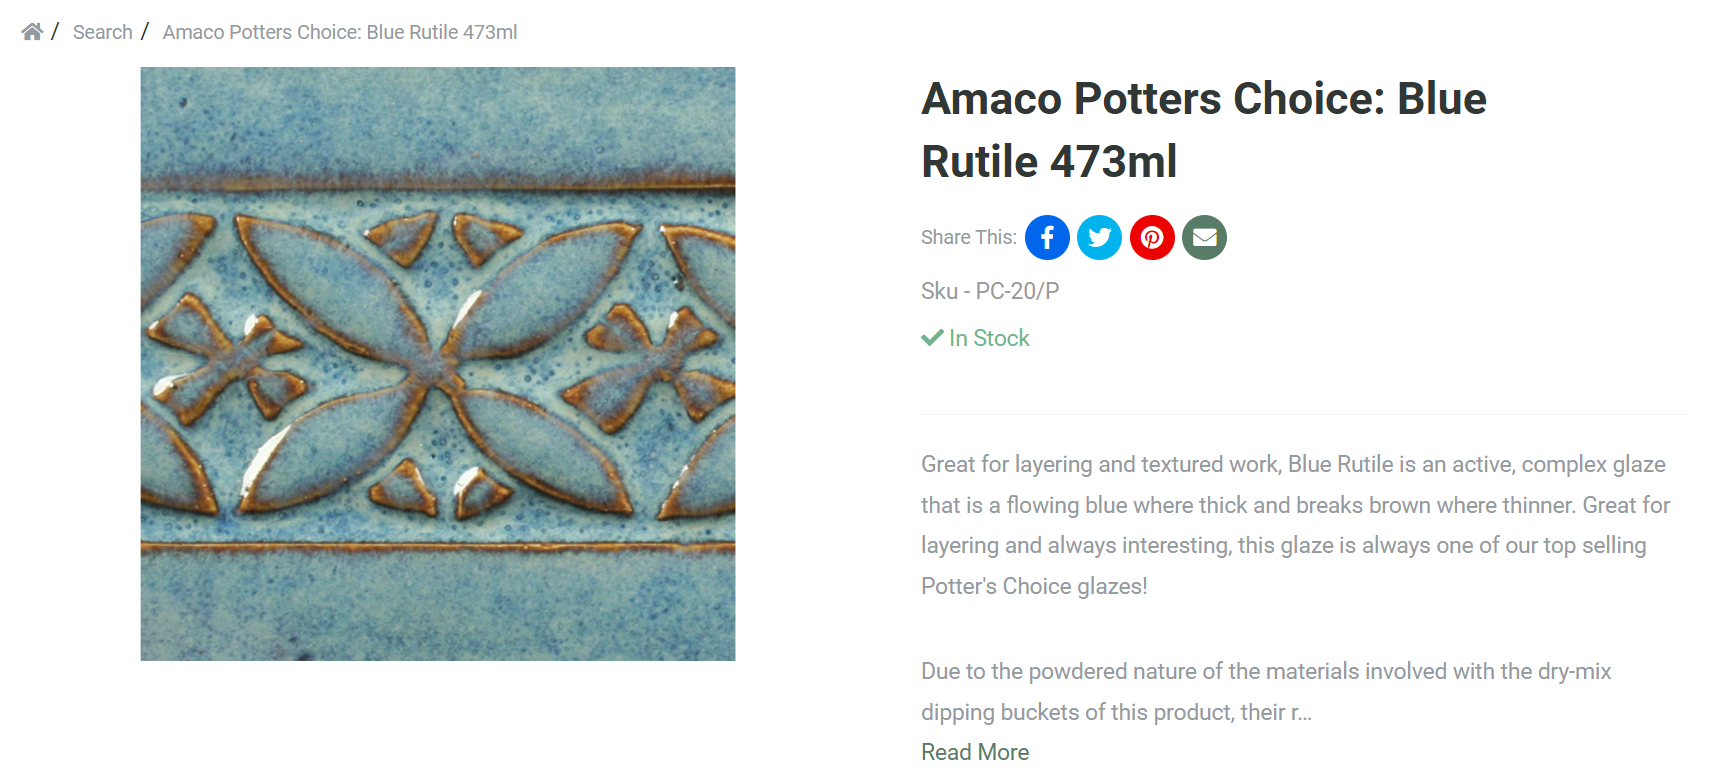
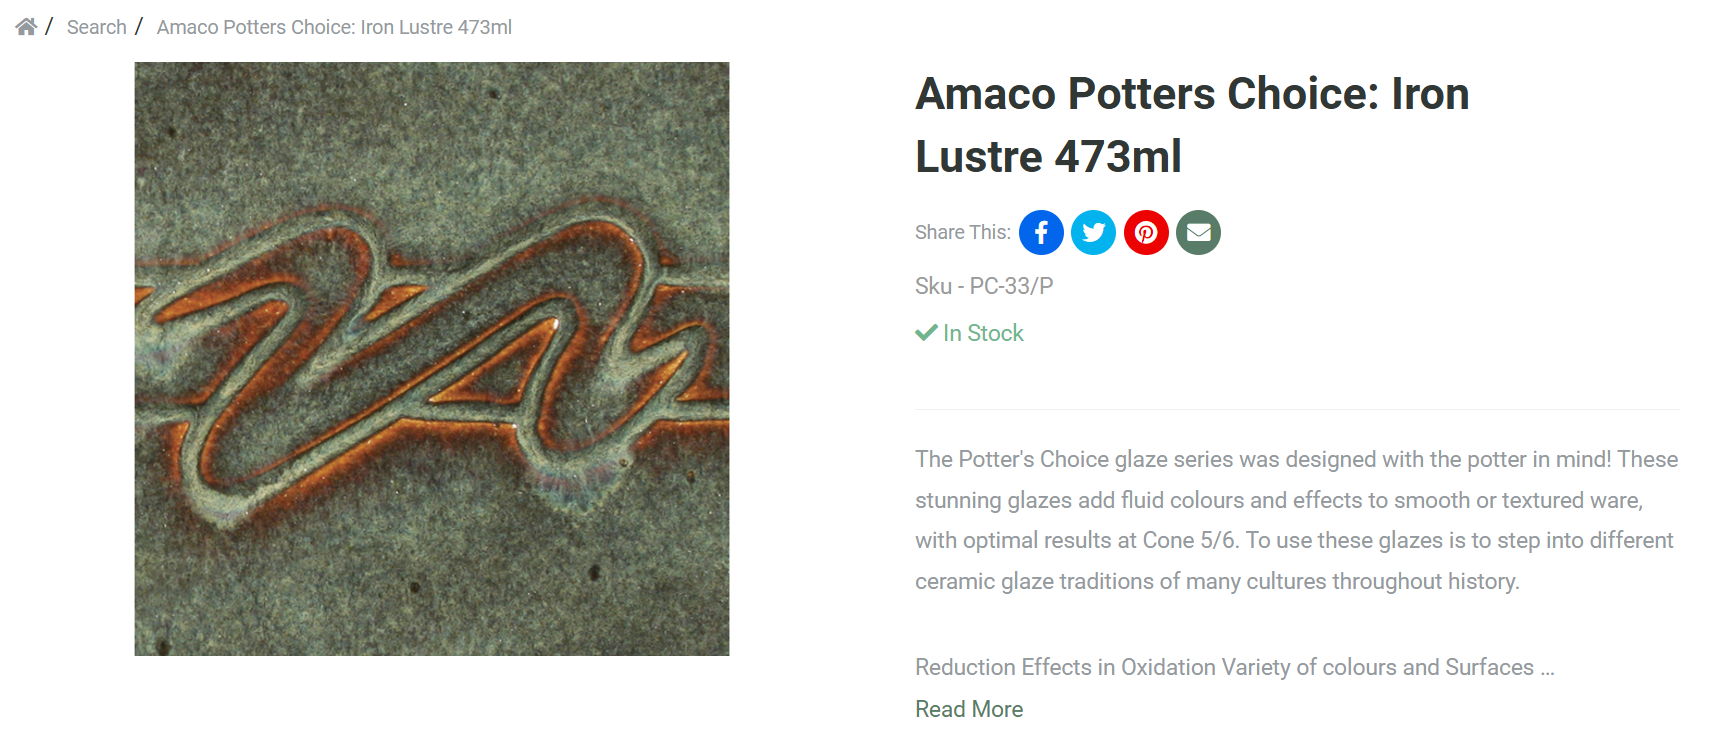
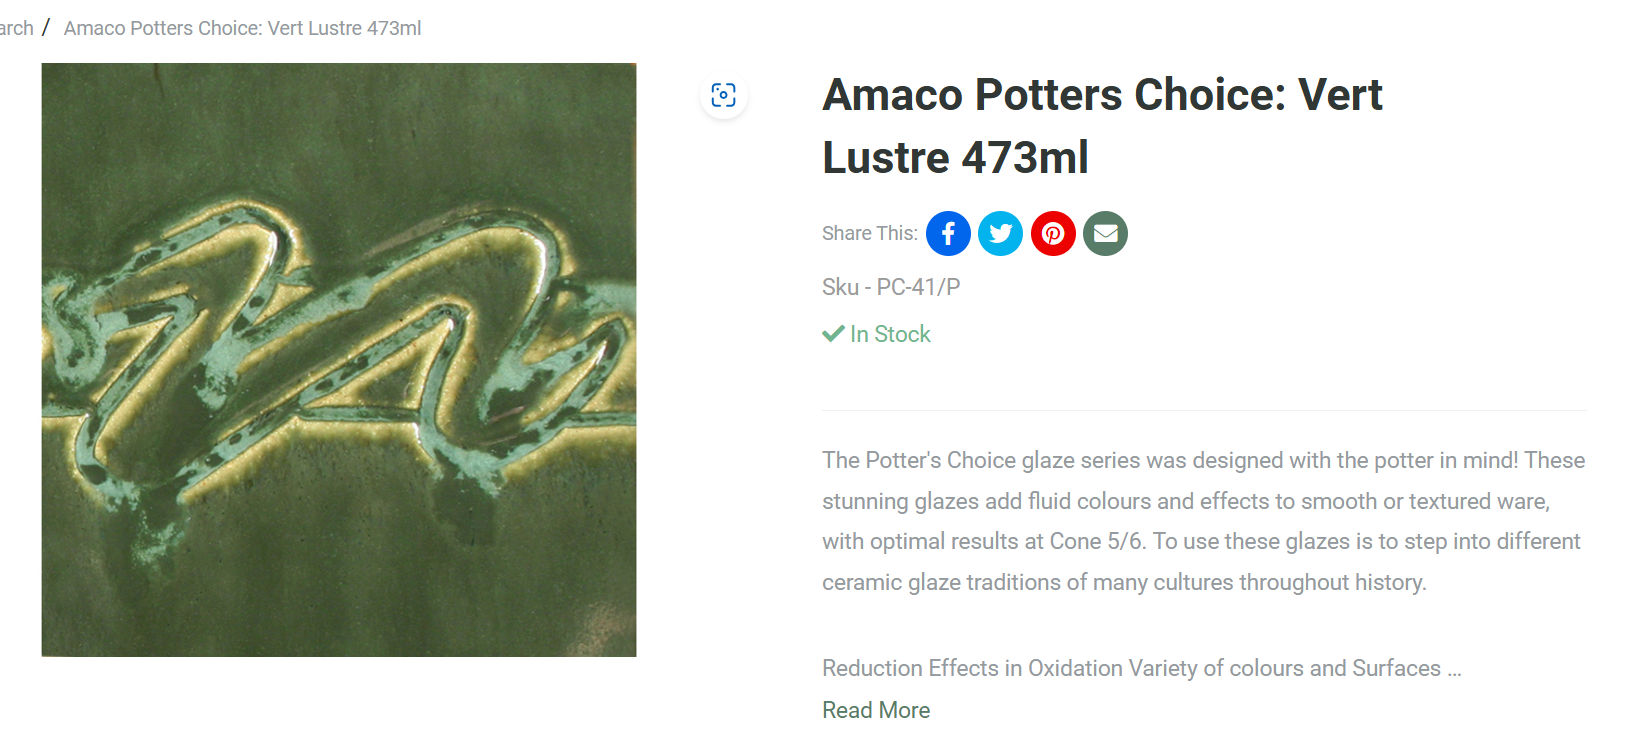
Research that I have completed in the research portion of my portfolio showed various combinations of glaze that I was instantly drawn to. The majority of my initial findings were types of Mayco glazes, which then prompted further research into this brand of glaze. When choosing a glaze style, I personally love the types of finishes that have an almost dripping effect because they have a sense of movement attached to it. I gravitate towards this style of glaze because I feel like it makes me look deeper at the surface and almost look inside of it. In relation to colour, I am personally more gravitated towards blues and greens because of my own personal associations that I have with them. When I think of these colours, I associate them with elements of nature like the sea and fields which are things I love because for me they represent things like fluidity, motion and freedom.
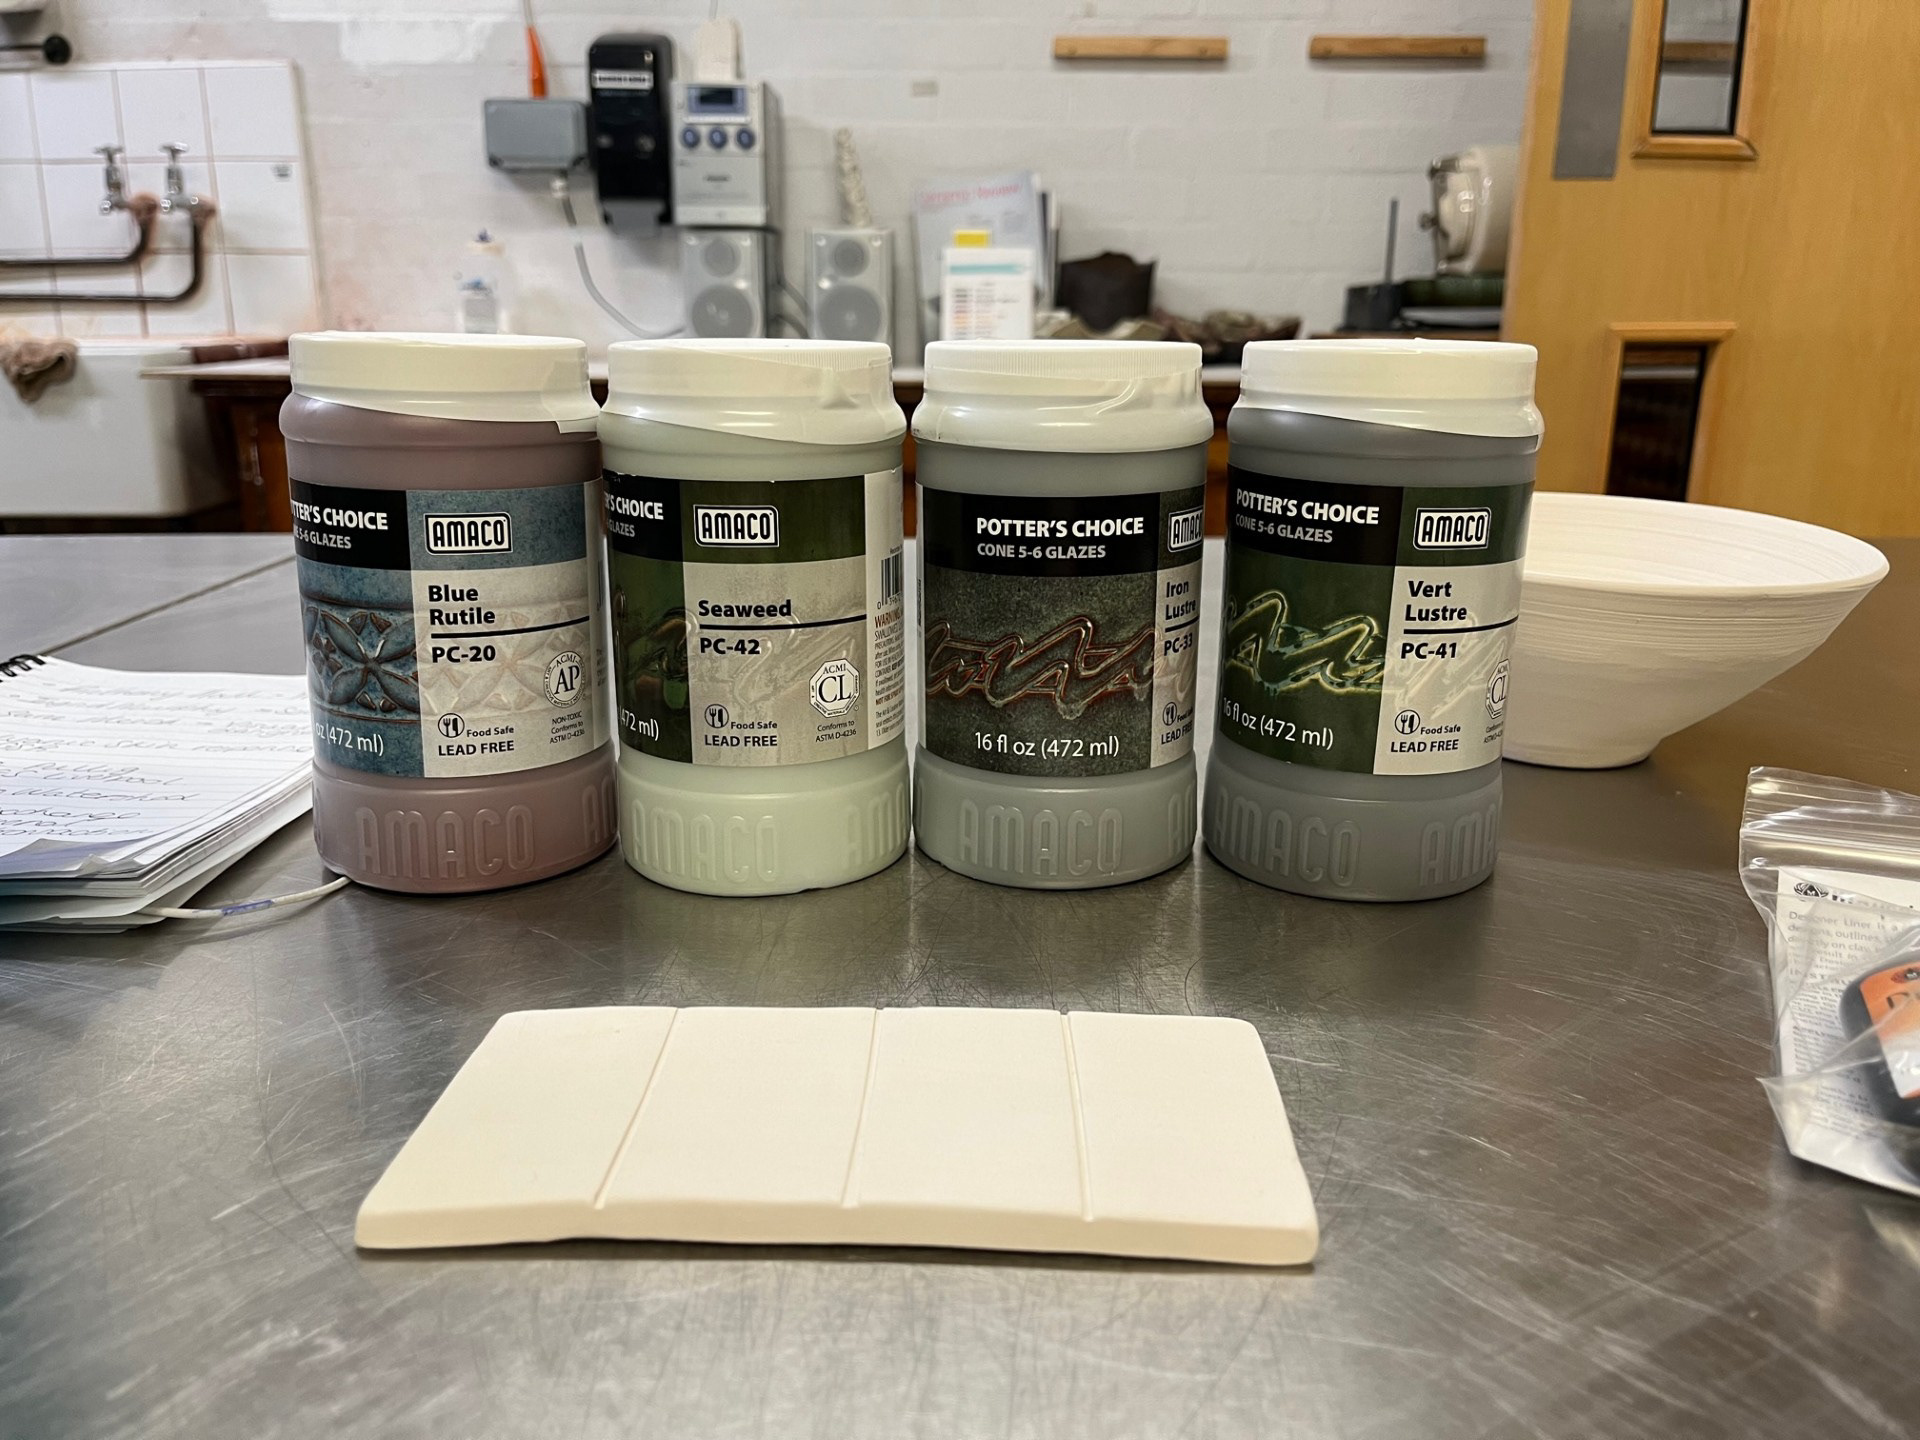
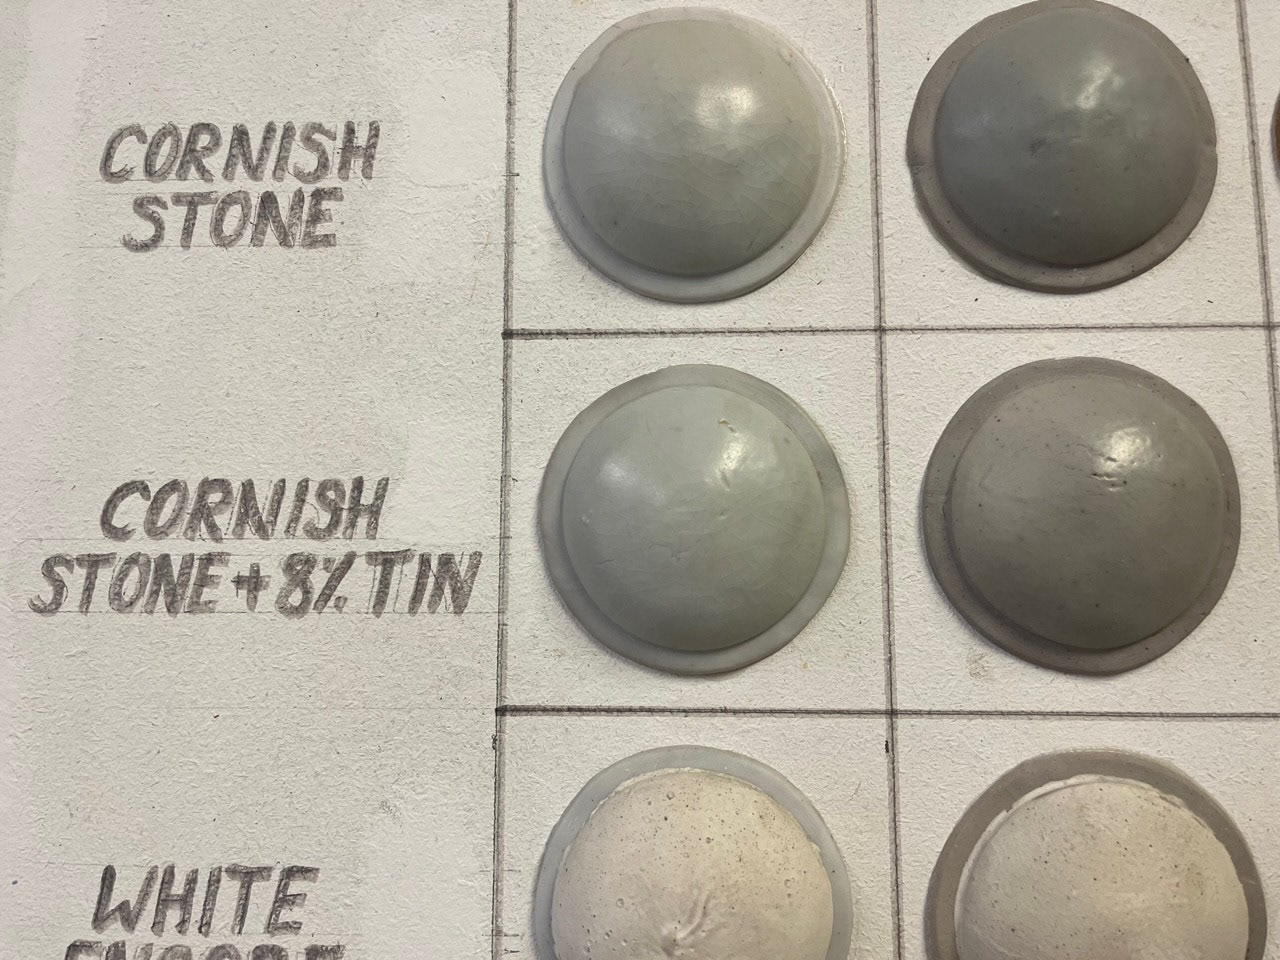
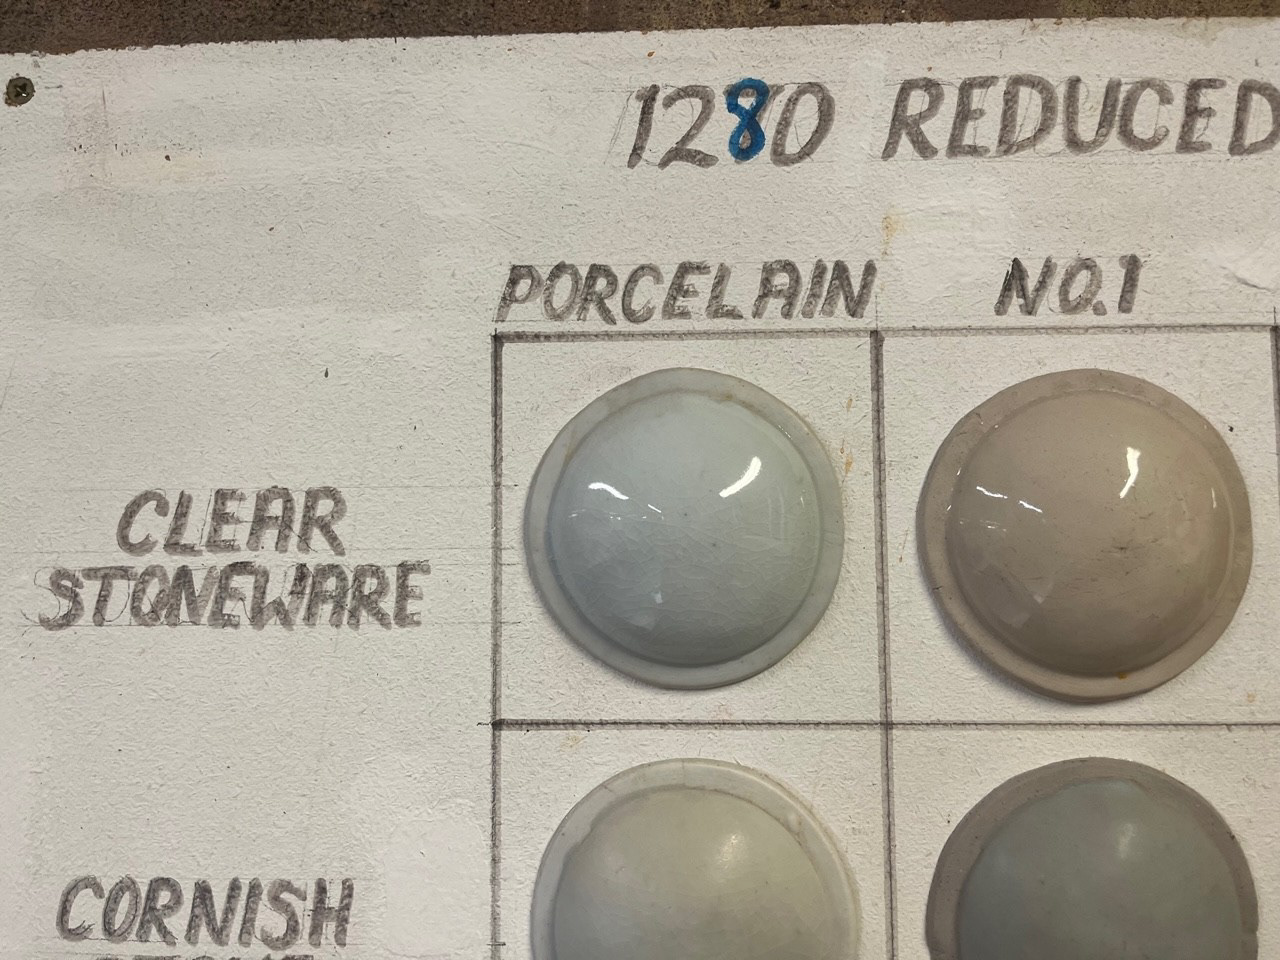
See below for chosen Glazes:
Initial Testing:
For the initial testing I used a sample that I had already made in preparation for testing at the beginning of the term. To start i just did a basic swatch of each colour doing two passes of each
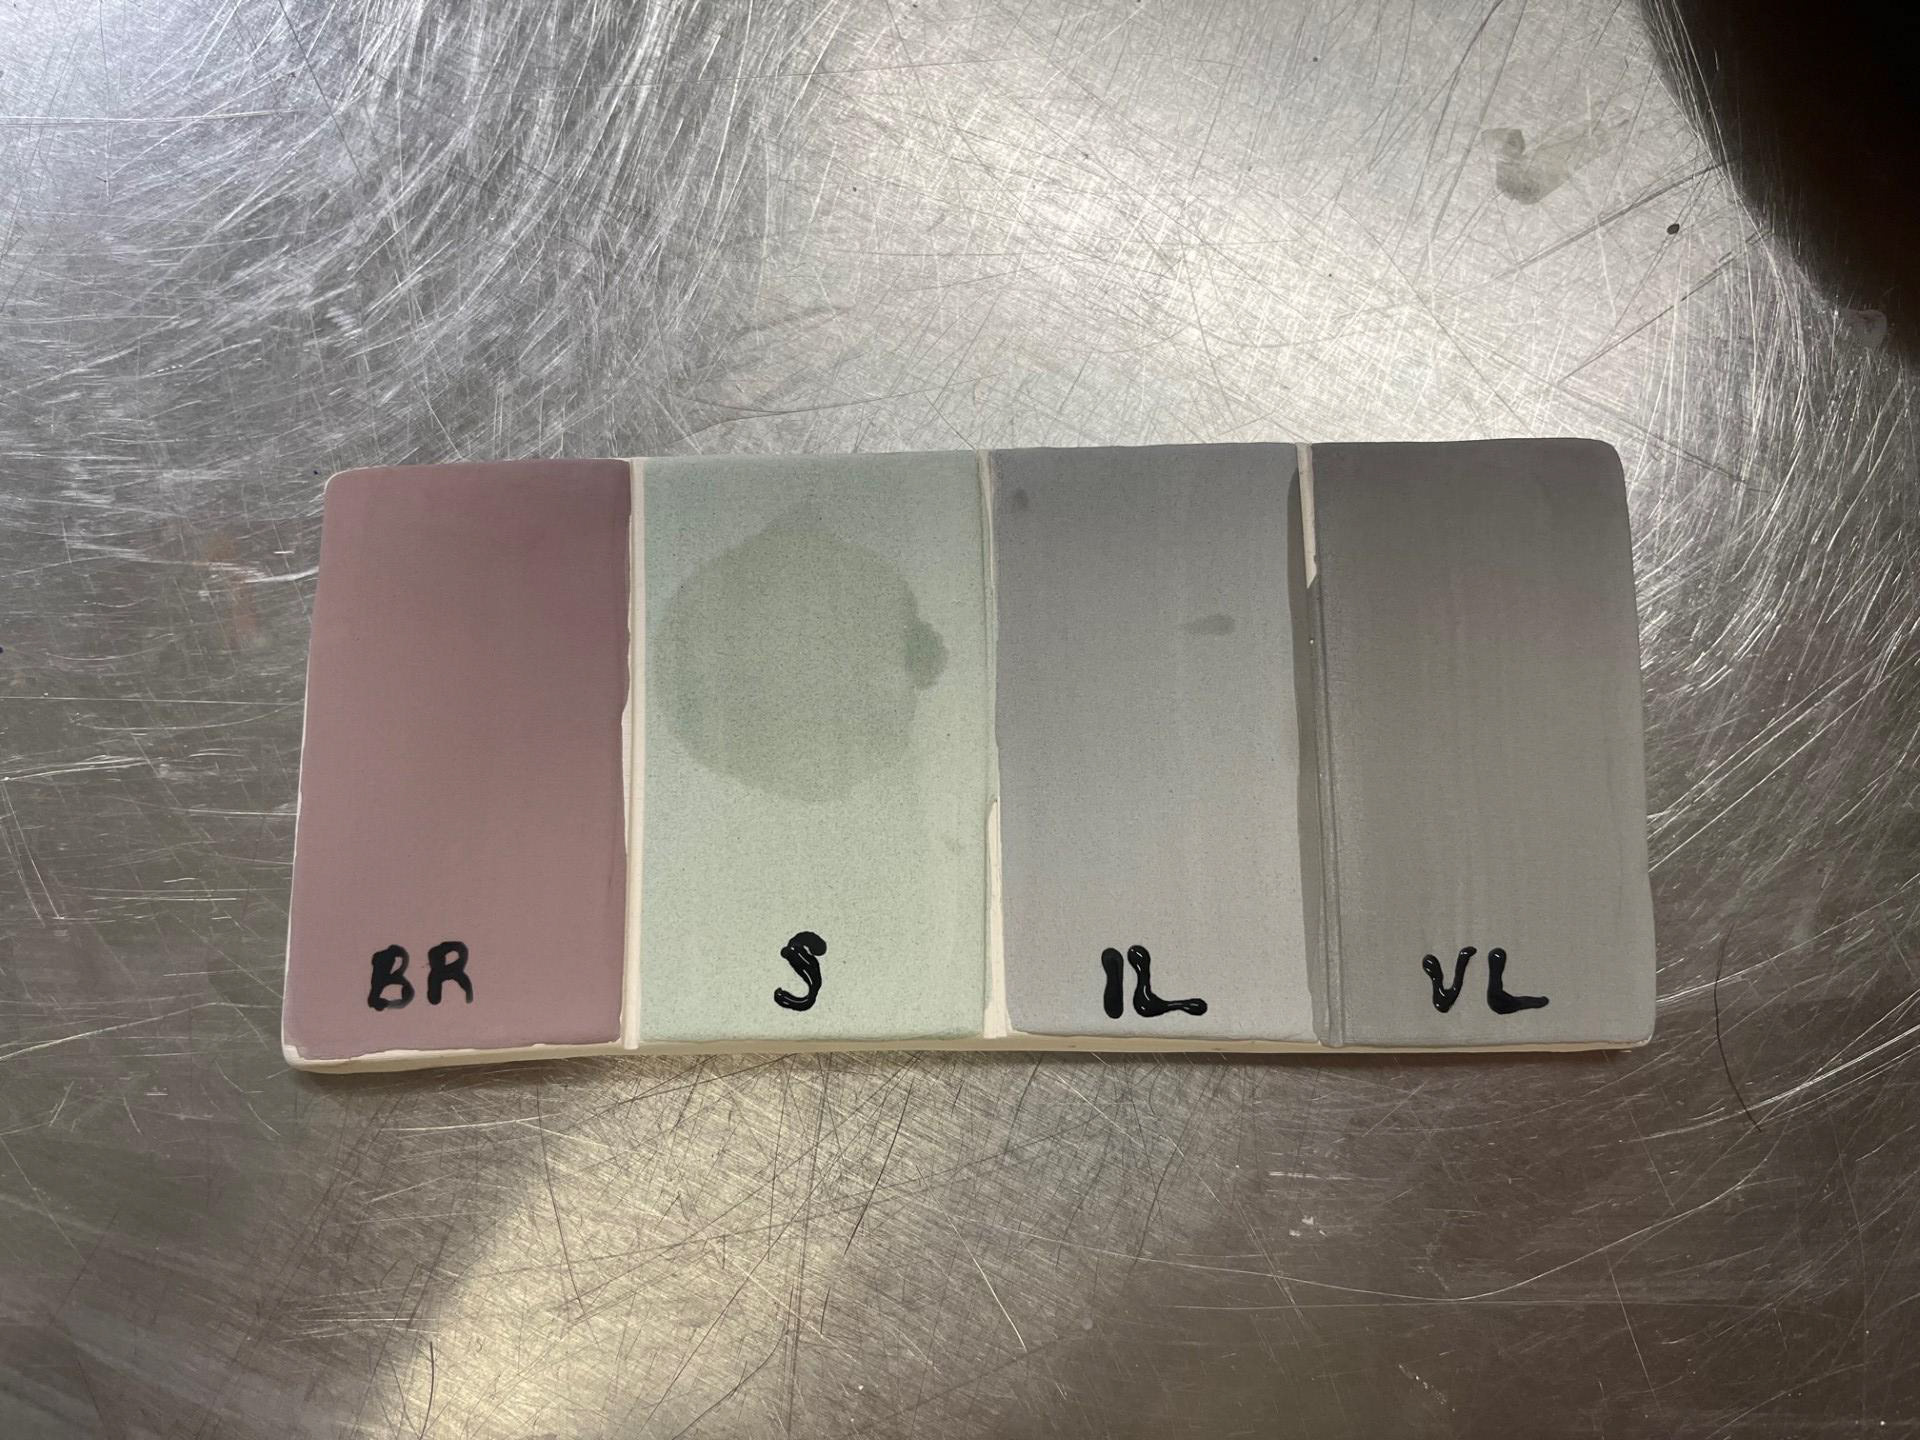
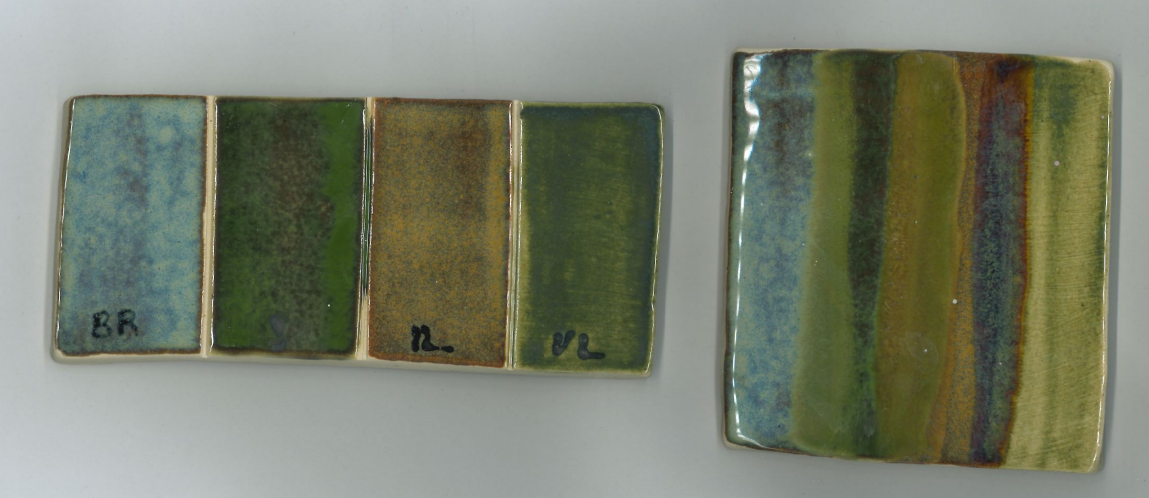
As a whole, I found this process very exiting because I was able to test out and play with my new glazes. The initial part of this process, meaning the initial image, was me just starting off using a tile that was split into four sections. This sample was one that I had already previously made at the beginning of this project in preparation for potential glaze testing. For this test I wanted to start by just doing 2 layers of each glaze for both samples because it would be good to build from. The sample on the right is one where I wanted to try and layer a few of them just based on image on the glaze alone. The colours are in the same chronological order as the sample on the right. I think that this was a valuable start because I quickly understood the relationships between some of the glazes quite quickly. Like for example, I really love the look of vert lustre layered over iron lustre because it creates almost a blue iridescent / rusty effect.
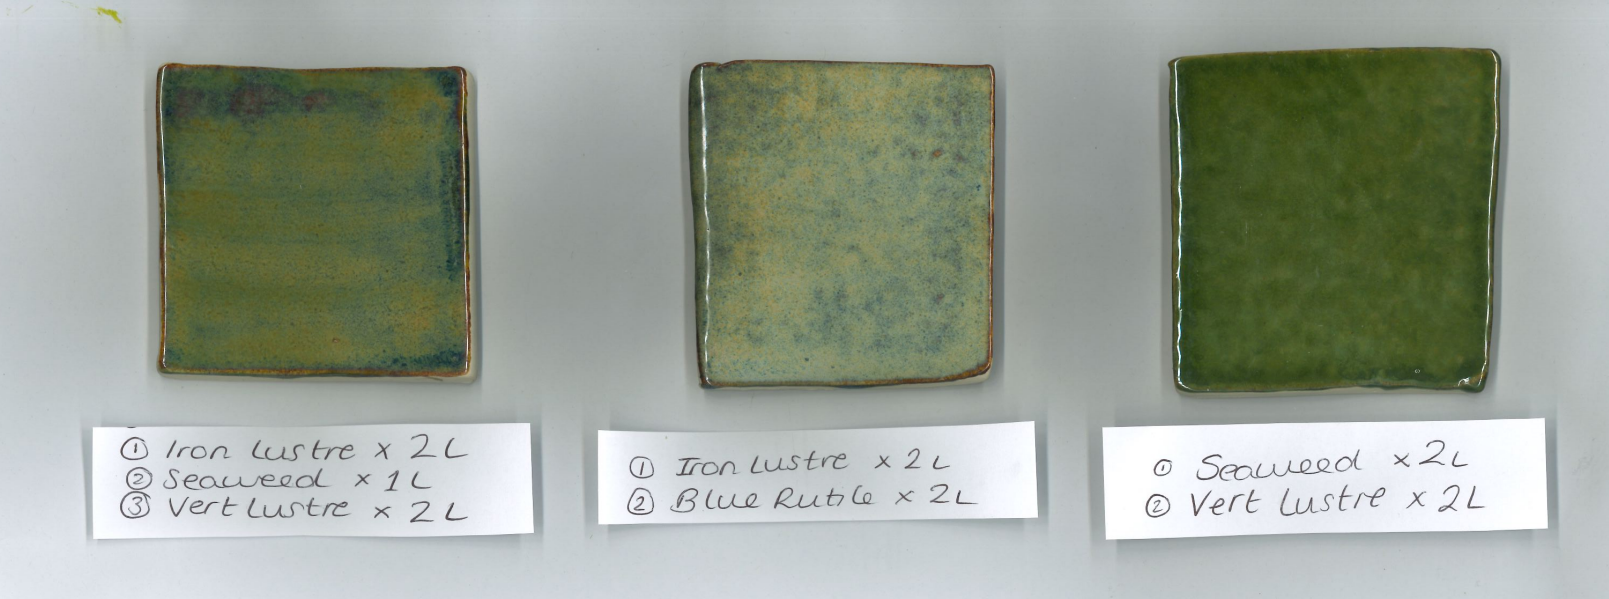
After getting these samples back, I instantly wanted to go into the next phase of my testing. There were a couple of new combinations that I wanted to try, one of those being combining vert lustre and iron lustre because I really want to see the effect of that seen on the above sample but on a deeper level. Another One that I really would like to try is Iron lustre and blue rutile. For this batch I also went on to use old pieces I made at the start of unit X primarily because I want to get these glazes samples and tested as soon as possible as we are on a strict timeline for the completion of unit X. See below for samples:
Further Development:

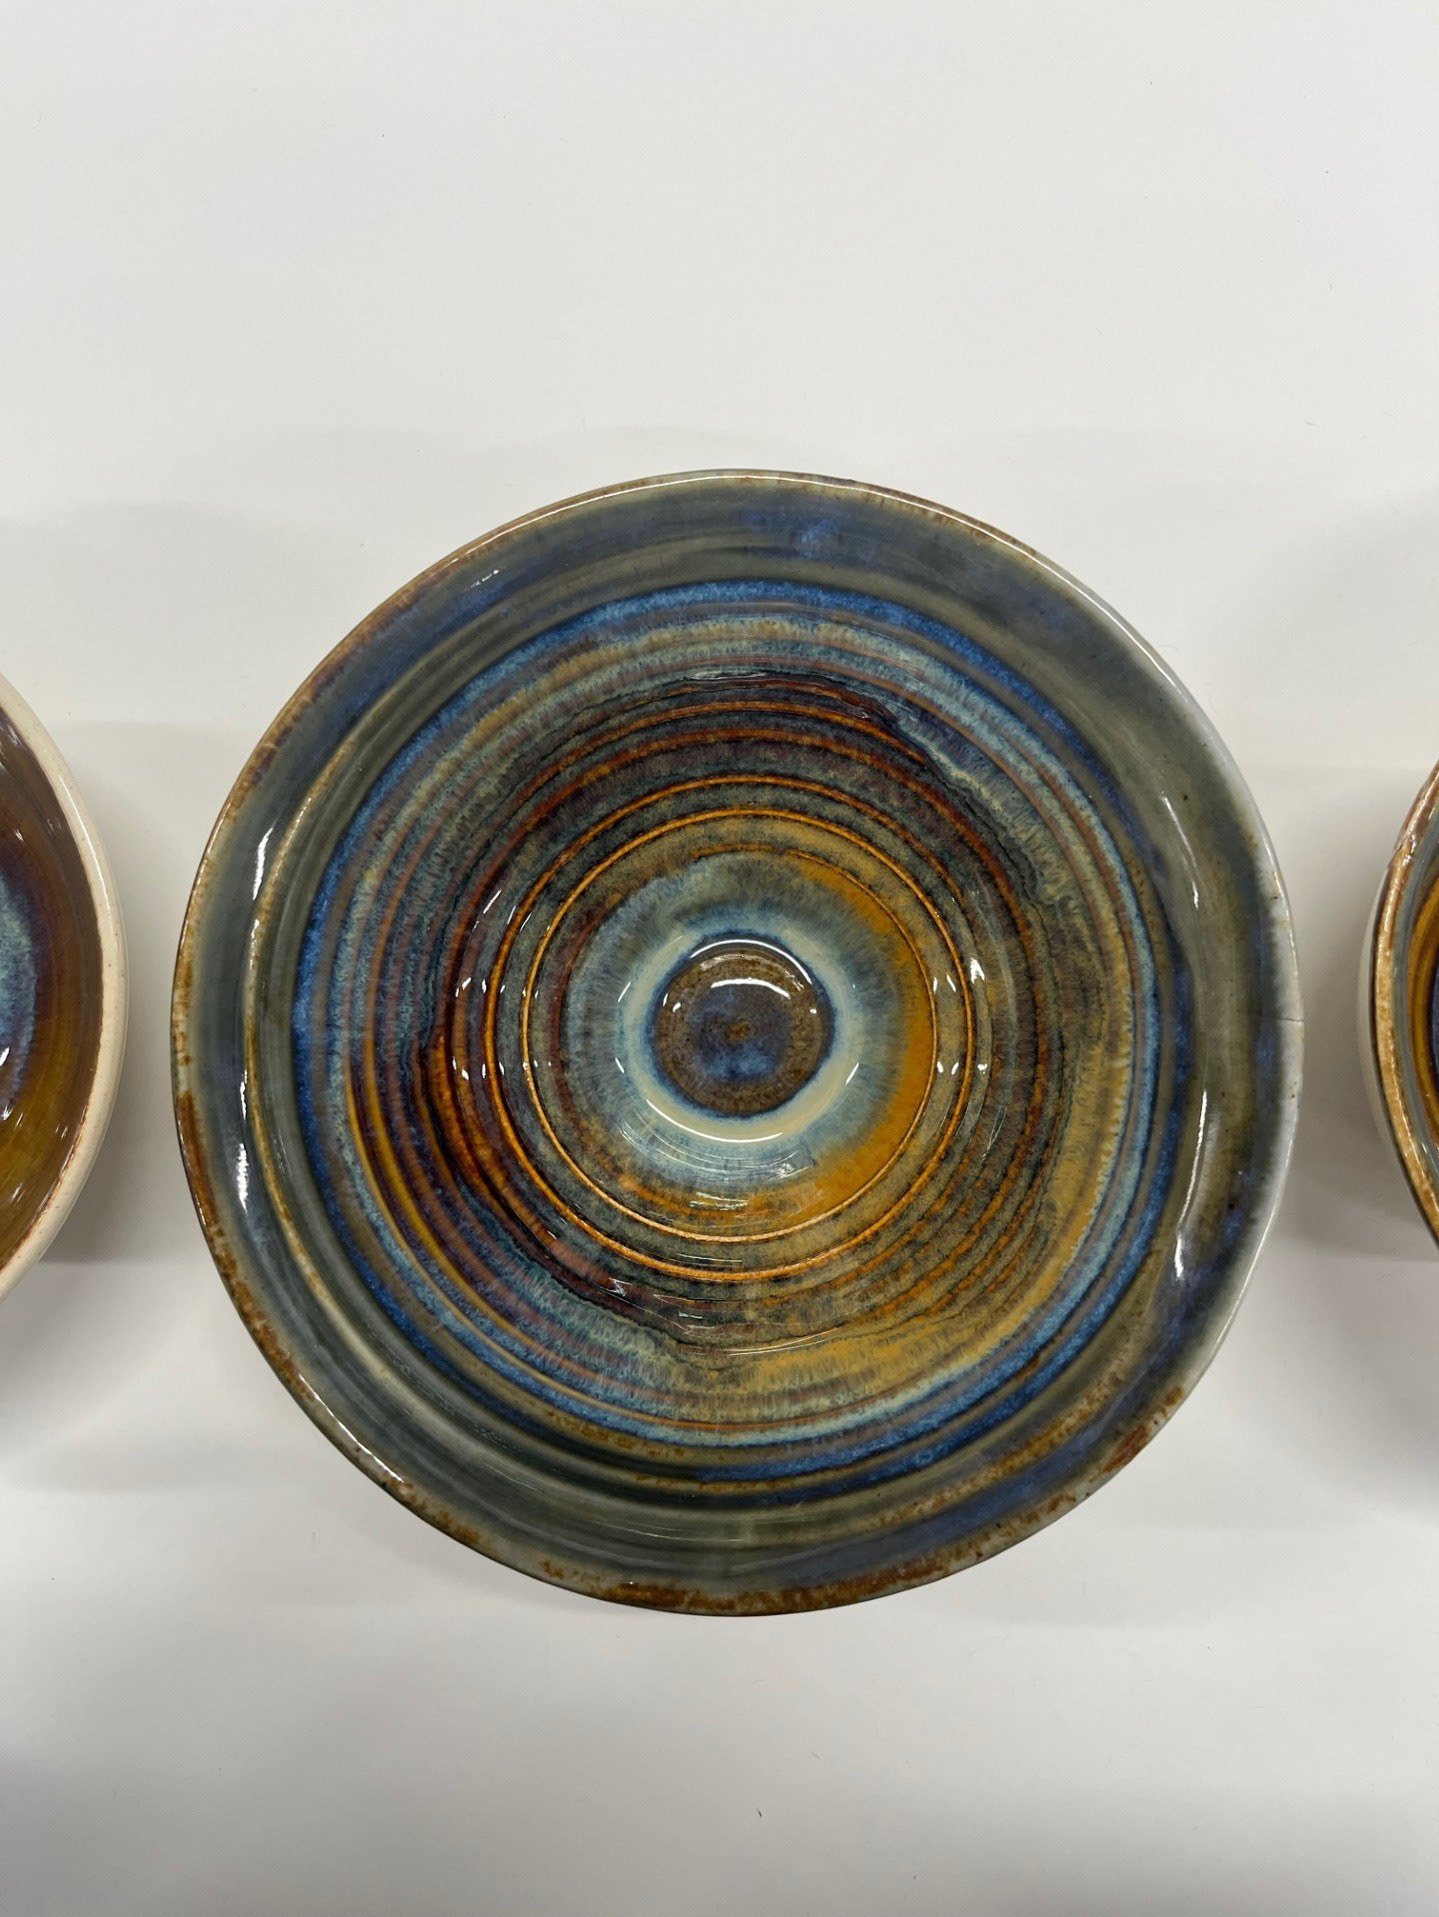
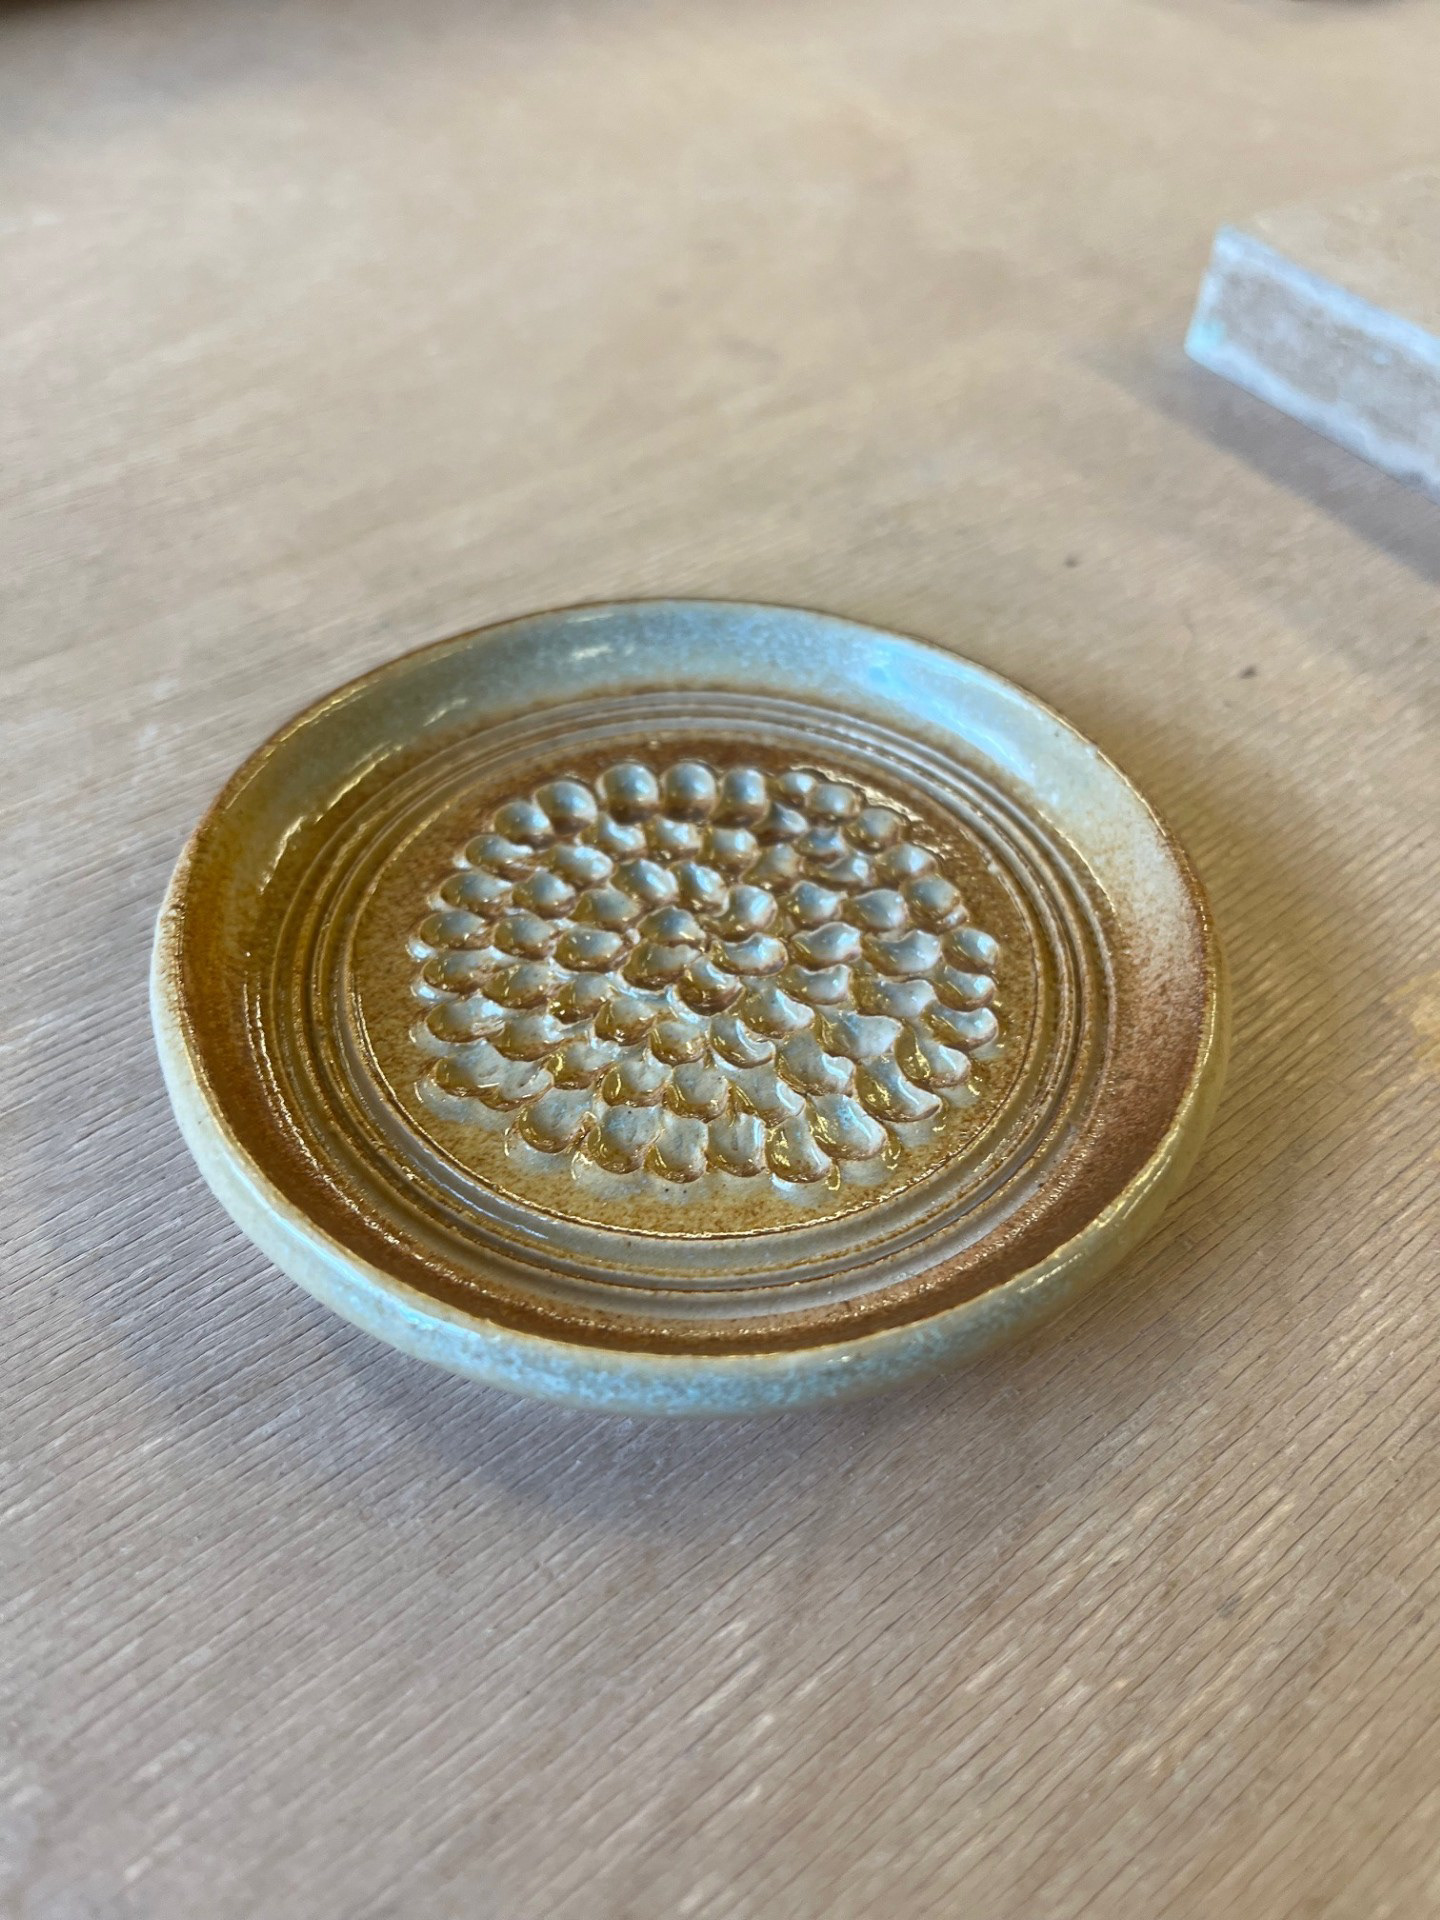
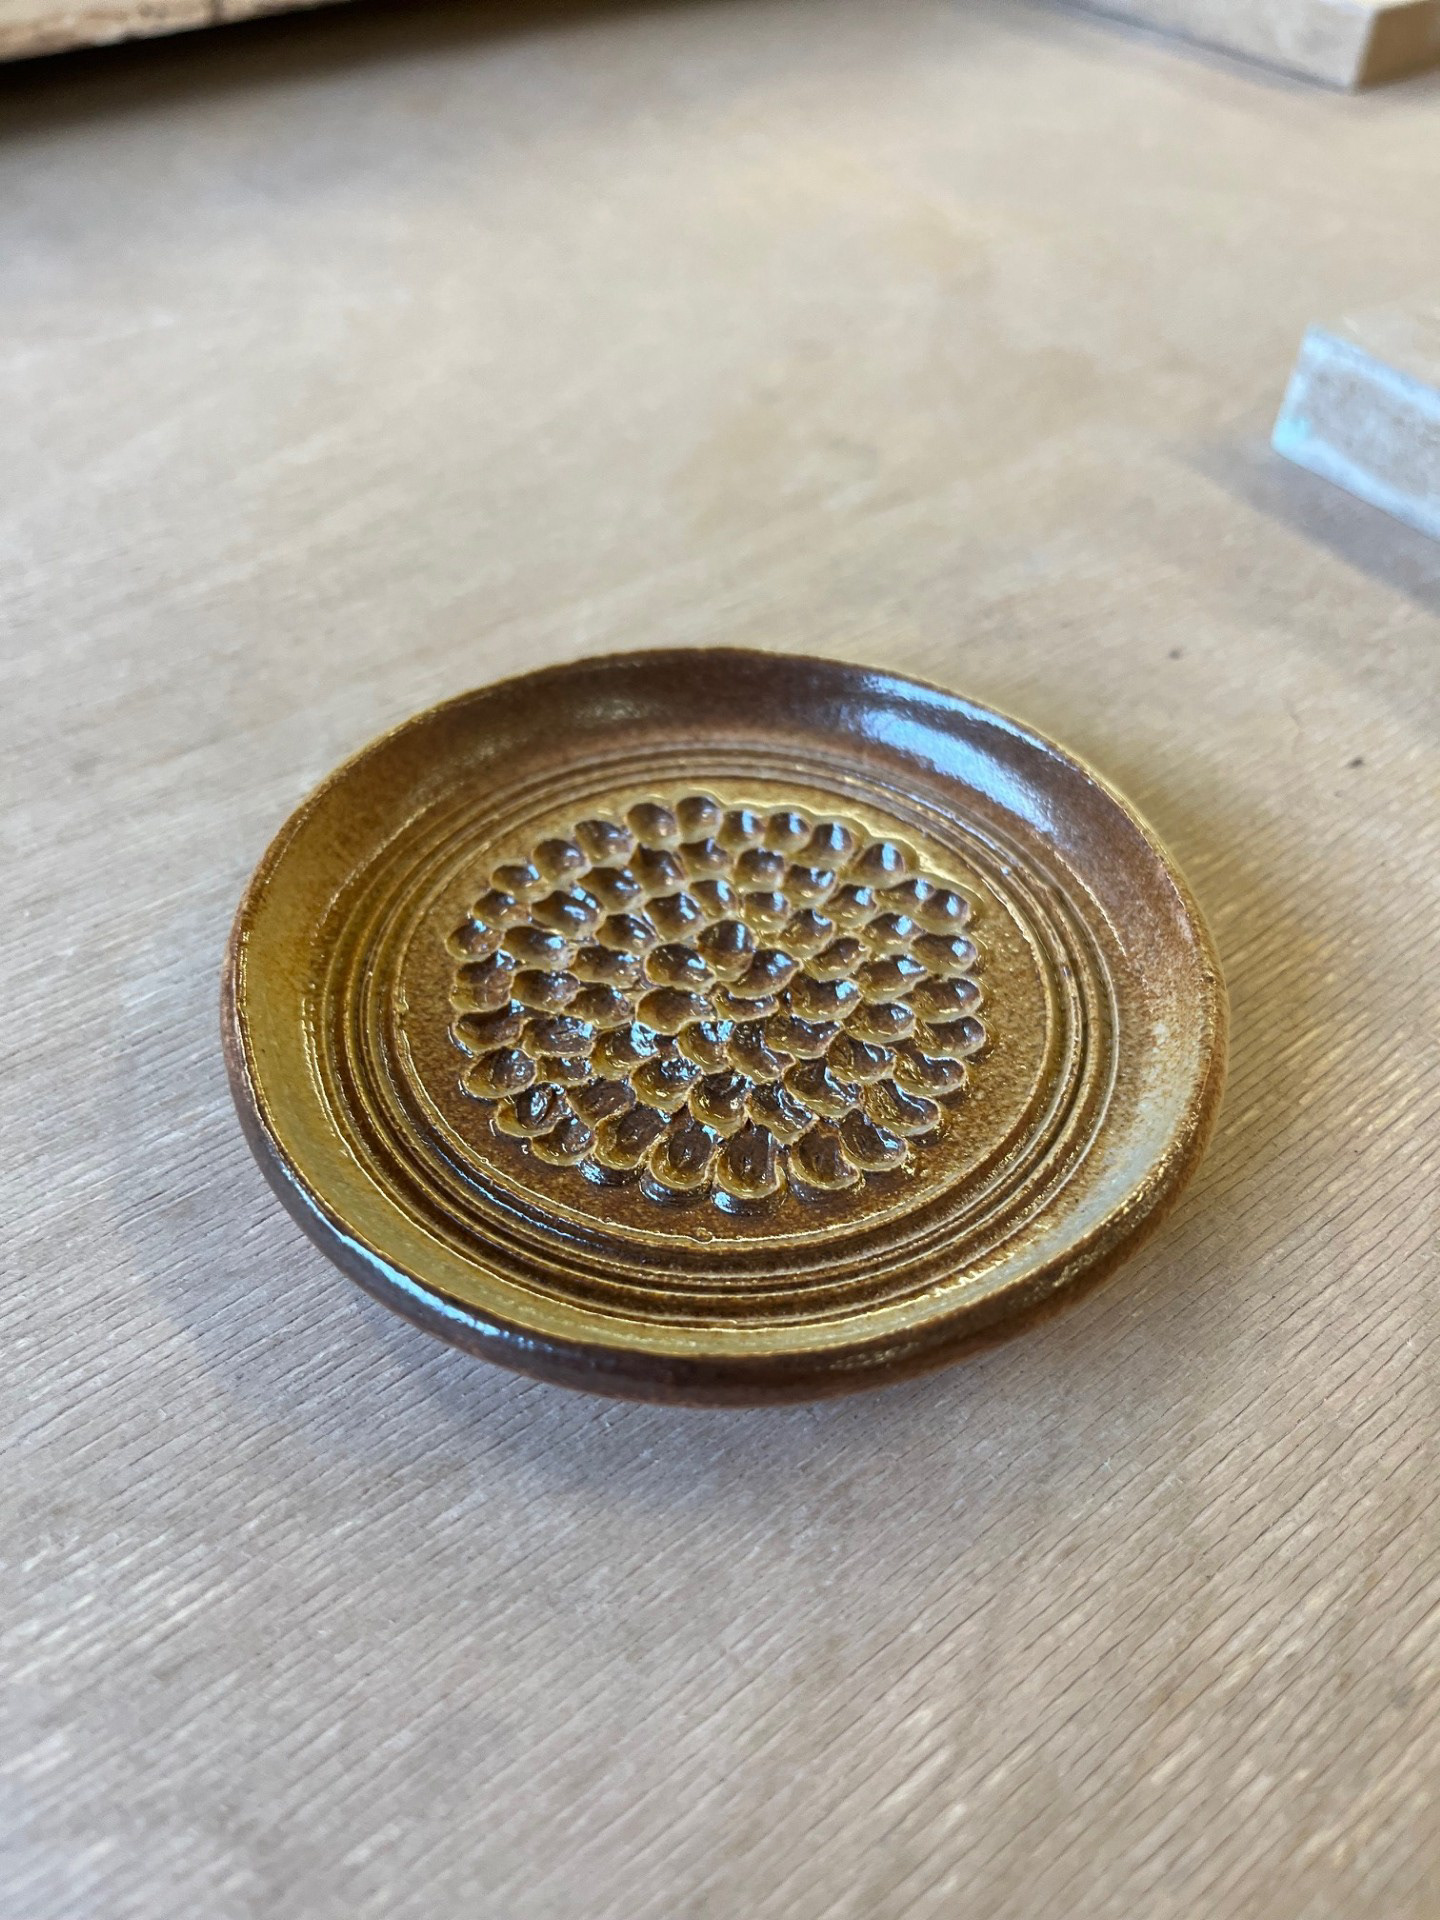
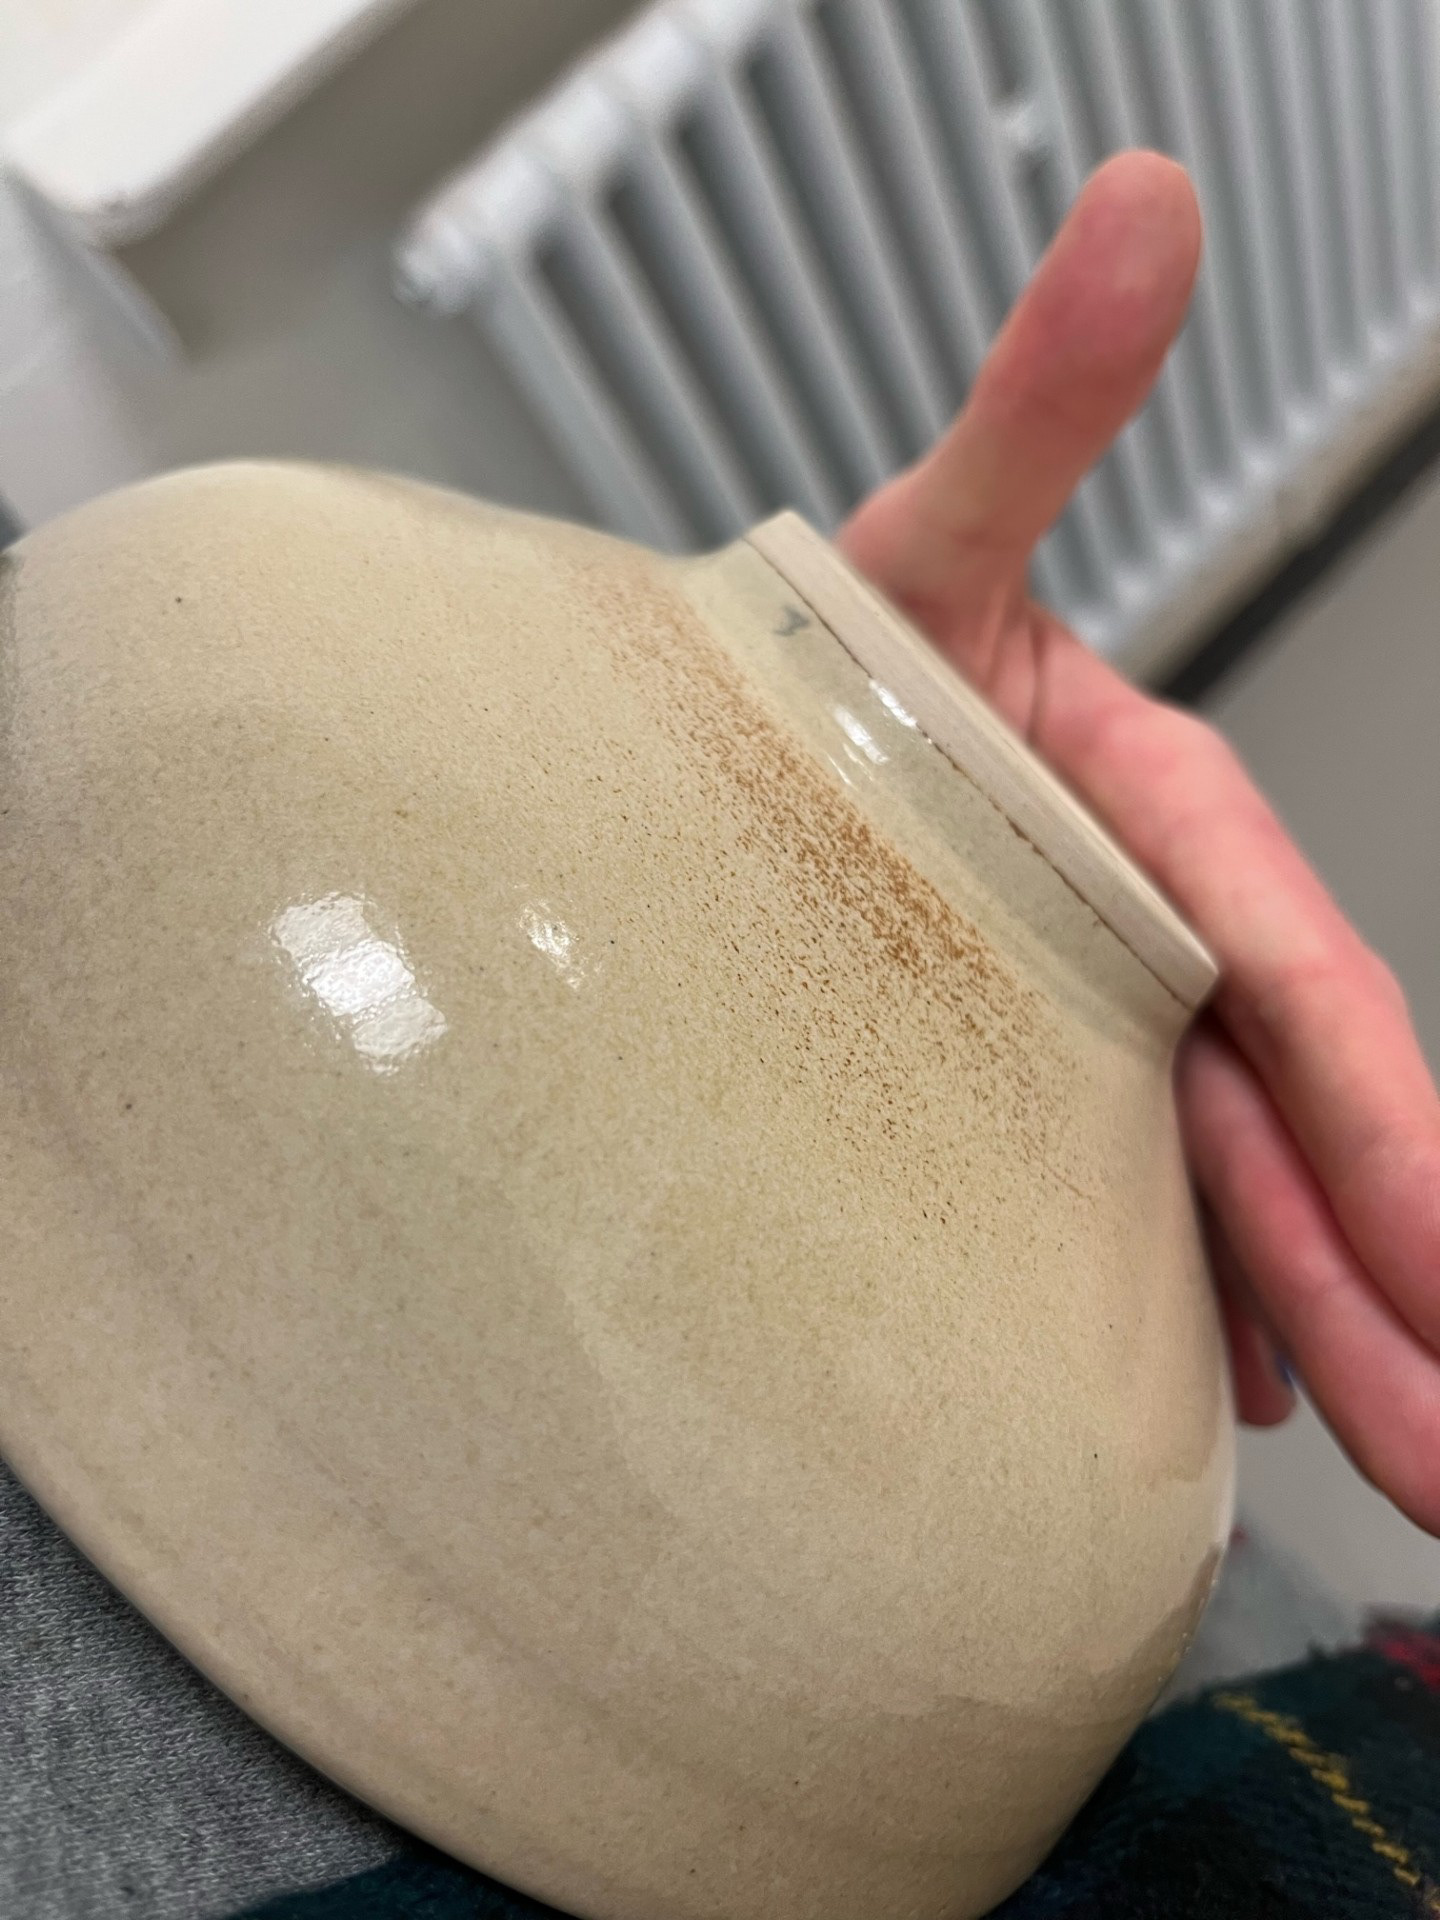
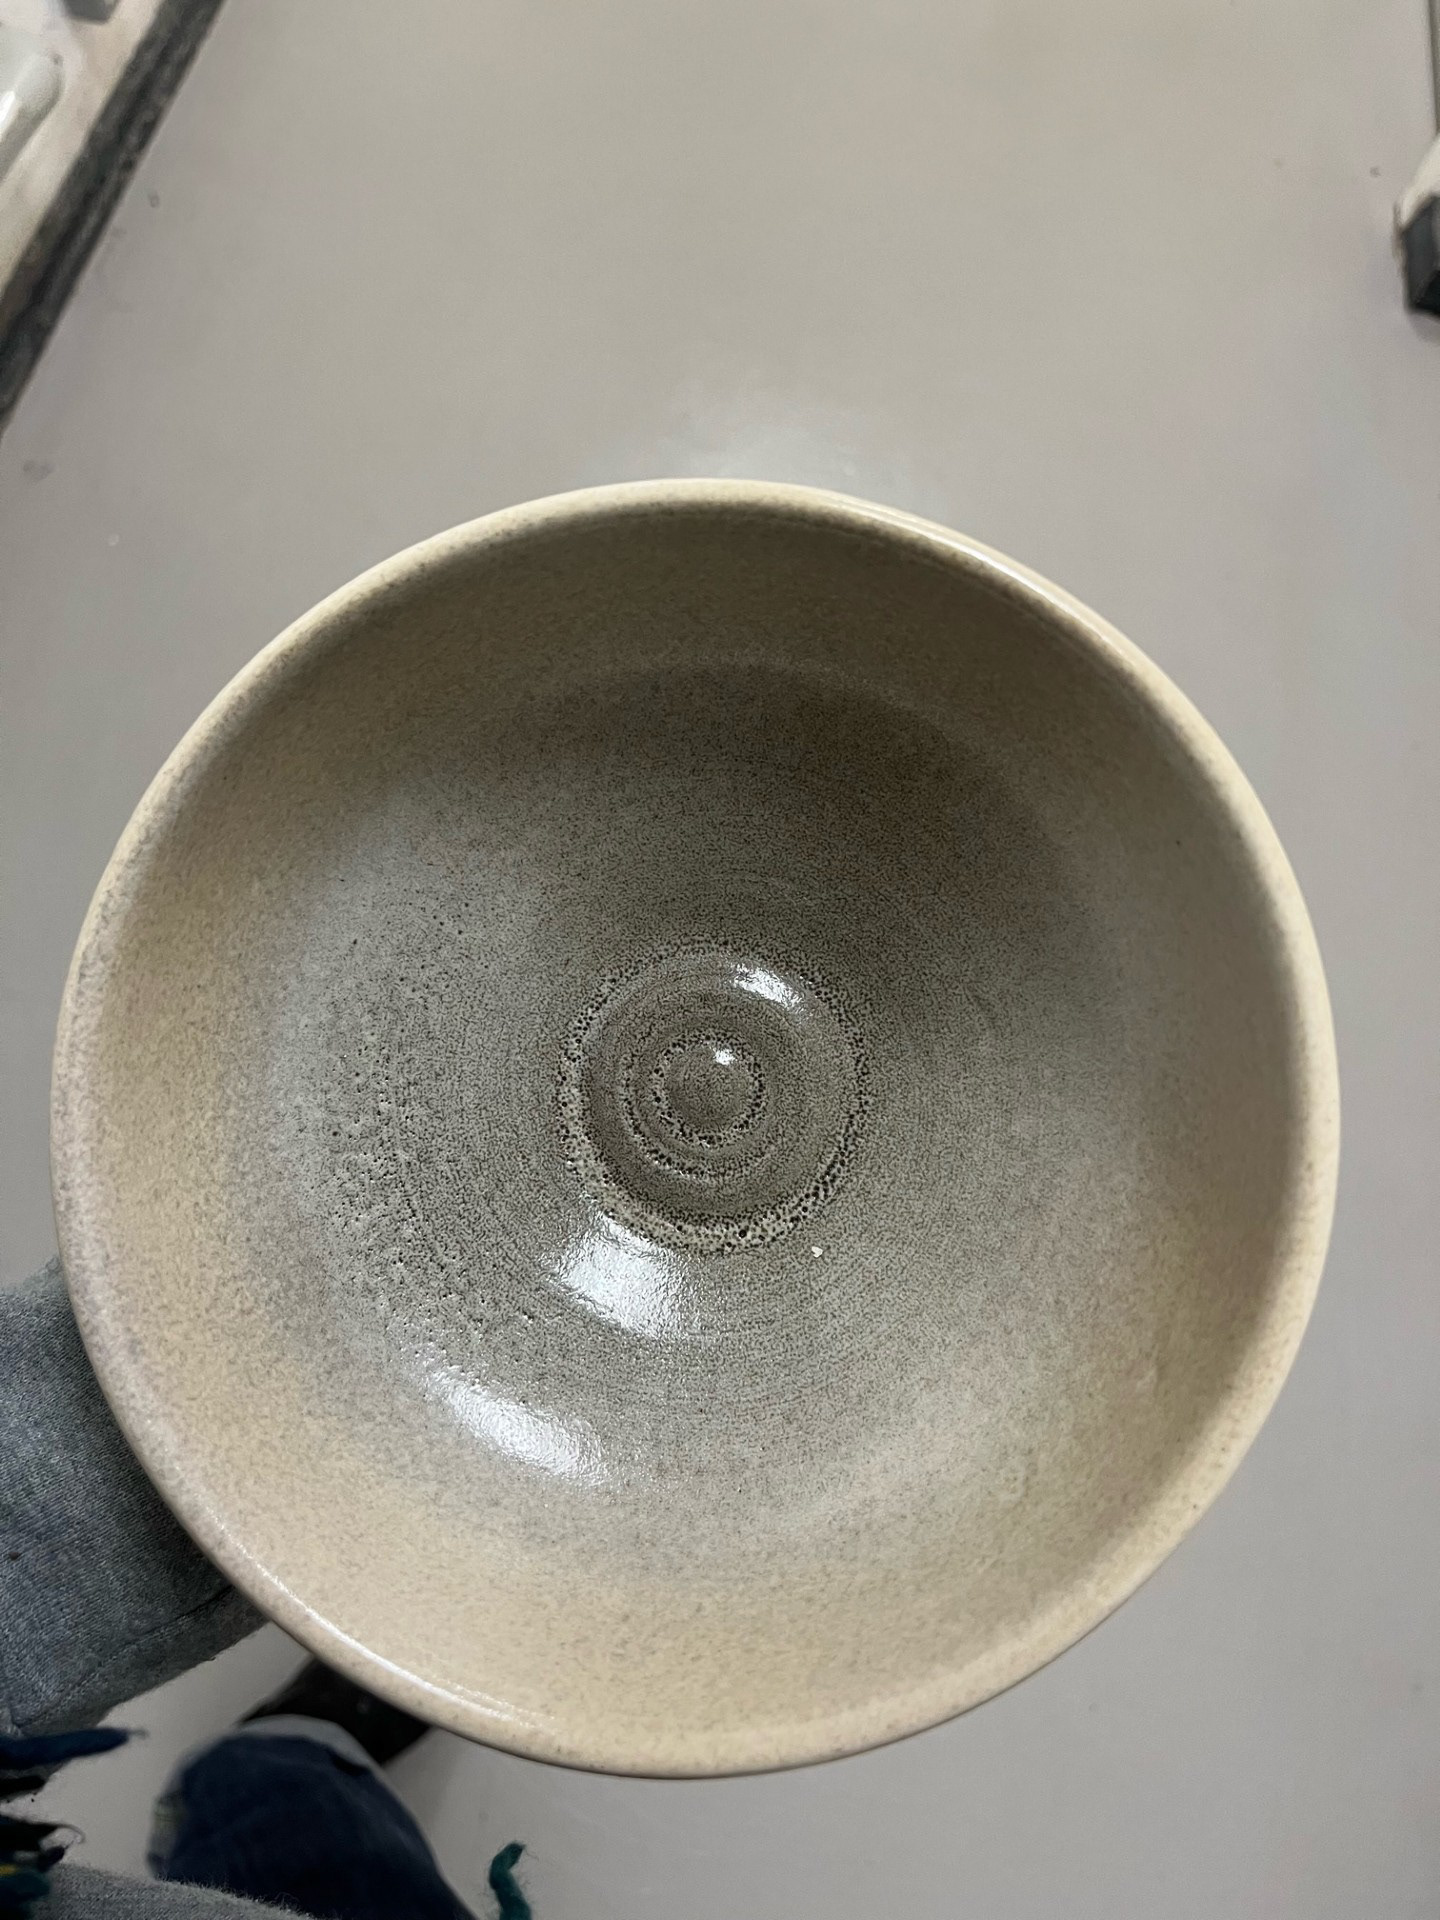
This is another sample I also completed that was left over from previous sessions. As soon as I saw this sample on the shelf, I knew that it would be perfect for what I wanted to achieve. I wanted to see what the glazes would look like when they were overlapped once again but in a different order. Another feature that drew me to this sample was its ridges as if would allow me to see what each glaze is like at pooling and understand when the glaze is rich, what colour it would go. I also chose this sample because I am currently expanding on my idea if including a projection into my final piece and one inspiration that I have for that is human auras; which is why I chose this piece because the circular ridges, when glazed, could create a form of radiating effect. For this sample, I also did 2 layers of each to allow myself to easily compare each sample set.
Overall I am quote happy with the outcome of this piece because it gave me a lot more insight to the relationship these glazes have with each other. I particularly like the way that the iron lustre in the outer layer has pooled because there is such a vast colour difference between the two but it adds a very cool effect to the piece. I also really like the way that the pooling and the ridges have a relationship with the eye to create a fluid image of this style of layering, creating one profile with immense depth and beauty.
See Below for images of the final sample and annotations:


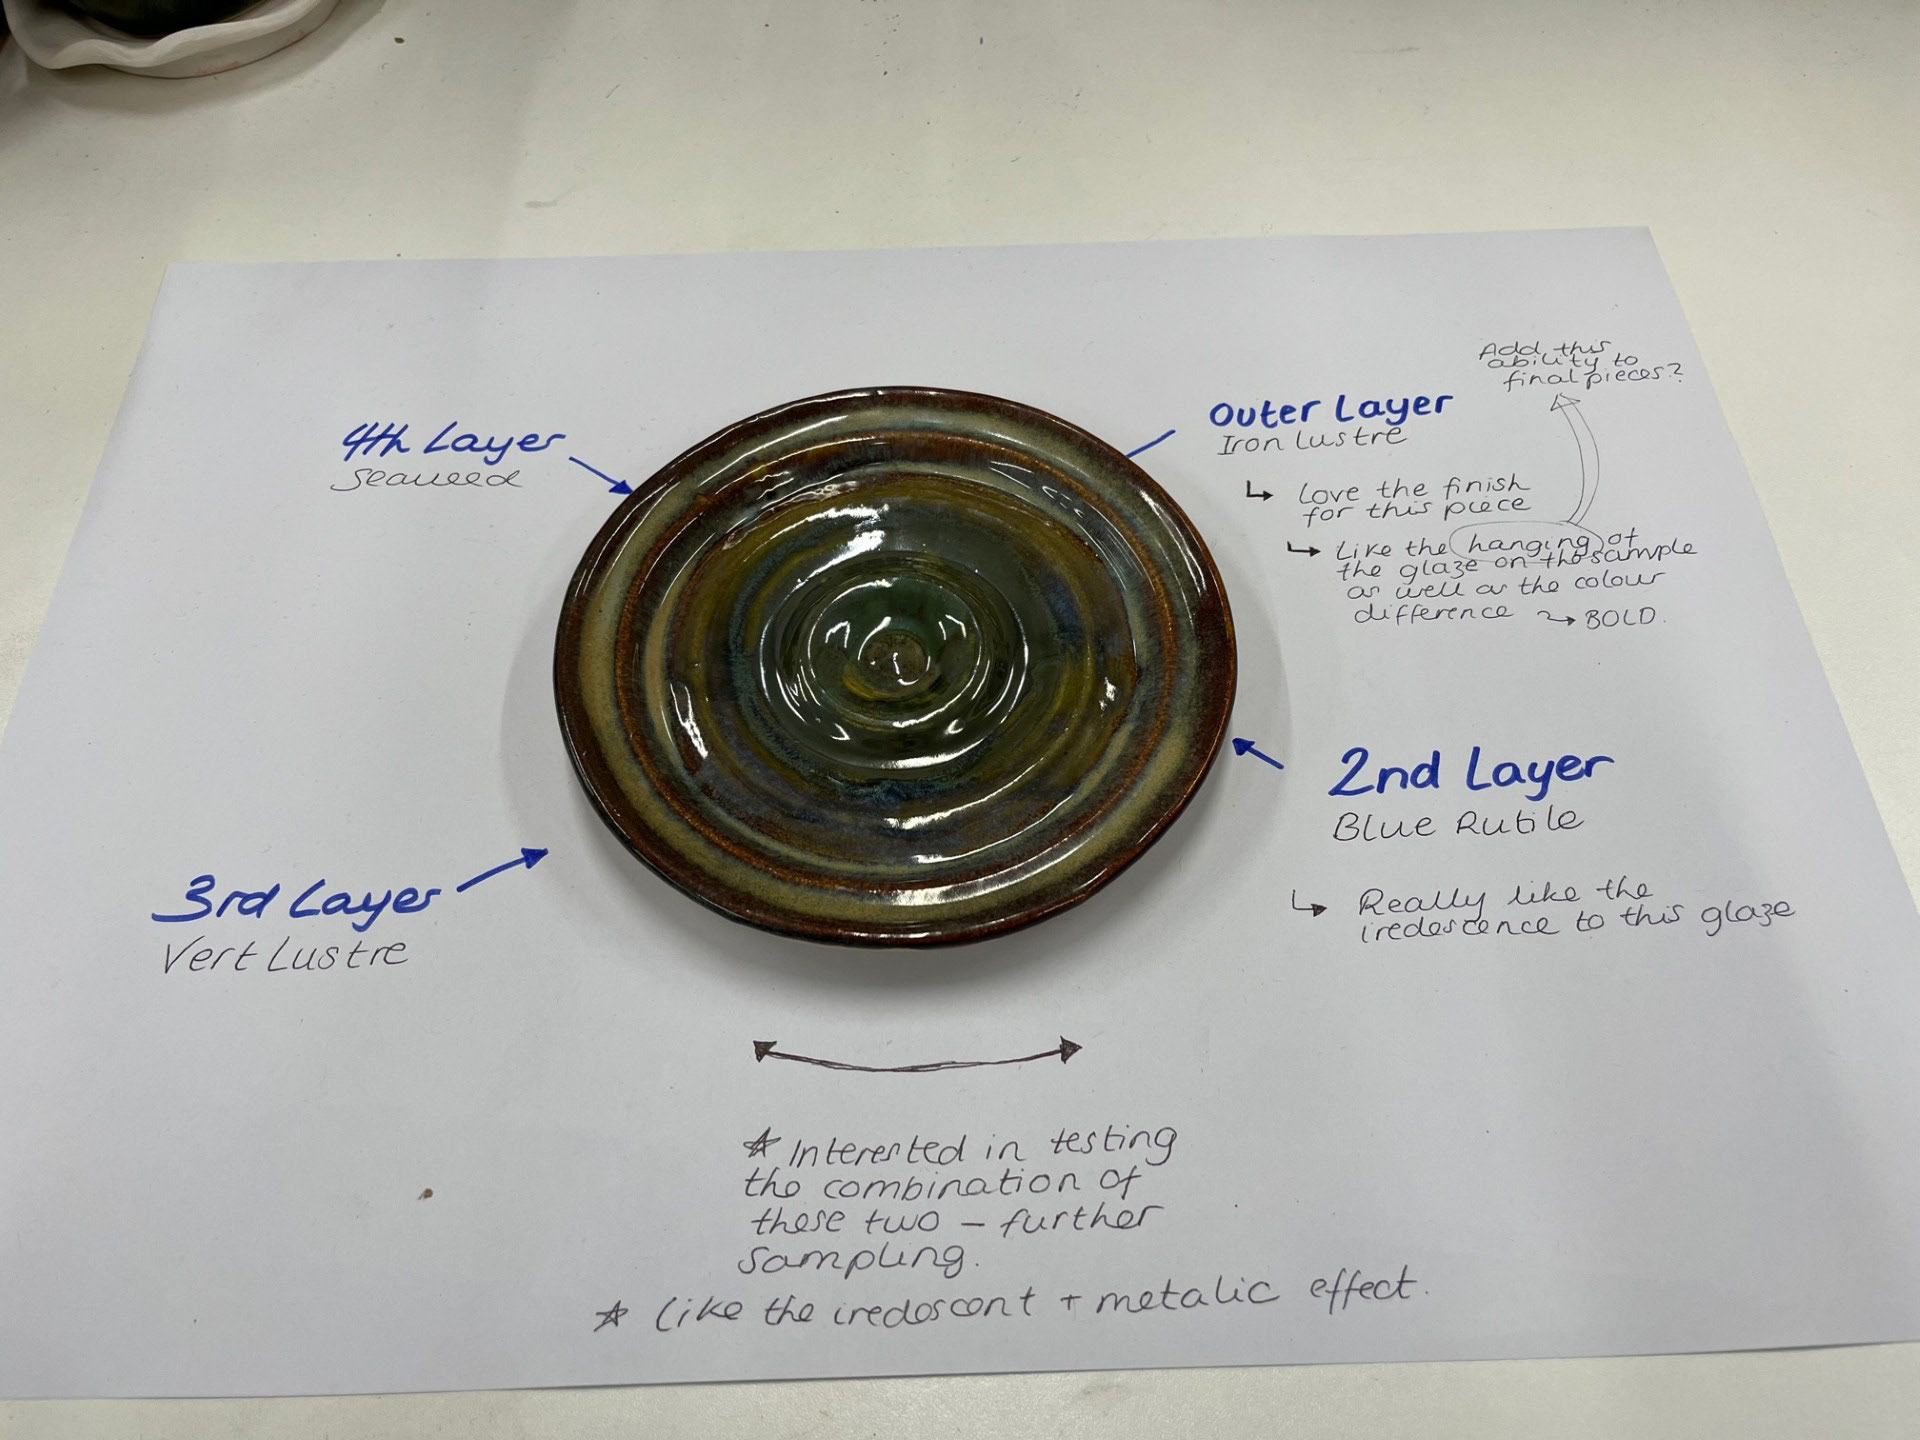
Overall I am quote happy with the outcome of this piece because it gave me a lot more insight to the relationship these glazes have with each other. I particularly like the way that the iron lustre in the outer layer has pooled because there is such a vast colour difference between the two but it adds a very cool effect to the piece. I also really like the way that the pooling and the ridges have a relationship with the eye to create a fluid image of this style of layering, creating one profile with immense depth and beauty.
Wanting to expand on that idea of the eyes relationship with the piece, I wanted to try and capture the perfect profile of this piece with the hope that I would be able to capture something similar to an aura. I decided to try and do this by scanning in the sample to see what it could pick up by placing the piece on the scanner and laying a piece of white paper over the top to try and enhance definition. See below for scan:
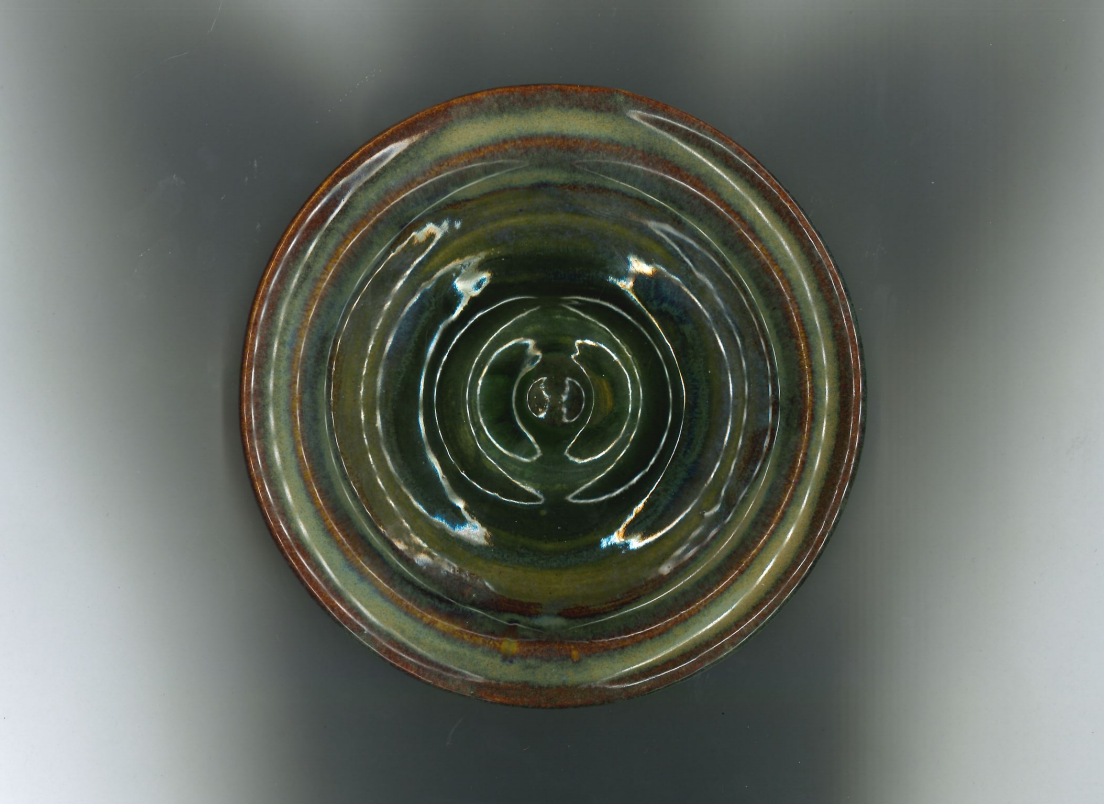


The outcome of this process was even better than imagined as the light carefully clung to each and every ripple on the piece to create almost a halo of light radiating from the centre of the piece. This is also leads me on to a good base for development when looking at my projection and how the light from that could potentially react with a piece. Following this sample batch, I think that I achieved a good amount of explorative information in relation to experimenting and blind testing of the colours and combinations. With regards to time, I think that this was a very wise decision because it has allowed me to gather more practical and mental understanding of what I want to do within this project; this has also pushed me much further in the practical side of development which is something that wouldn't have been achieved if this testing wasn't completed. In terms of development, I think that the aspect of the ridges is definitely something that I would consider moving forward because I found that the way the light captured the piece was simply breath-taking; I would also be interested to see how a projection would interact with this surface.
One thing that I think that could be aided for future is the lack of planning and understanding of the sampling process as a whole. I knew what basic things I wanted to achieve but there was no concrete and organised air to it, I just did it. This lead me to have a lack of precise understanding about which glazes I used where. To change this, one thing that I could potentially do is to complete a glaze grid as it allows me to see all of the combinations of glaze in an organised and clear manor so that it can act as a referencing point for my future glazing.
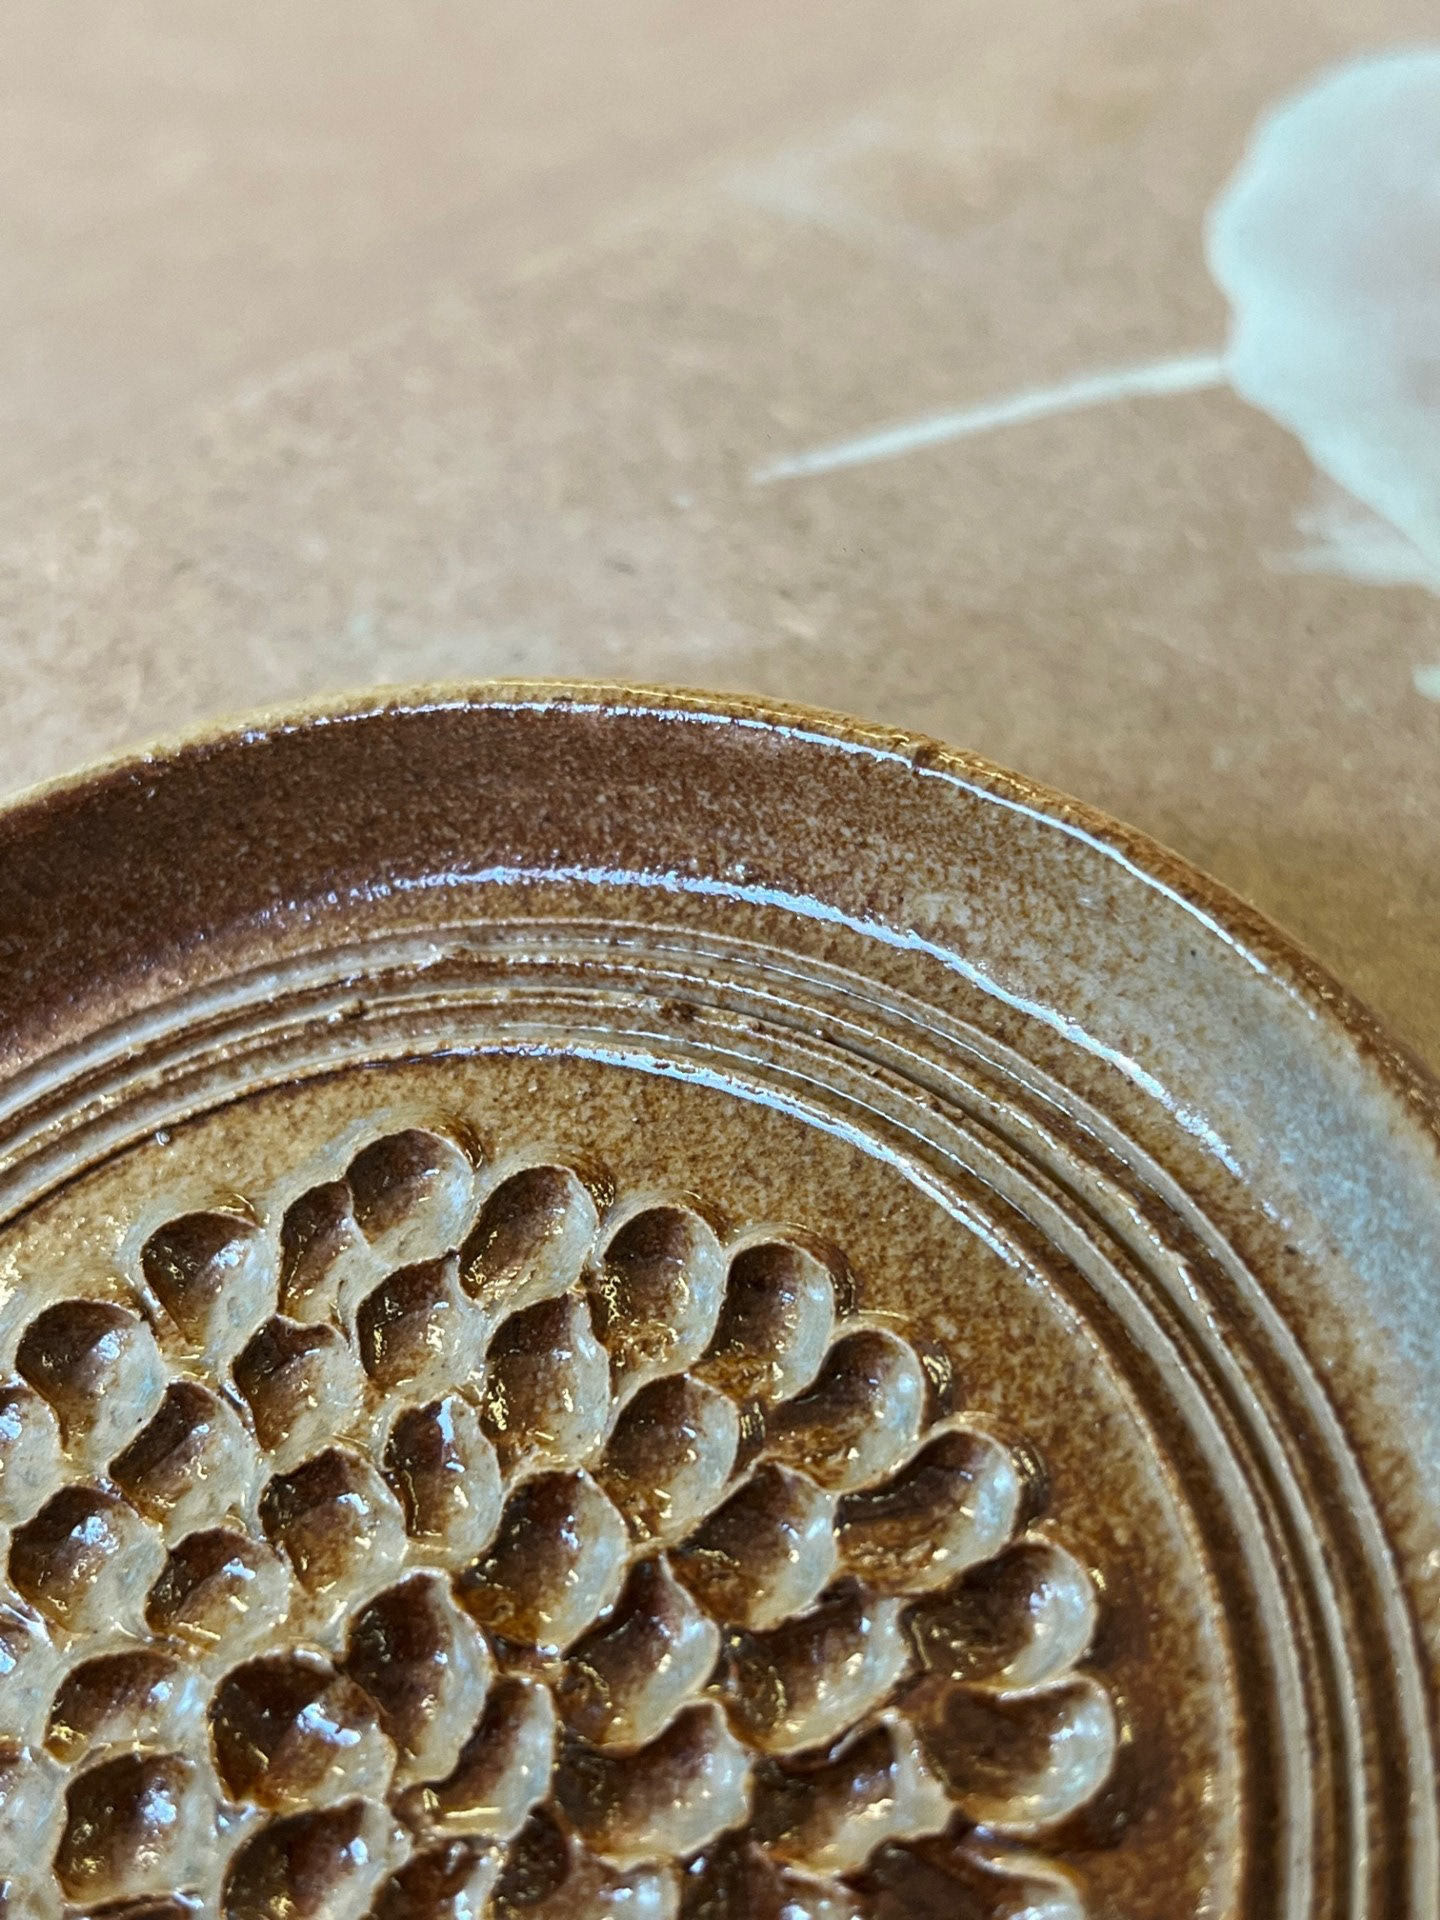
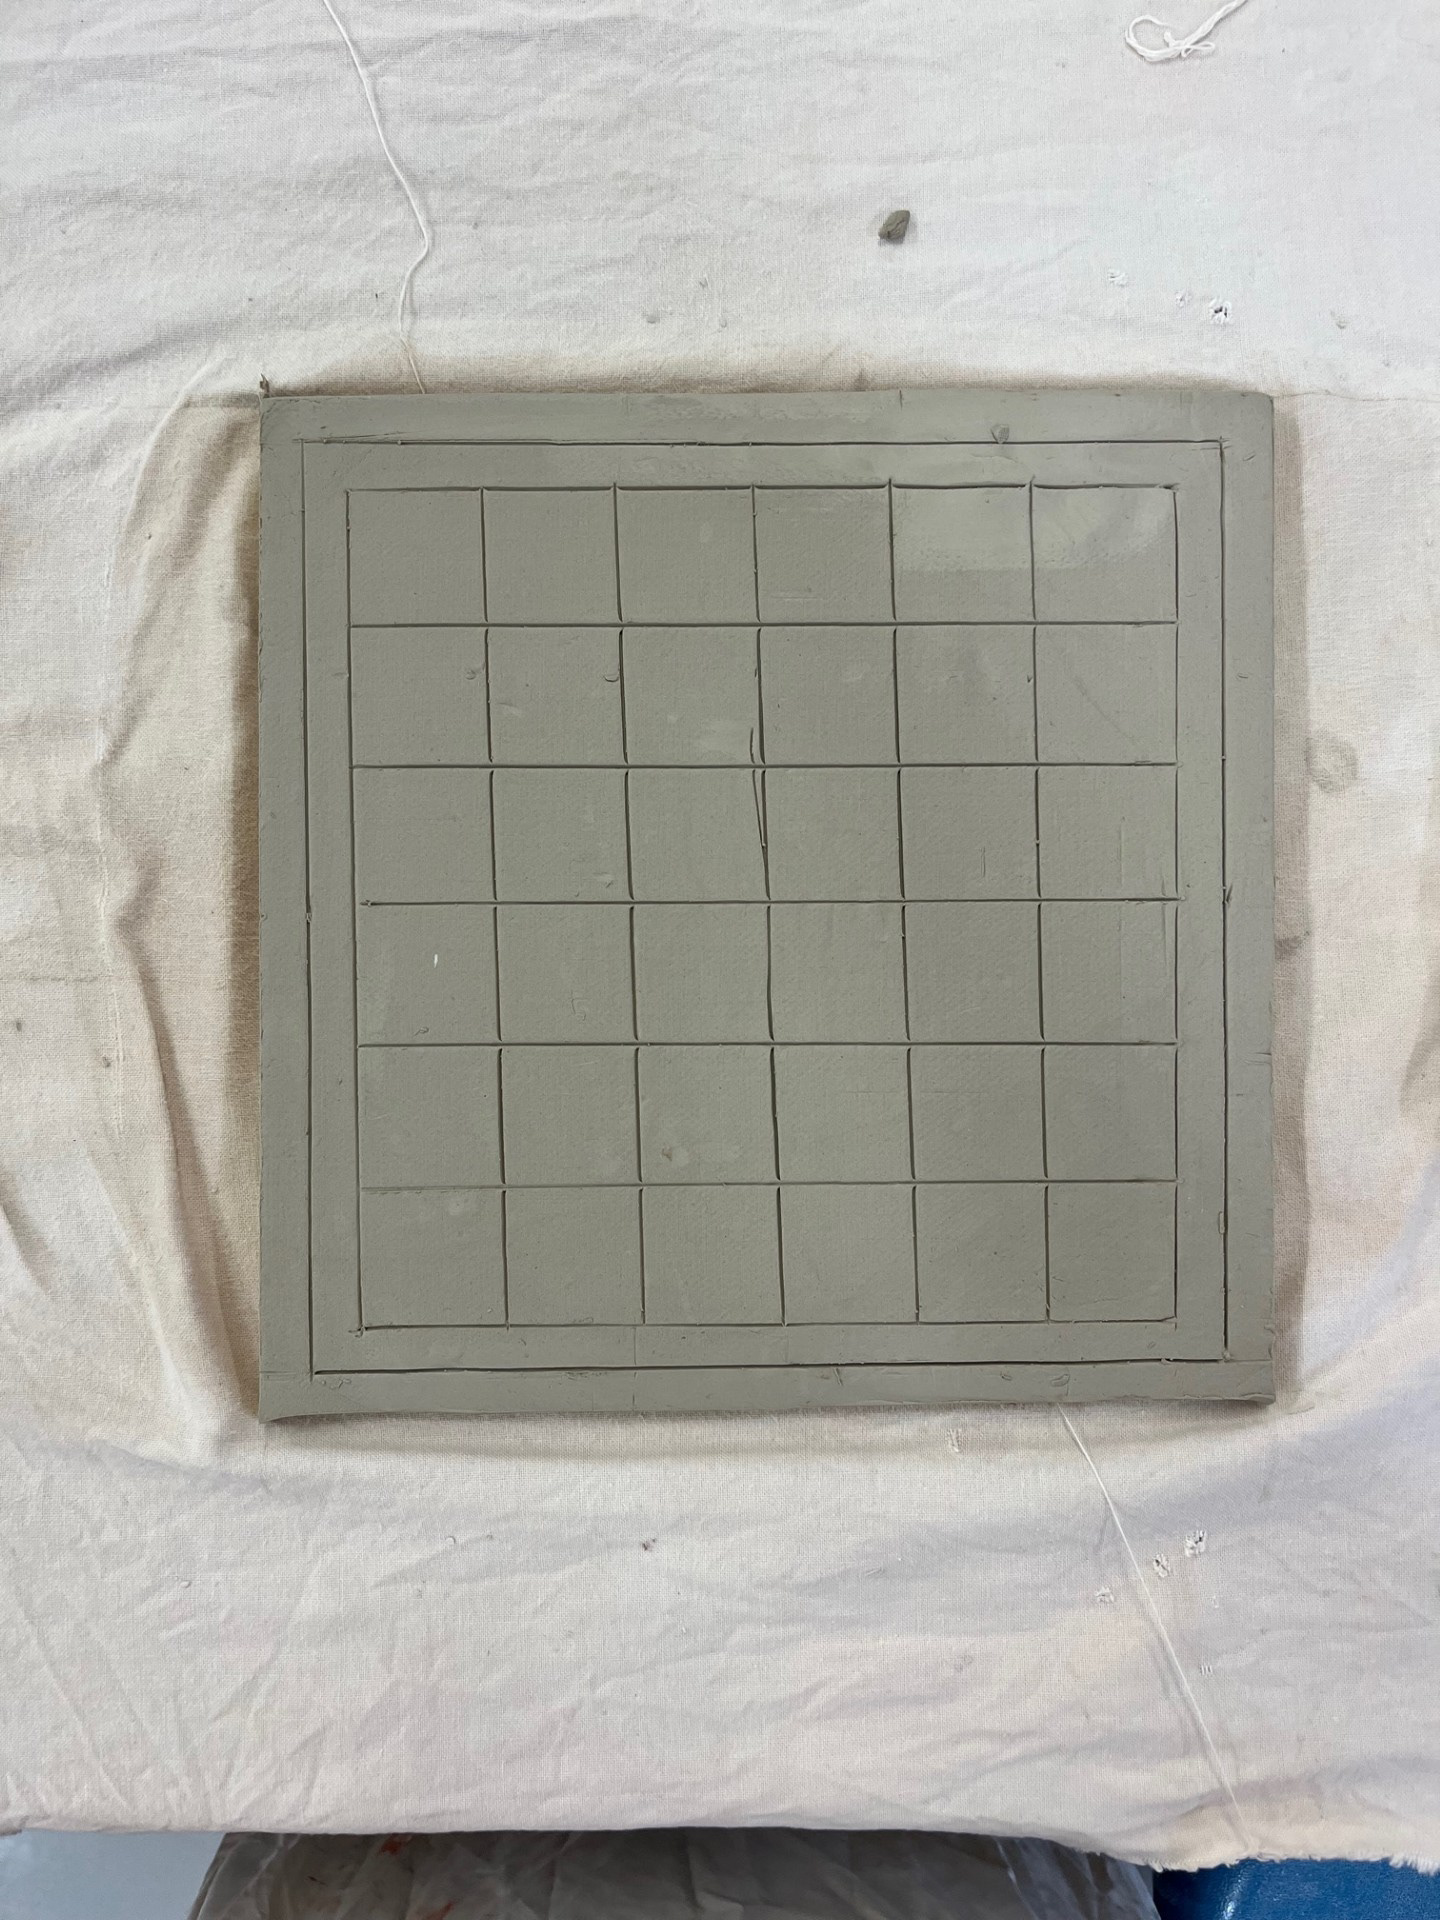
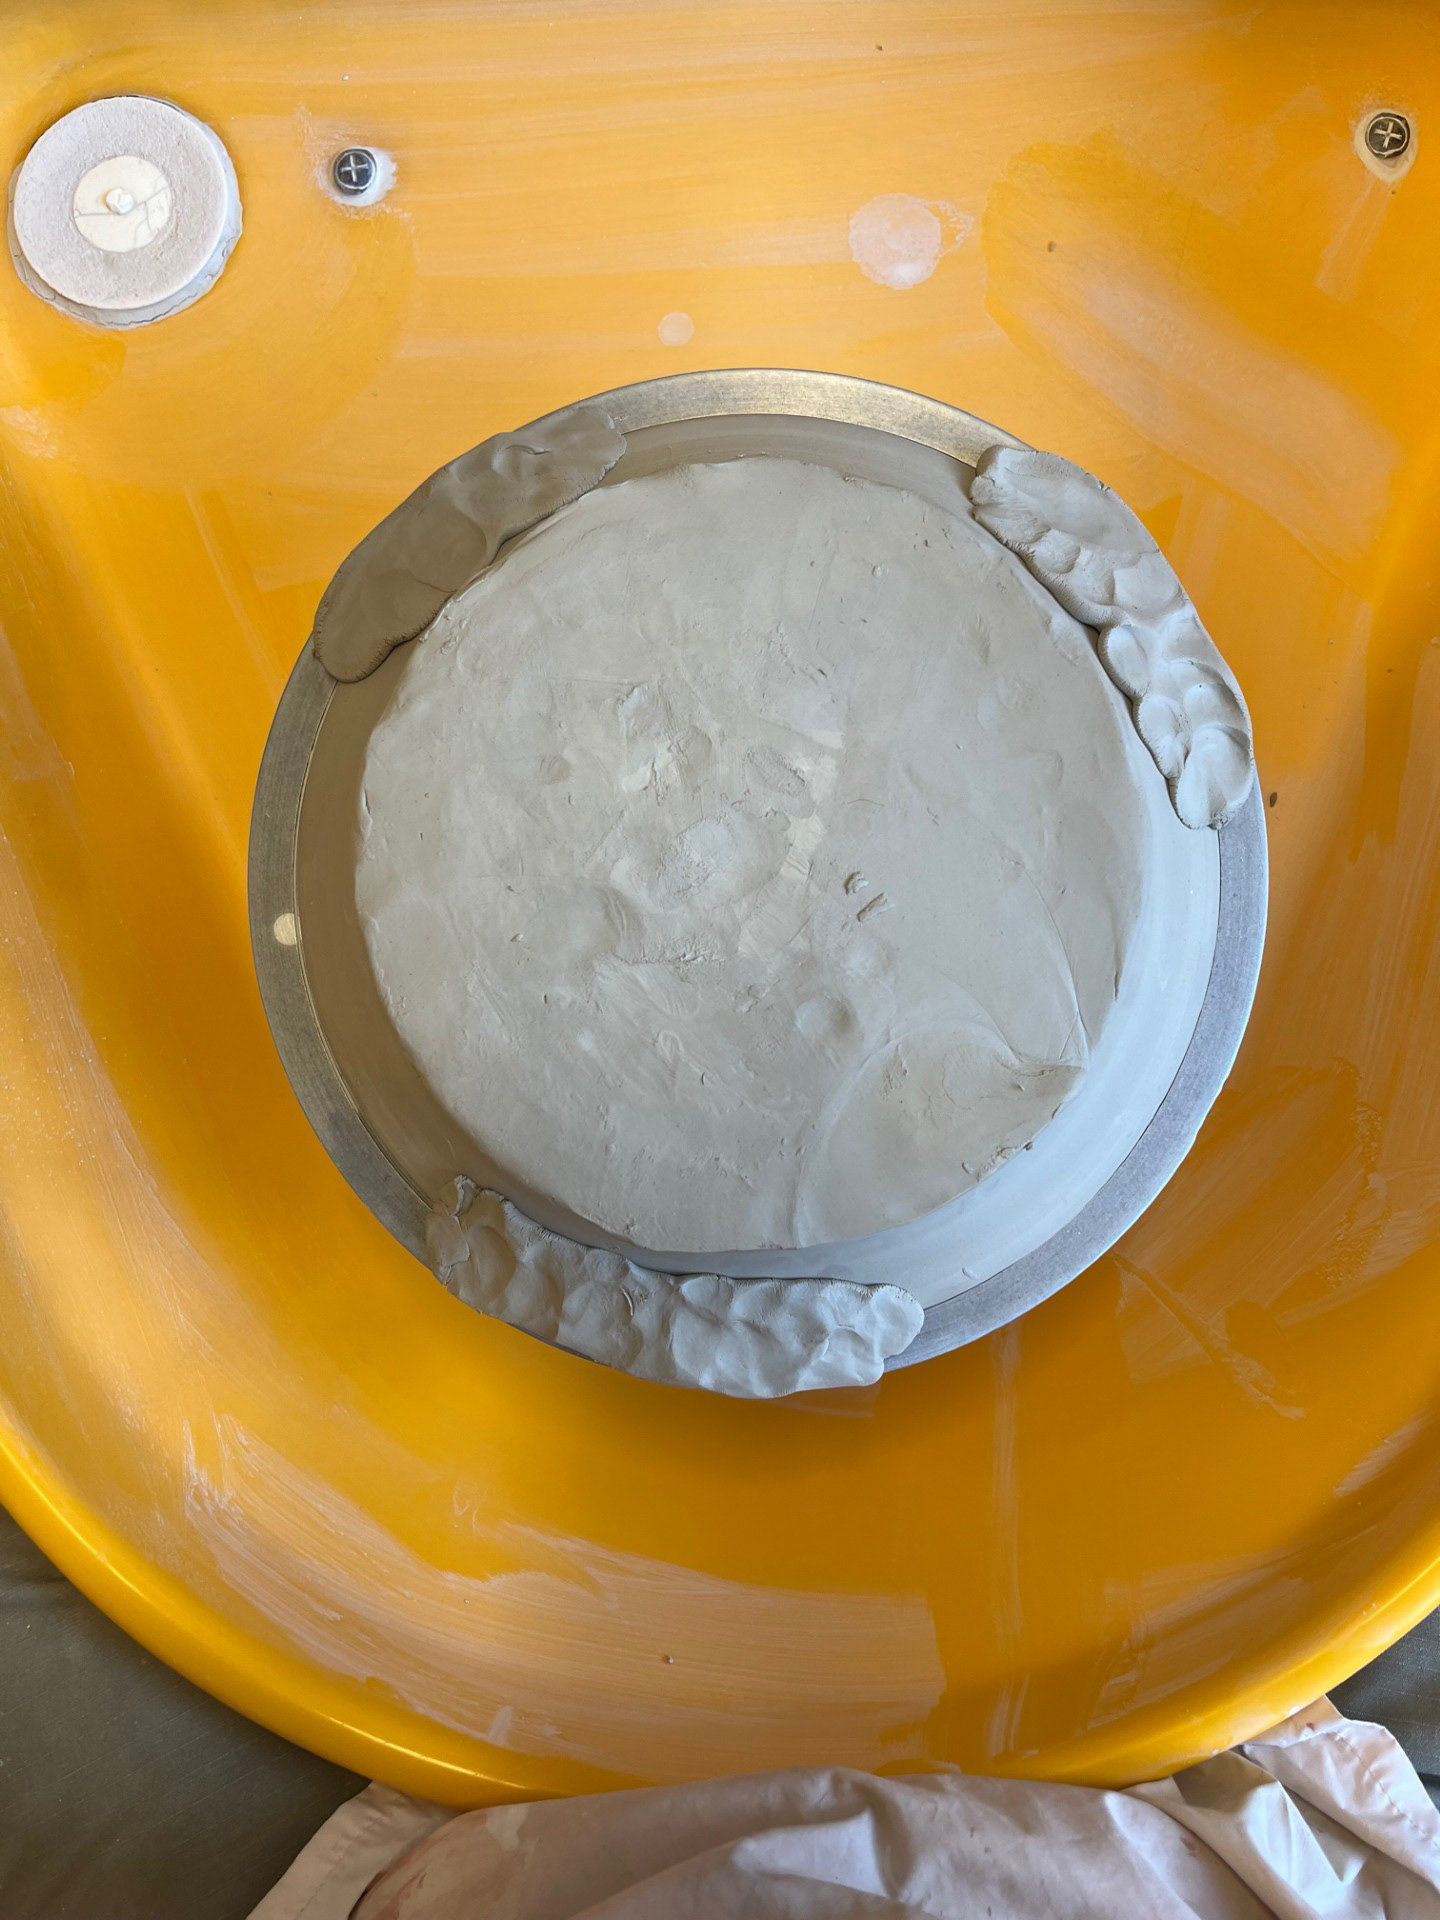
Creating Glaze Grid:
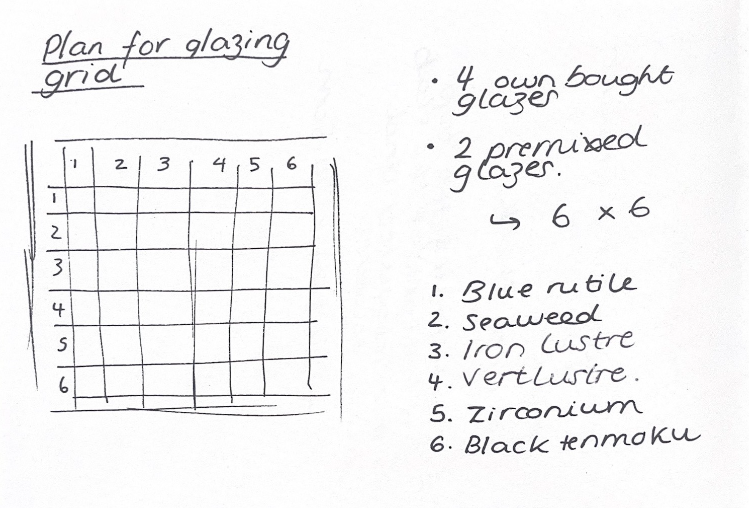
This is something that was suggested to me by our ceramics technician Rudi as a method of implementing and showing various different glaze combinations. I told Rudi that I was struggling with things like organisation and planning and he suggested this because it makes the process a lot easier and simpler because everything you need to know is right in front of you when attempting to glaze. For the grid, I have planned to use all of my 4 glazes plus the premixed glazes Black tenmoku and zirconium because I have used them quite a lot in my sampling process this year and I'm quite curious to see how they react with my personal ones.
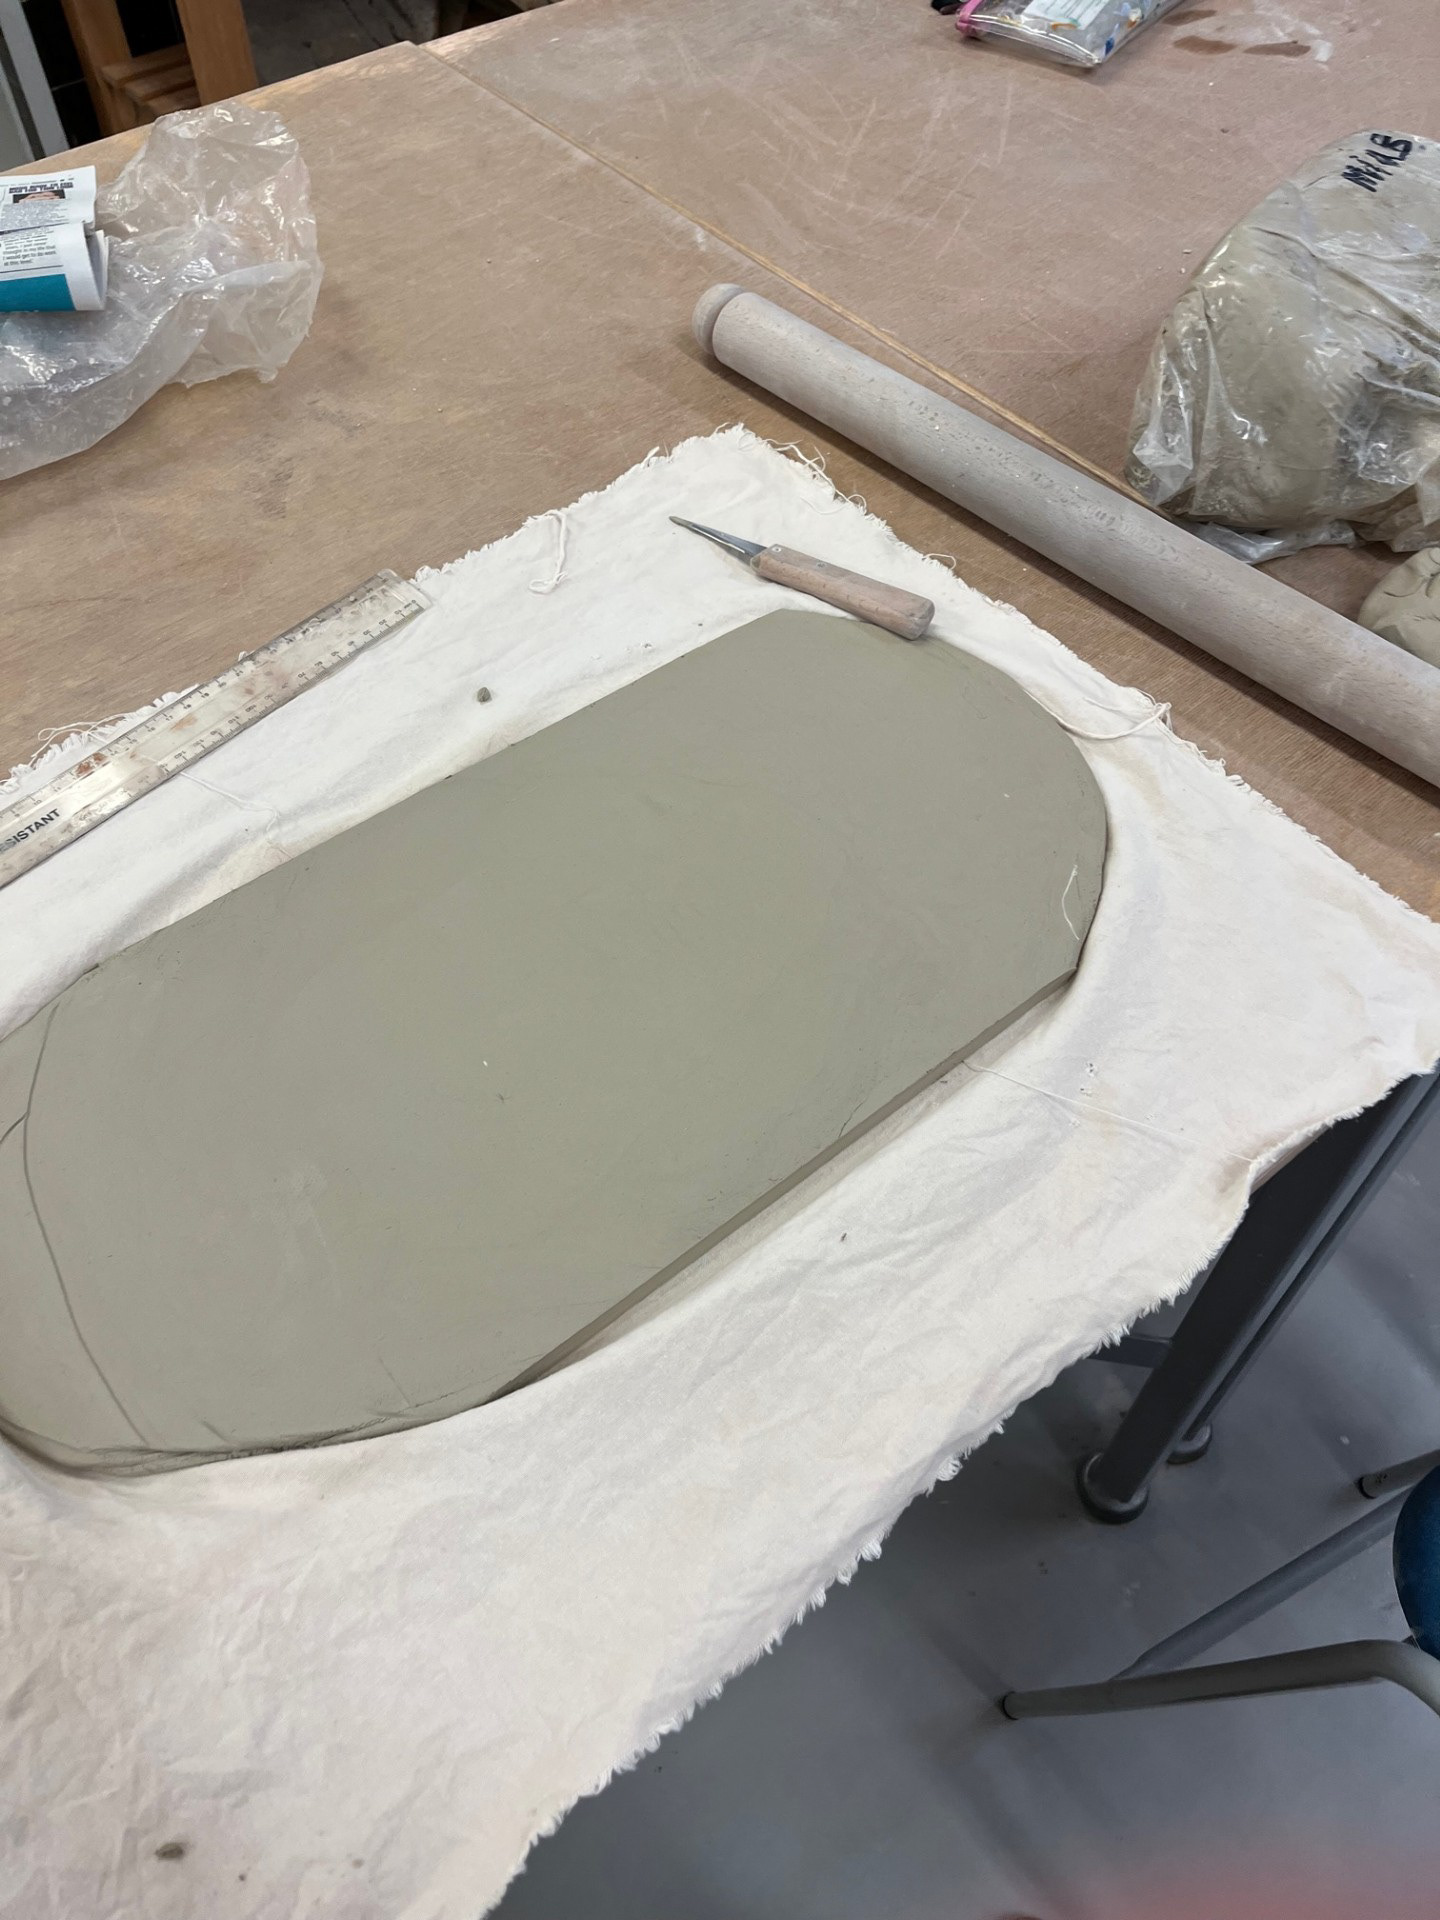
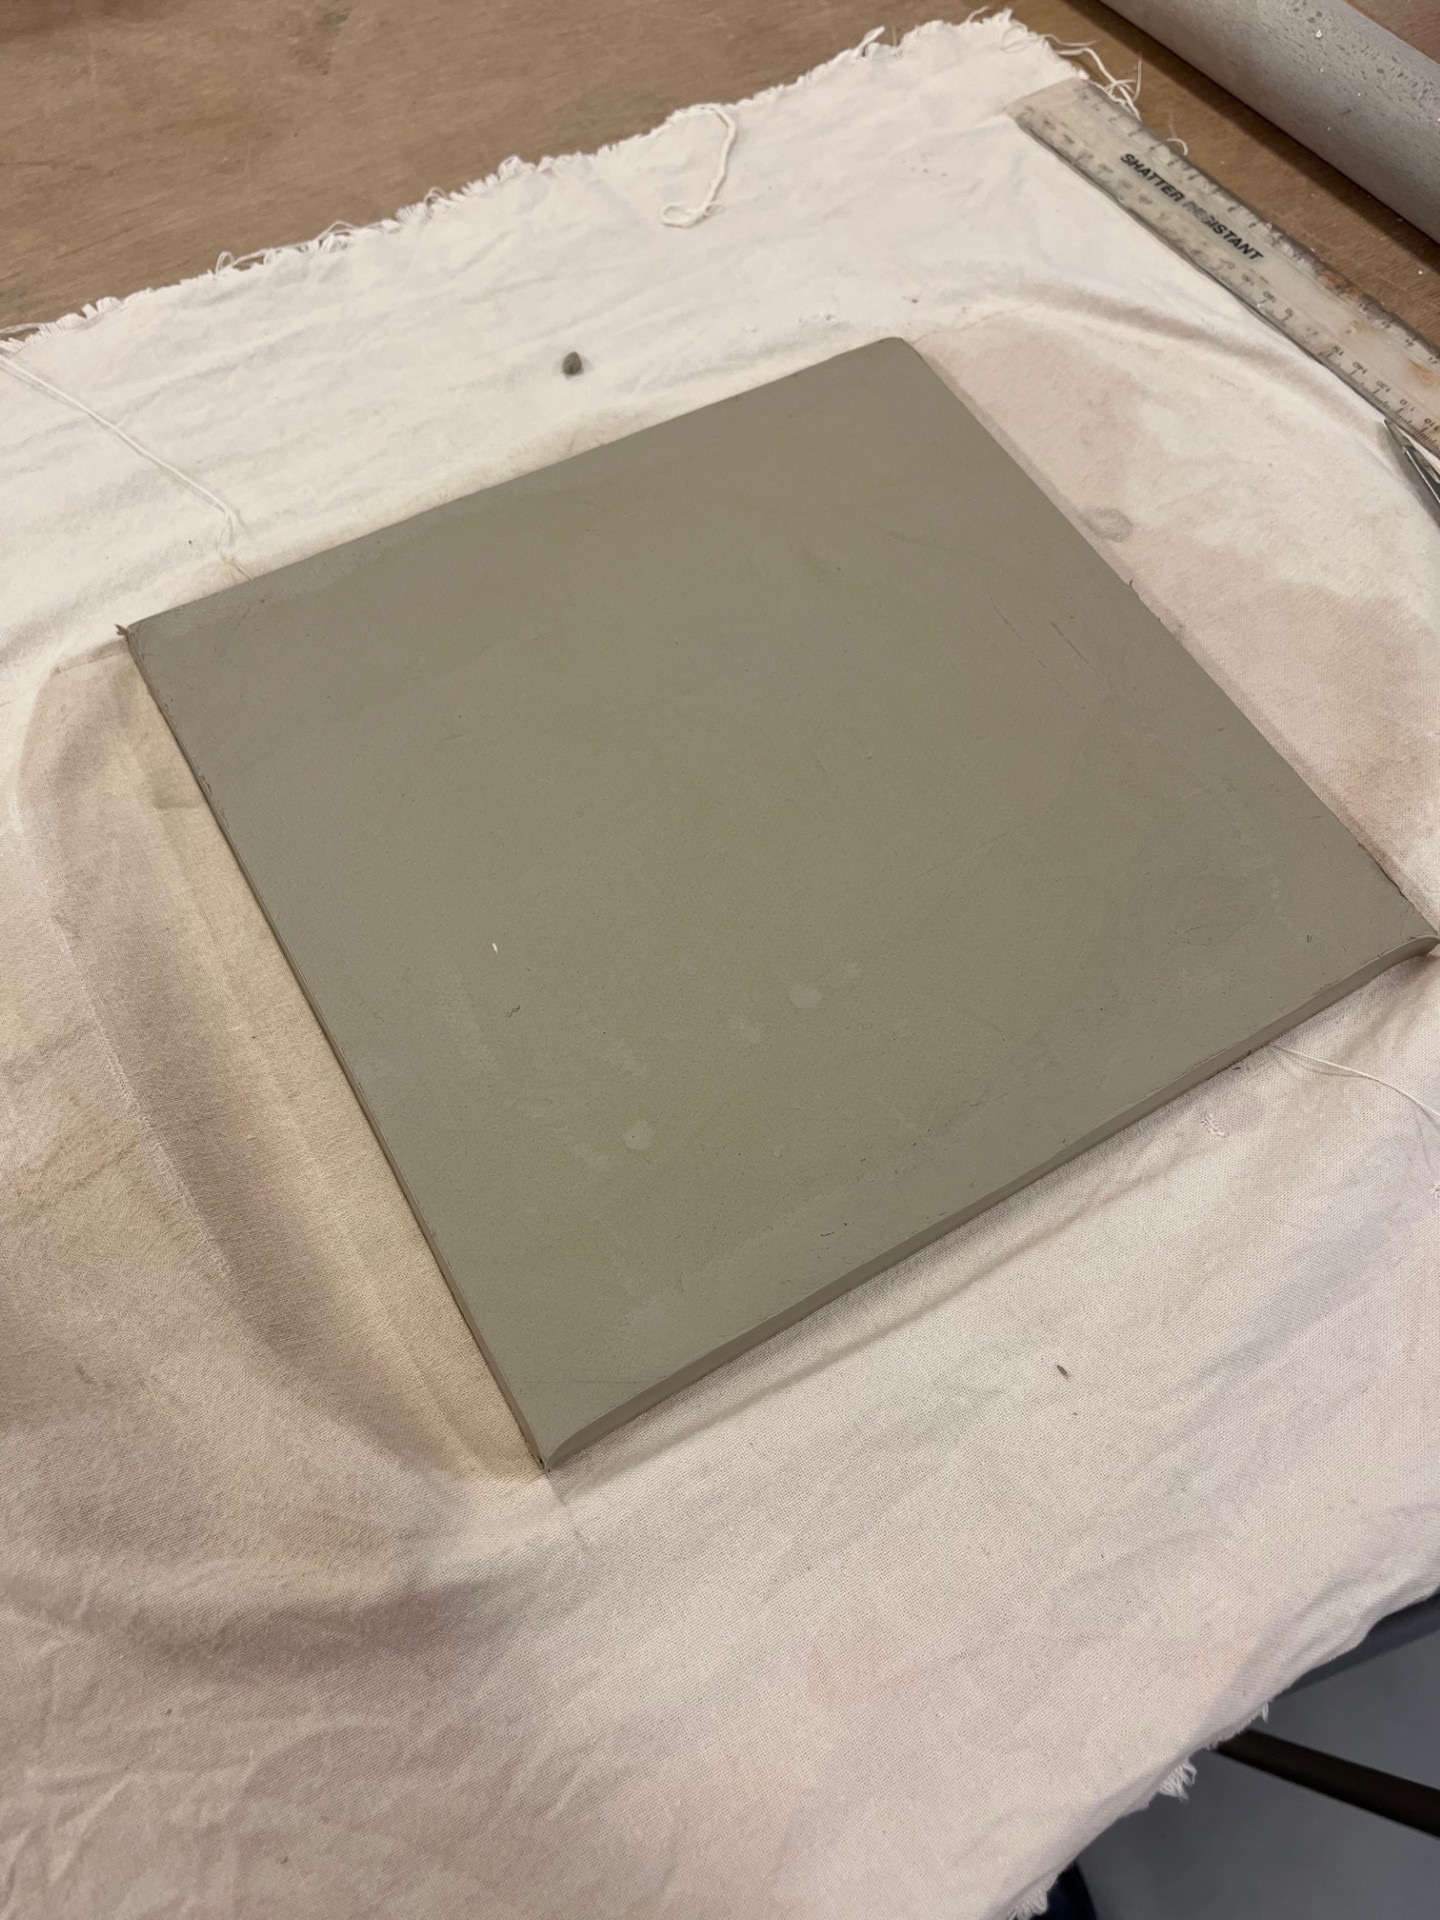
The actual making process is fairly simple as it is just a flat square. To complete this I began by using the slab roller to roll out the clay to 1cm thick, then I proceeded to measure out a square. The next thing that I did was split it evenly into a 6x6 grid after adding a 2cm border for writing the type of glaze. Once this process was completed I then put the piece between two boards to dry so that it wouldn't warp during this process. See Below for images of process:
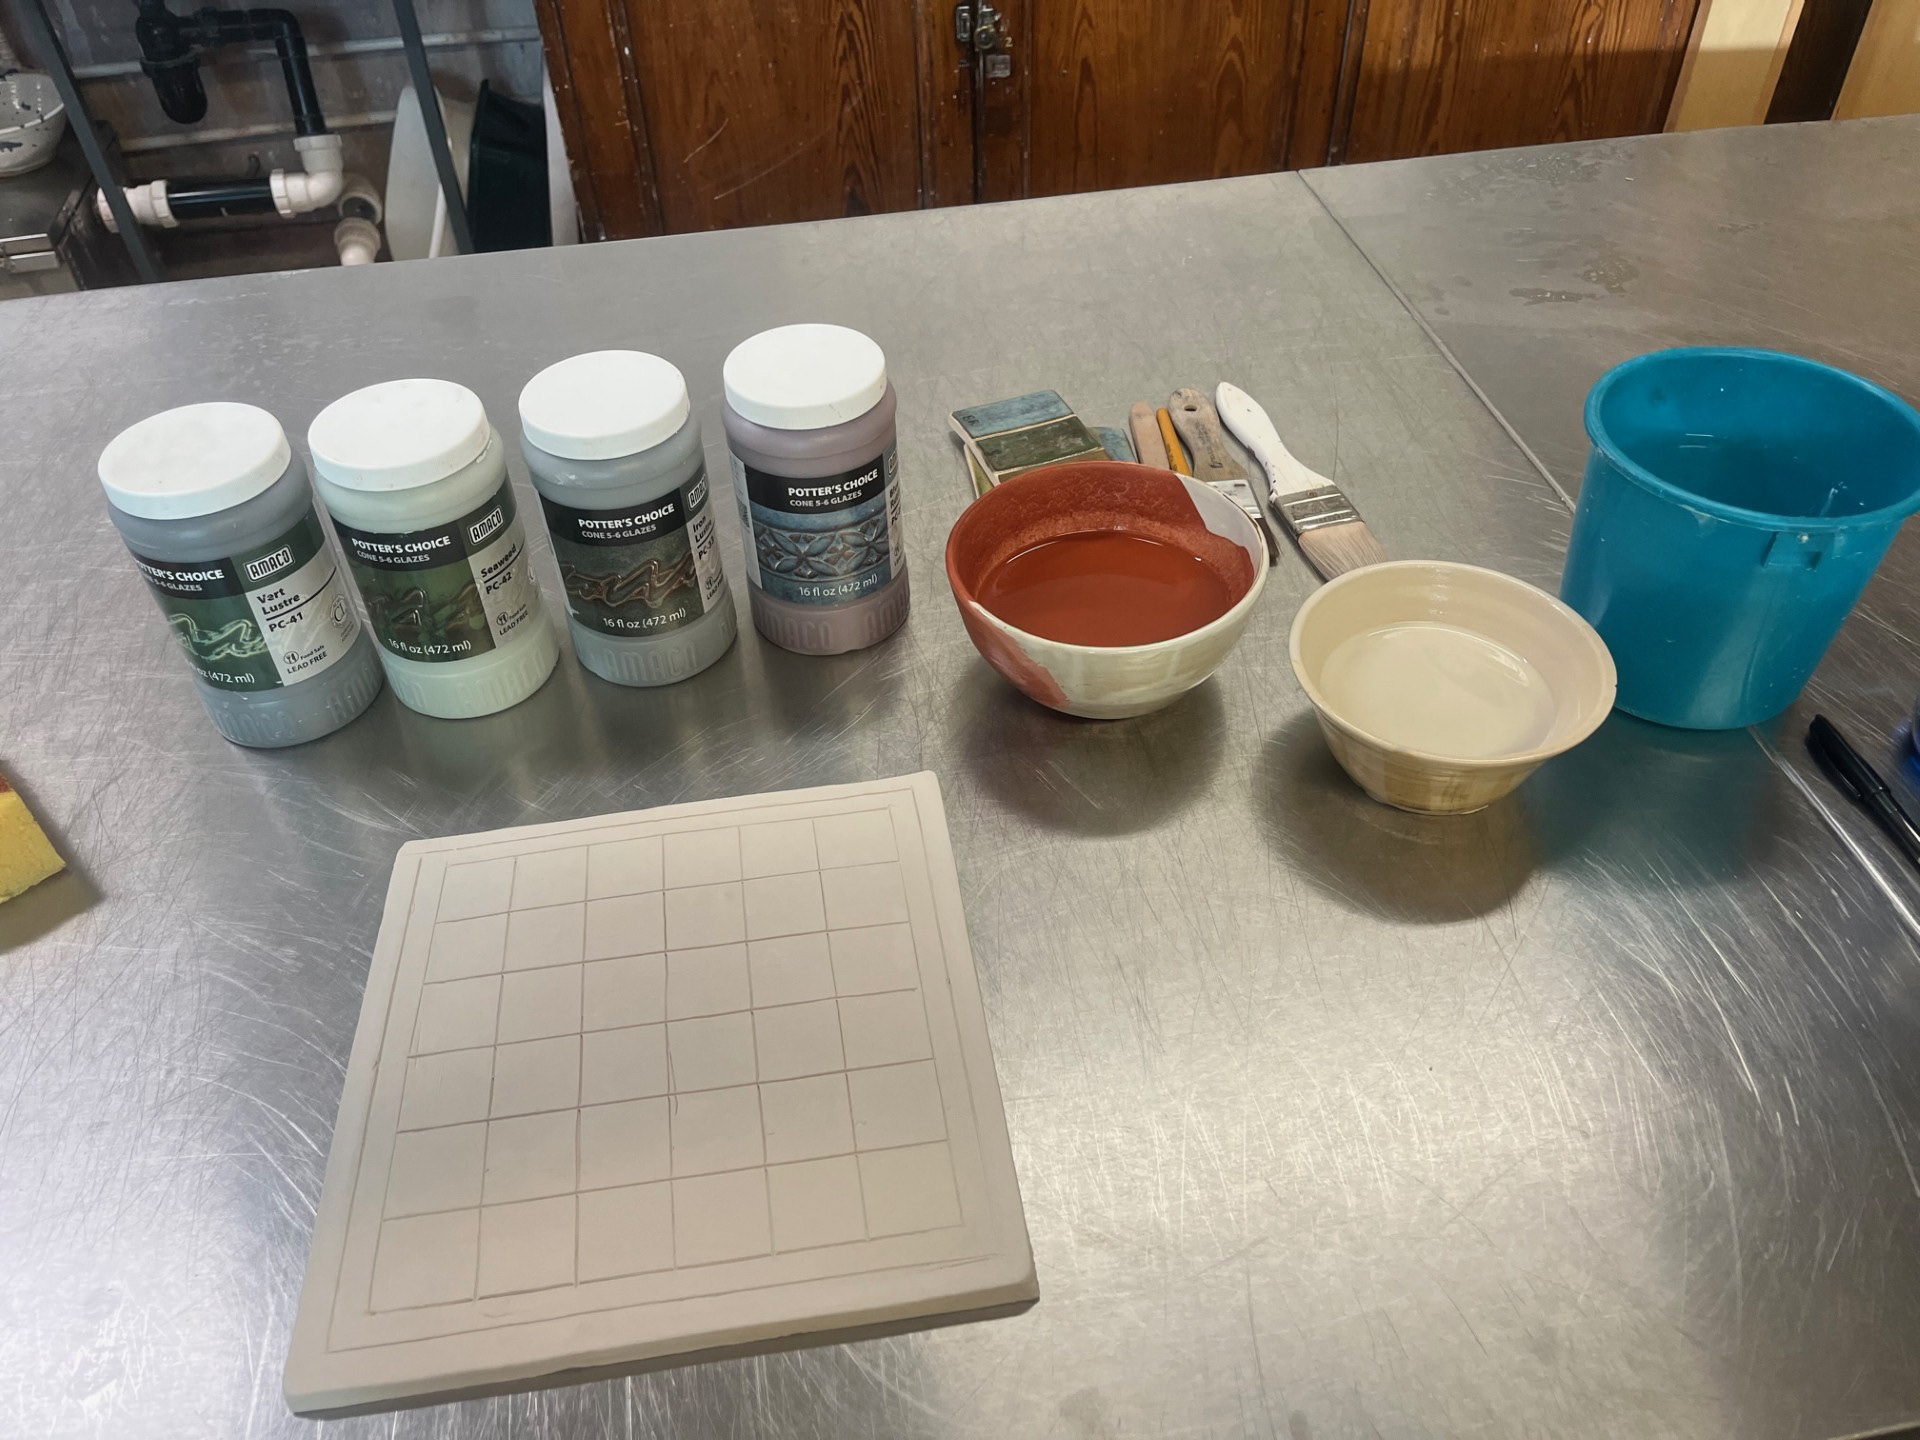

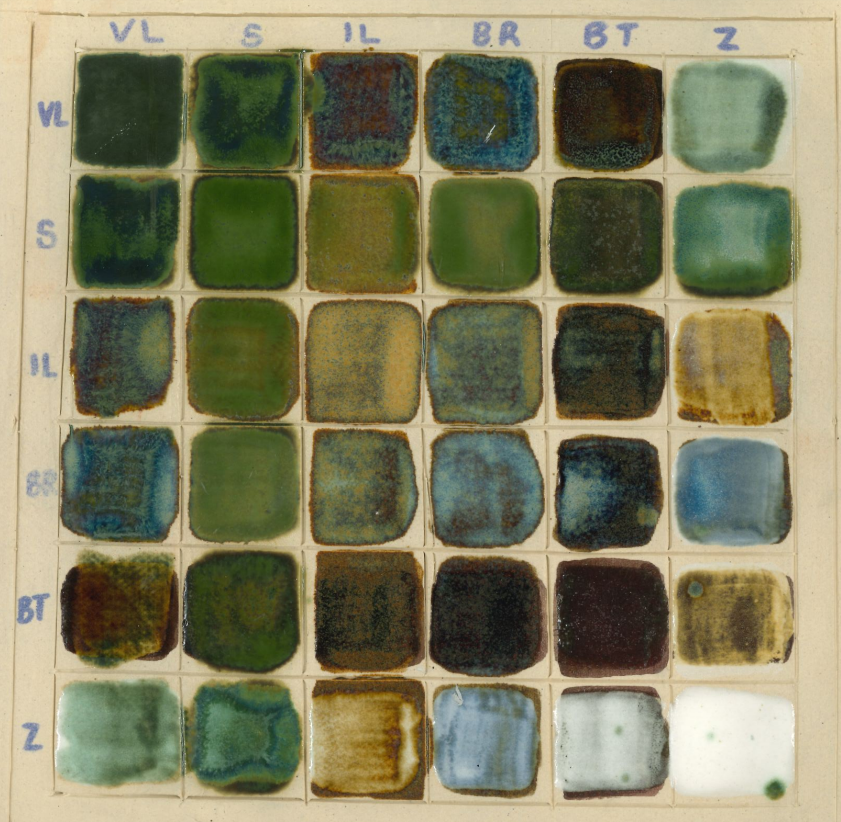
overall went well as I am very pleased with the outcome. Rudi warned me that some of them might not work as it is the first test of these combinations with regards to firing, layers, application etc. However, all of the colours that have been produces are, in my opinion, representative of the the true combinations because each one has a very clear and different reaction each time. Personally, I am really a fan of the Blue Rutile combinations as the glaze itself is very bright and iridescent making it a lot more eye catching. I also like the ones that have a colour contrast within the glaze itself, for example, most of the iron lustre combinations because they have colours like blue, red tones and almost yellows. Overall, this is definitely a testing method I'm going to take forward to life after university as it is an extremely efficient and effective way of testing glaze combinations.
Summary of focus in the next few weeks:
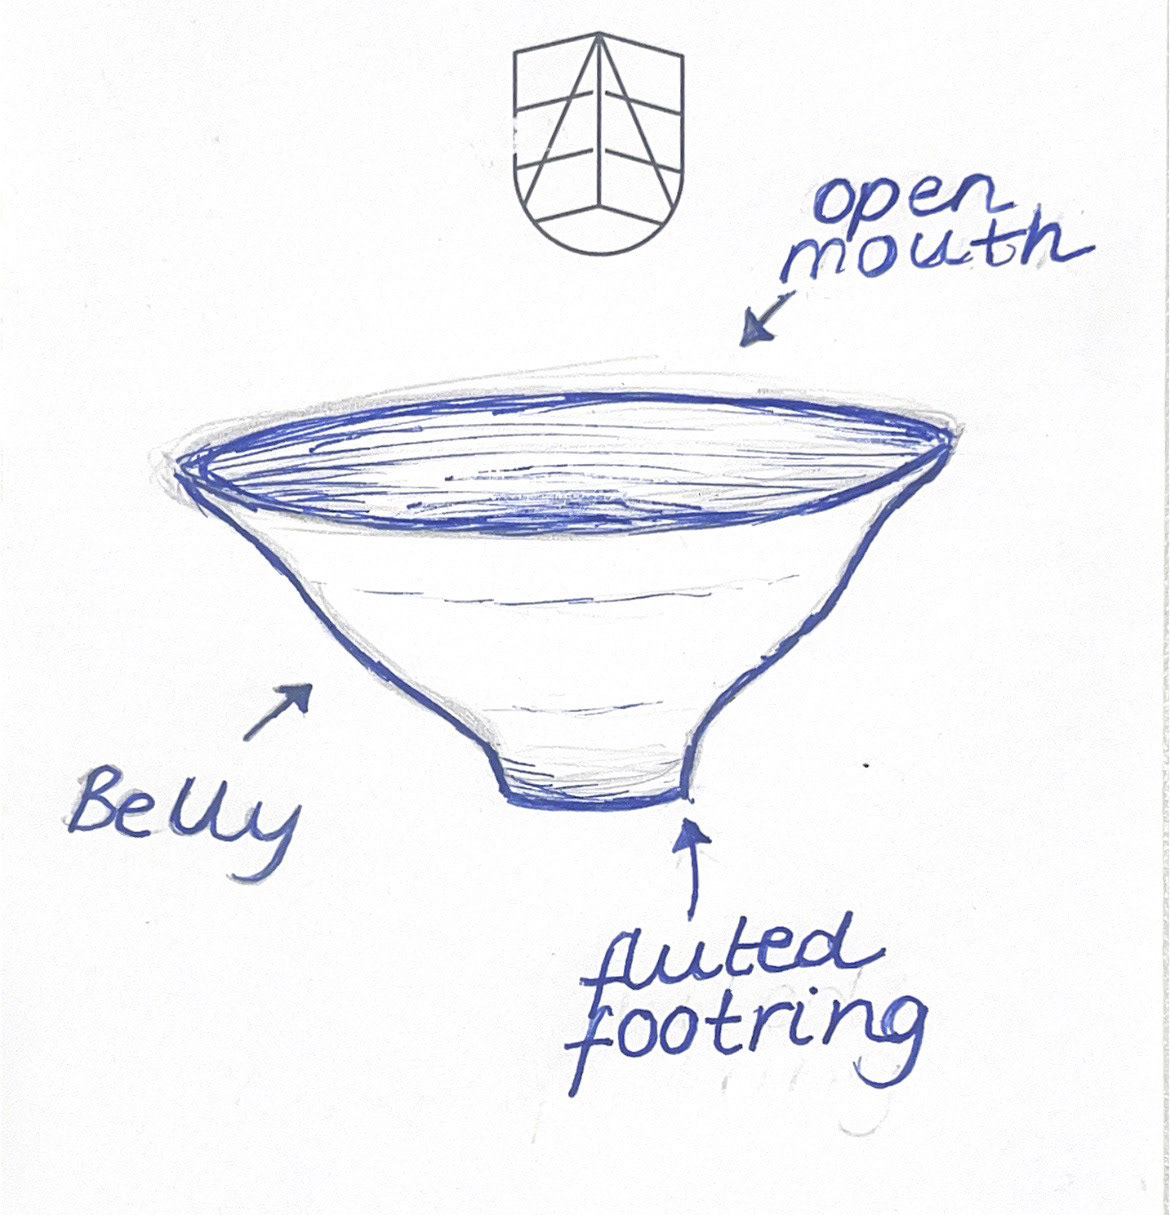
At this point in my development, I have come to many realisations about my path within this project. One of these being that I don't think final piece will feature the glazes that I bought because I am going to put my effort into the projection inquiry this term. However, I am still going to be using the glazes within this project in the commission sector of my portfolio as they are much more applicable. For my practical, the main focus is going to be on the production of form and then reflection of the projection onto the vessel. I want the vessel itself to be a reflection of my refinement of practice as that is what I have been naturally driven to achieve throughout this project. I want to refine my practice as much as possible so that I can create vessels that have a great professional base which I can then develop from in future. I could possibly incorporate measuring into my practice as I really want to create a reliable and usable process. The actual from that I have chosen is the one that you can see on the left. I previously identified that I liked this form earlier on in my development so I definitely want this to be part of my final series of pieces. I think I like this form because of the open mouth. it really makes me feel like you could almost dive into it, representing oneness and completeness.
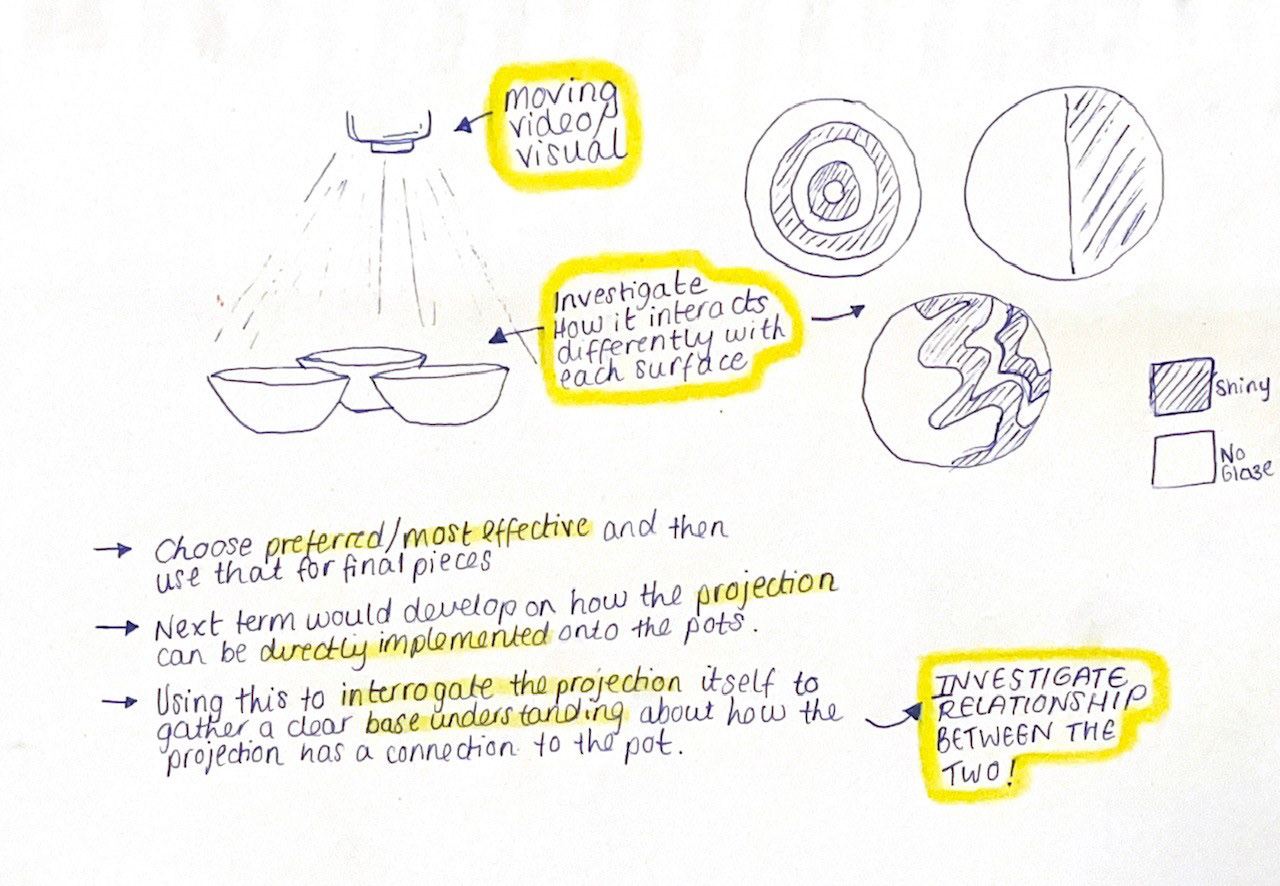
Plan of overall project:
For my final resolution, I think that I want to create a series of pieces of a relating from that will be used as a blank canvas for my collaborative projection. At this point in the project, I have identified that the main priority in this module is to test my workflow. Meaning that i need to see how the application methods of the theory and projection would work harmoniously to create a final outcome. I had a meeting with CJ and within this we discussed ways of completing testing for this development. I knew that I wanted to test different styles of finish e.g. matte shiny and no glaze to see how projection interacted with each and what the differences were. Initially I had the idea of creating different patterns in glaze to see how projection moved around the glaze patterns. However, after speaking to CJ I realised that with the time we had left, I should just keep it simple and chose a more basic application style.
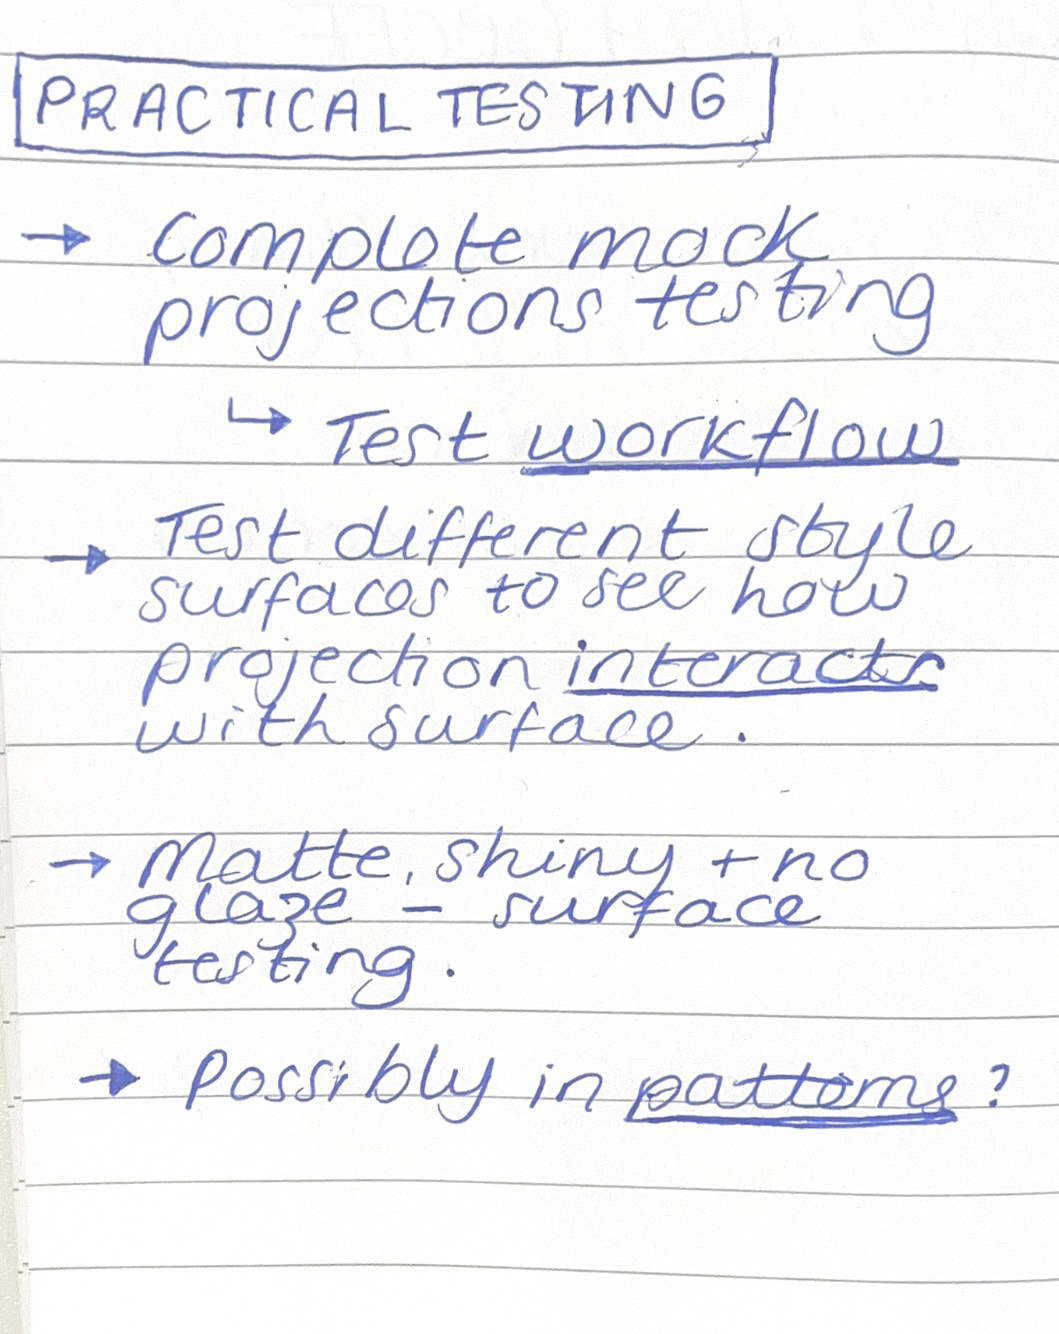
Material Testing:
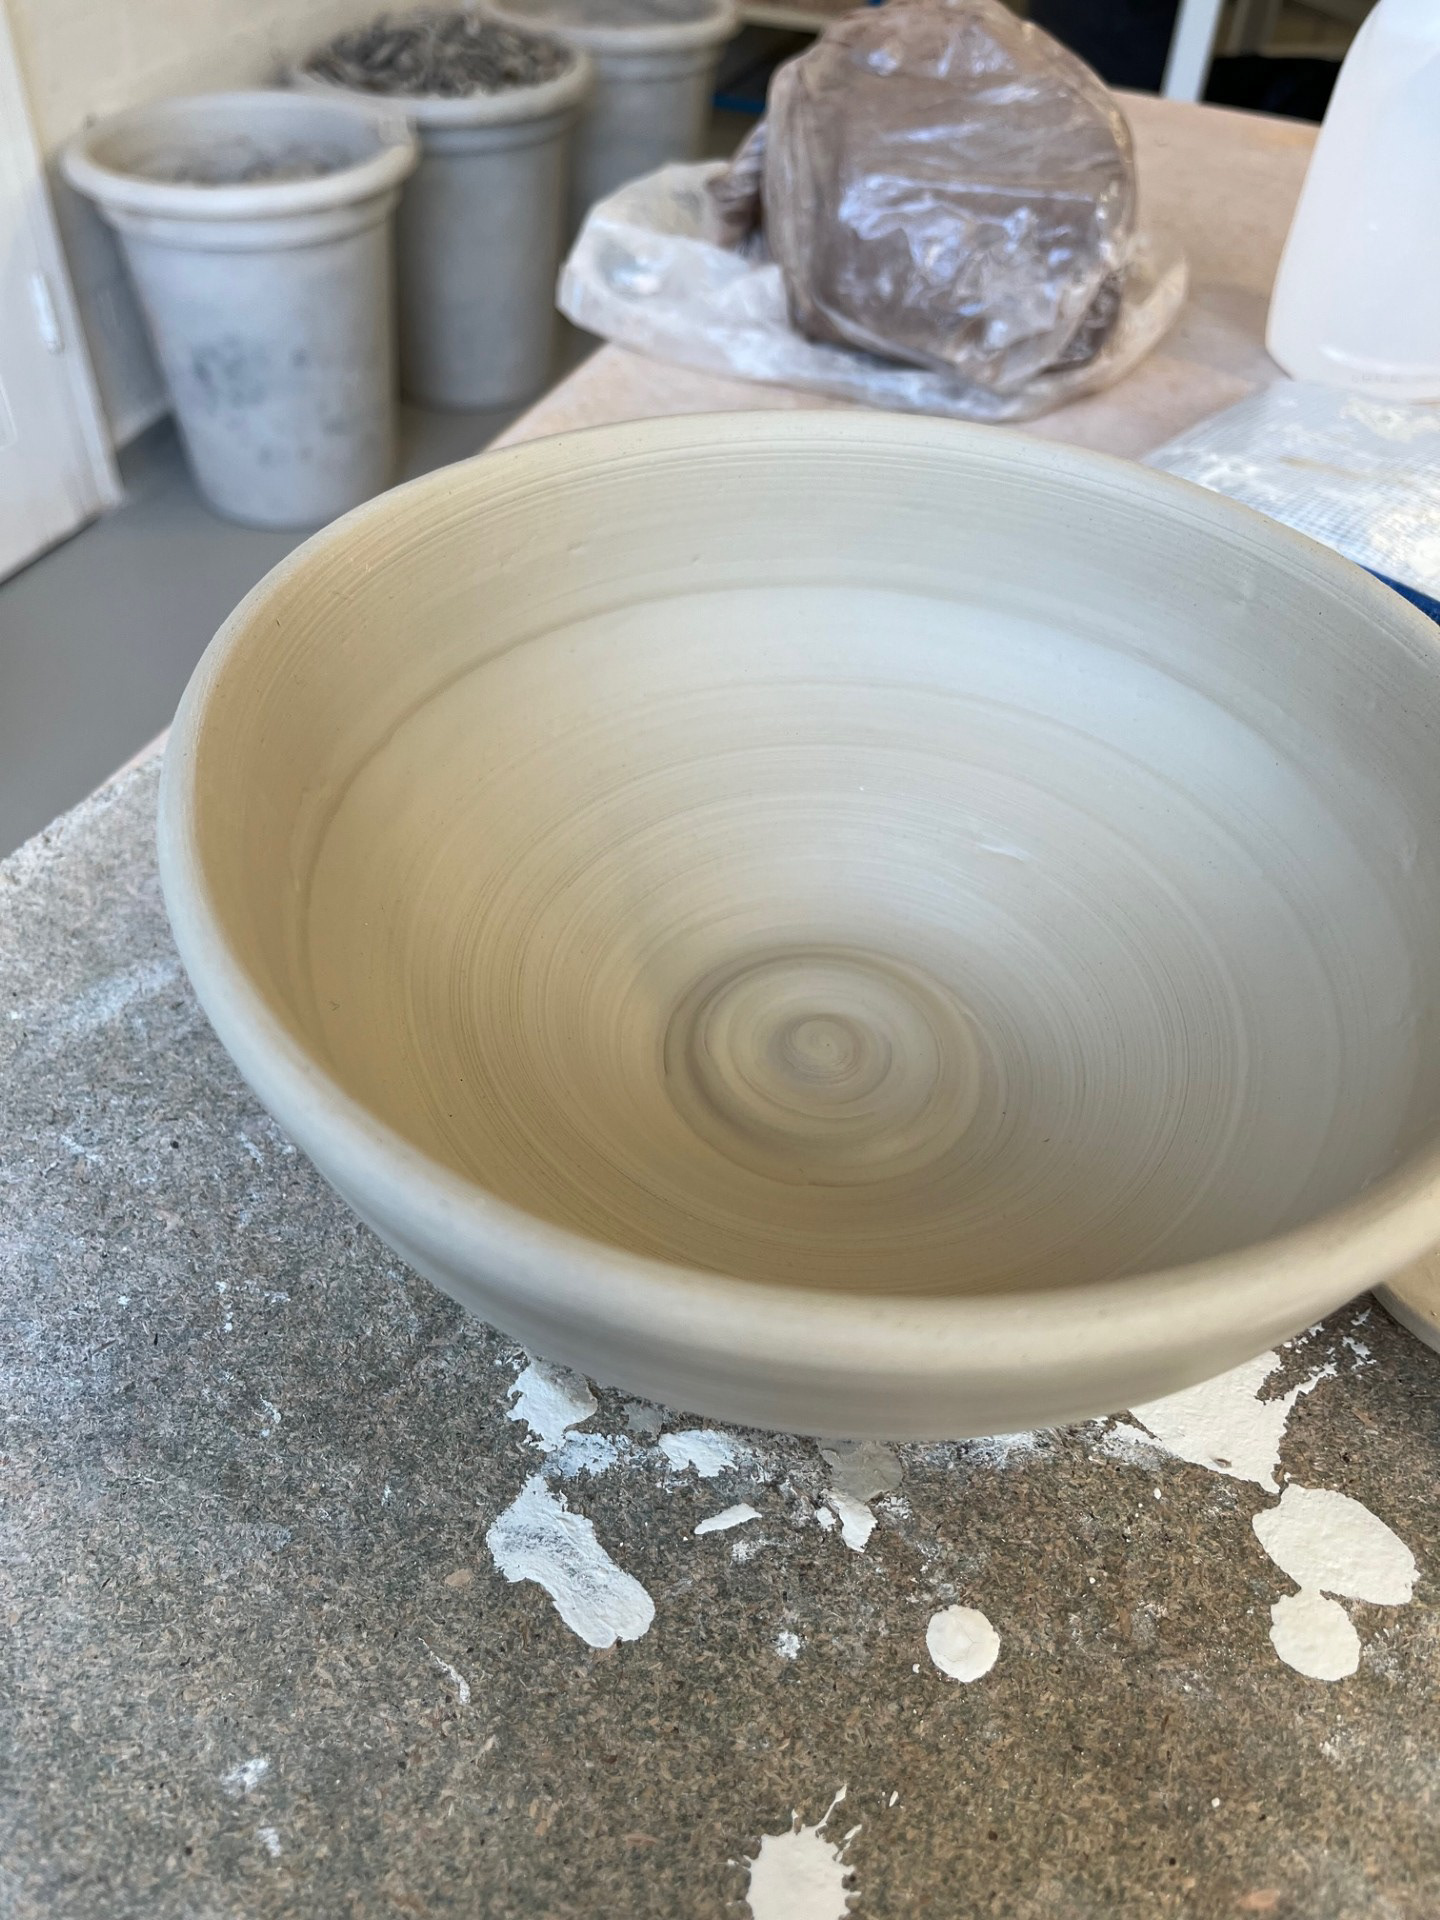
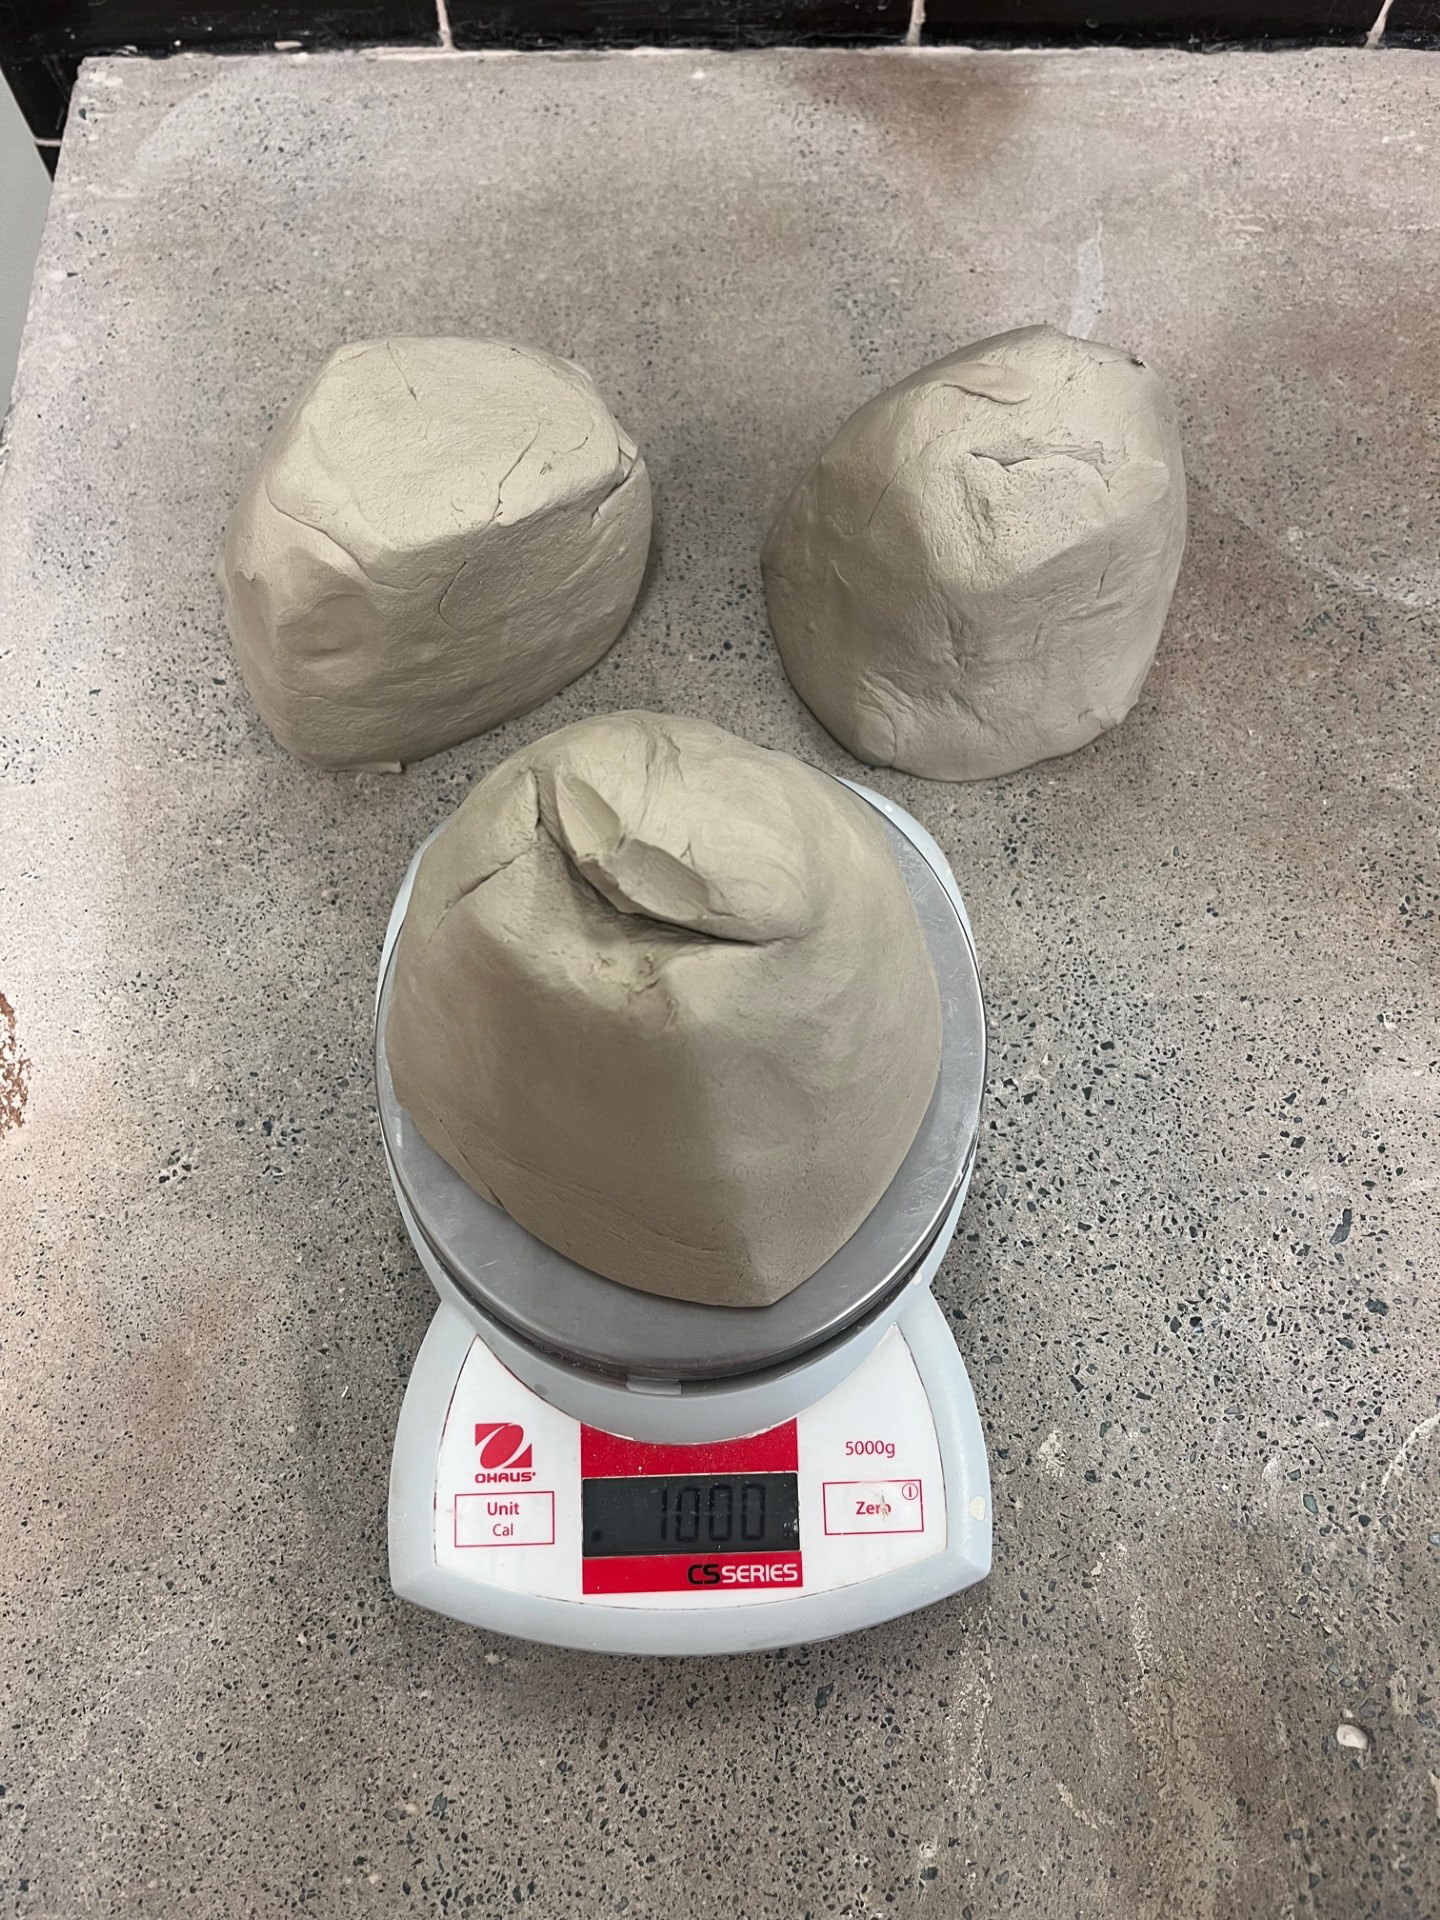
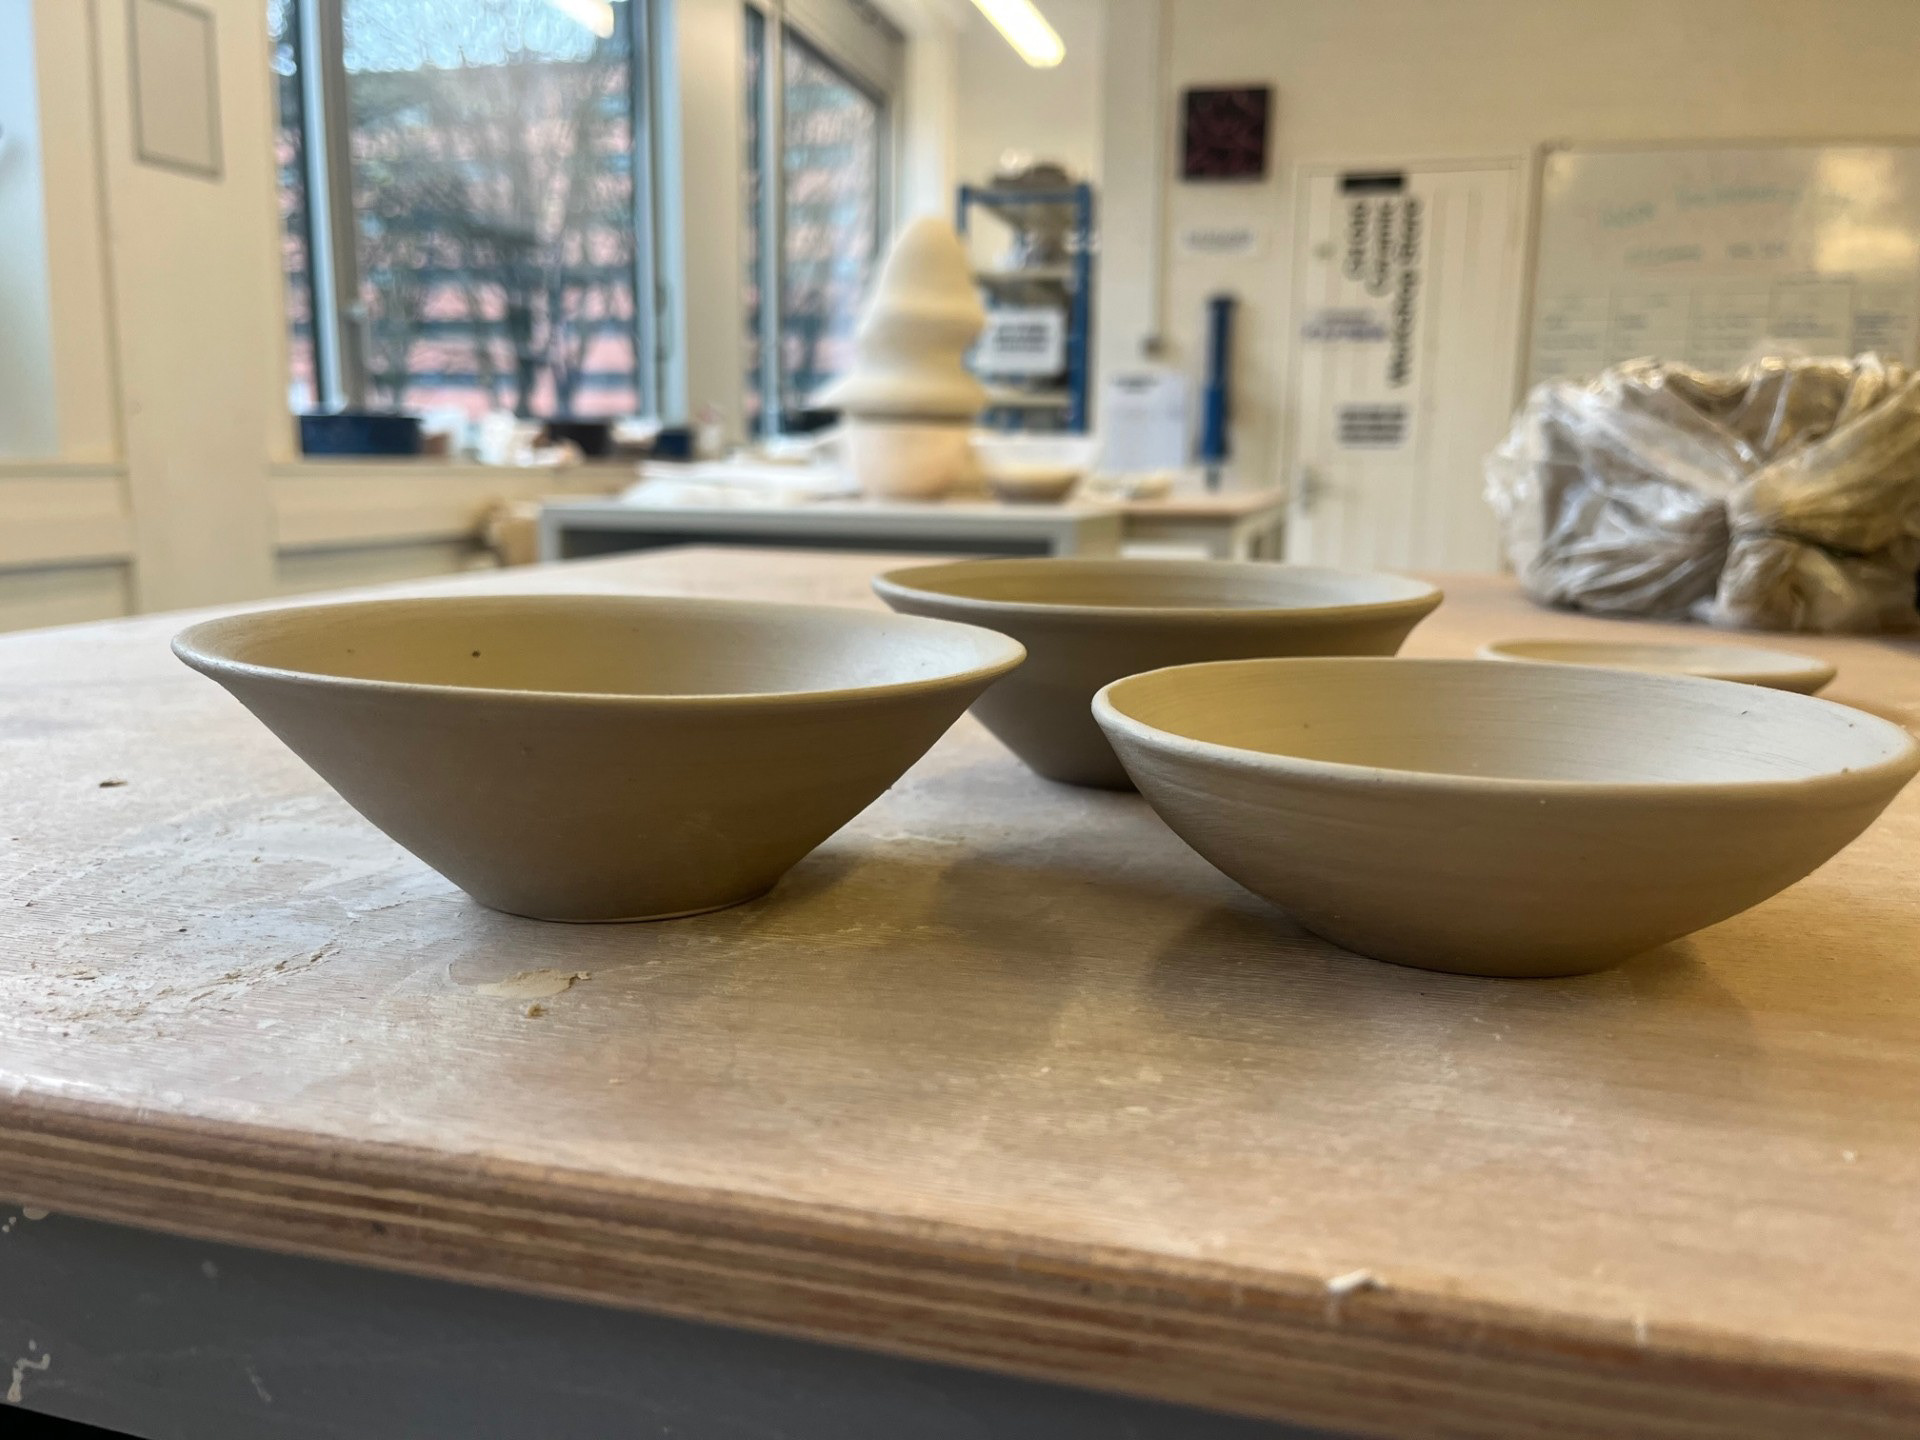
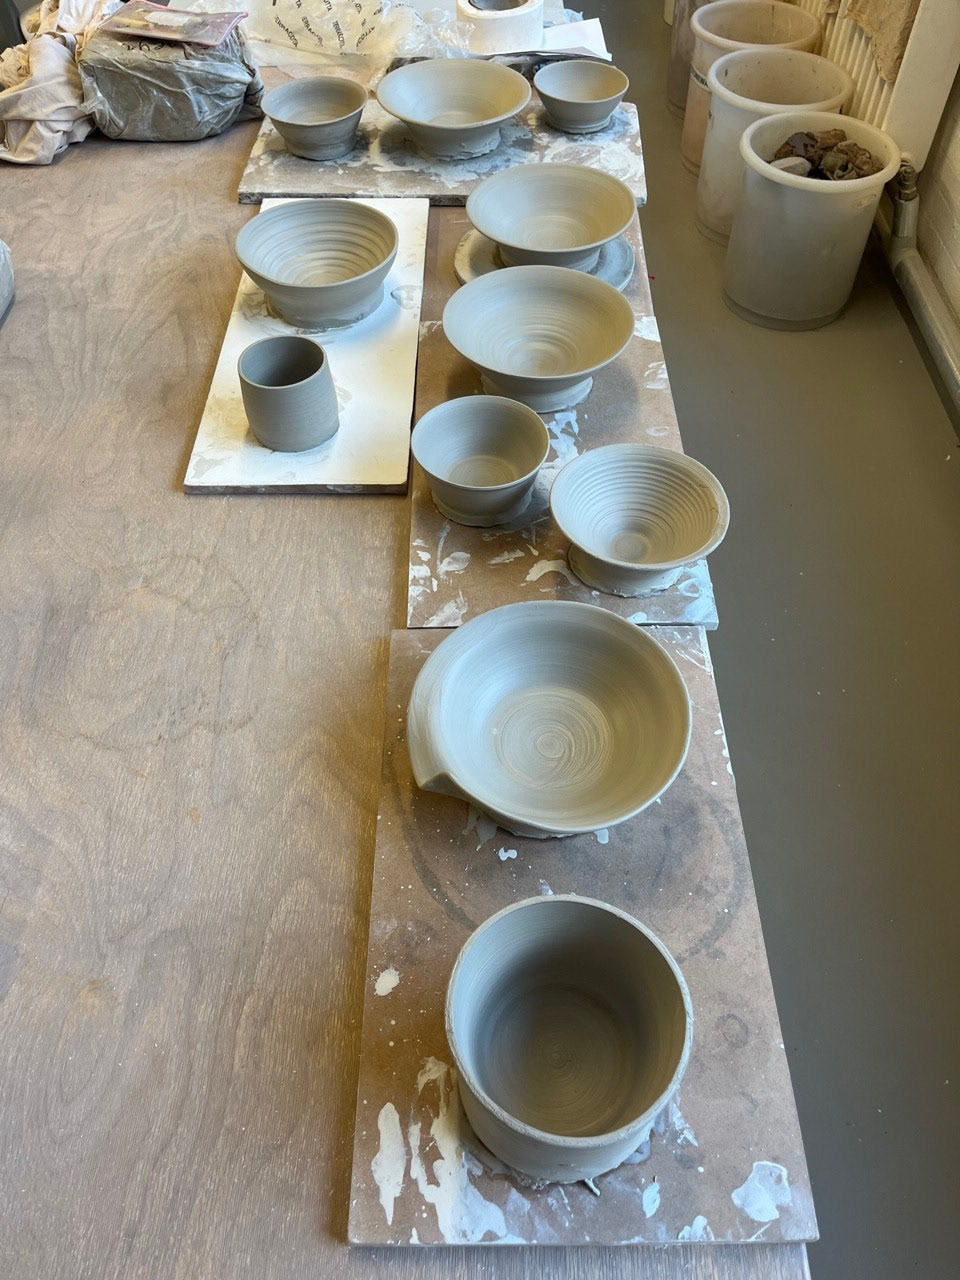
For this testing I have decided that the best way to go about it is to make multiple small sample bowls that have the different surface finishes on them to test how projections interact with the surface. Overall this is a very simple process but the main thing that I'm thinking about is making the bowls so that they are roughly of the same shape as the form that I am going for. See below for plan and practical execution:

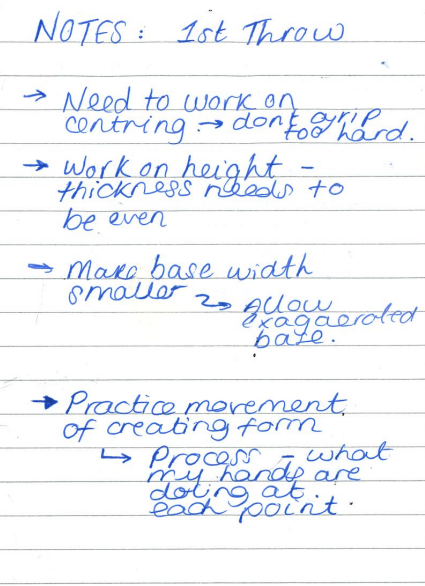
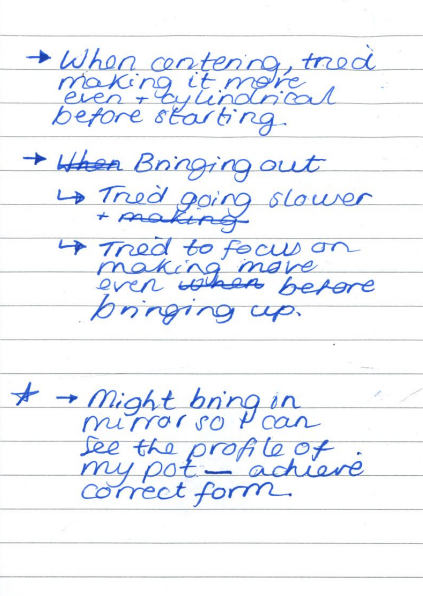
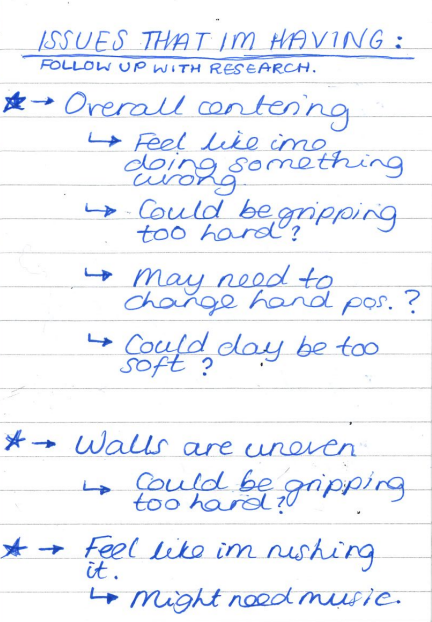
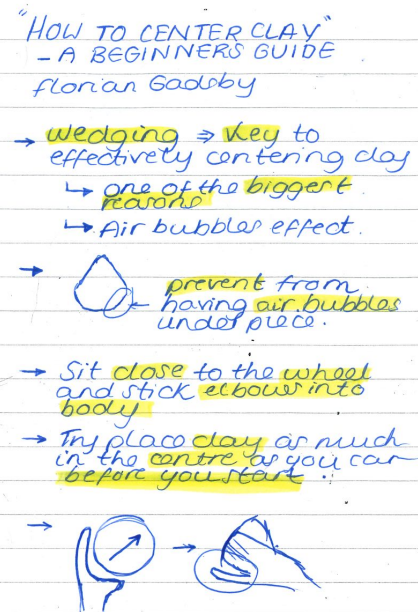
For the past couple weeks, I have been struggling a little bit practically. Before that I was actually making quite a lot of progress when it came to my throwing quality and ability as I was throwing things that were much larger than I had ever produced before. However, something has changed in these last two weeks, I feel like I've lost something and I'm not quite sure what it is. The issues above are ones that have been reoccurring for me, the main one being centring. Centring my clay recently has been increasingly difficult as I have been taking up to ten minutes which is abnormal for me and even then it isn't even fully centred. This issue could have increased partly because of my own impatience, but I do find it hard spending a long time centring because I feel like I'm going crazy! This leads on to another issue that I'm having which is that I simply feel like I am rushing everything. Currently, I know for a fact that when I throw, I whiz through all of the process stages as in my head, the only stages that I have are centre and then pot. Not paying enough attention to each stage is resulting in me not having the best outcome and when in striving for my work to reach a higher level, this is definitely something that is getting in my way. Due to these issues that I have been having, I have decided to turn to YouTube and making videos to go back to basics so that I can try and rewrite the bad habits that I have built up mentally and manually.
See below for outcome of sample batch:
Research for Developing Practice:
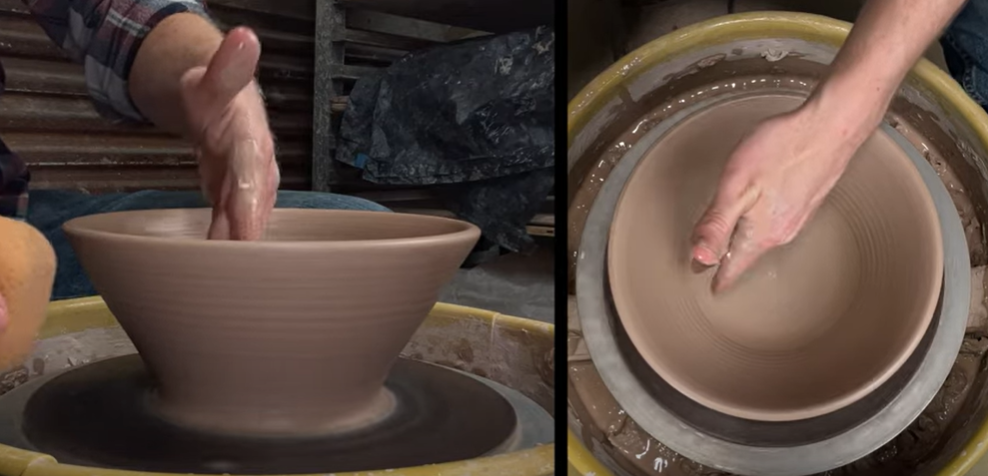
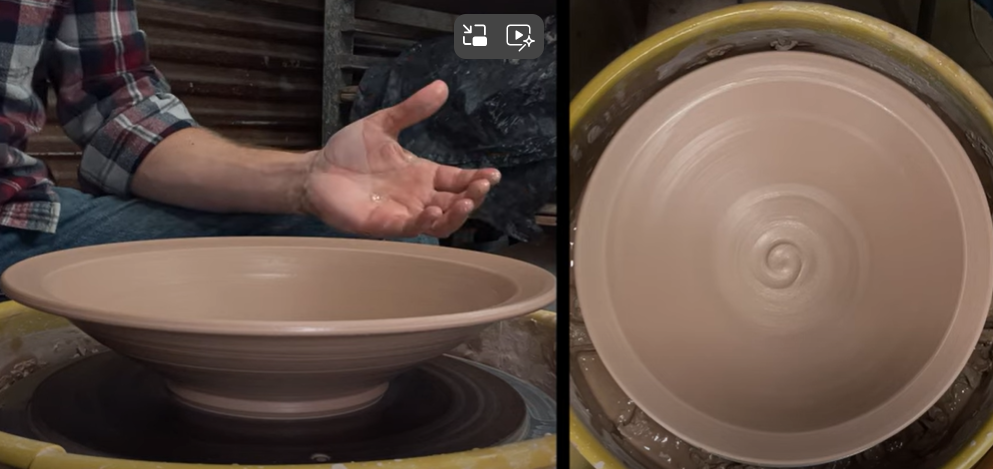
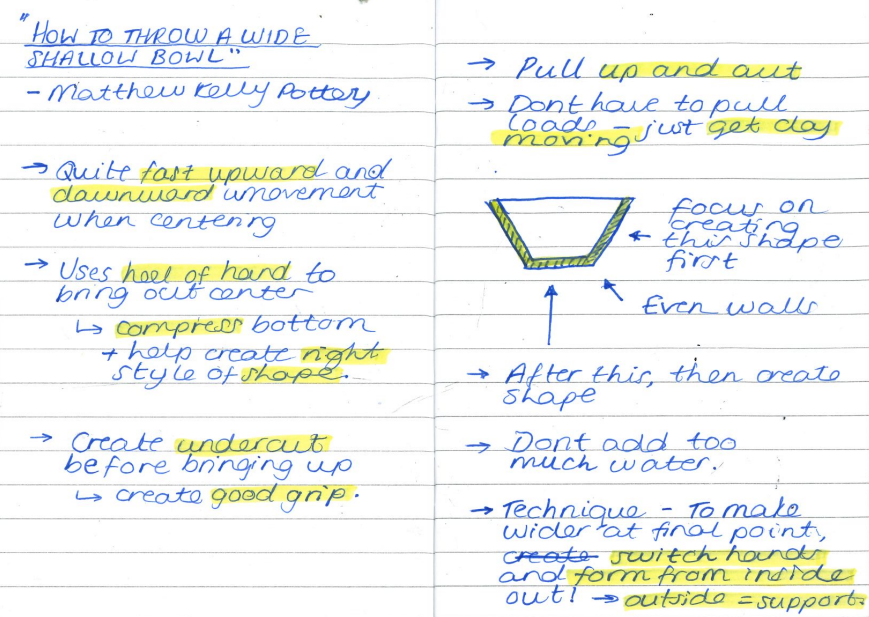
I found this video very interesting because this is a similar style of form that I want to produce. making on a large scale is something that I have already identified as a priority for my making and this video was very insightful for my overall practice. The main thing that this person said was that to create a stable and even bowl, you should build up the walls in the shape that you want the vessel to be in. this is definitely something that I am going to take forward as previously I would build my walls up vertically and then pull them out into the shape. I realised that this puts a lot of stress on the clay to hold the shape so I will be keen to give this a try.
Practice Development Session:

Reflection of process:
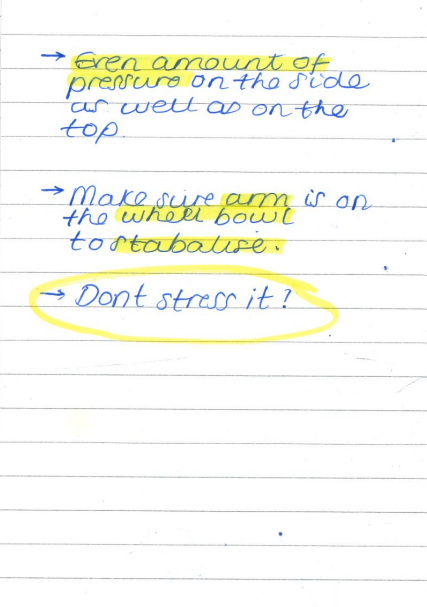
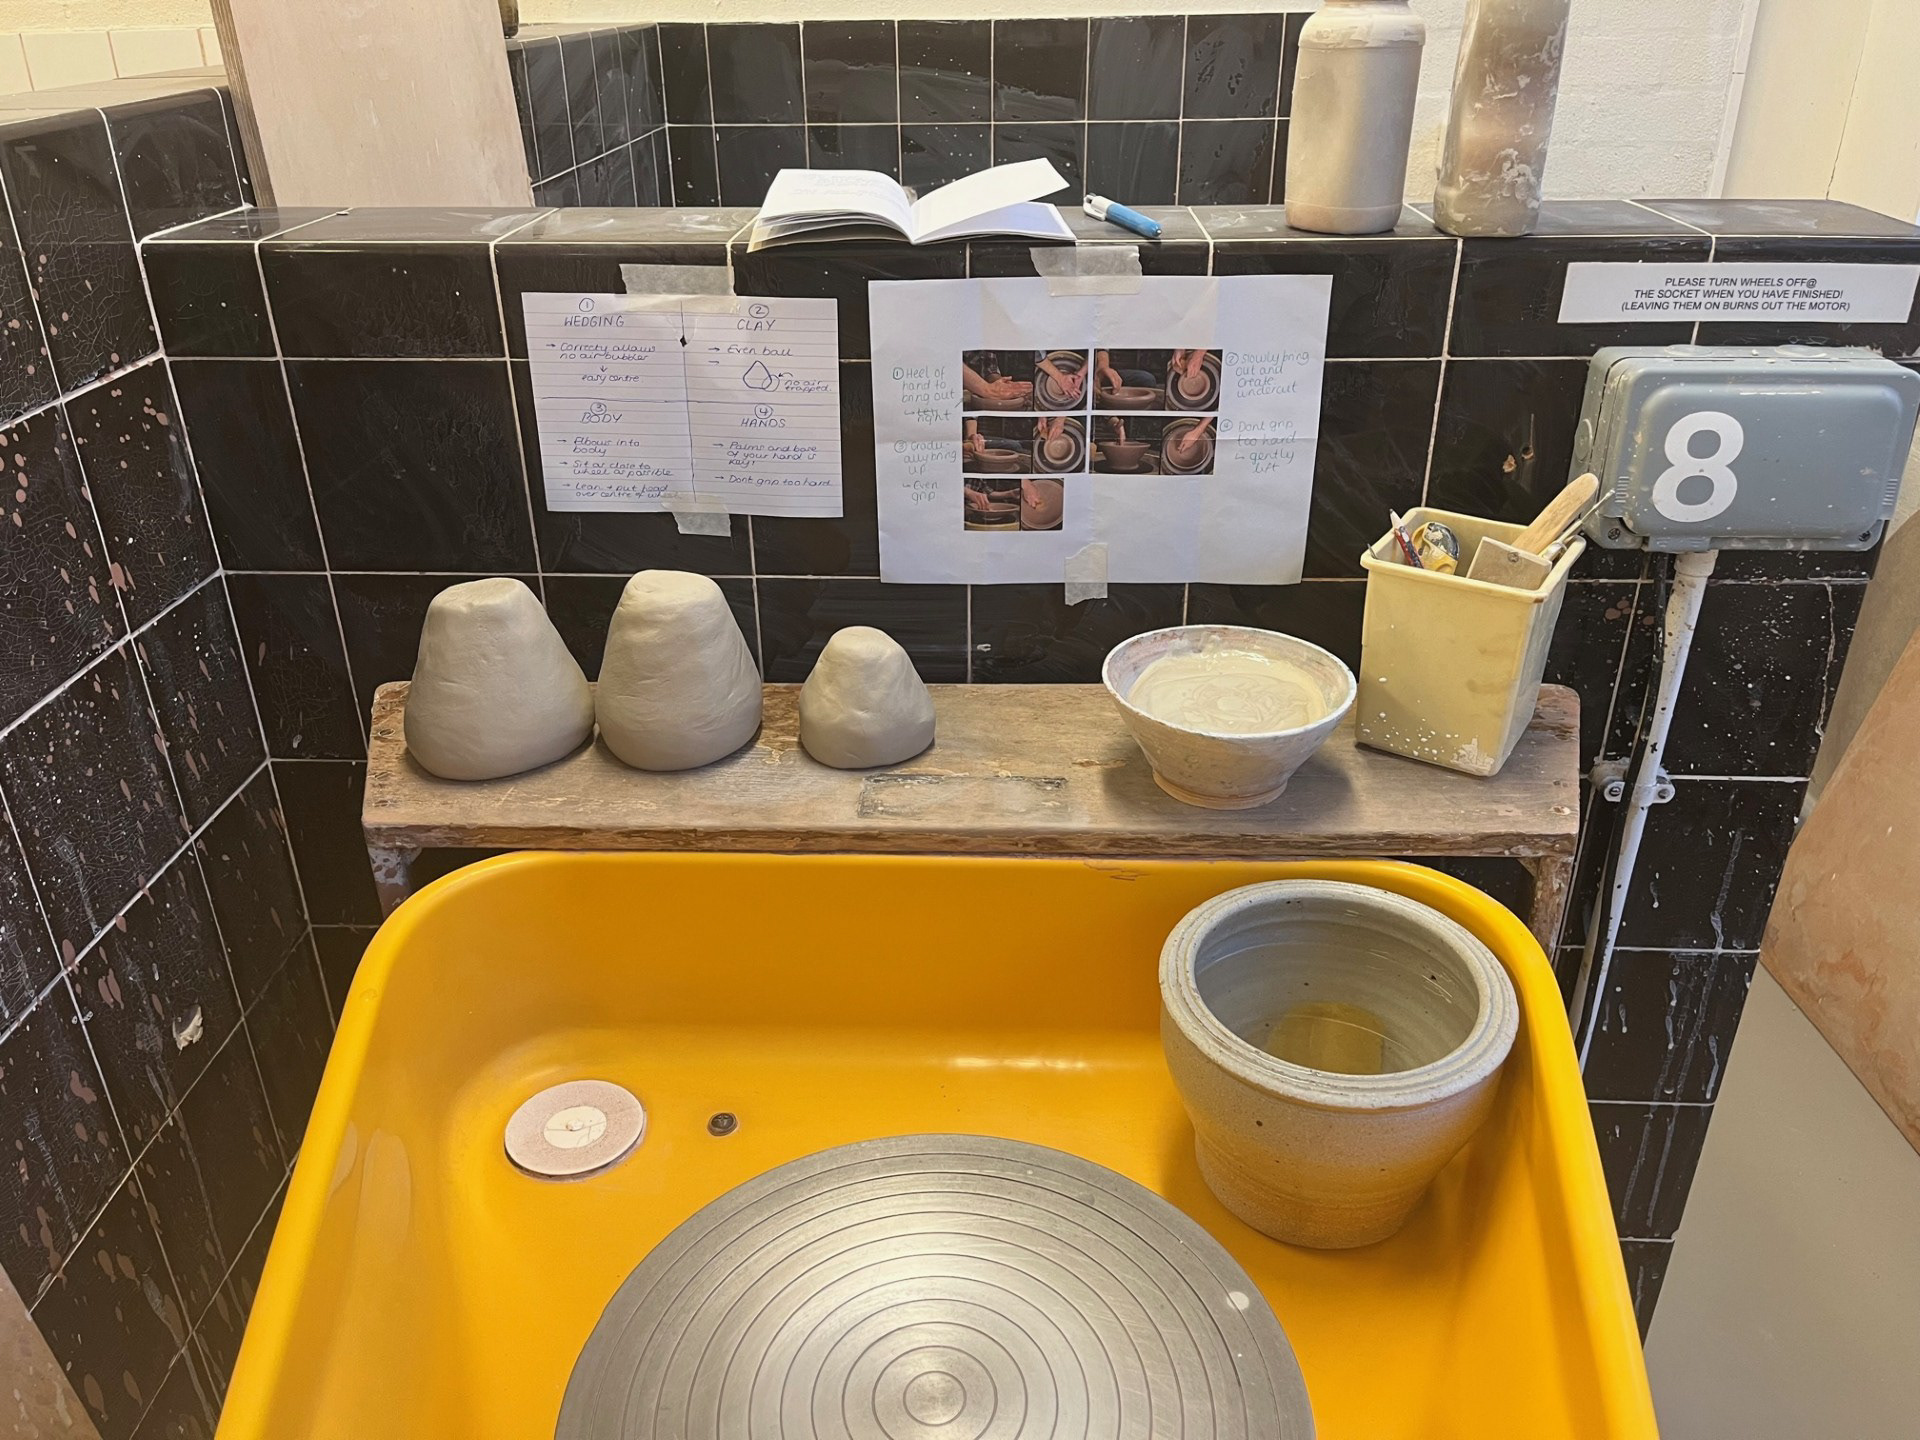
One of the main things that was recommended was to really focus on wedging because it can be detrimental to a successful throw. Before beginning this process, I put a heavy focus on wedging, more than I do usually so I could see if it helps. I definitely noticed a difference because it made my work a little easy to centre. Overall, I think that it was good to have something to look at and reference to allow me to remember the good steps however I think that it was actually distracting me a bit. it was taking my attention away from the clay and making me overthink even more instead of simplifying the process.
When I came to this realisation I decided to try something else by going to Rudi for some guidance. I chose to do this because although having those print outs on the wall was beneficial, I could tell that there was something that I was just missing and I thought that the only way that that could be realised is for me to be observed. Rudi really helped me as he allowed me to realise that I was massively overthinking and overcomplicating it in my head! Rudi made me realise that all of this pressure I was putting on myself was making me in turn put too much pressure on the clay. From this I realised that I just needed to take a step back and feel and encourage the clay instead of force it.Material Testing:
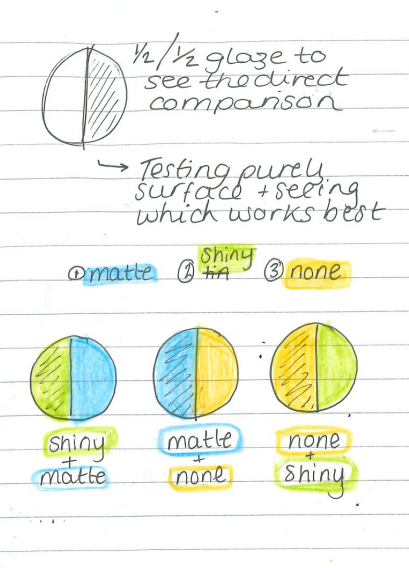
I have chosen to complete this testing by having the bowls with half glaze on each. Splitting it this way makes it a lot easier to directly compare the different surfaces against one another. Having a clear line between the two will allow me to focus on the analysis of contrast so I can build arguments for all types of finish. Initially I was going to do samples with various patterns like rings or waves but through talking to CJ, we both decided that it was better to keep it simple for the testing because my main focus this term is the workflow and how successful it will be. This choice of glazing uses only 3 bowls which means that it will leave me with £ additional bowls, because I have 6 sample bowls, to do further whole samples with. My plan is to just do a bowl with each finish.
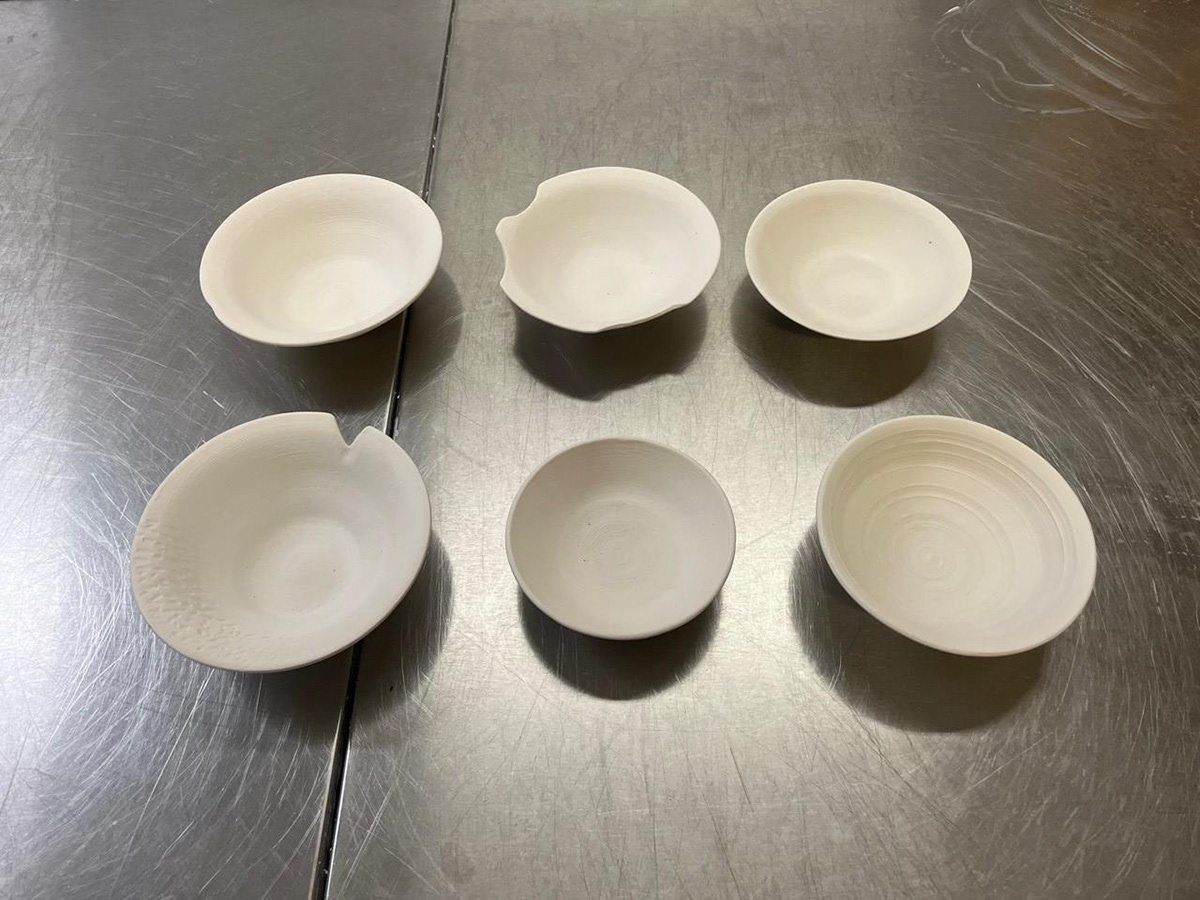
The outcome of the samples themselves was ok because they are just there to fulfil a purpose however they could have gone a bit more to plan. I made the bowls and then returned to them the day after and due to the edges being thin and there being a sudden drop of temperature, they became very brittle. Meaning that when it came to trying to turn them, a few of them broke unfortunately. However, I don't really mind because these were just simply to test the surface finish.
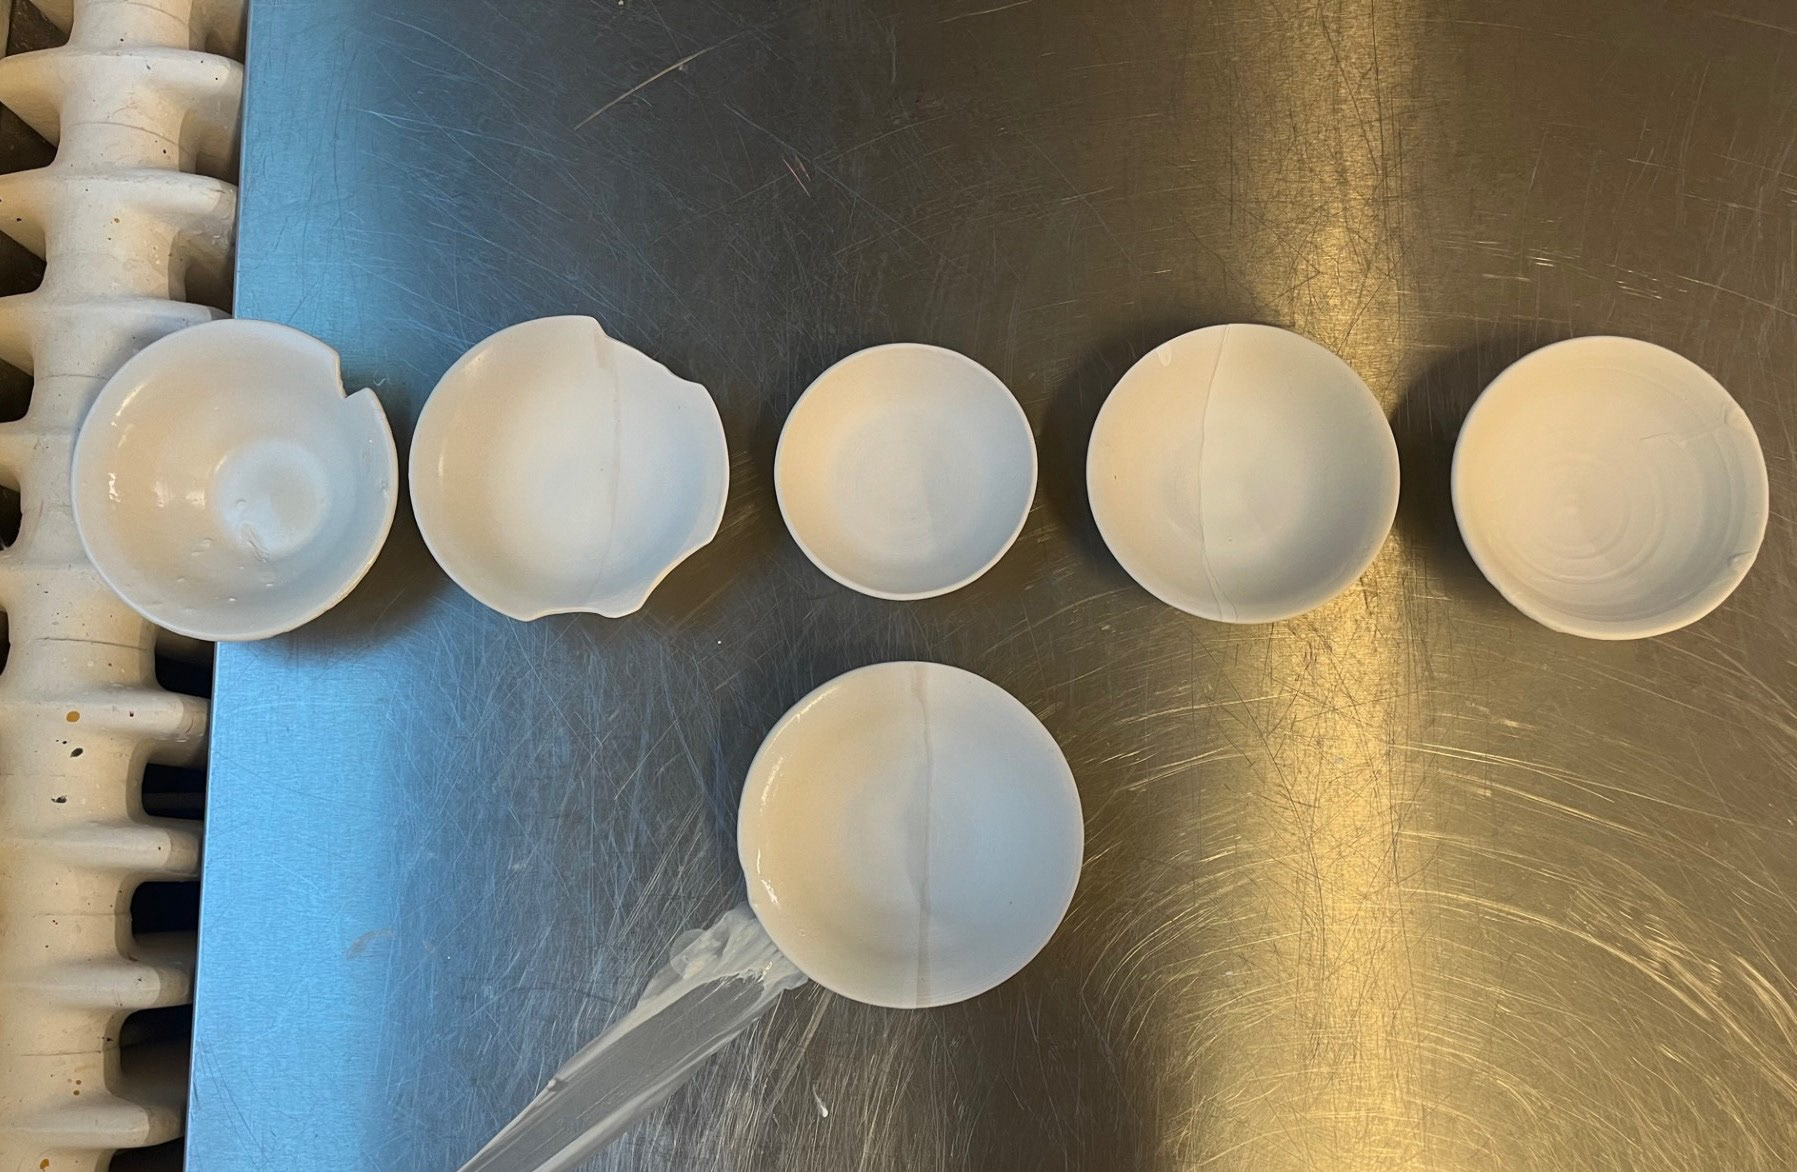
In the middle is a no glaze finish, the three around it are the 50/50 splits combining different finishes and the two on the outside are purely one of each glaze, clear shiny and Cornish stoneware. Overall, this was a fairly simple process but I'm glad I chose to do it like this because it made it a lot easier than it potentially could have been. In the end i think that the imperfections in the bowls acted in my favour because I forgot to do labels before beginning the process so they made it easier to identify which glaze went on which sample.
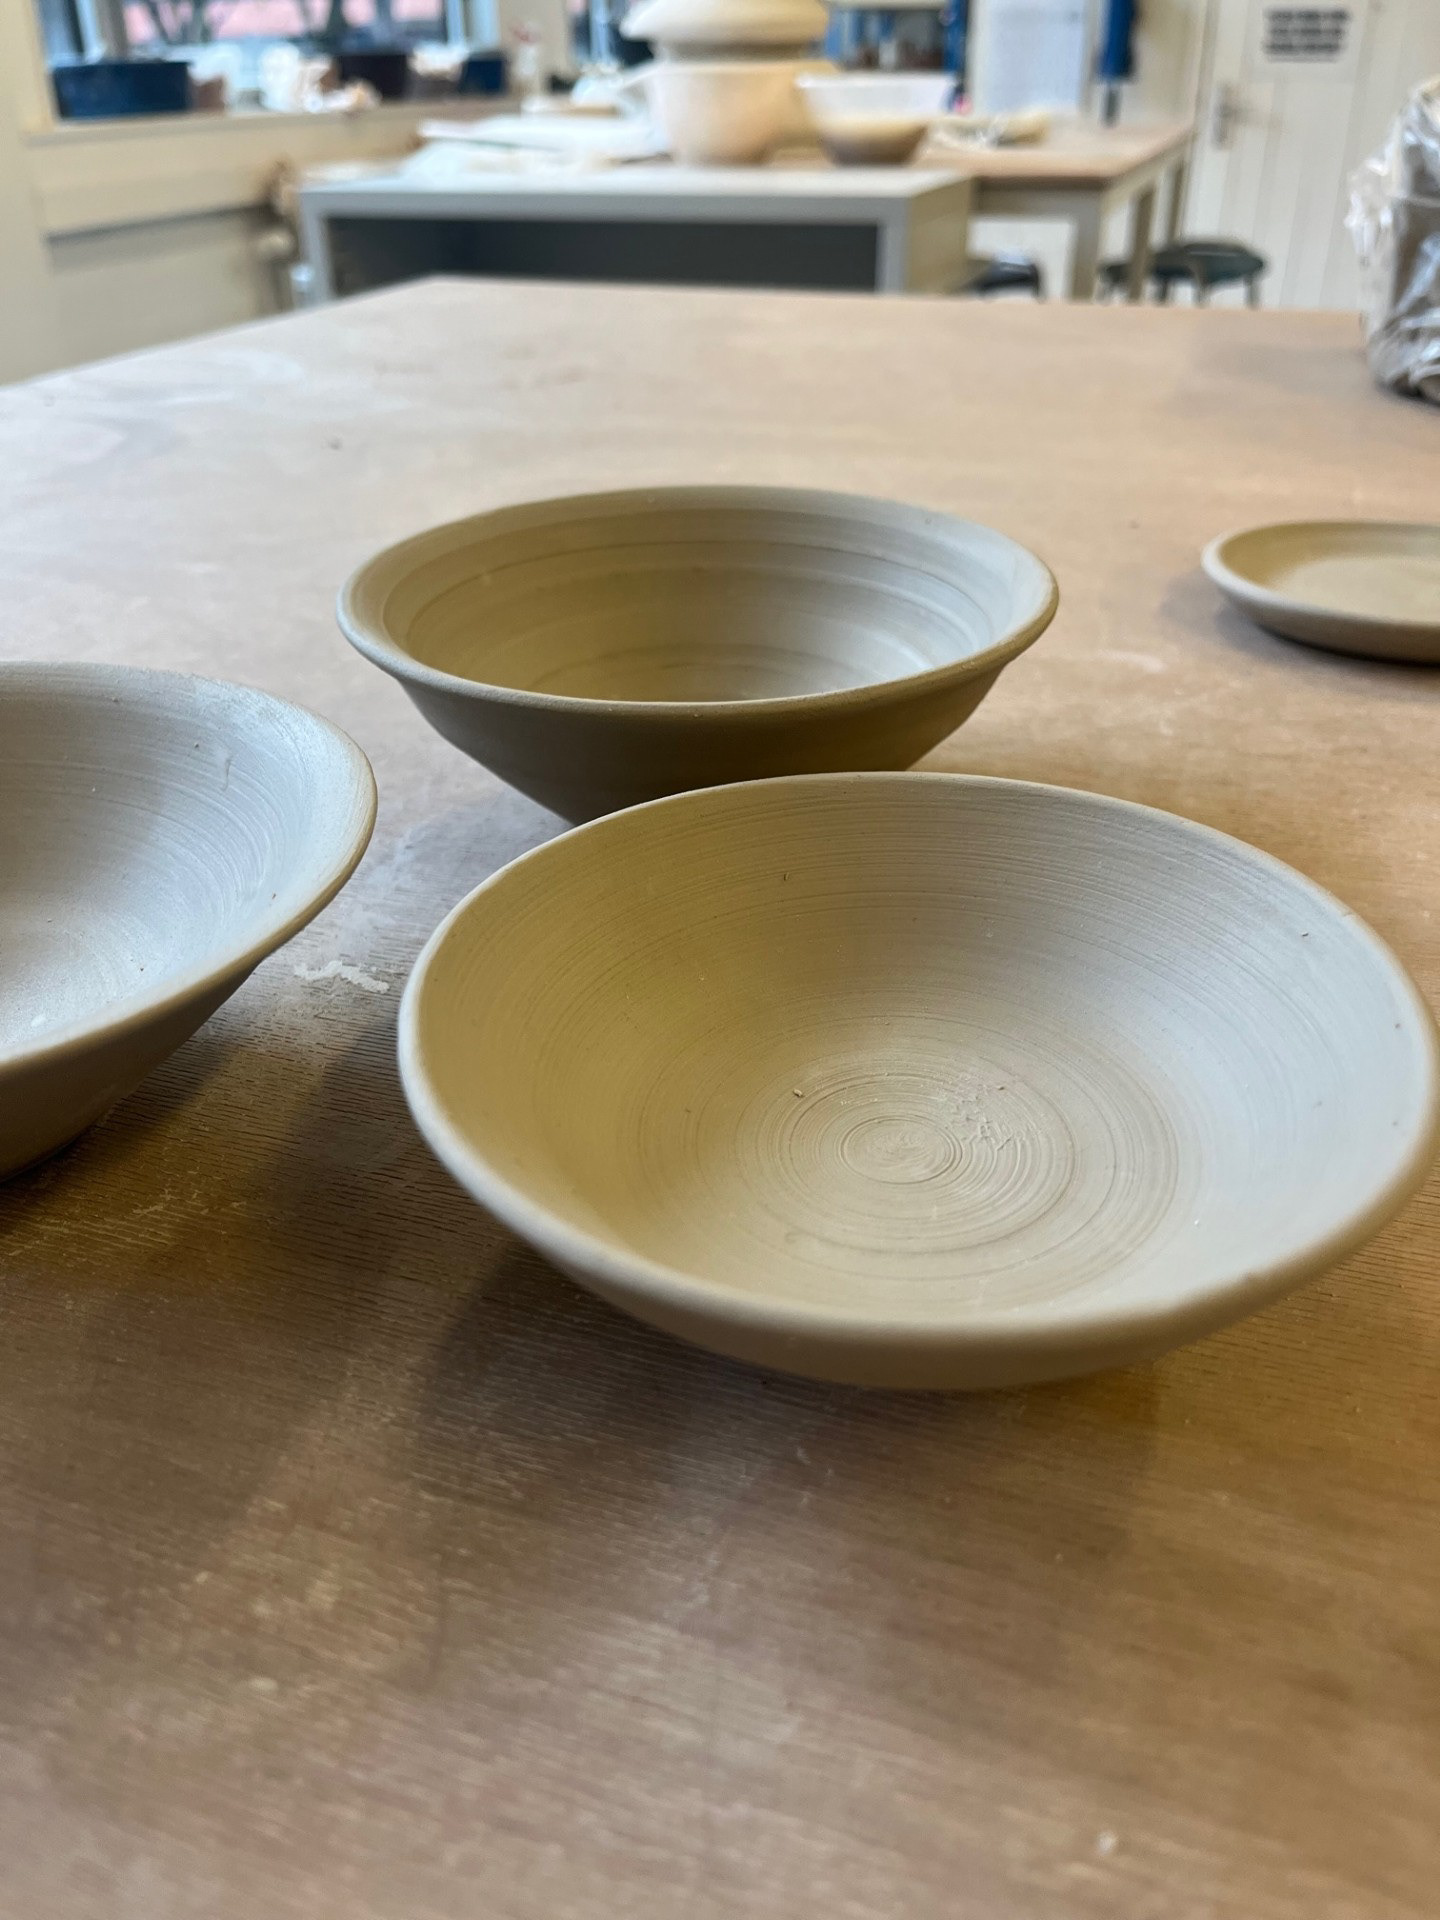
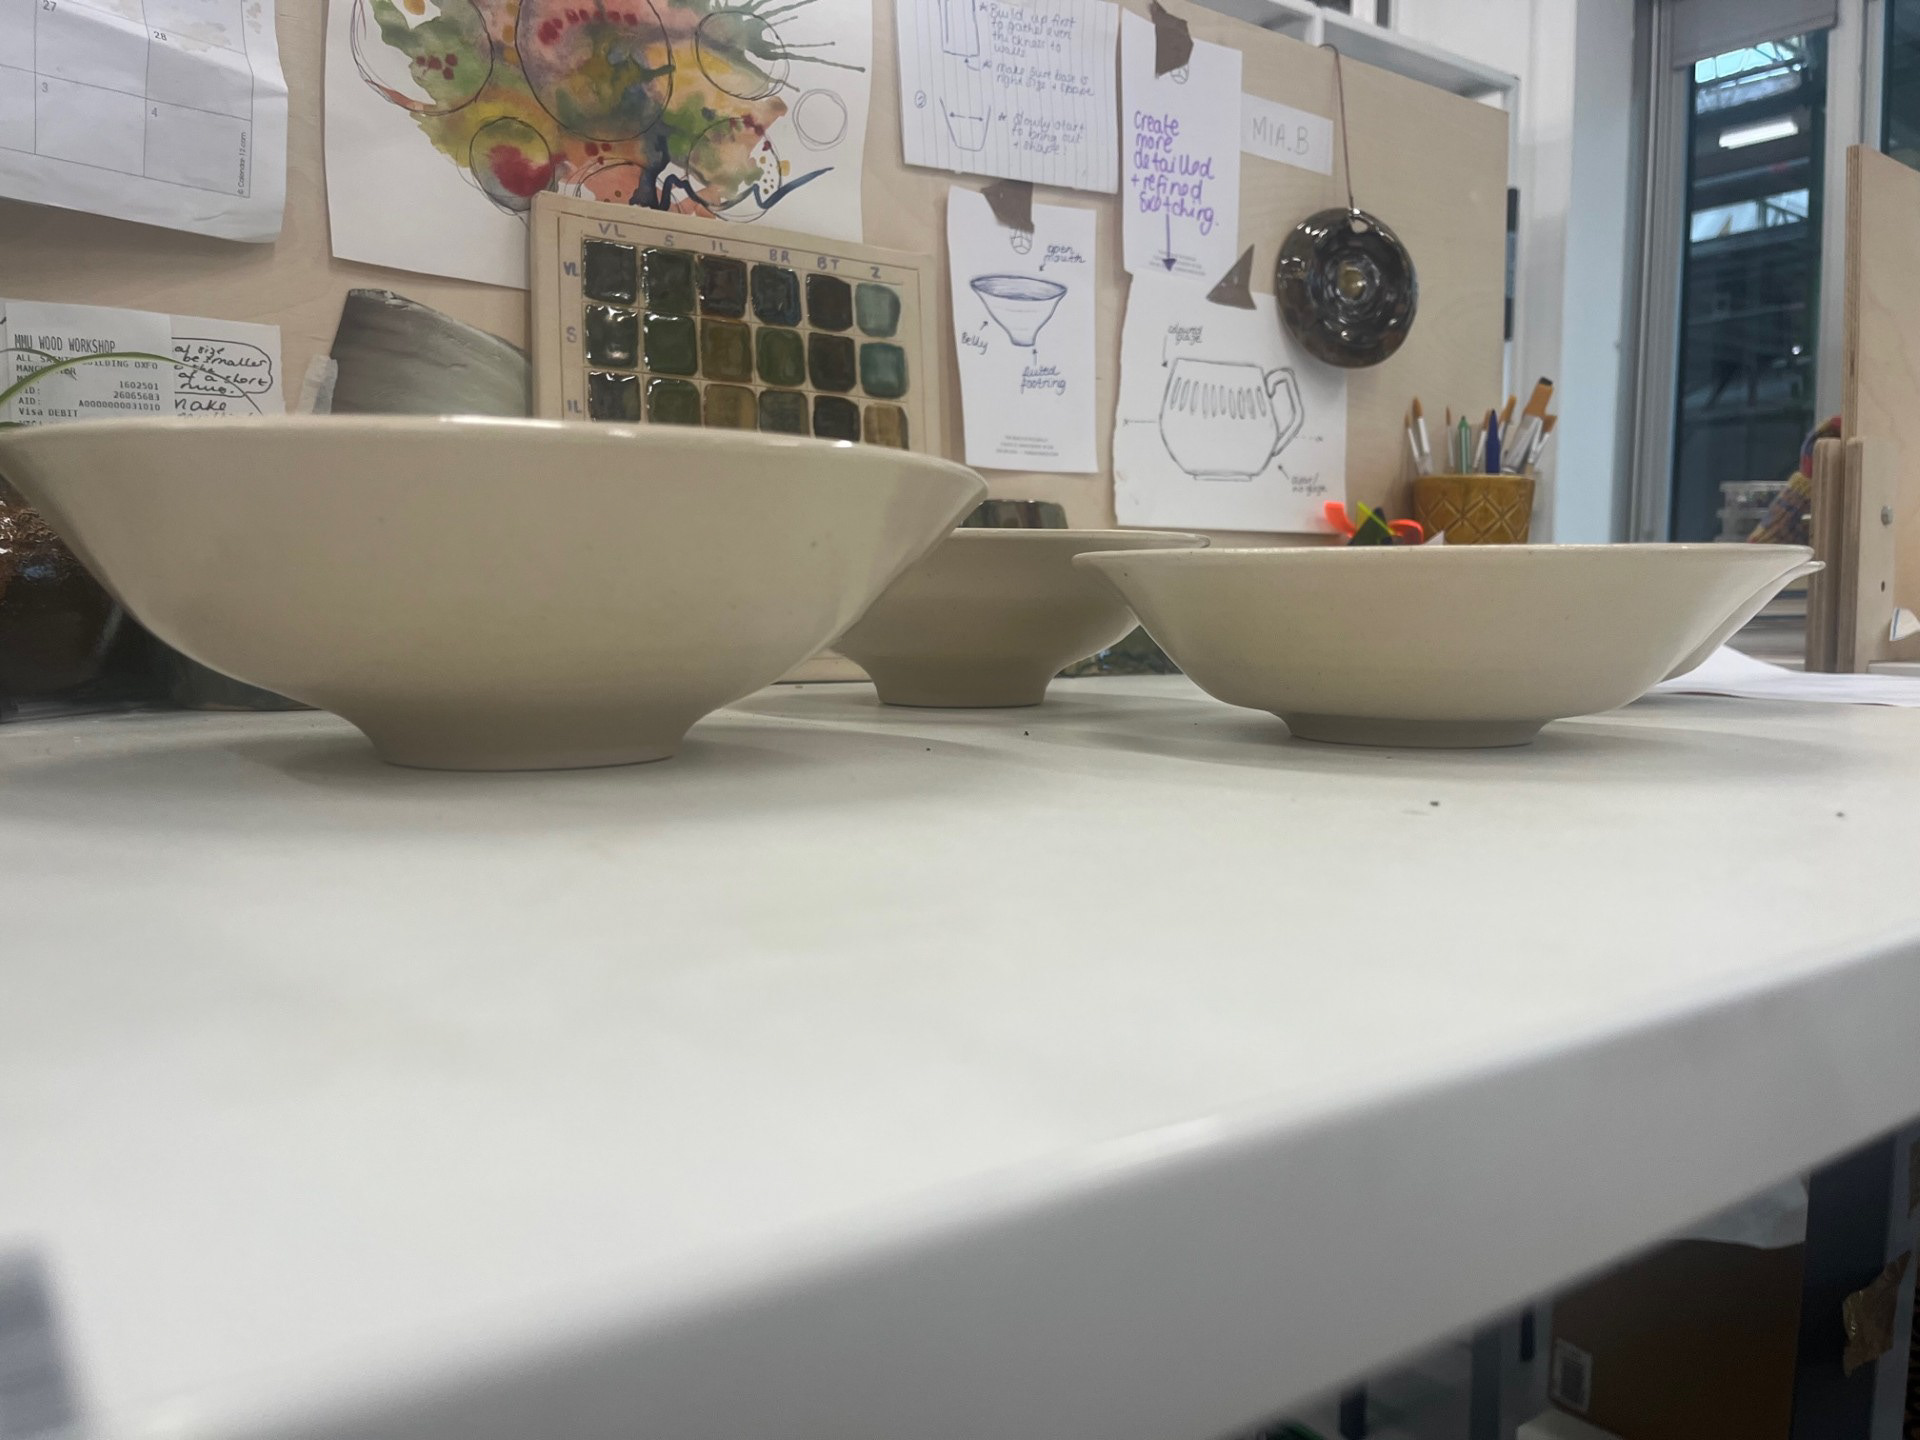
Practice Testing:
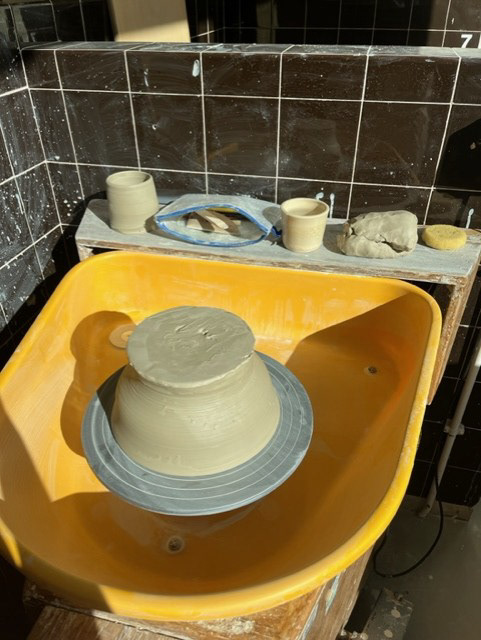
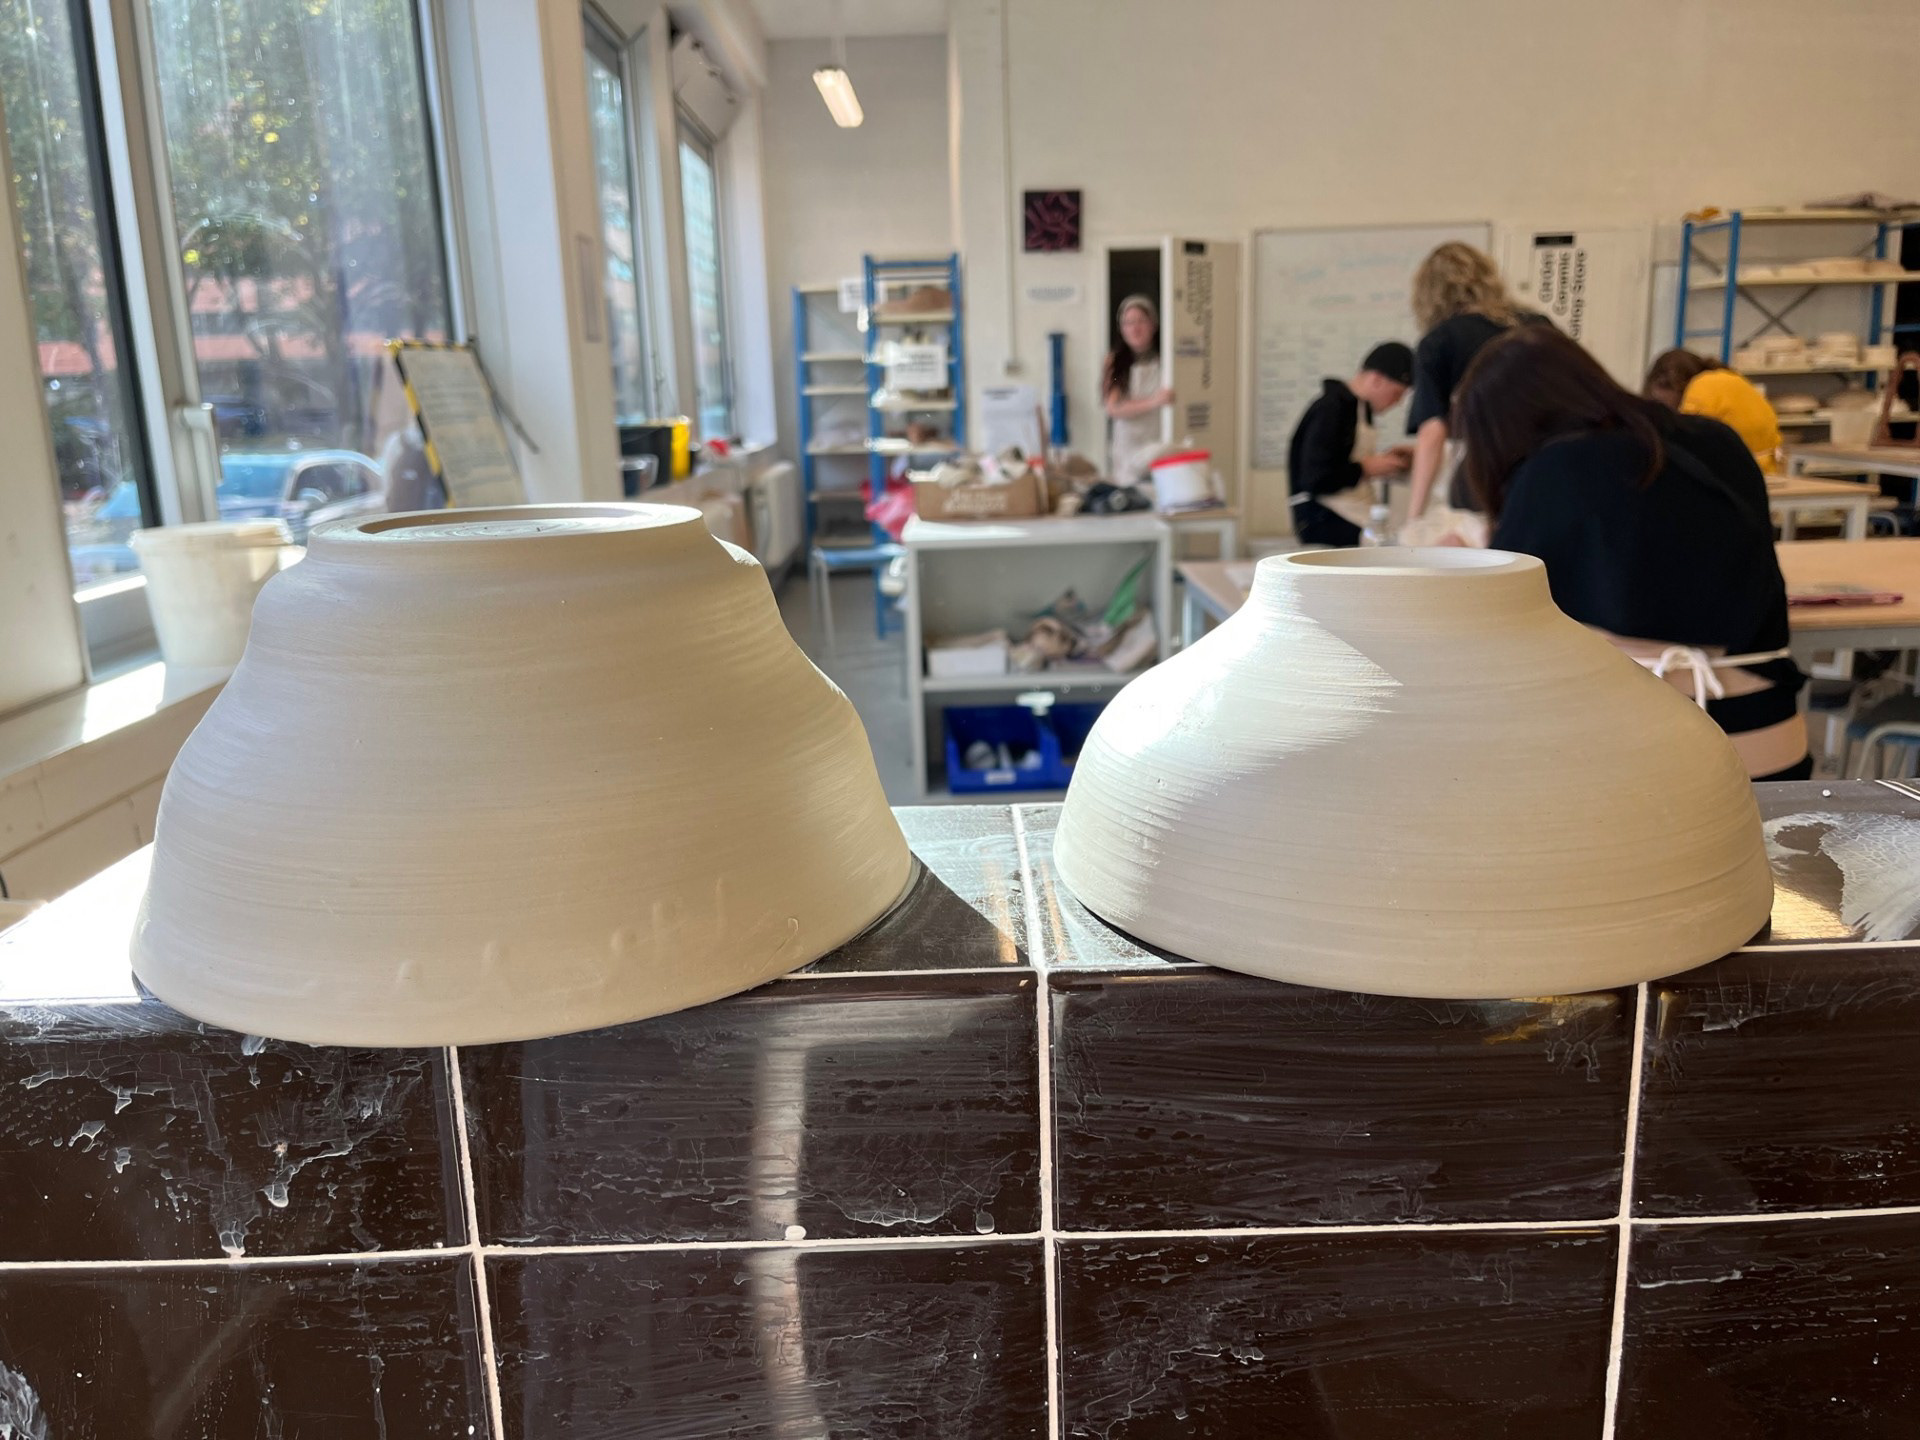
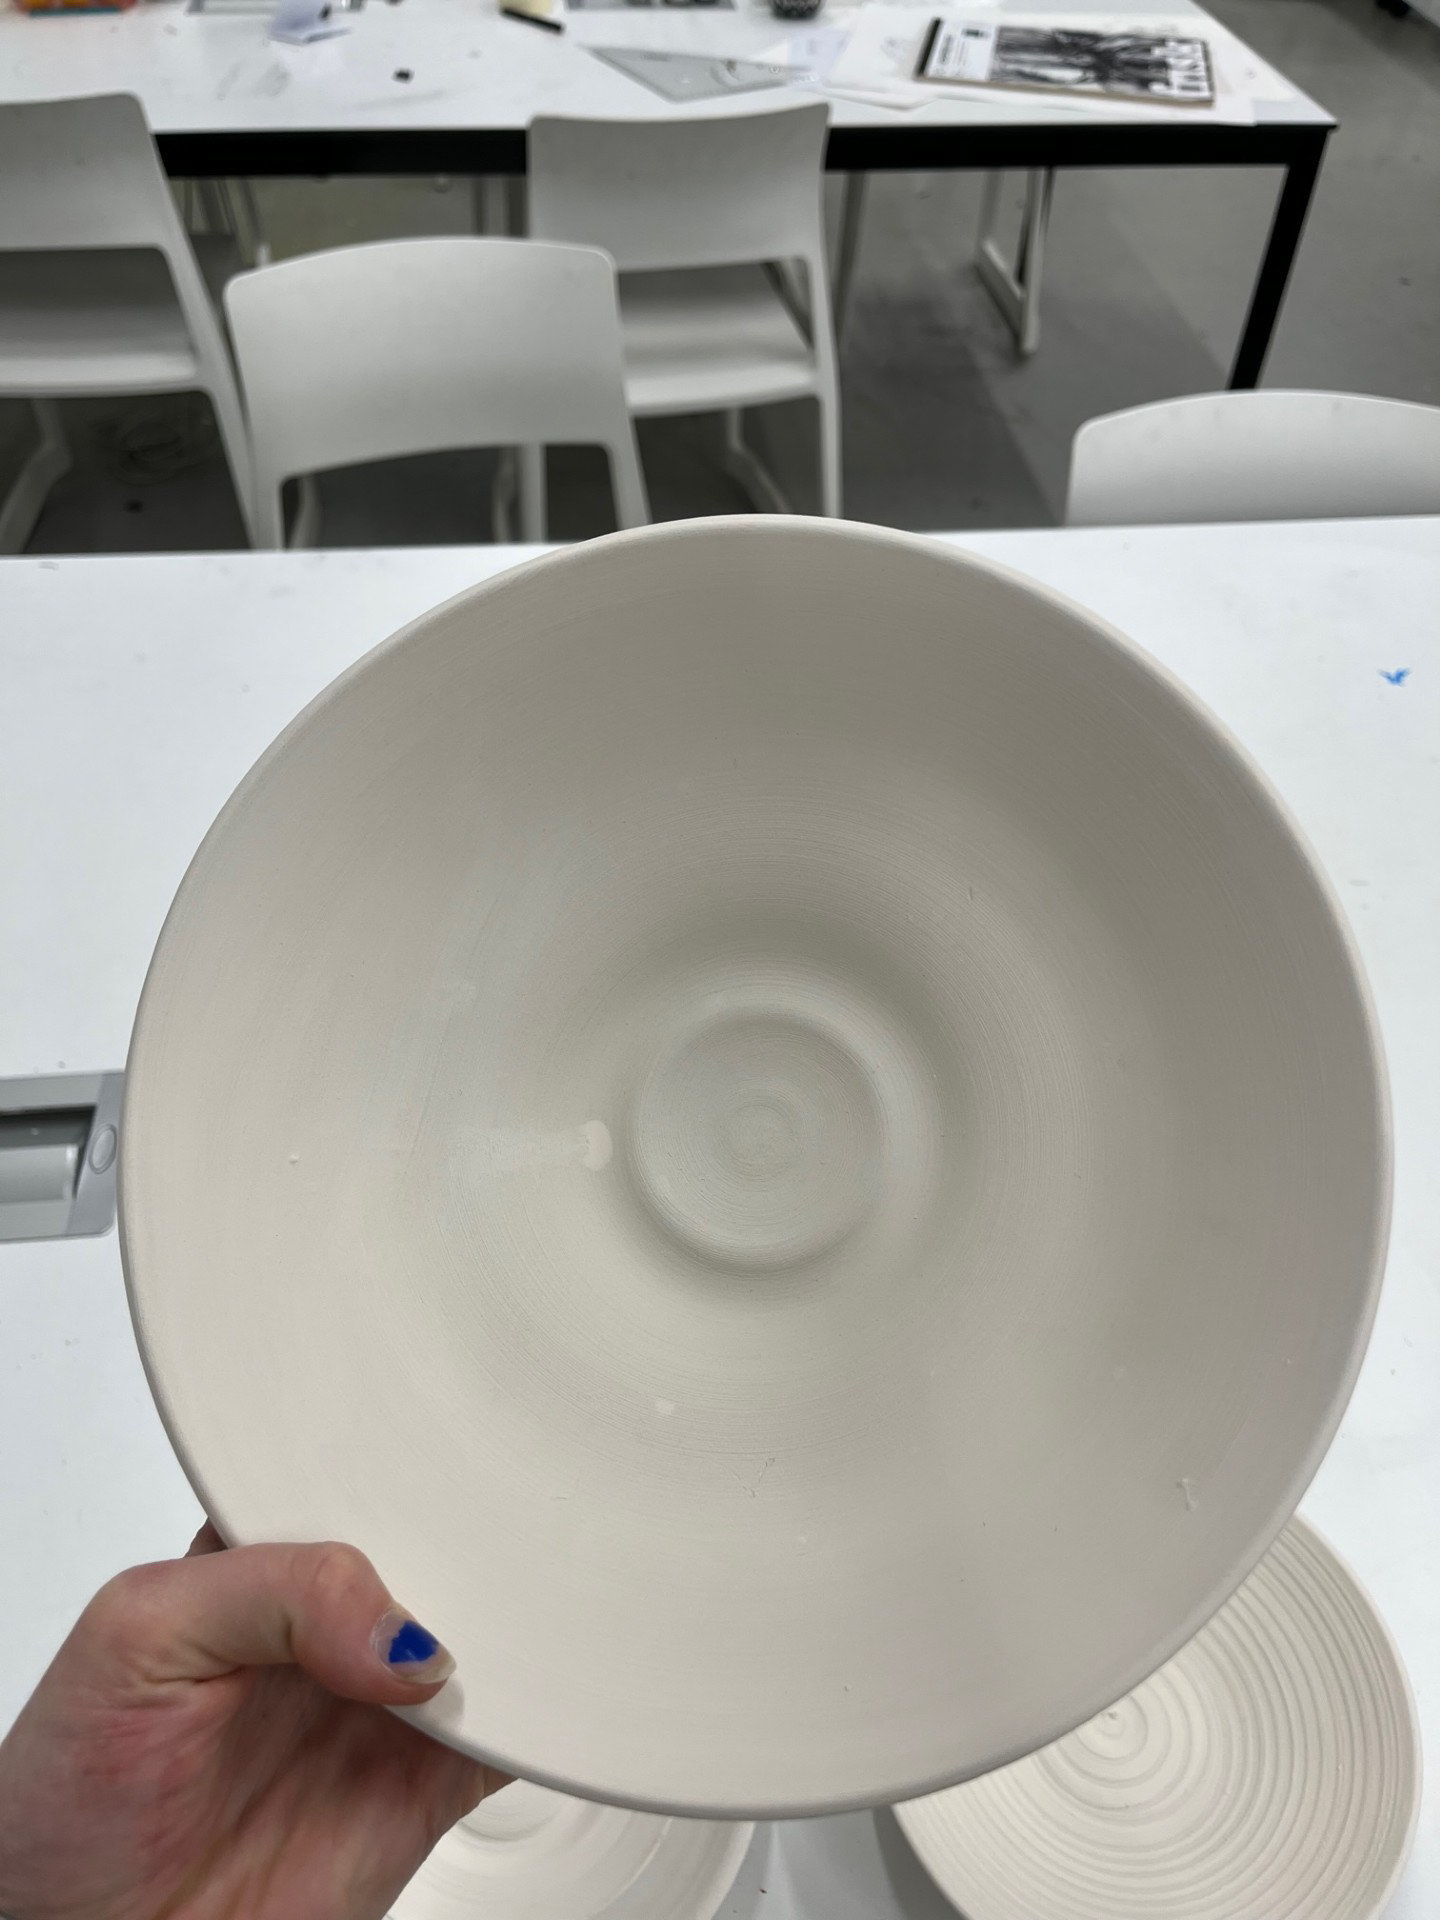
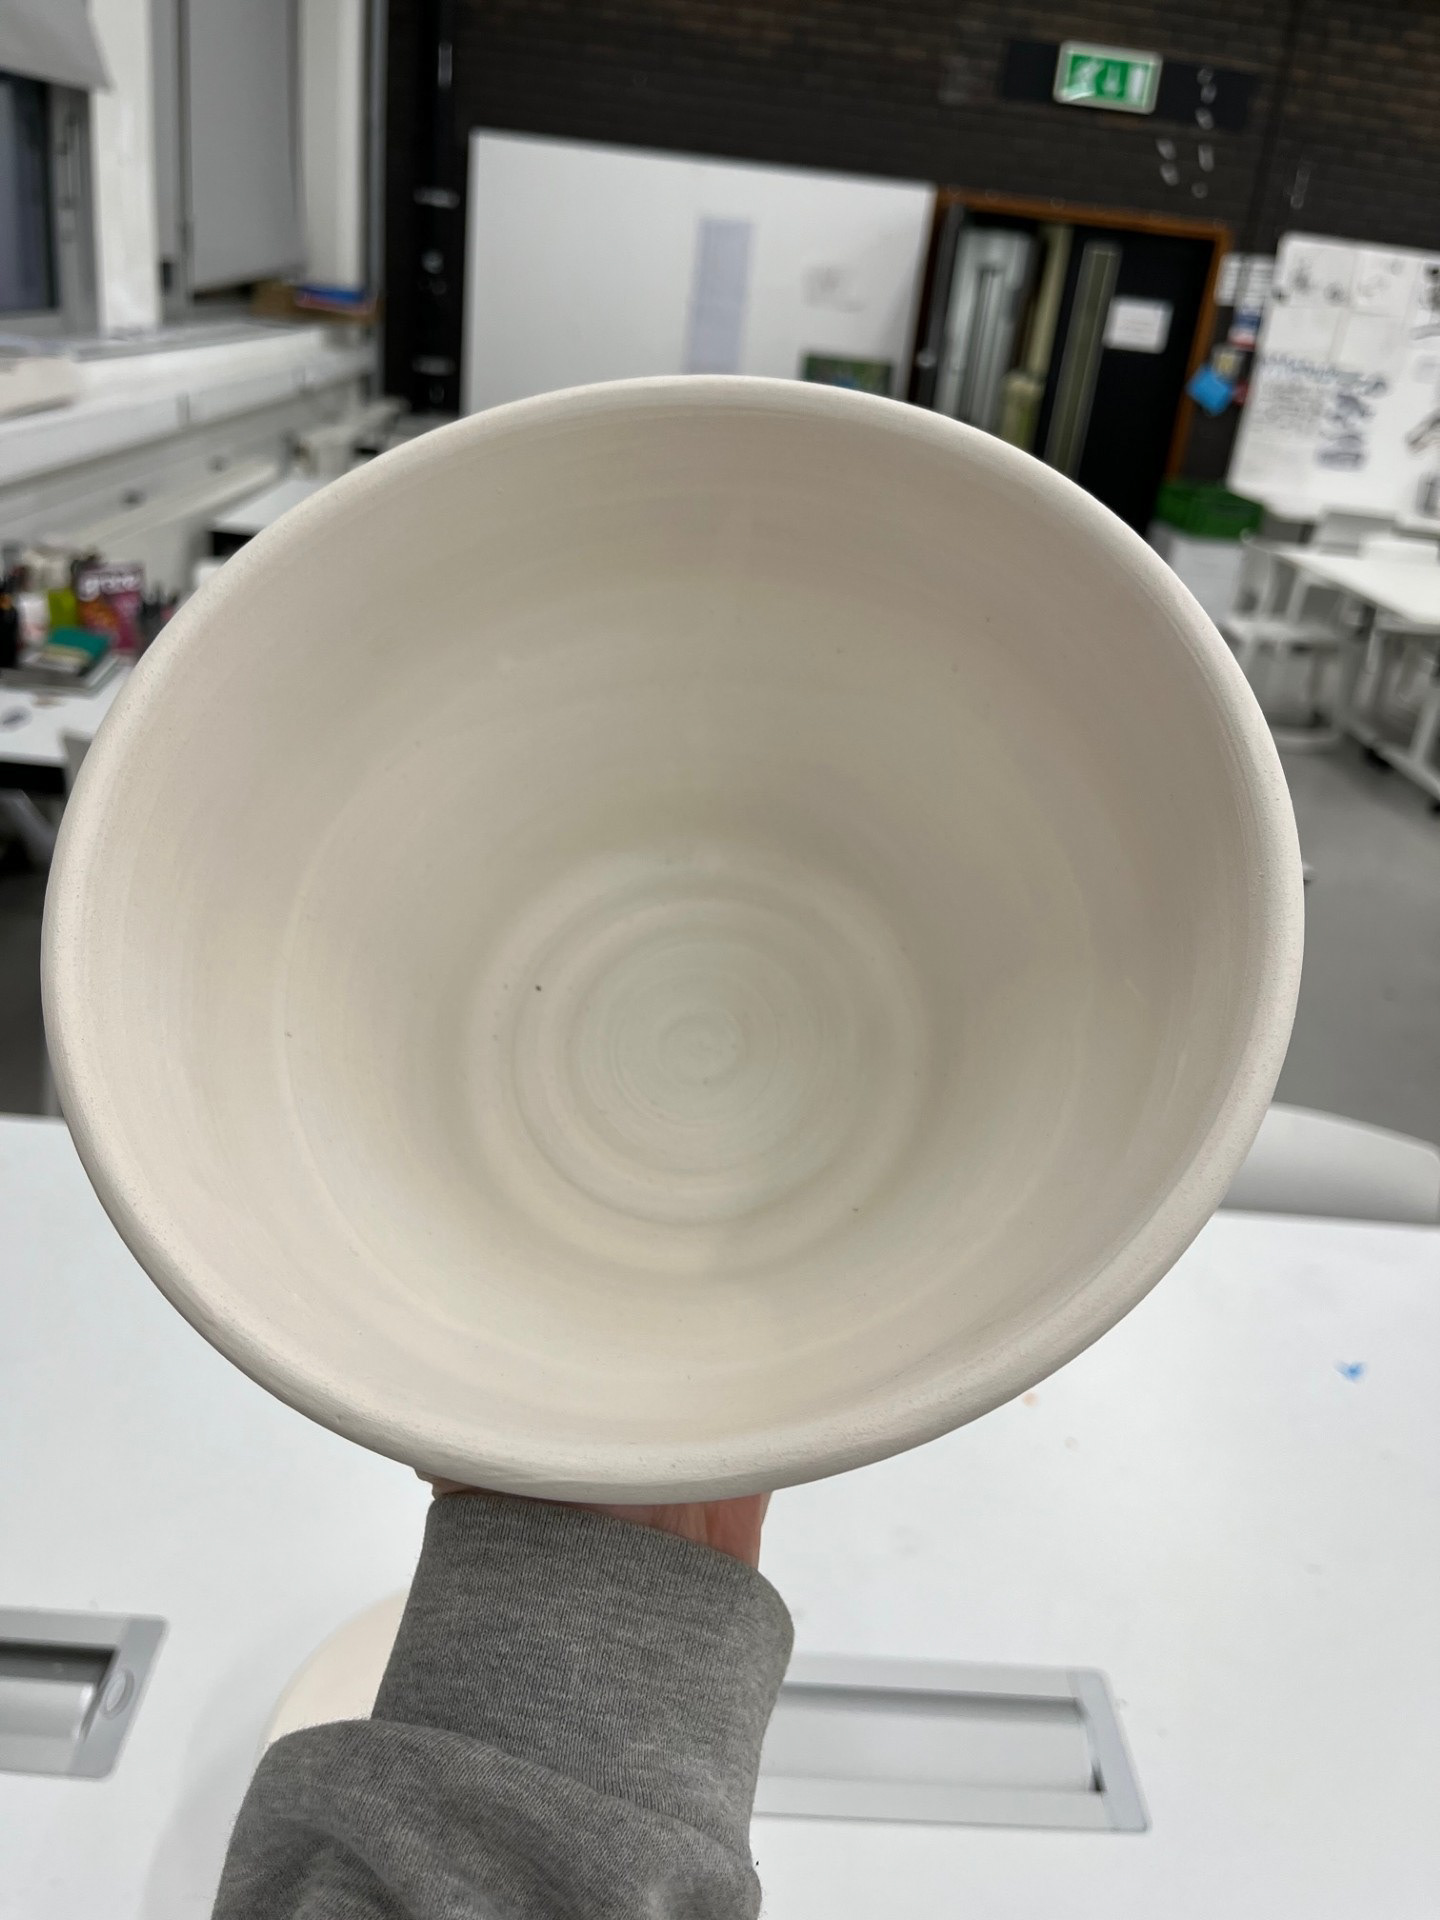
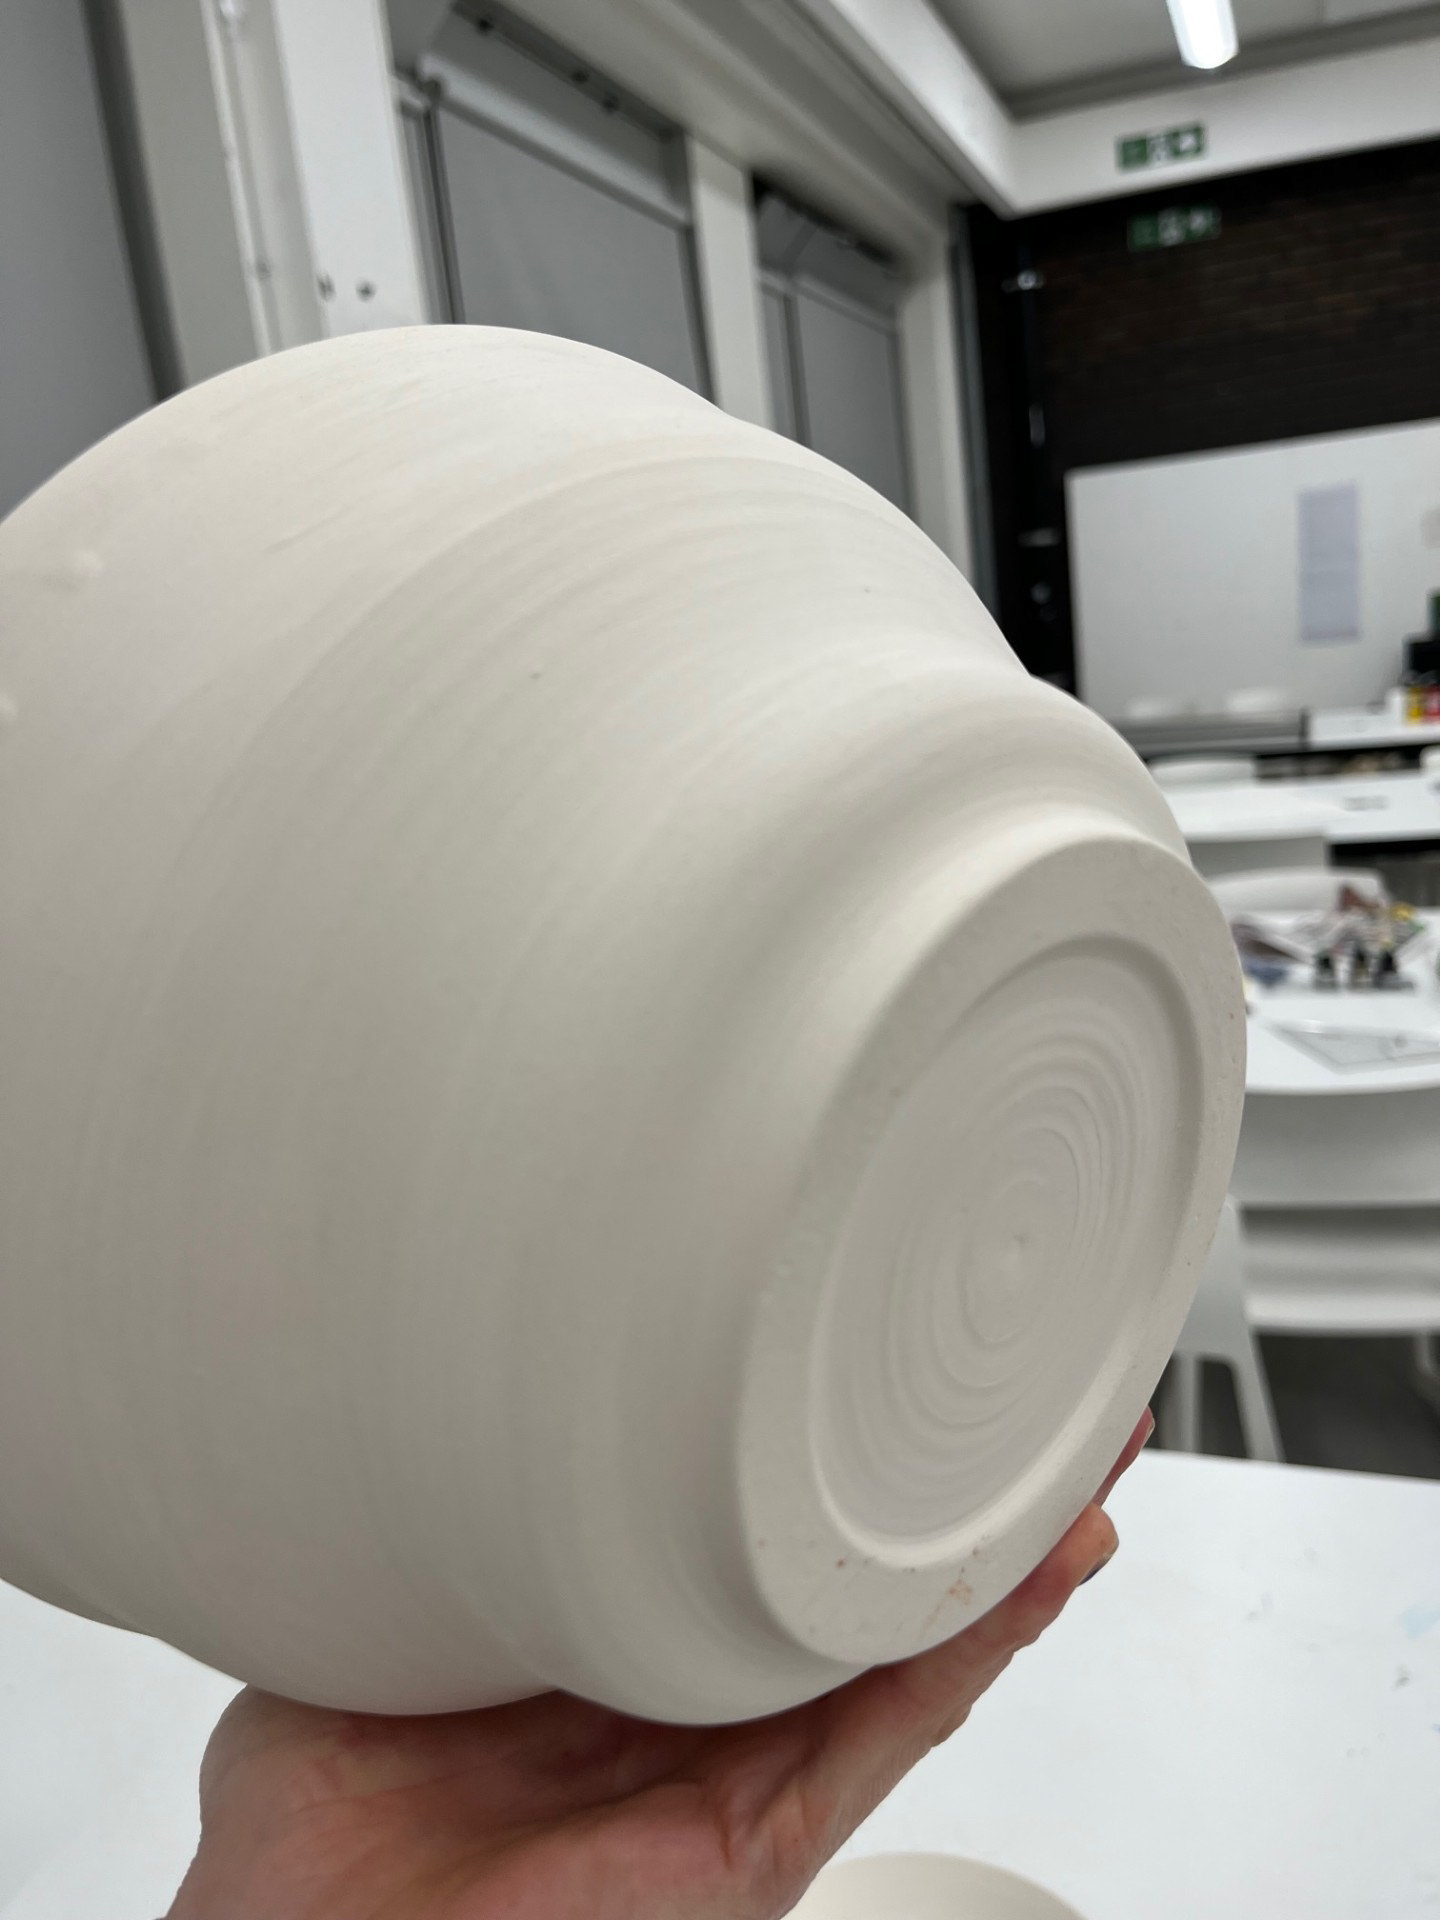
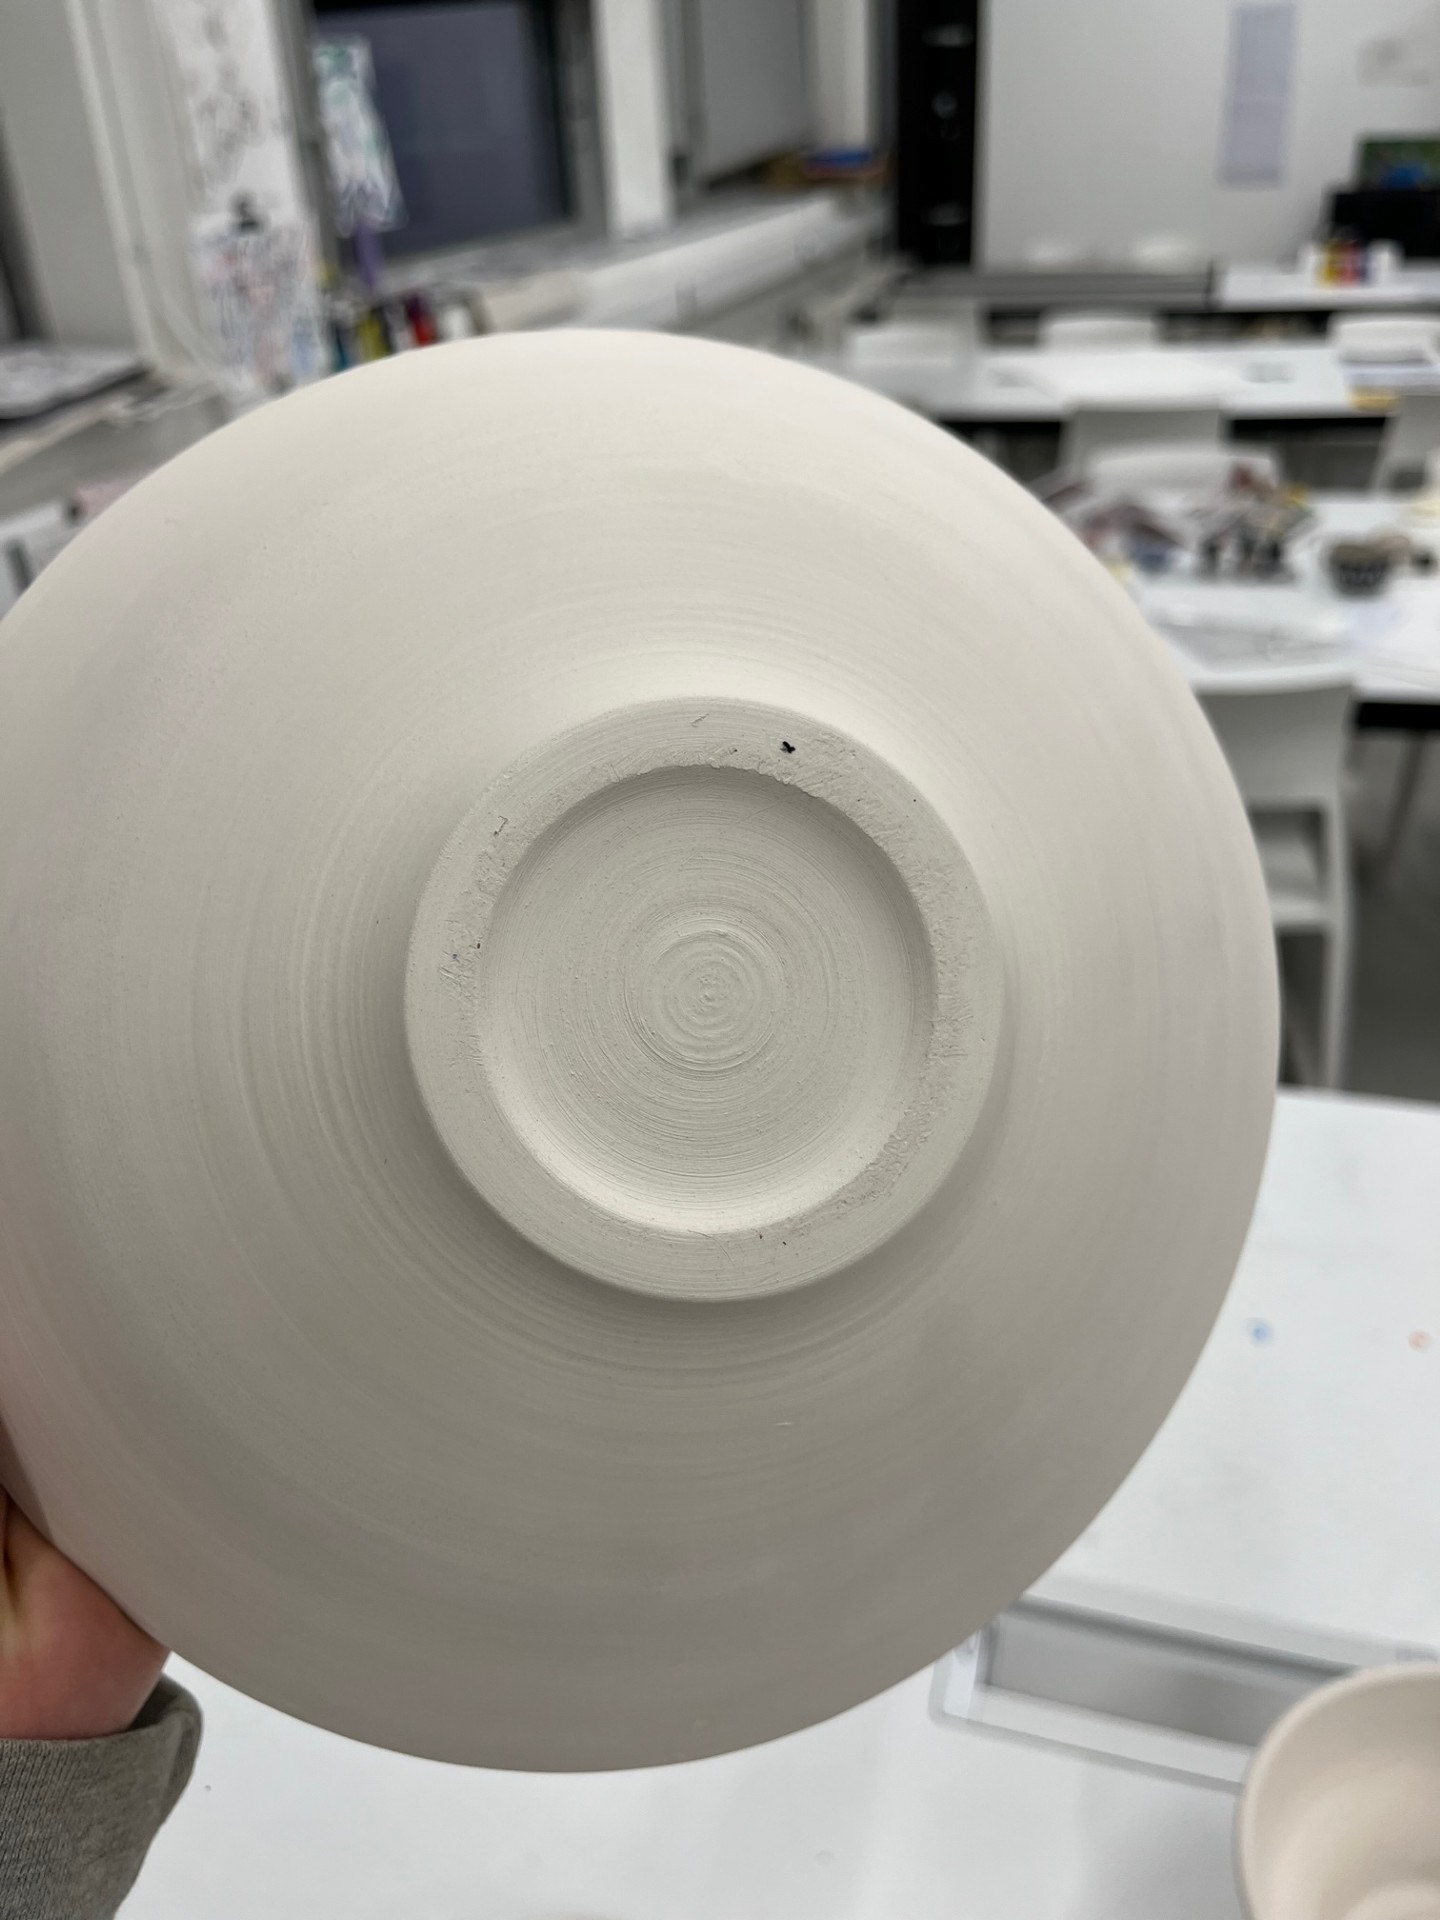
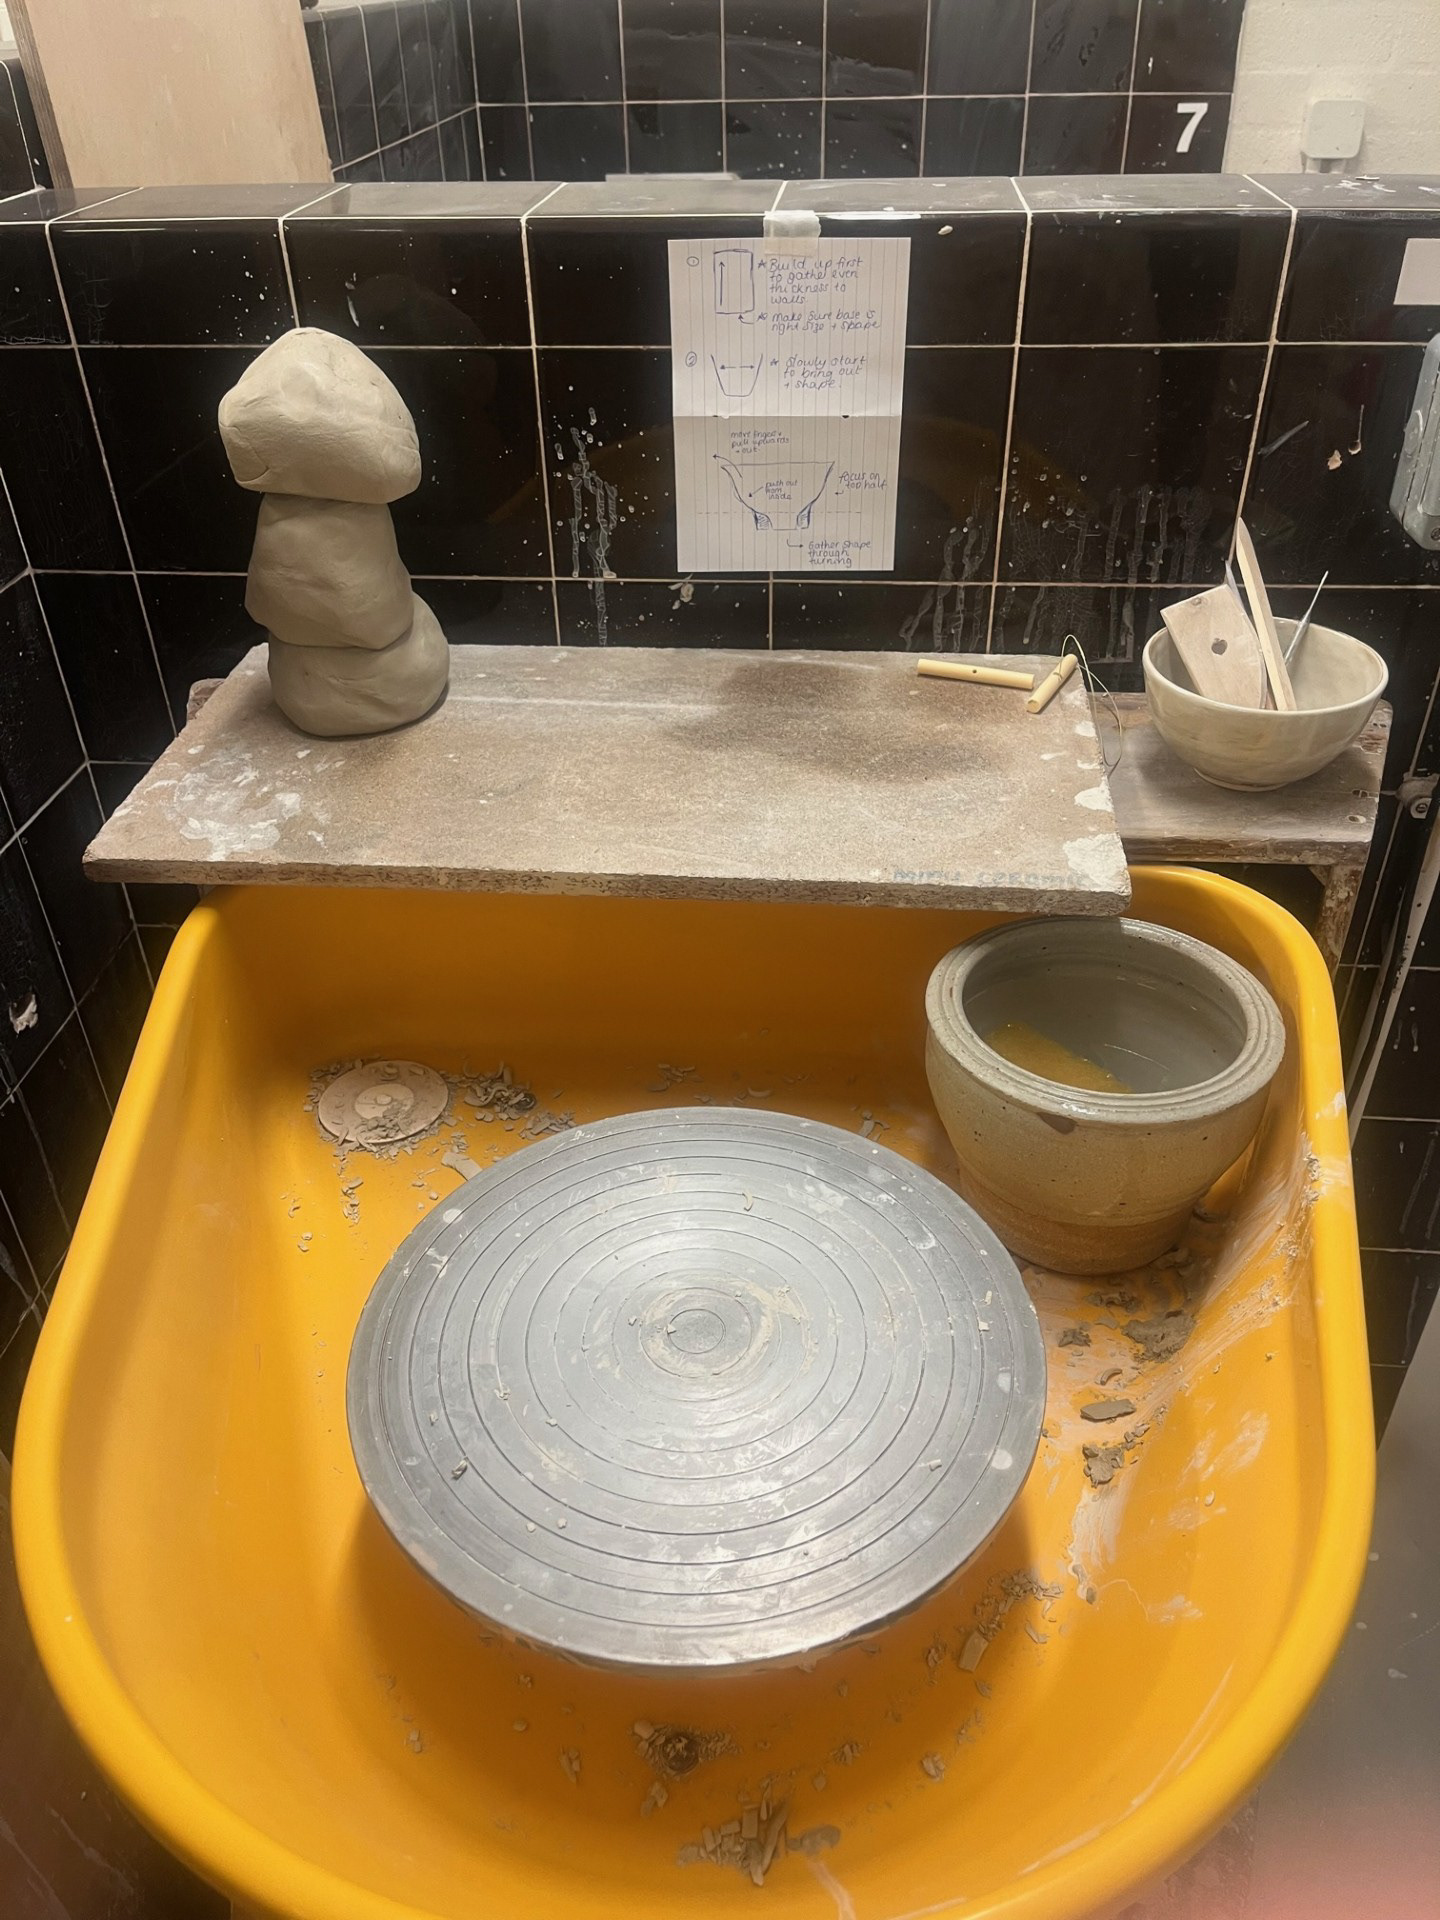
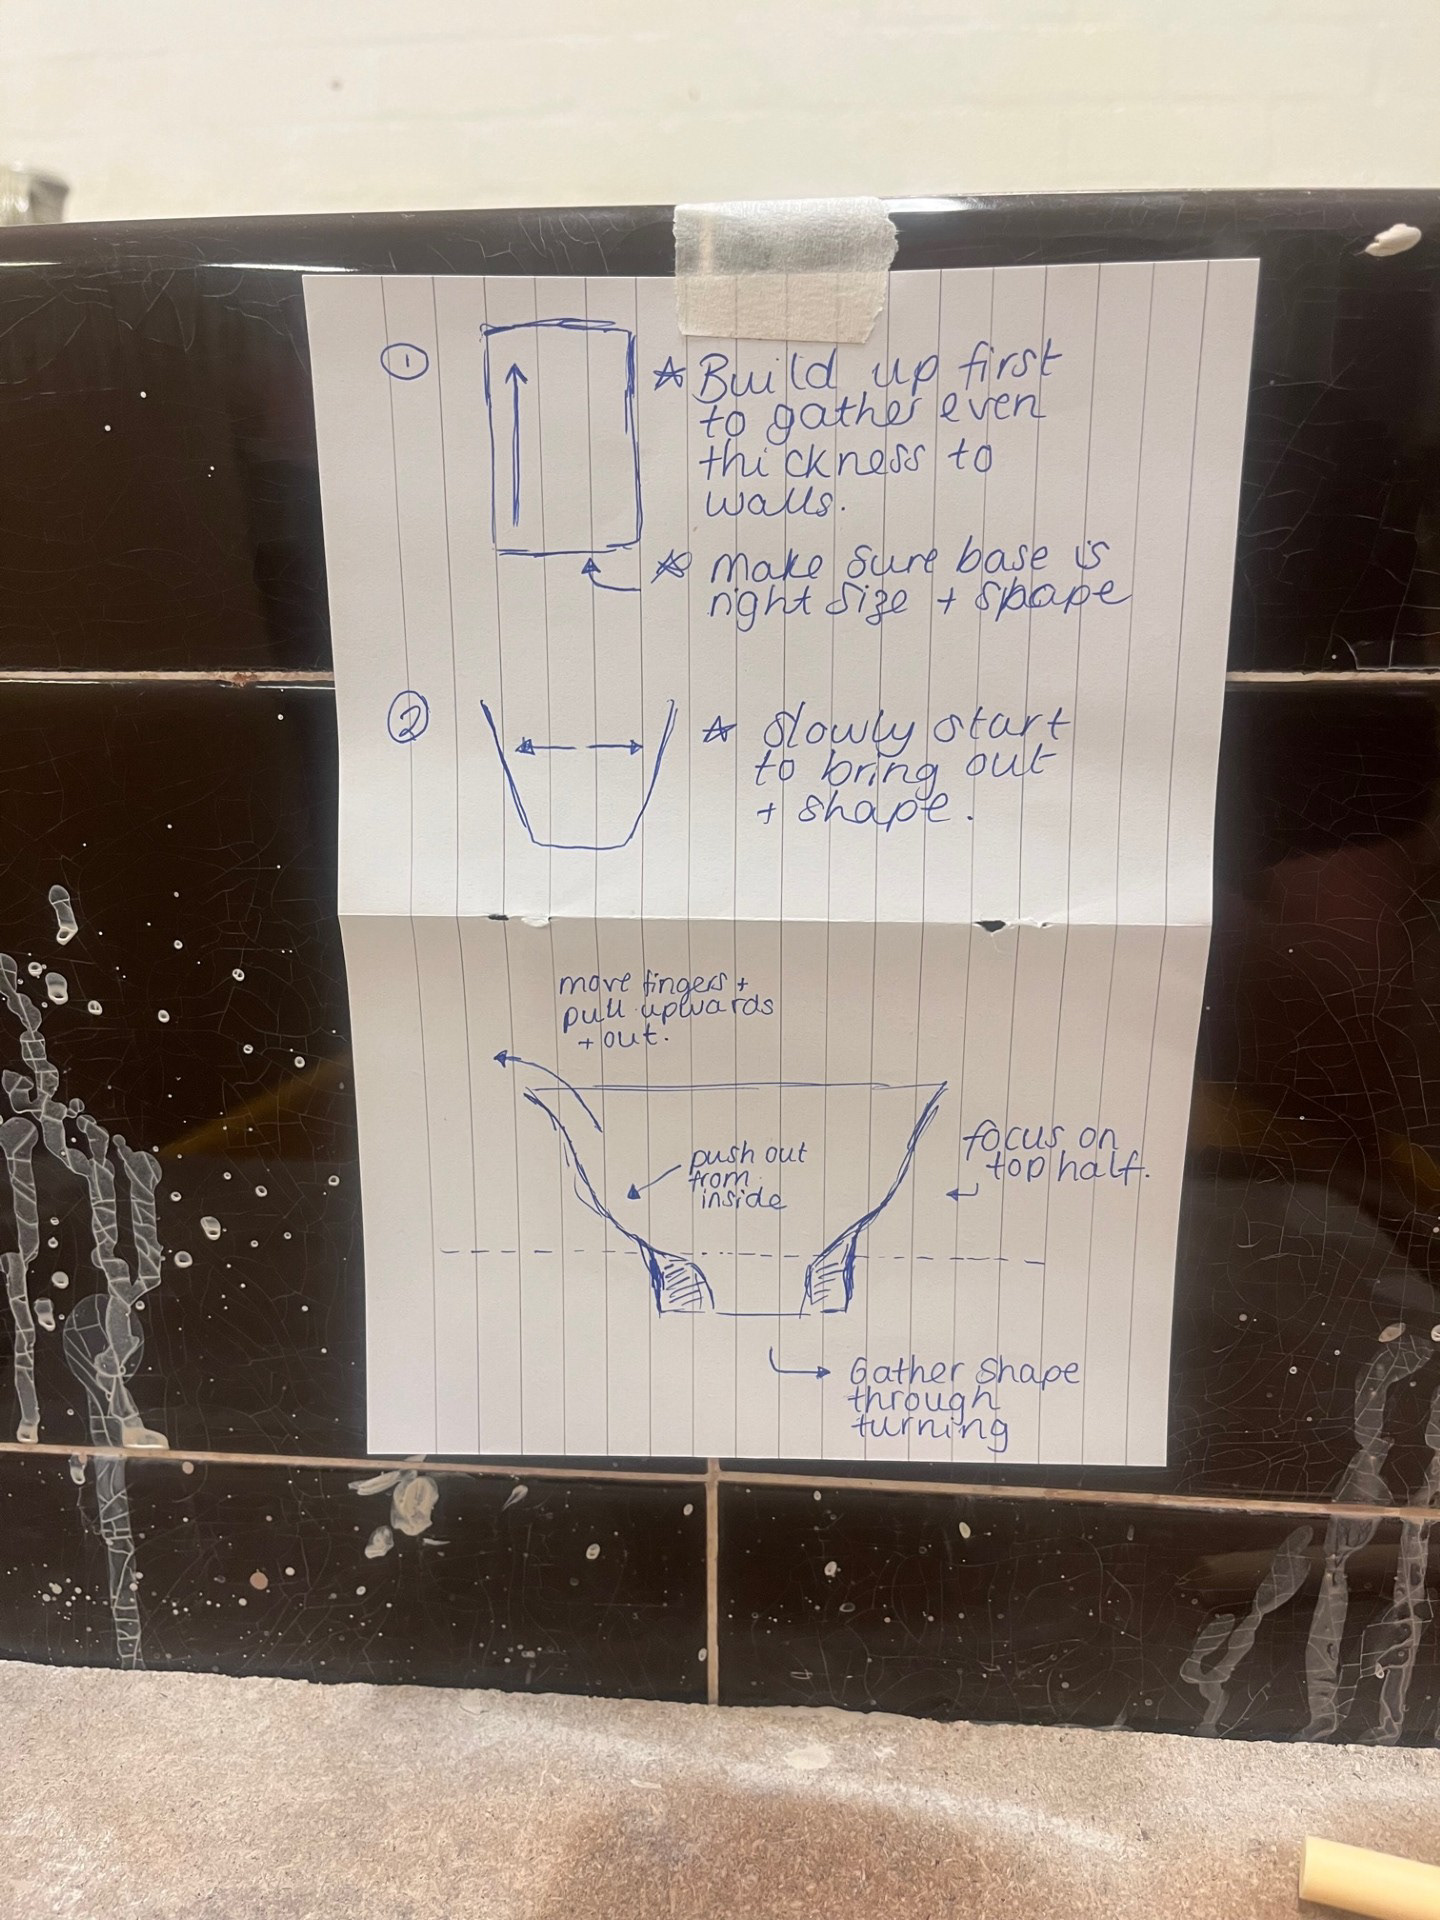
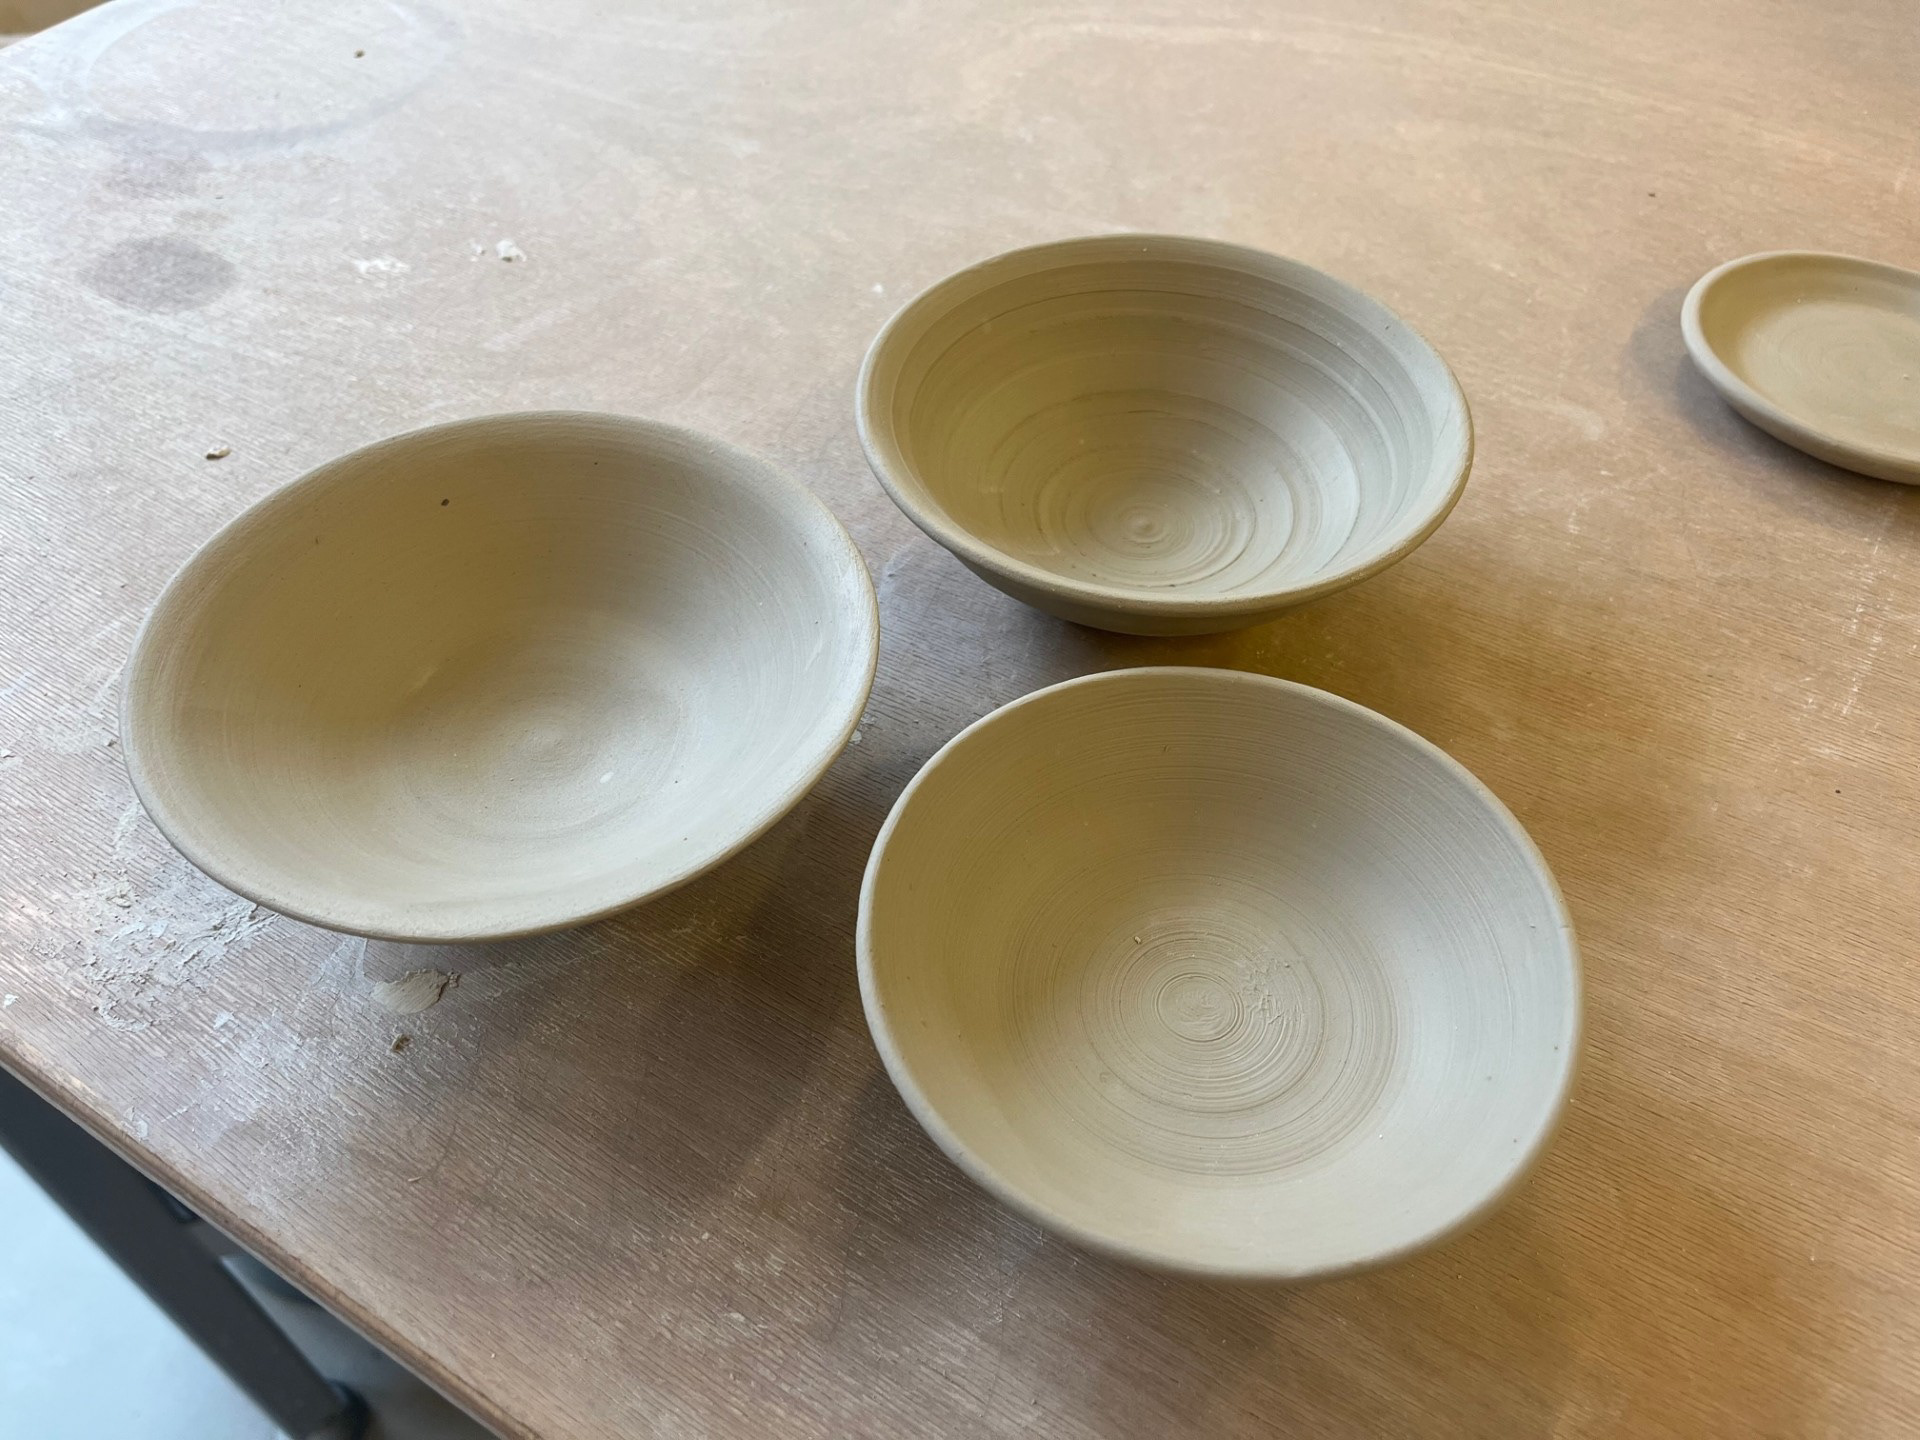
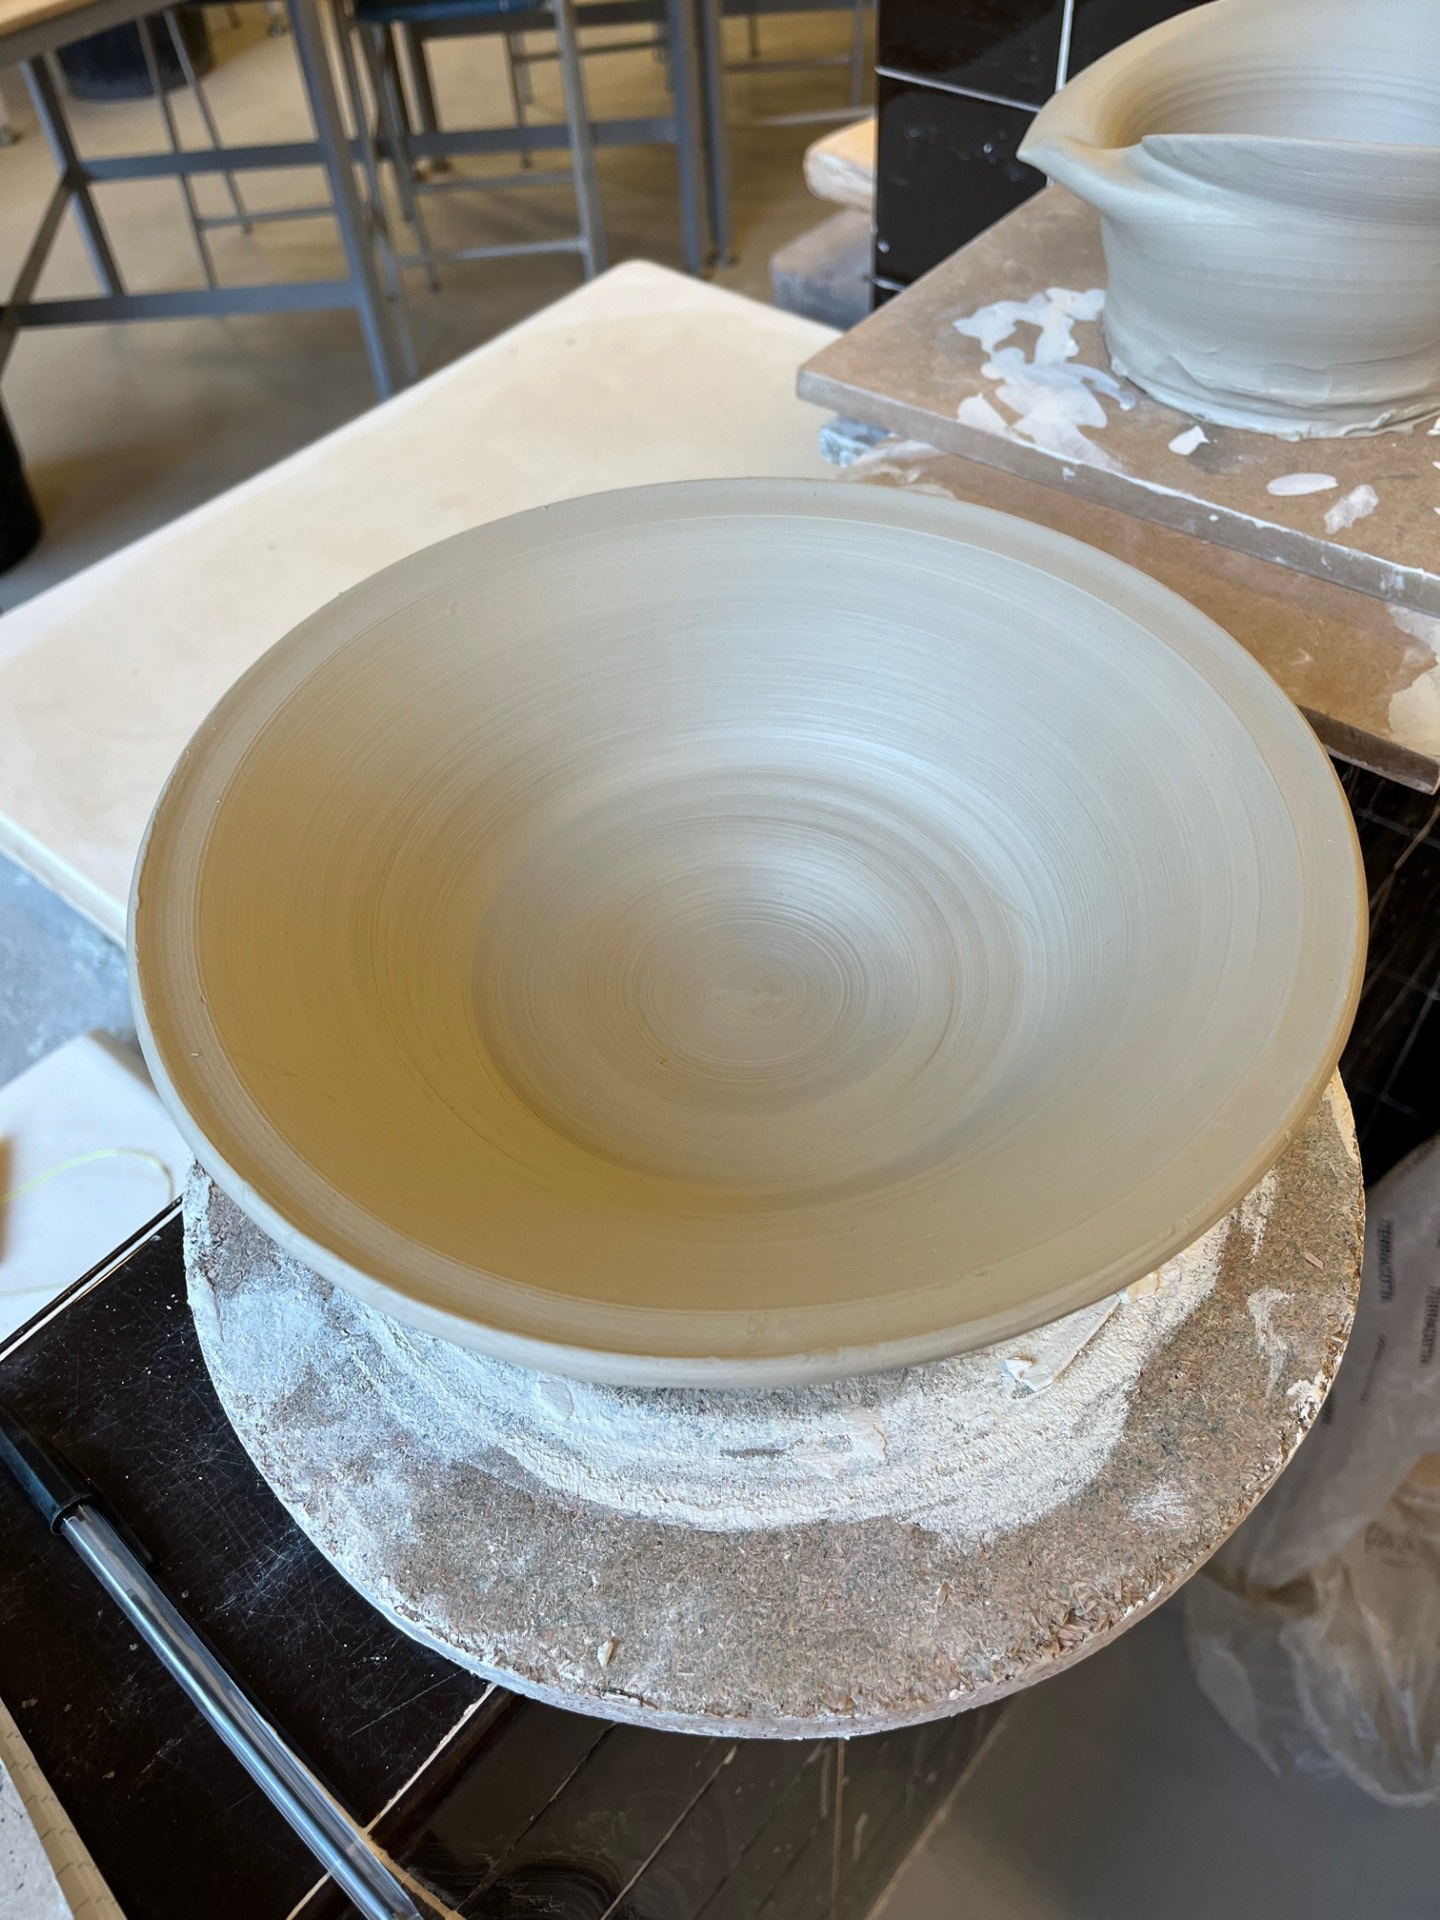
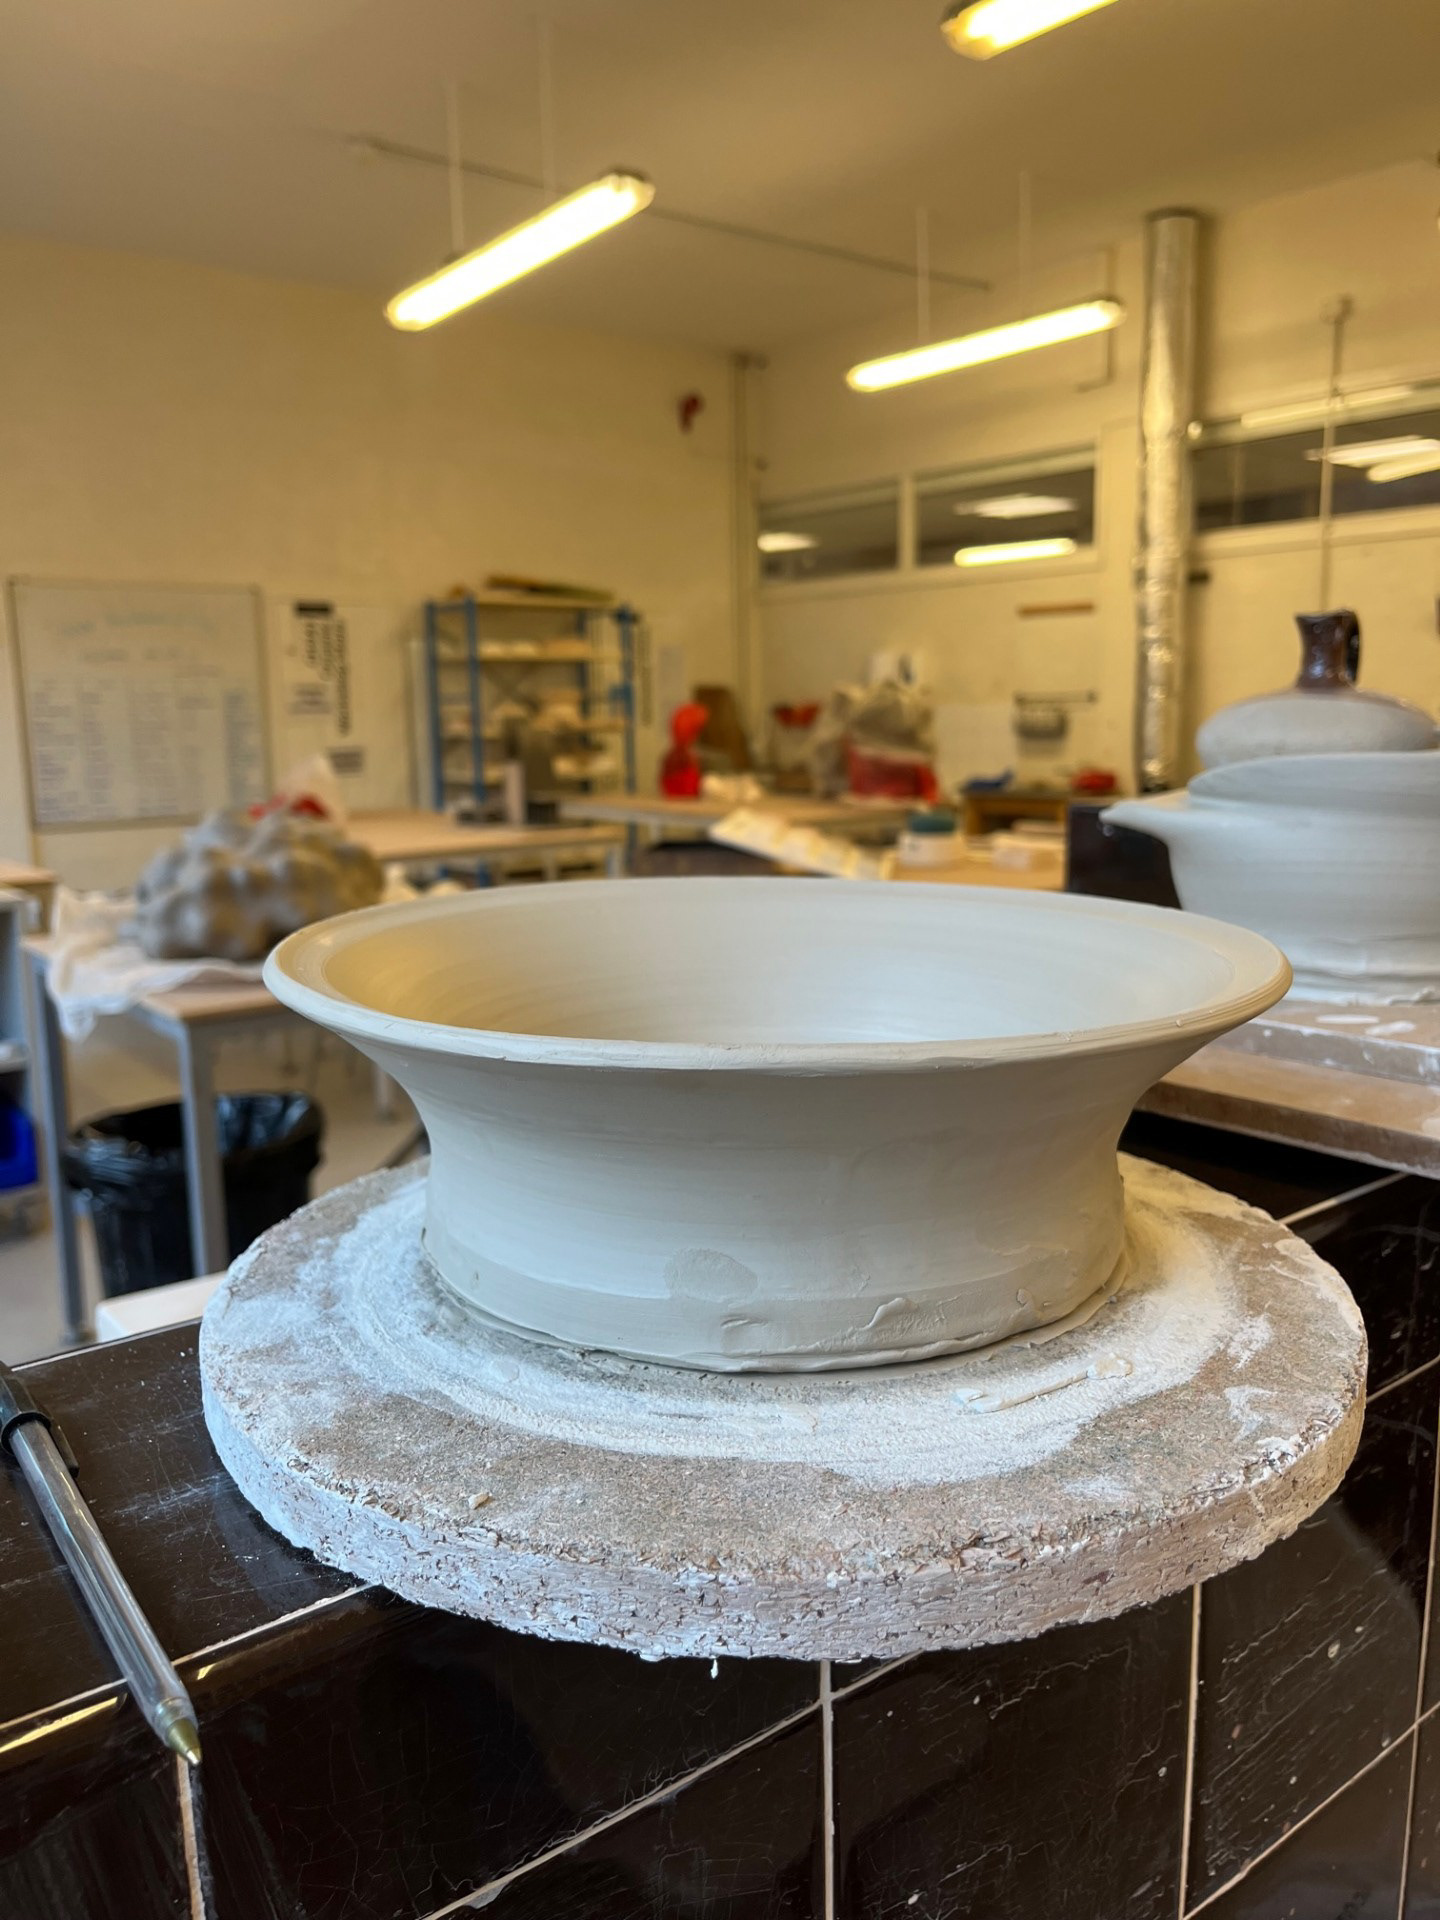
Since I have chosen my style of form that I want to stick with, I wanted to do a small sample batch testing my turning ability. I wanted to practice making different dishes that were of different shapes into bowls with the belly and the fluted bottom. During this process, although for some of them I wasn't able o complete a full foot ring due to there not being enough space on the base which wasn't ideal. However, I knew before this began that that wasn't my main priority because I wanted to really hone in on the skill of creating the silhouette; figure out what my hands do at every point, look at how my fingers rotate the tool and then ask myself, how could I do that in a smother and more efficient way? In this practical section, although I am looking at a specific form, i dont really mind if they are slightly different as at this stage in my throwing journey, the main think that I want to achieve is those repeatable features: fluted foot ring, bellied middle and opened mouth.

Chosen Form
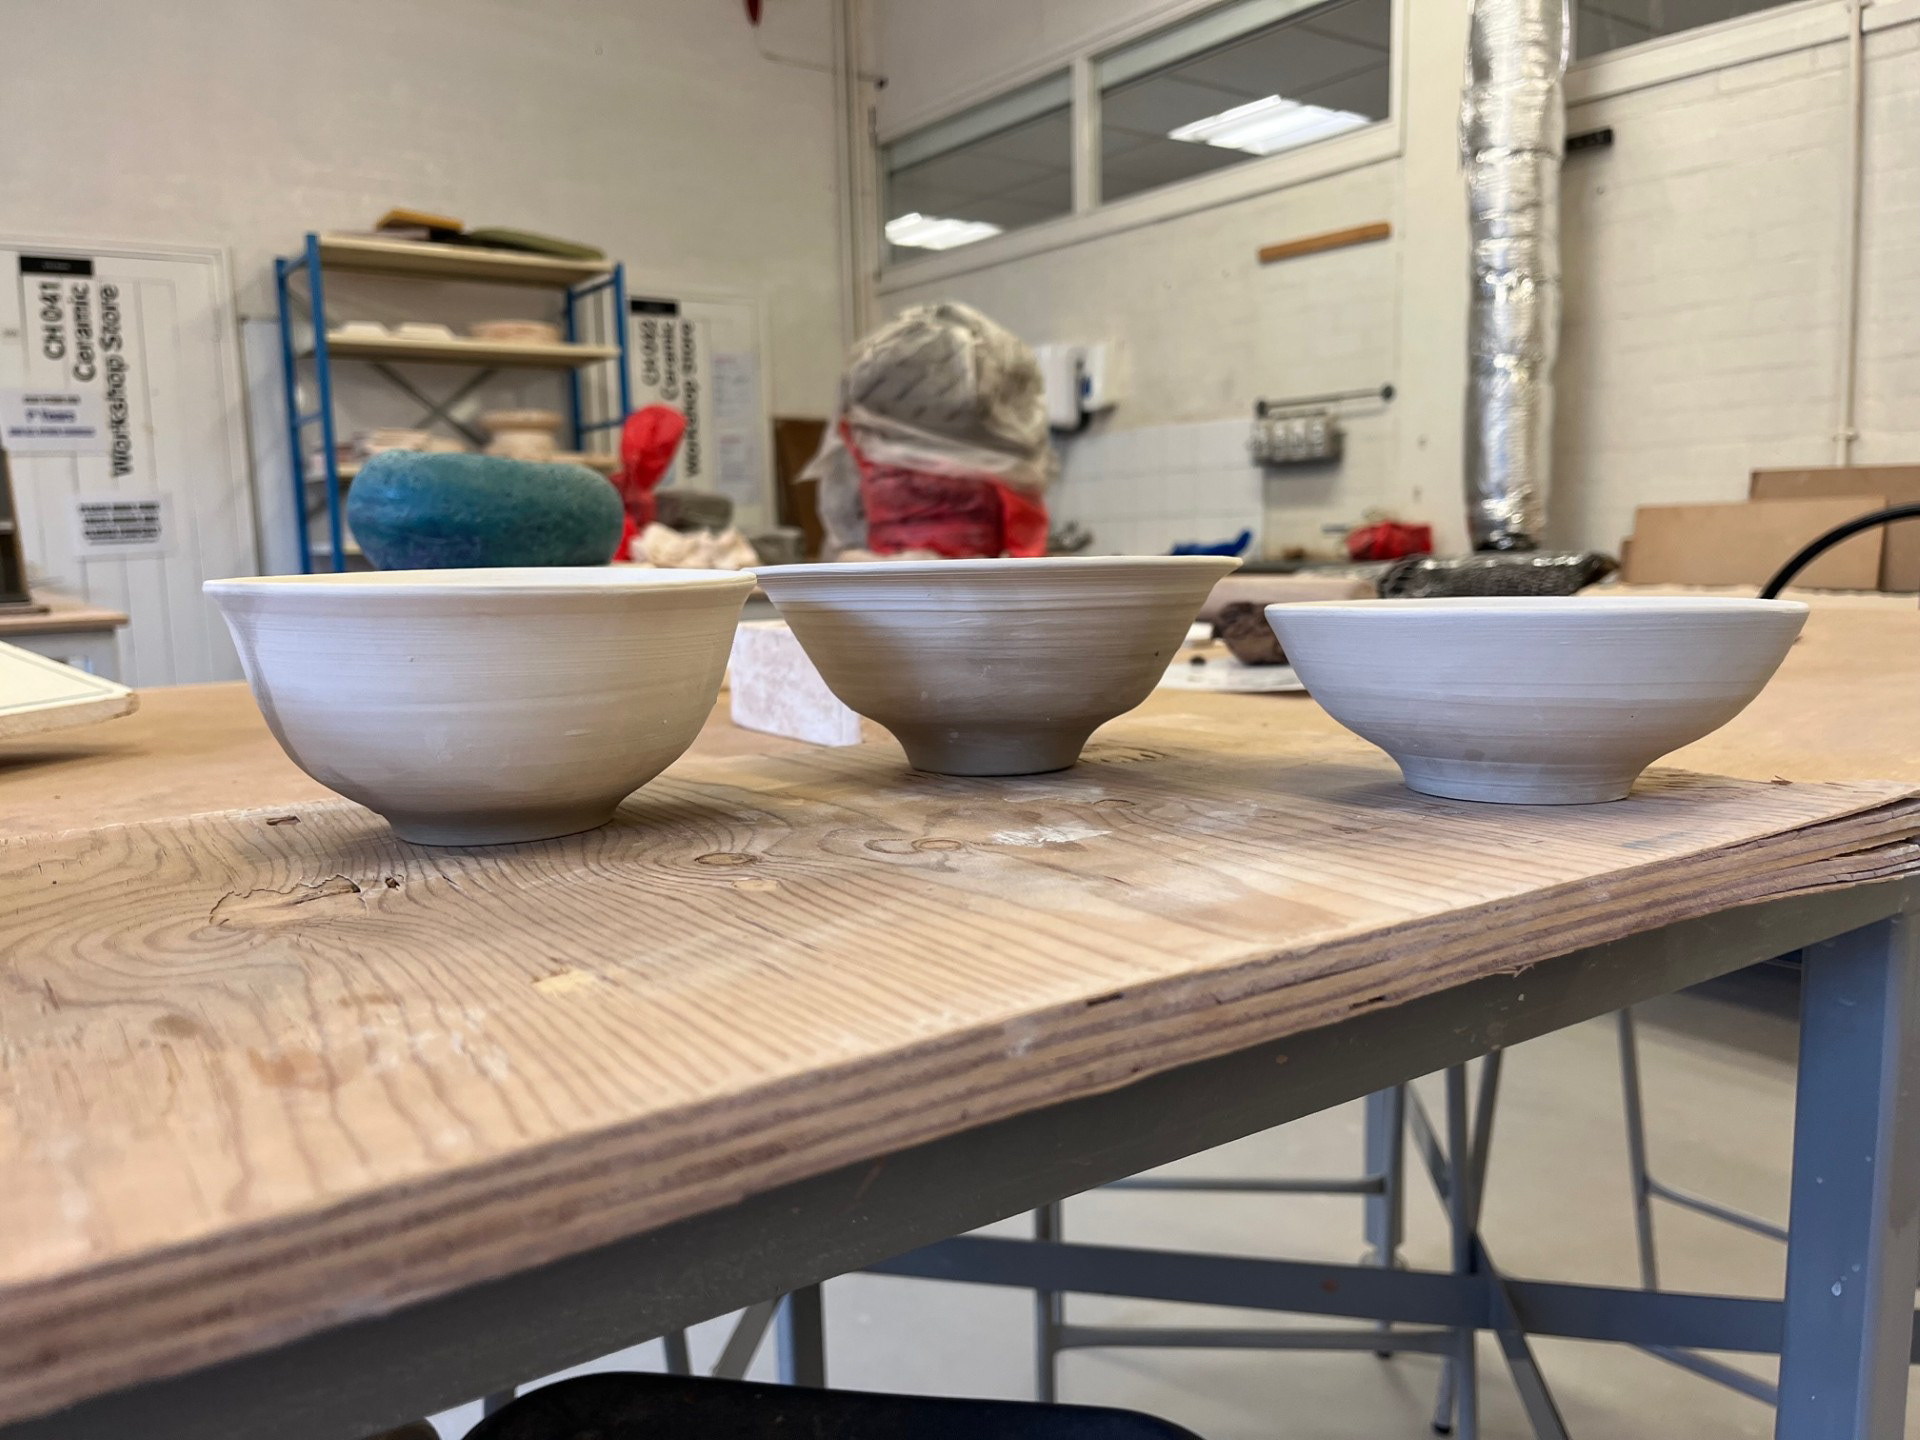
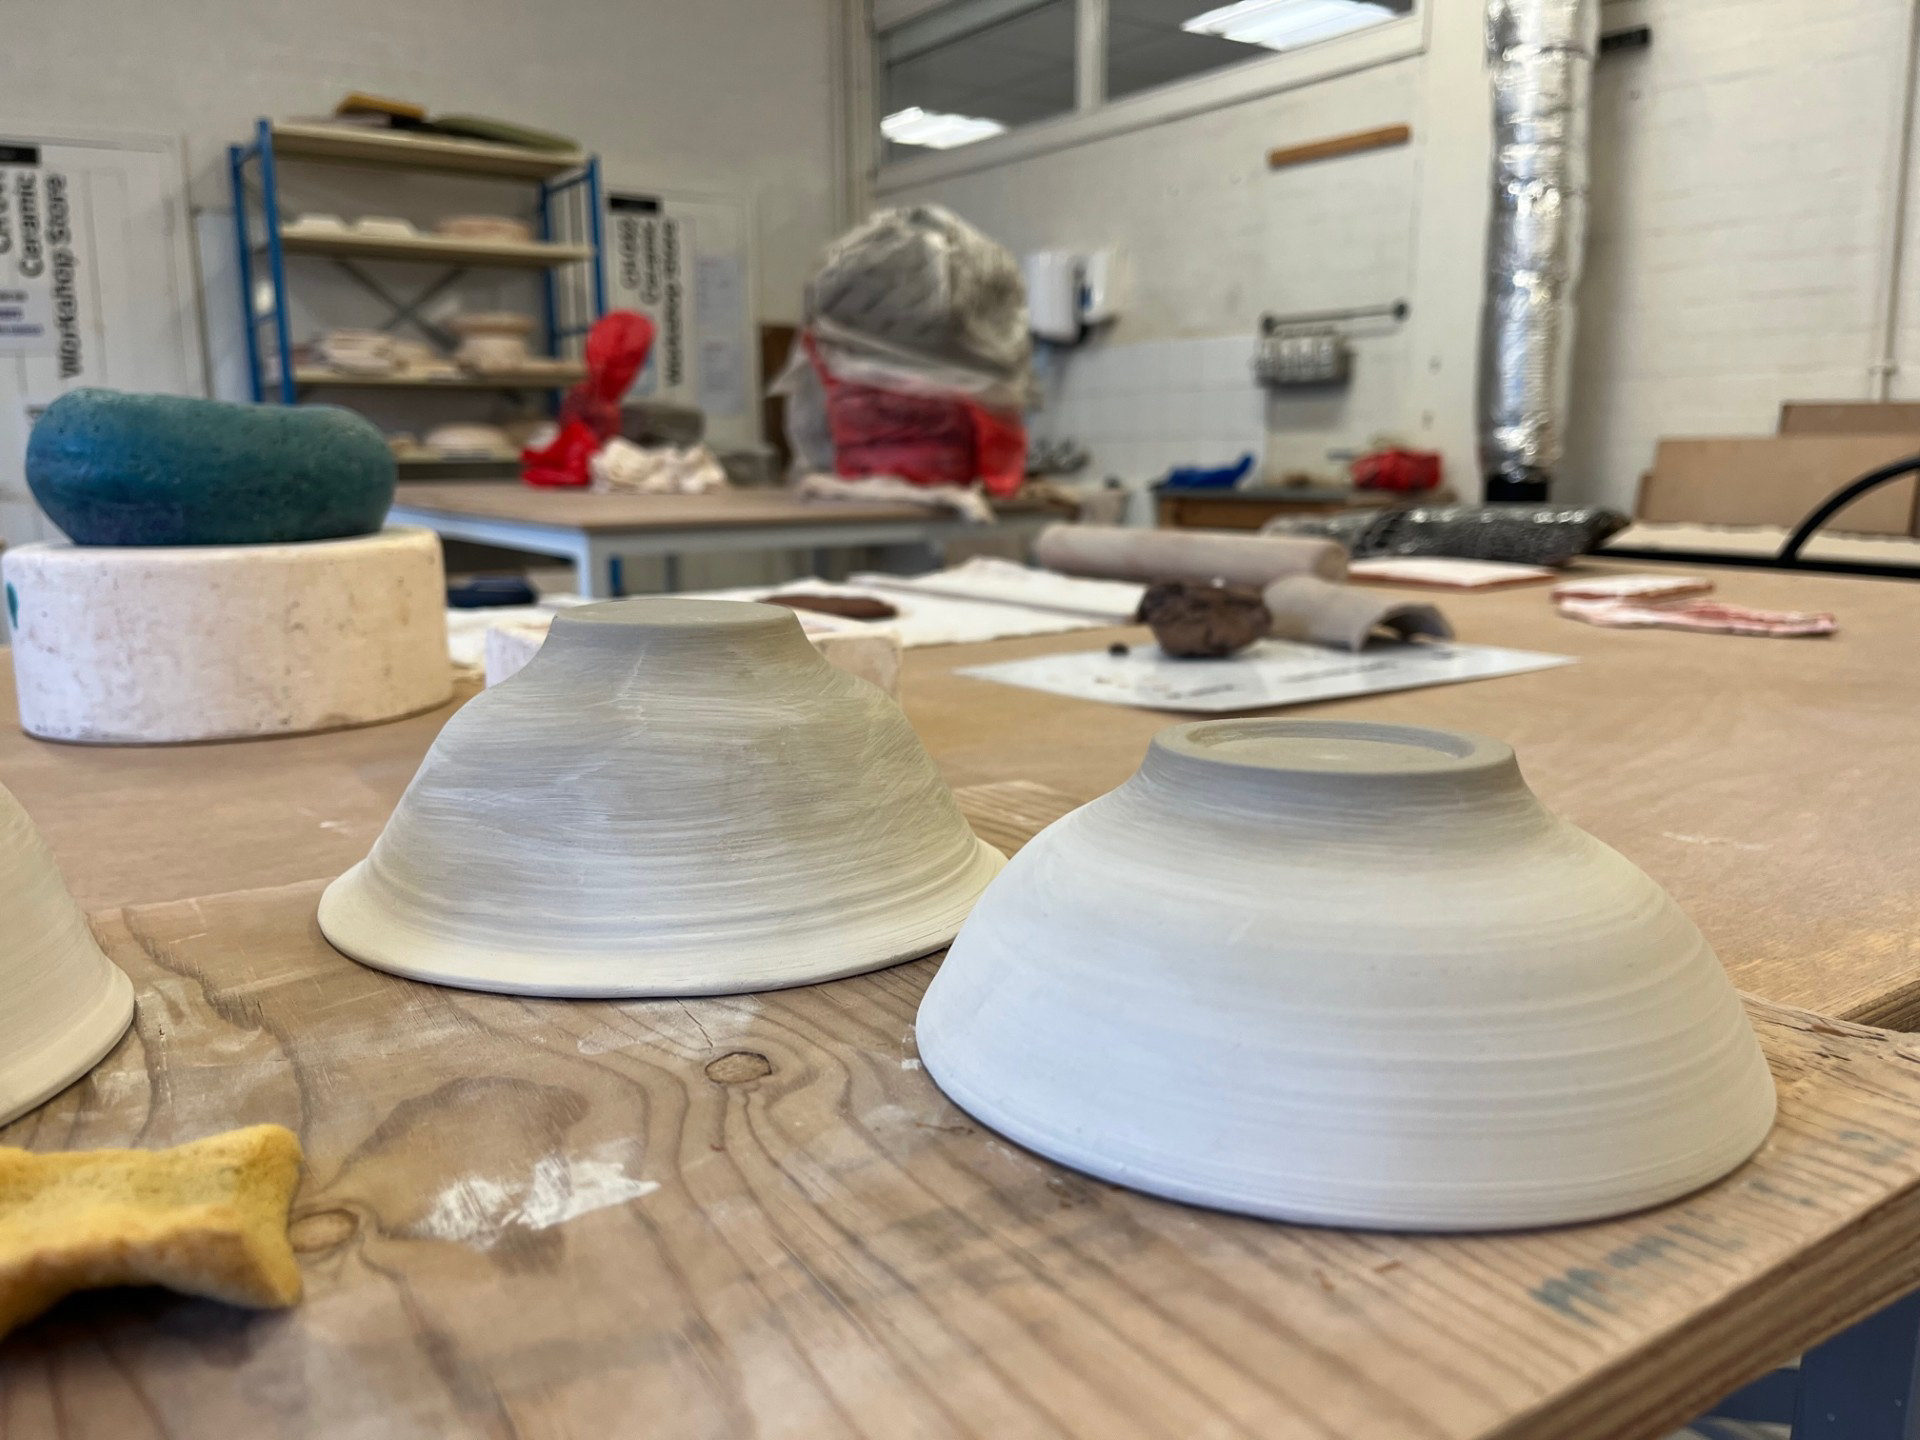
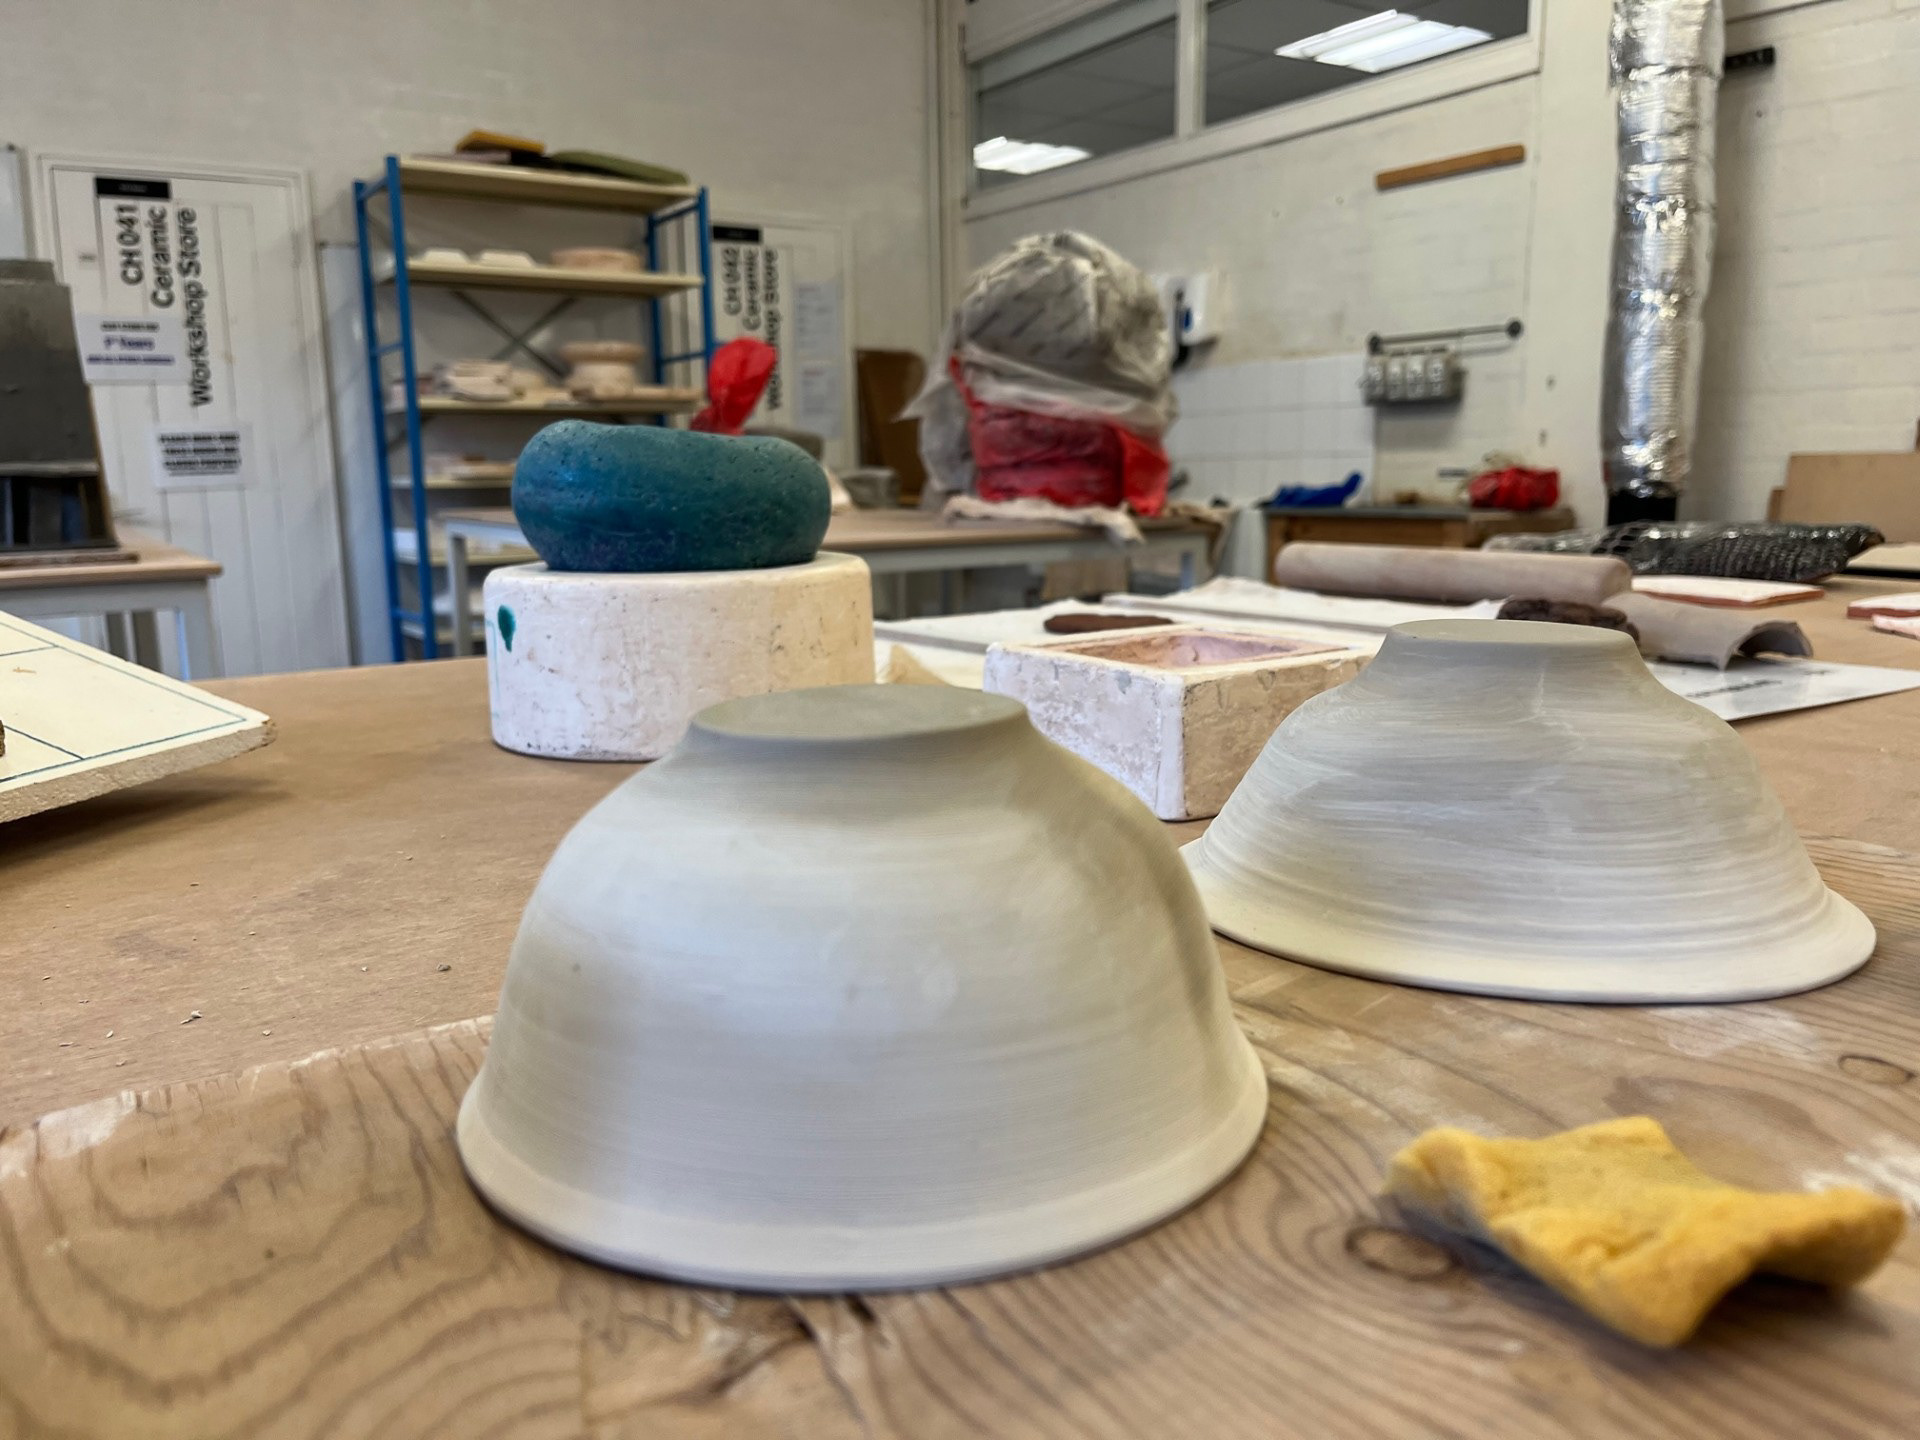
Overall, I am happy with this sample testing because it allowed me to really focus on and isolate the turning stage which is where the shape is really executed. through this process I realised that its best to turn the edge of the piece to really get a good shape first as it allows my to put added focus on achieving the shape. This was a good testing to complete prior to the making of the final piece as it has given me a good and reliable method that I will be able to take forward to make consistent pieces.
My throwing has improved leaps and bounds since I first started this unit, however because I developed my ability quite fast, I feel like my throwing is now missing a few elements. I feel like there is just something that I am missing. Since trying to improve my throwing by looking at the videos covering the fundamental basics of throwing, I have improved somewhat but I still felt like something was missing. I chose for my next step to be to ask Rudi to just have a look at me throw. I chose to do this because I felt like whatever was happening, I wouldn't be able to figure it out by myself; only someone watching what I do would be able to figure it out. With the help of Rudi, I was able to realise that I was over complicating many of my processes. Previously I had the realisation that I needed to think deeper about the actual process and break down what I am doing but I'm also overthinking those processes in all of the wrong ways which is why change needed to happen. I have realised throughout my making probes so far that the more I take my time the easier it’ll become. Although it might be slow at first, if I persist it will soon become clockwork and I feel like I am at the beginning of that transitional stage right now.
Reflection - Prior to final piece
With the help of Rudi, I was able to realise that I was over complicating many of my processes. Previously I had the realisation that I needed to think deeper about the actual process and break down what I am doing but I'm also overthinking those processes in all of the wrong ways which is why change needed to happen. My throwing has improved leaps and bounds since I first started this unit, but I have realised throughout my making problems so far that the more I take my time the easier it’ll become. Although it might be slow at first, if I persist it will soon become clockwork and I feel like I am at the beginning of that transitional stage right now. In relation to my timeline, most of the pieces that I made were ready for final submission, however for others it may not be the same. 3 pieces have been made and need to be fired however I would like to make a couple more which may disrupt my timeline. But on my timeline, I left room for 1 firing at the end to add leeway if something were to go wrong.
For my practical, I have noticed that where sometimes music can distract me and make my mental processing a bit slower, when I am on the wheel, it quietens my mind to the perfect level. Music allows me to allow my hands to do the work and filters my thoughts so that there is only space for one solid solution to reach the forefront of my mind. if something is going wrong, I would usually be overthinking the whole process but having music allows my hands to mainly focus on tactile feedback and just feel the clay. Almost like a goldilocks state. Going froward, i am going to make having music as a priority as it will allow me to make as much progress as possible to enhance my future development.
Making Final Pieces:
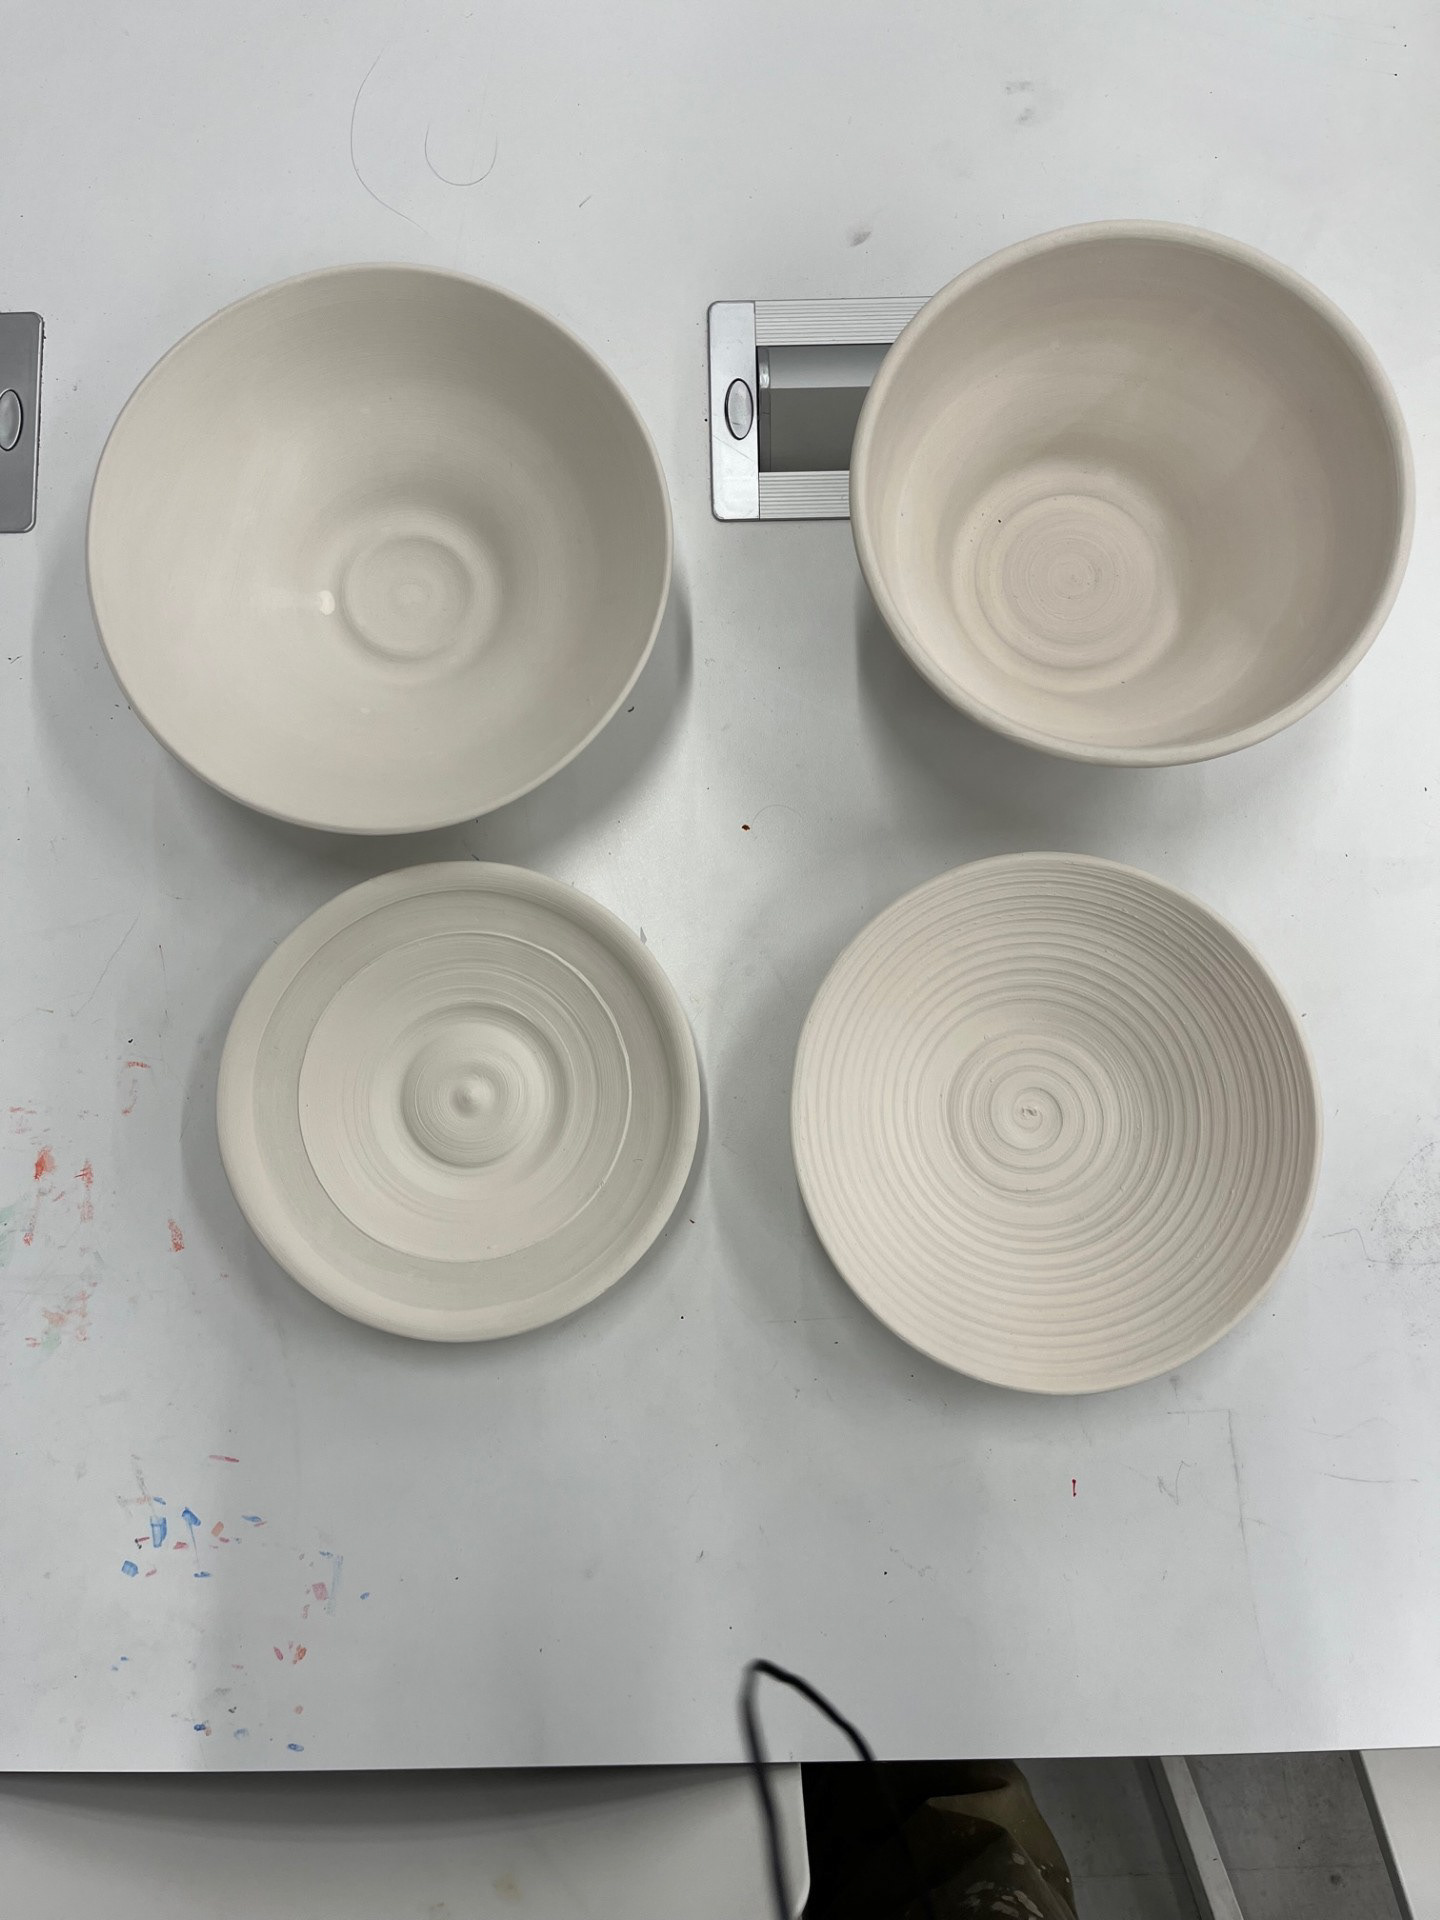
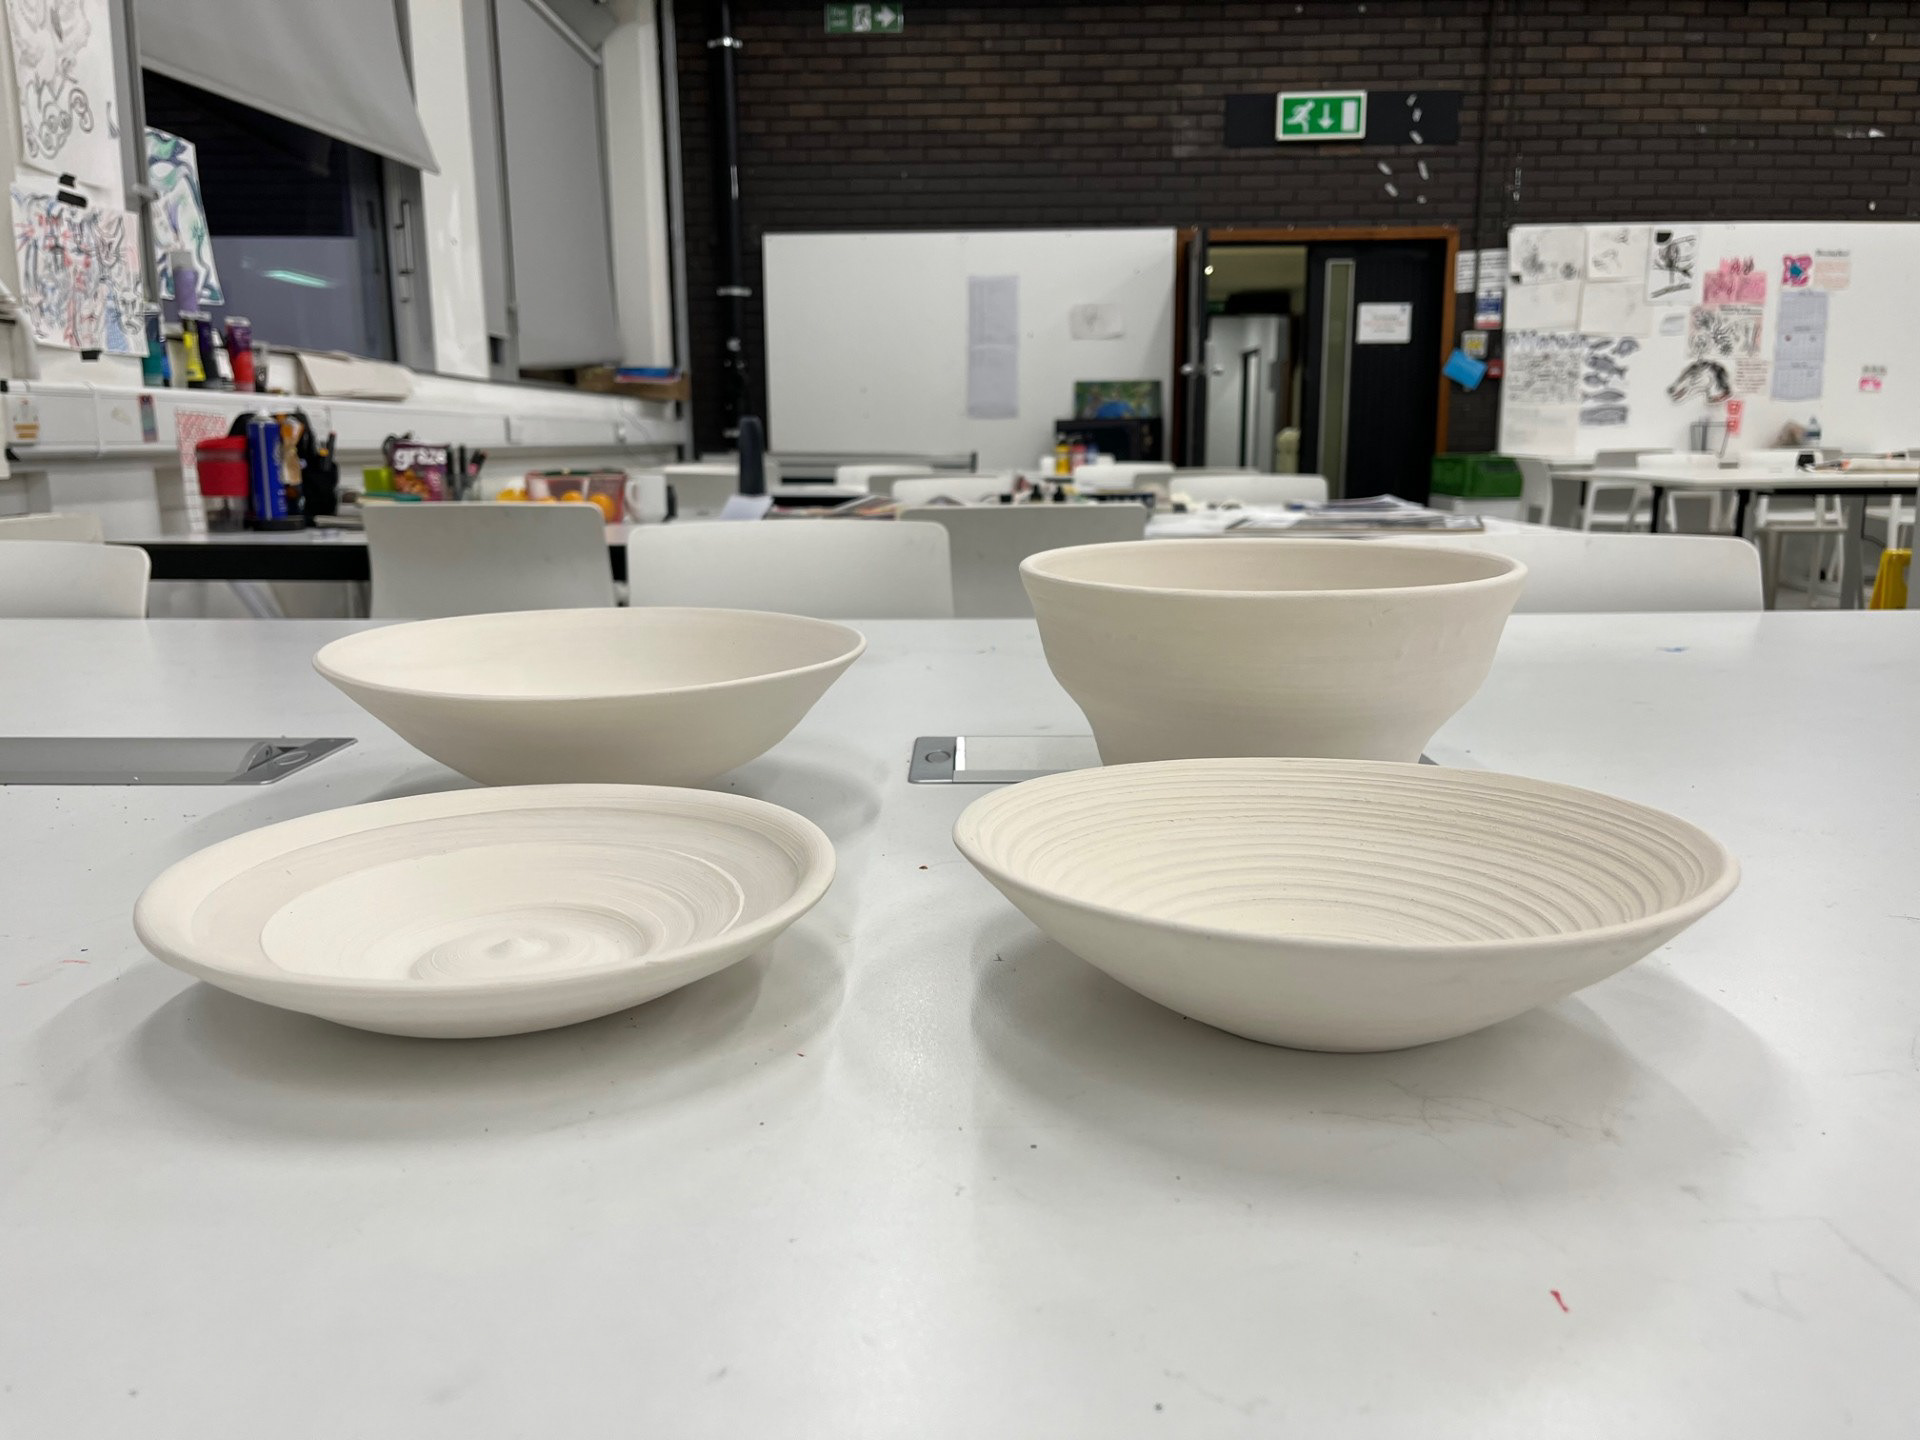
Going in to making my final pieces, I had already made one bowl earlier in the semester that is what inspired me to chase my chosen form and knew that I wanted to include this in my final resolution so I chose to save it. Although I wanted to make all of the bowls look the same, I decided to change it so that one would match the bowl that I saved perfectly. I realised that I wanted some to be slightly more low set because then they would act as a better projection base as they would sit much flatter. The split would be 2/3 which I am actually quite happy with because it would create a slightly eclectic look which is a style that I have always been a fan of, all the way through my making.
When I began this process, I started off by wedging the clay very well as that something that I have already identified, through research, as an important component to successful throwing. I Knew what form I wanted to achieve so I I just simply sat down and began making. Throughout this process, not all of the vessels went to plan but I continued to make them into other forms of vessels. I am actually really happy with how I completed this session because I feel like it fulfilled my true goal of embracing my own flow state. Although I was intending to make a certain form and that didn't go to plan, i love that point where I am on the wheel and I just let my hands do the talking because its not planned.. However, there were 3 pots that went very much to plan as they were all what I had envisioned for my final pieces. One of them I wanted to make more similar to the sample at the beginning of the term and I achieved that. For the other ones I knew that I wanted to make a couple that were lower as I wanted there to be more flat surface for there to be projected on to. Overall, I am very happy with this process although I unfortunately didn't get any pictures of the 3 successful bowls.
have 5 bowls as my final resolution and at this point I only had 4 so I decided to go in again the following day and make another pot. From looking at the vessels I had already created, I know that I wanted one that was larger to add a bit more depth to the selection of vessels. Visually I also wanted the final outcome to look a bit more eclectic since they were all going to have the same glaze on them as well as them being unified within the final projection. I used a larger ball of clay
For this piece, I used clay that I had been recycling for the past few days. throughout, I have been collecting offcuts from turning my pieces and reclaiming it. I don't do it often within my making purely because I make at quite a high volume and I don't really have the time to recycle clay that often. I also use of cuts from turning specifically so it means that it takes time to build up enough to make it into a good batch. As this clay was going to be used for a final piece, I really put effort into the wedging as I wanted to ensure that there were no air bubbles or impurities.
See below for the piece once thrown:
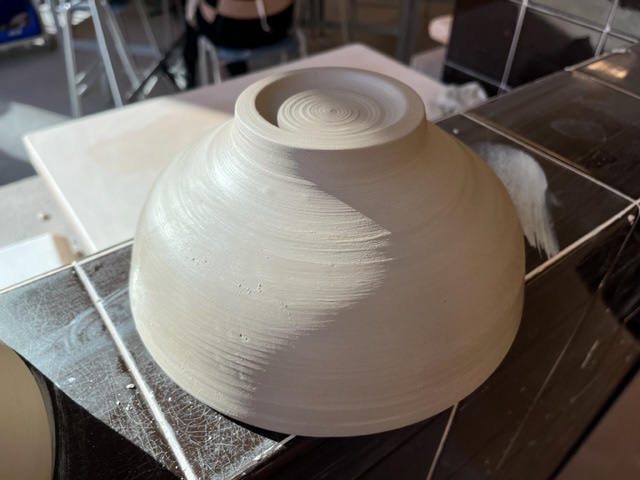
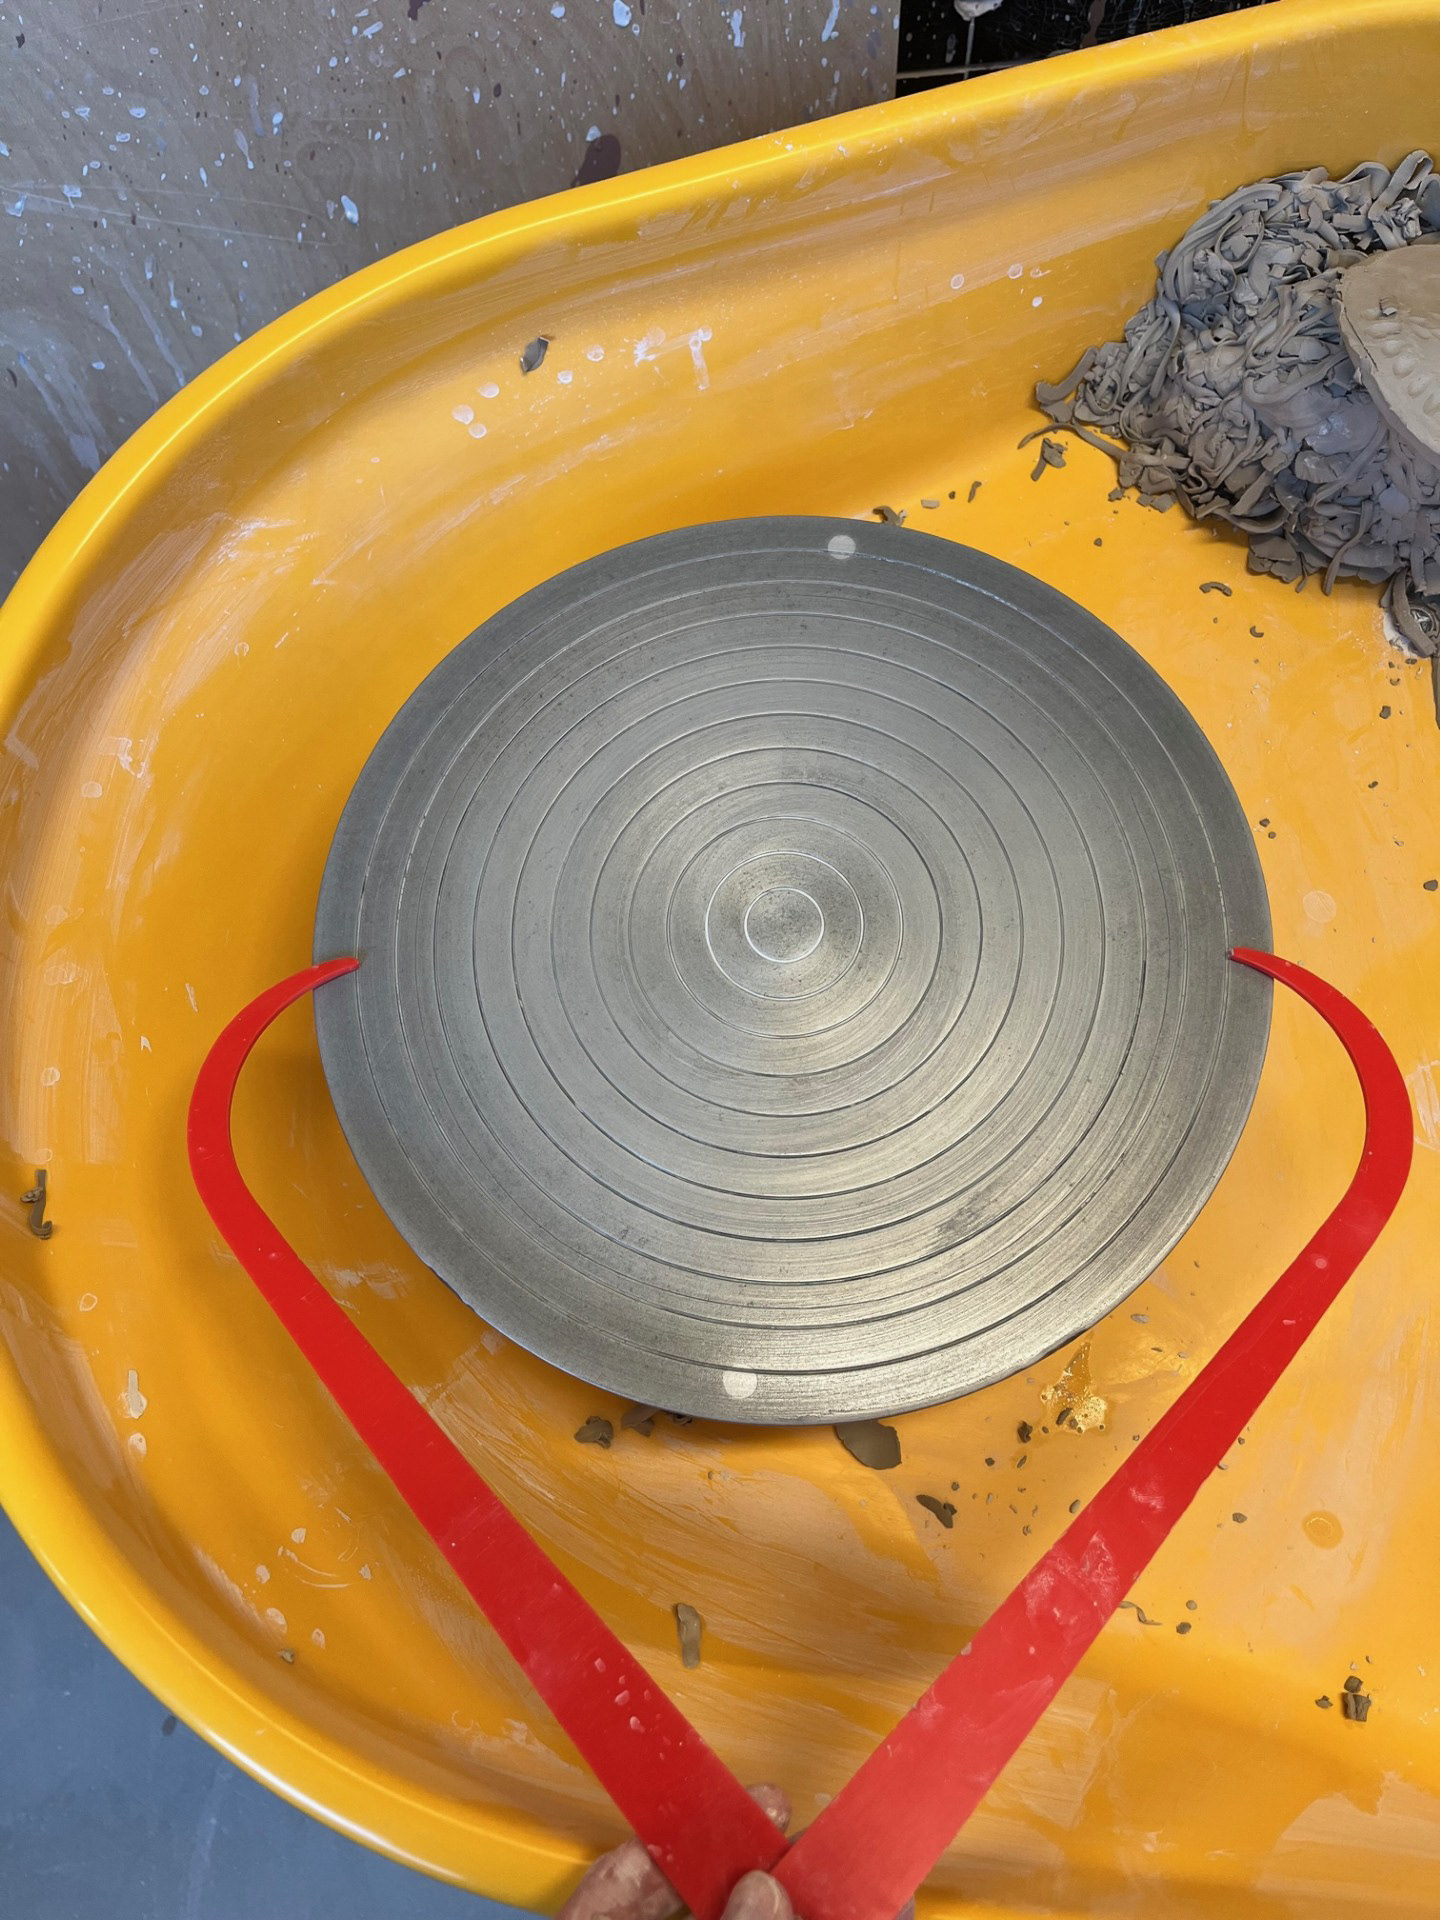
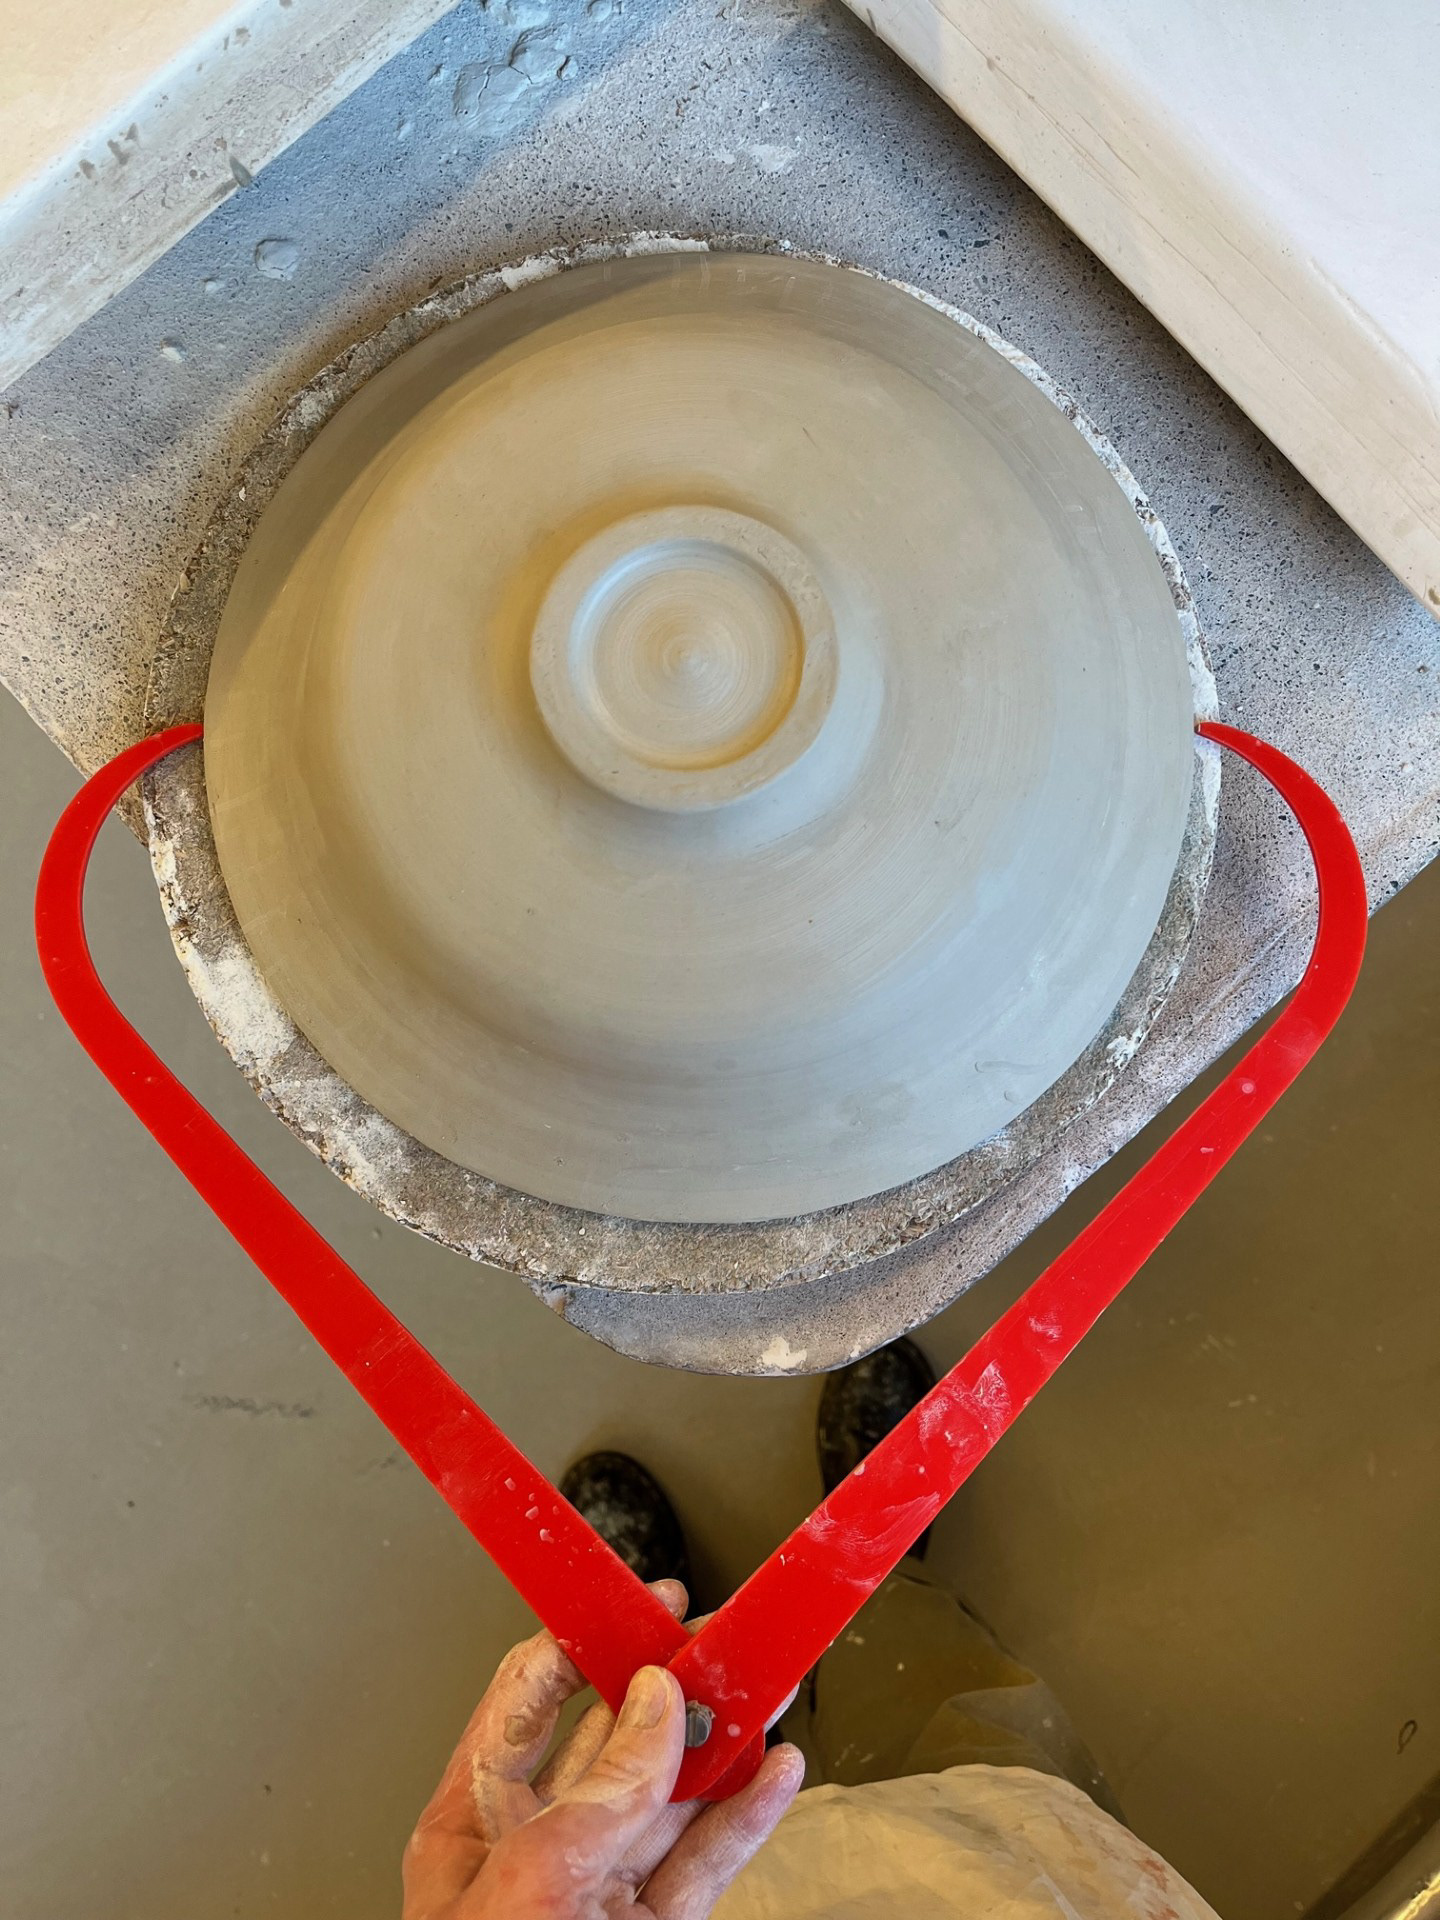
For this piece, I wanted to create a large base so that I would be able to manipulate the shape a lot better and really cut into the piece. See below for turning of the piece:
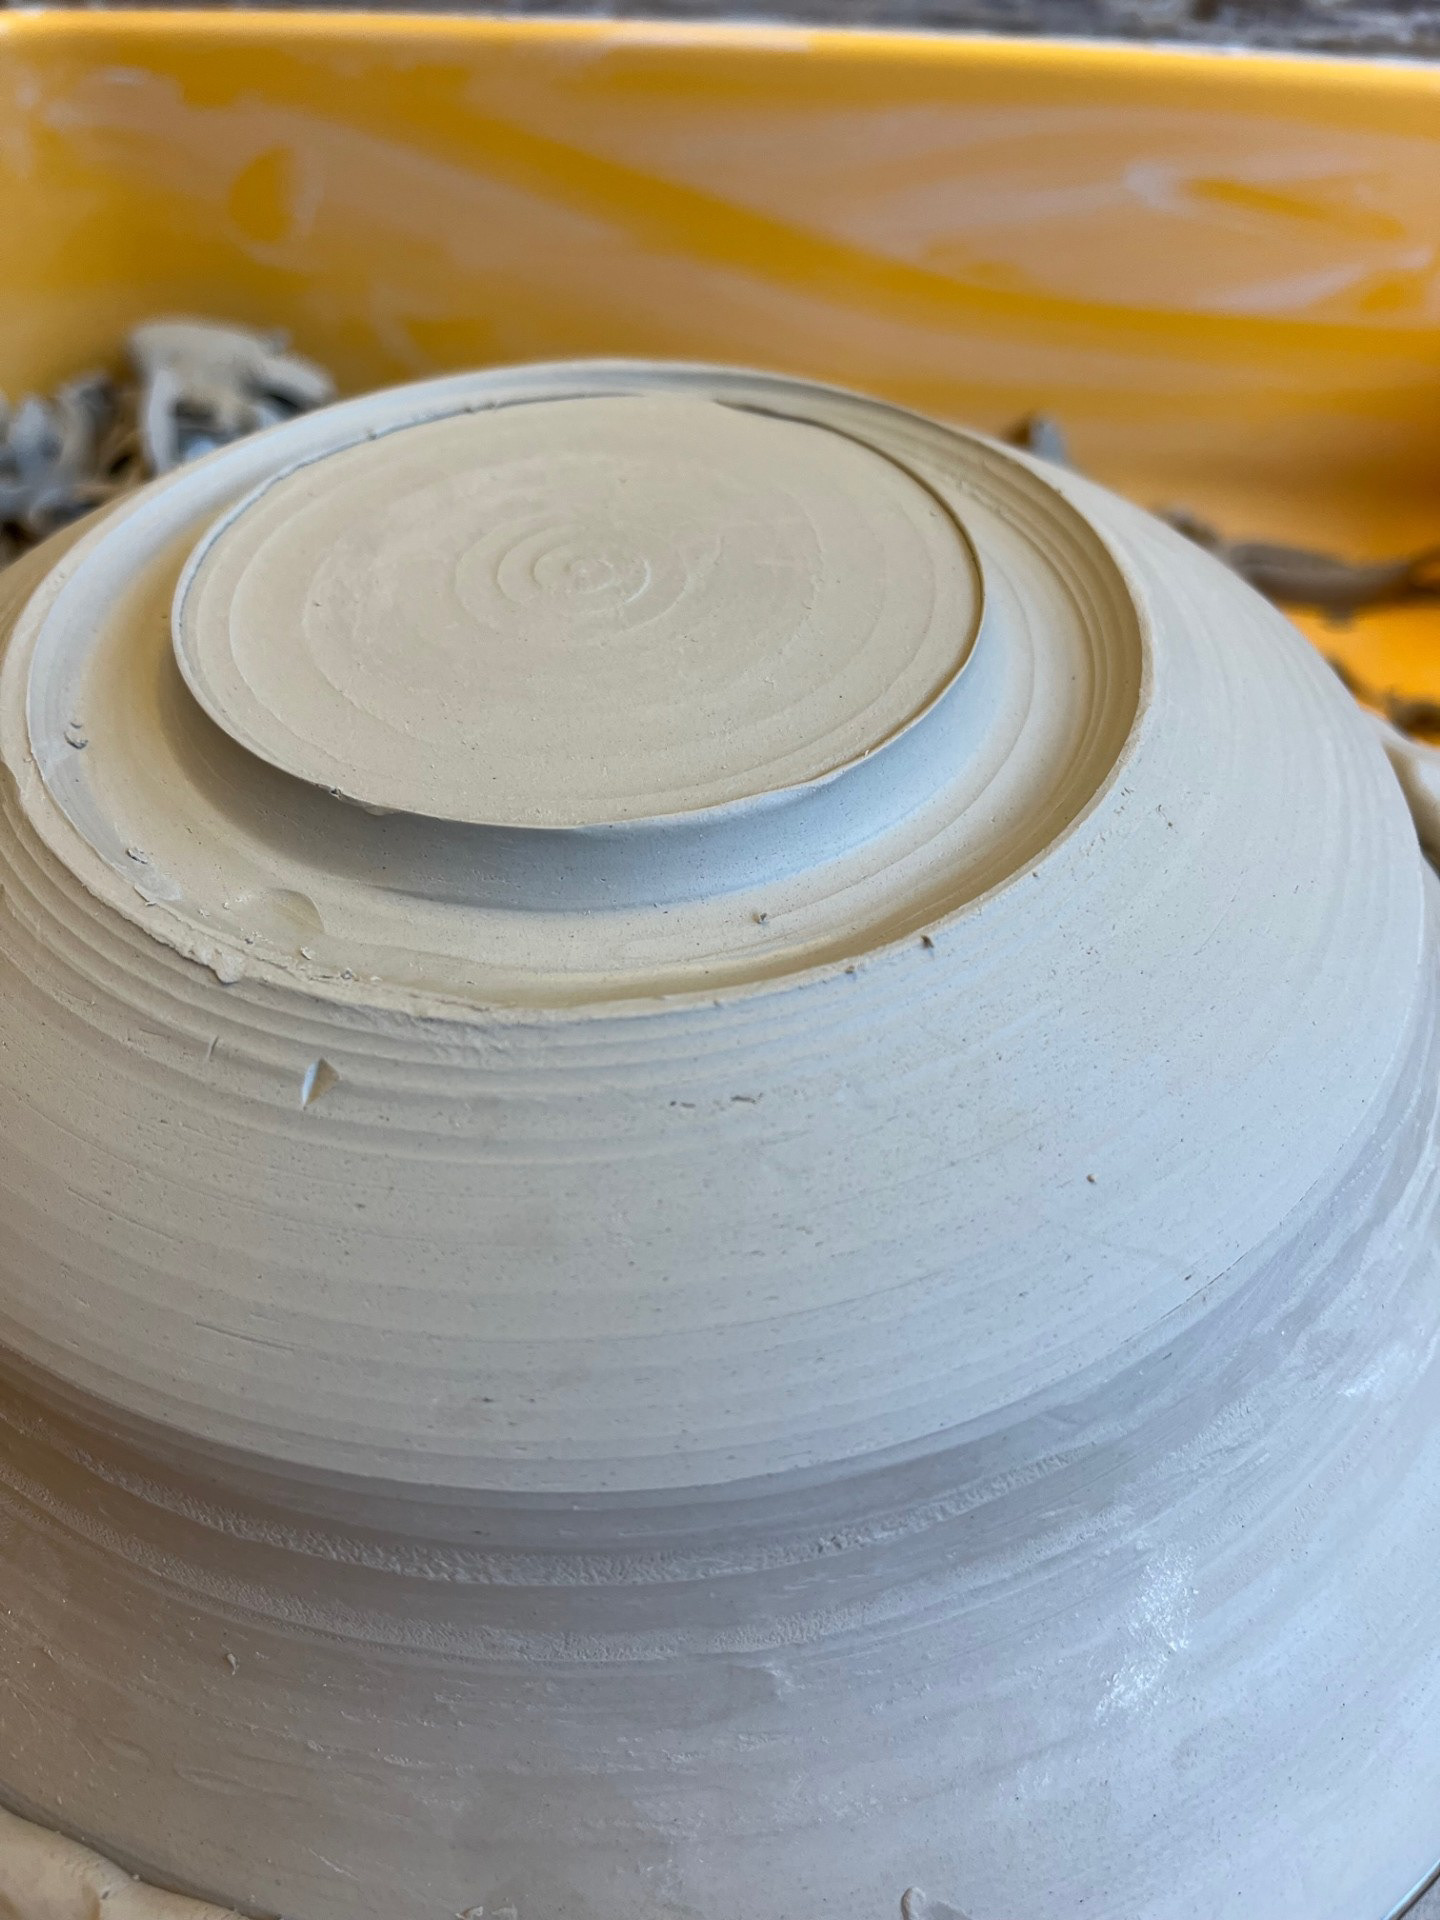
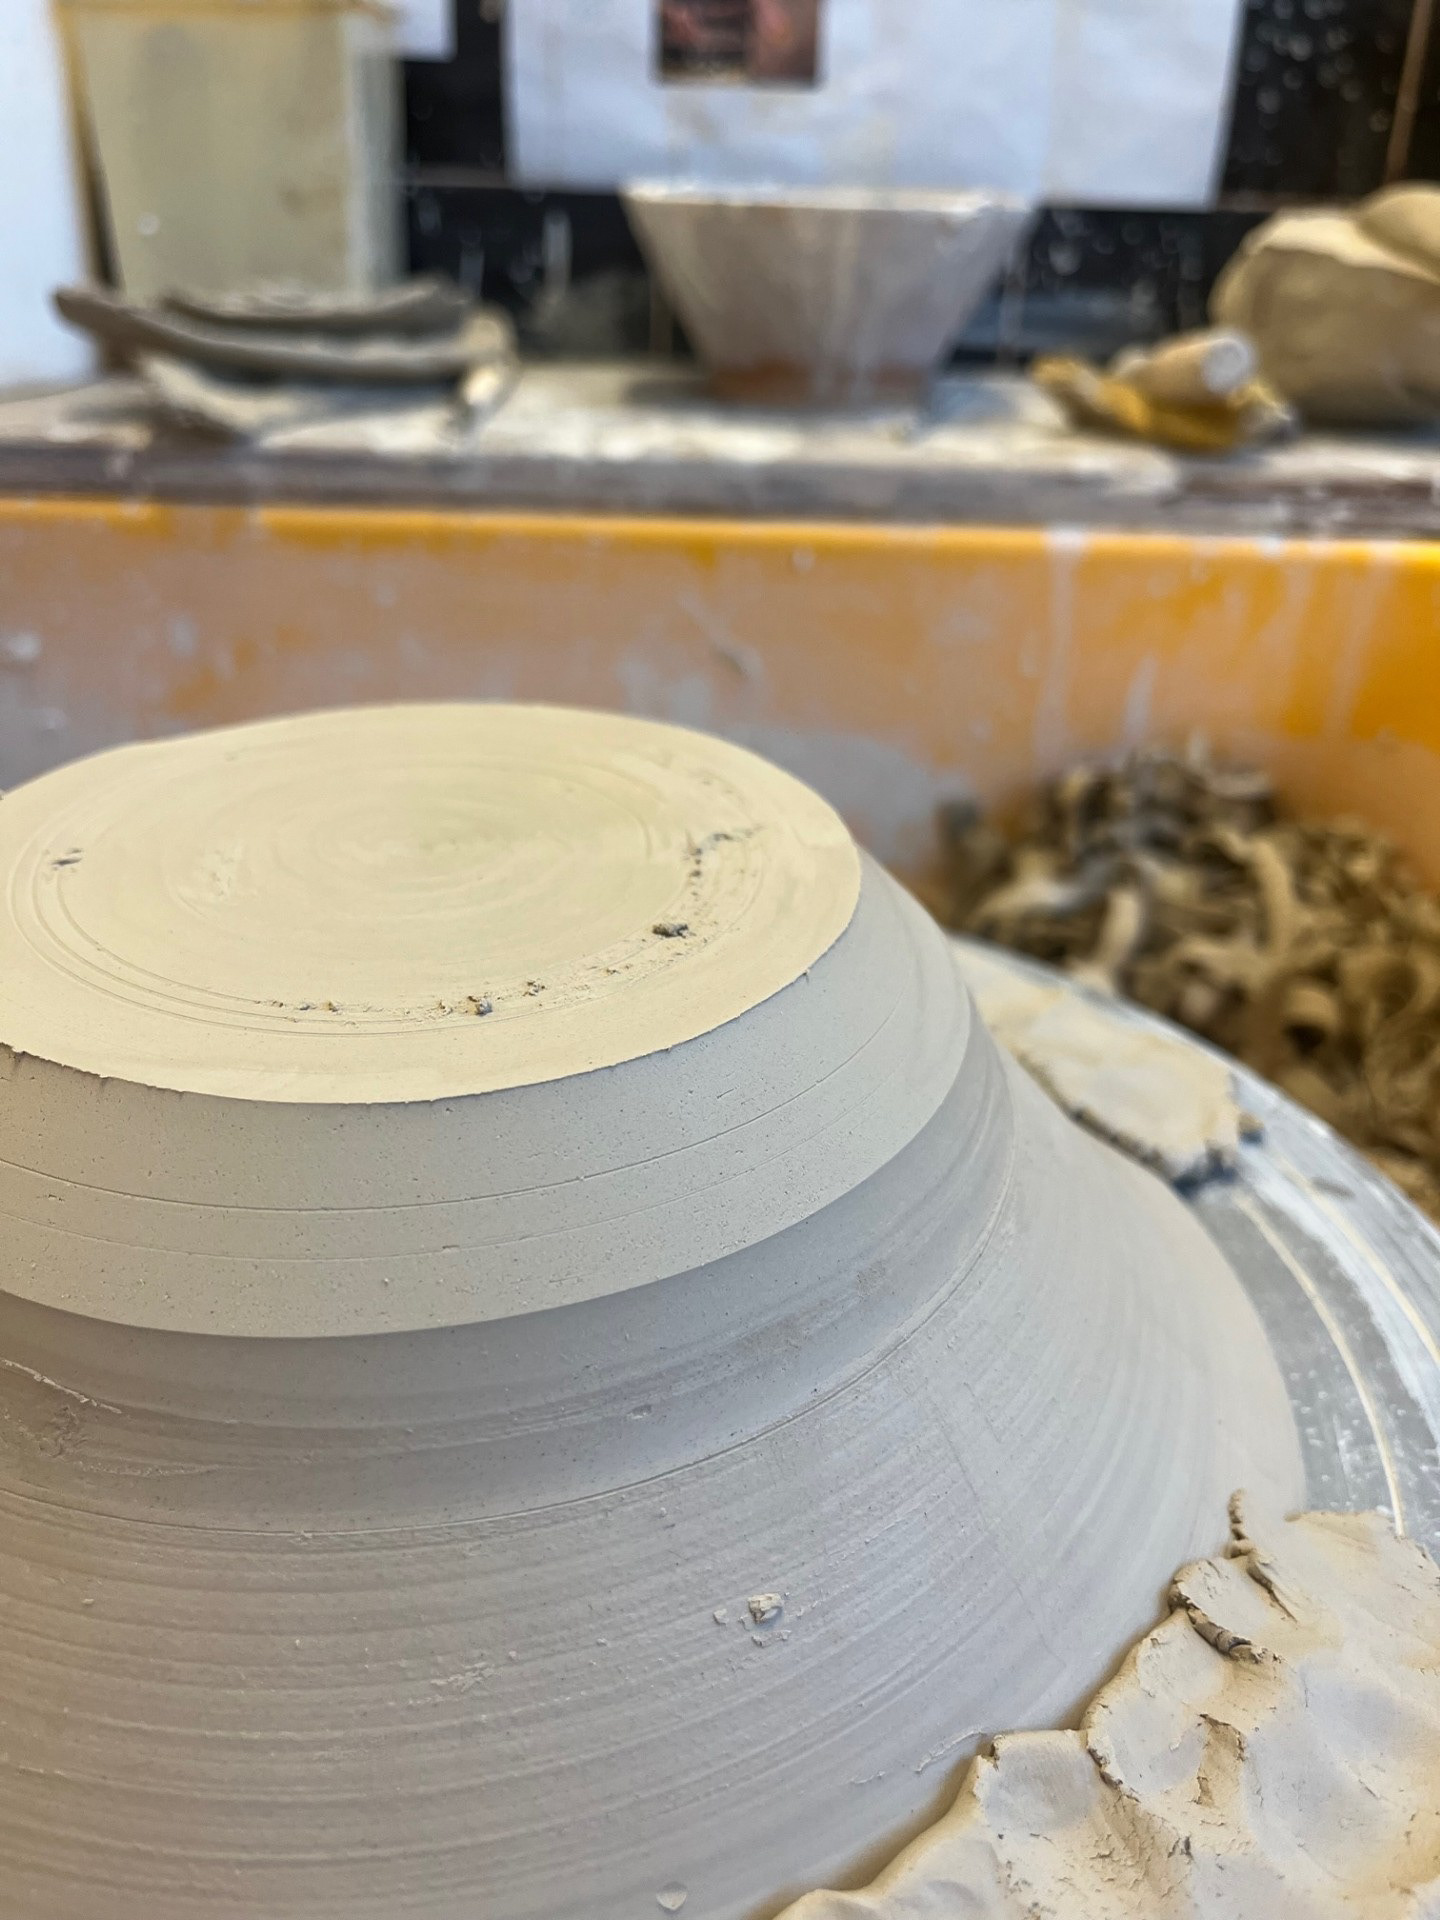
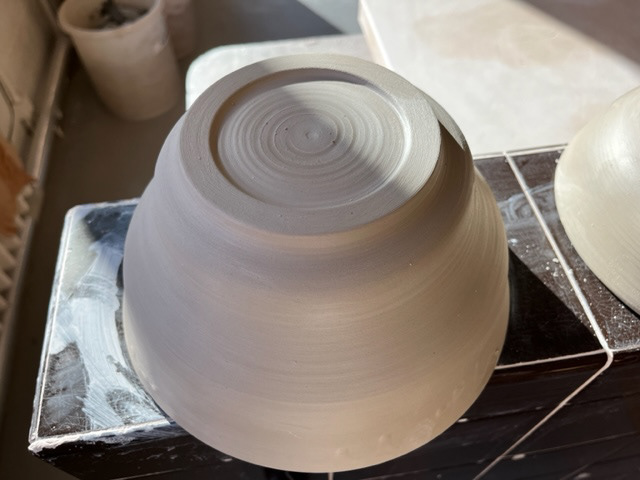
for the turning of this piece, I used some advice that I got from Dianne who is the other ceramics technician. As we know, i have previously massively overcomplicated most of my making and that stretches to turning too. I previously was putting way too much clay around the base of my pots because I thought that it would make it a lot more stable. Dianne showed me that that's not the case because one of the most effective ways to do it is to just have 3 pieces of clay because it makes it a lot more stable. I started the turning by isolating a ring at the top of the piece. I did this so that I could isolate the area that I would be shaping to make it easier to focus on the area. I then went in and shaped the edge.
Once I turned this piece I realised something which could potentially be developed on next term is that I could measure out and purposefully make the rims of my vessels the same size of the rings on the wheel to make it easier to centre when turning. This is something I would definitely consider taking forward as it something that I do regularly struggle with.
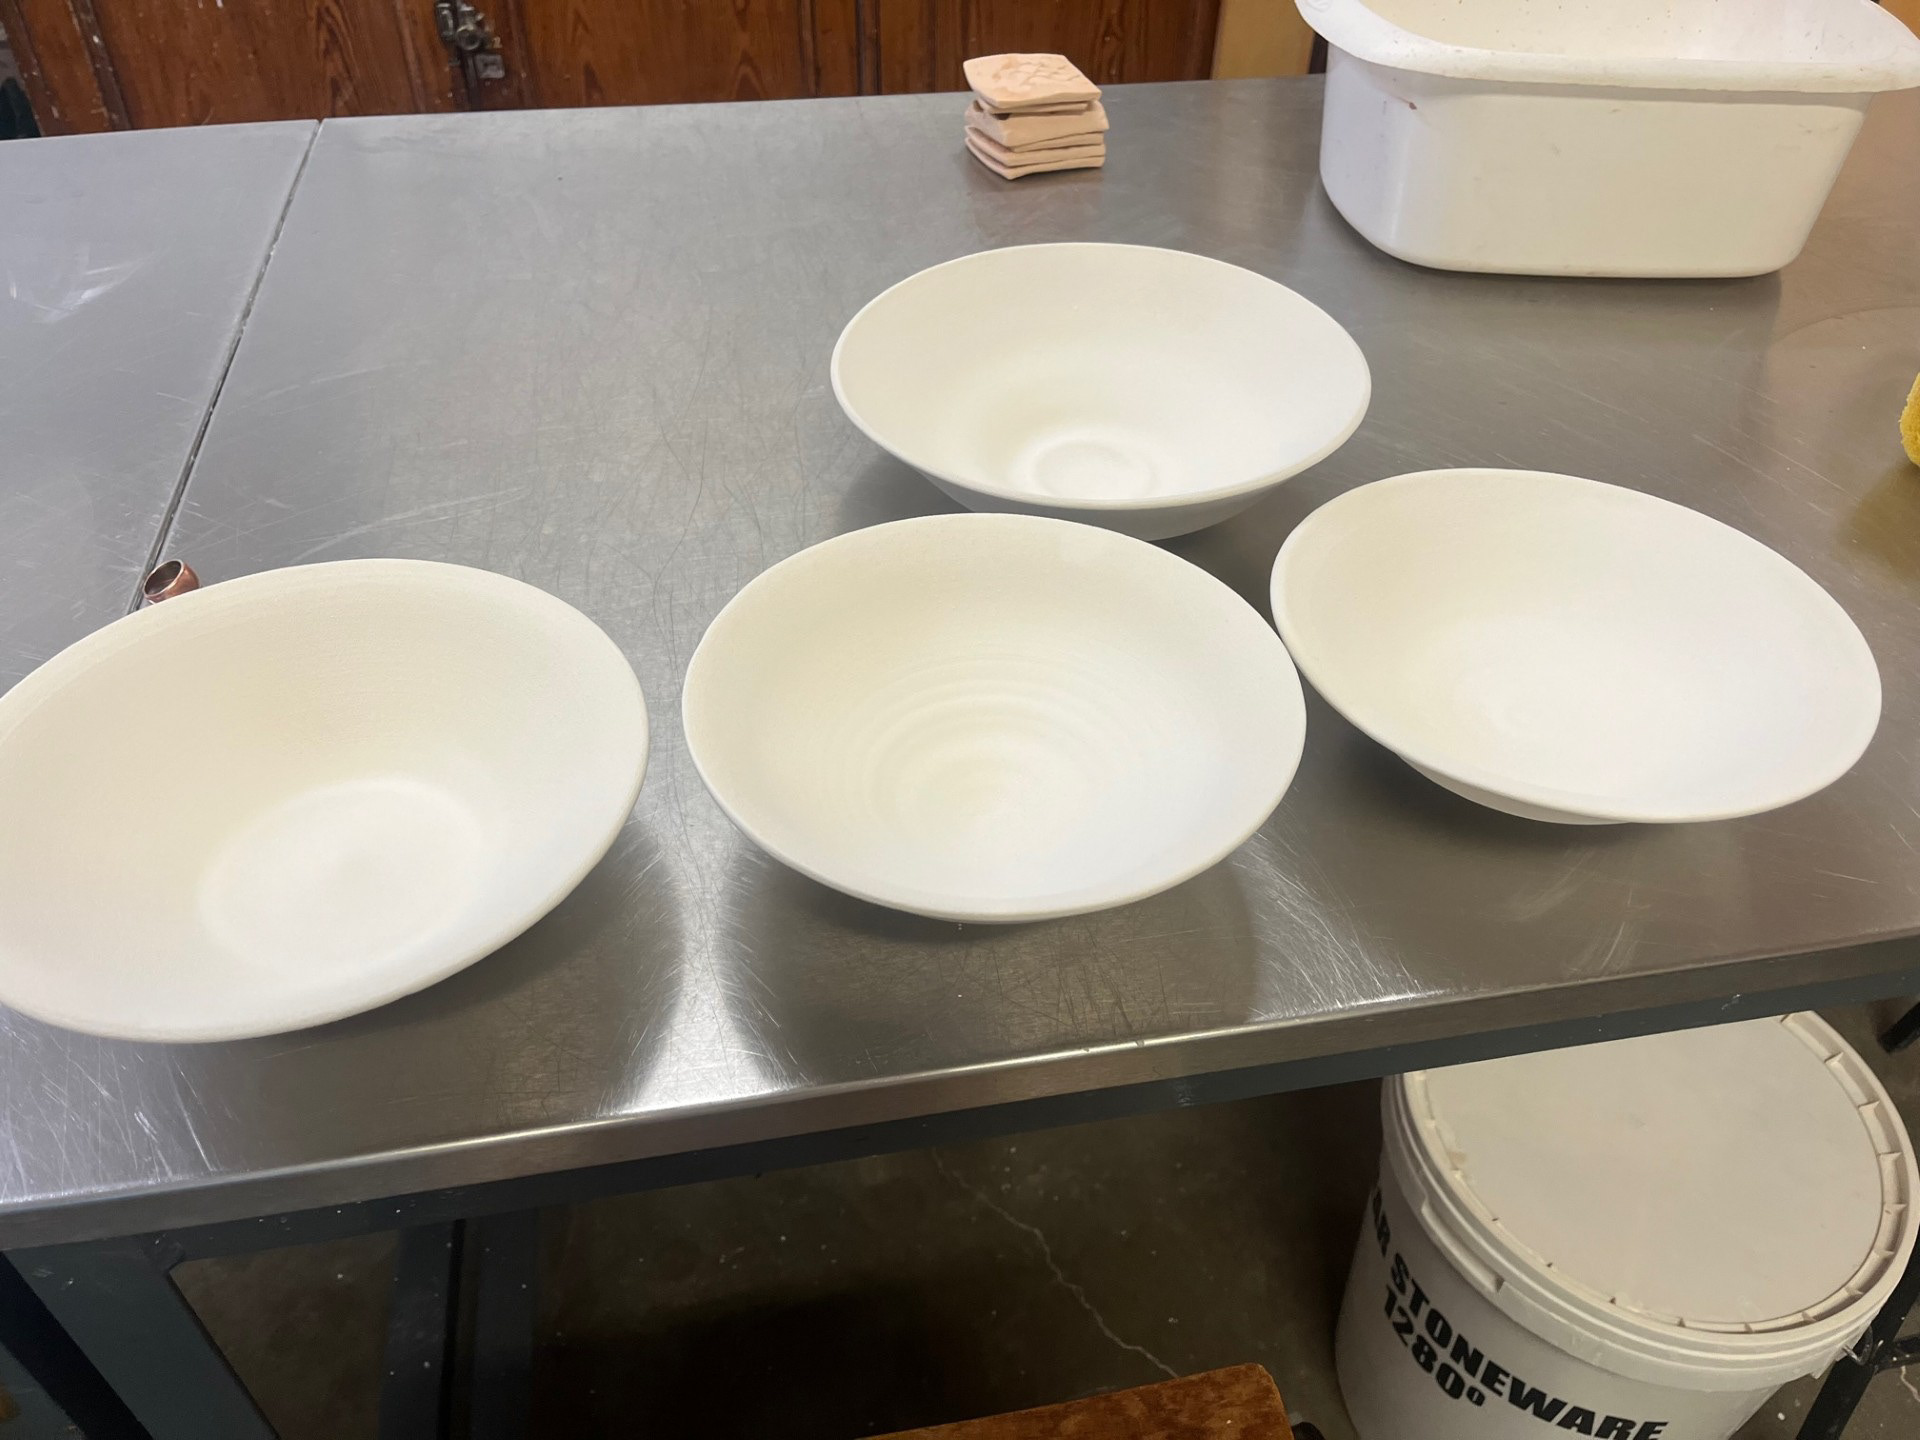
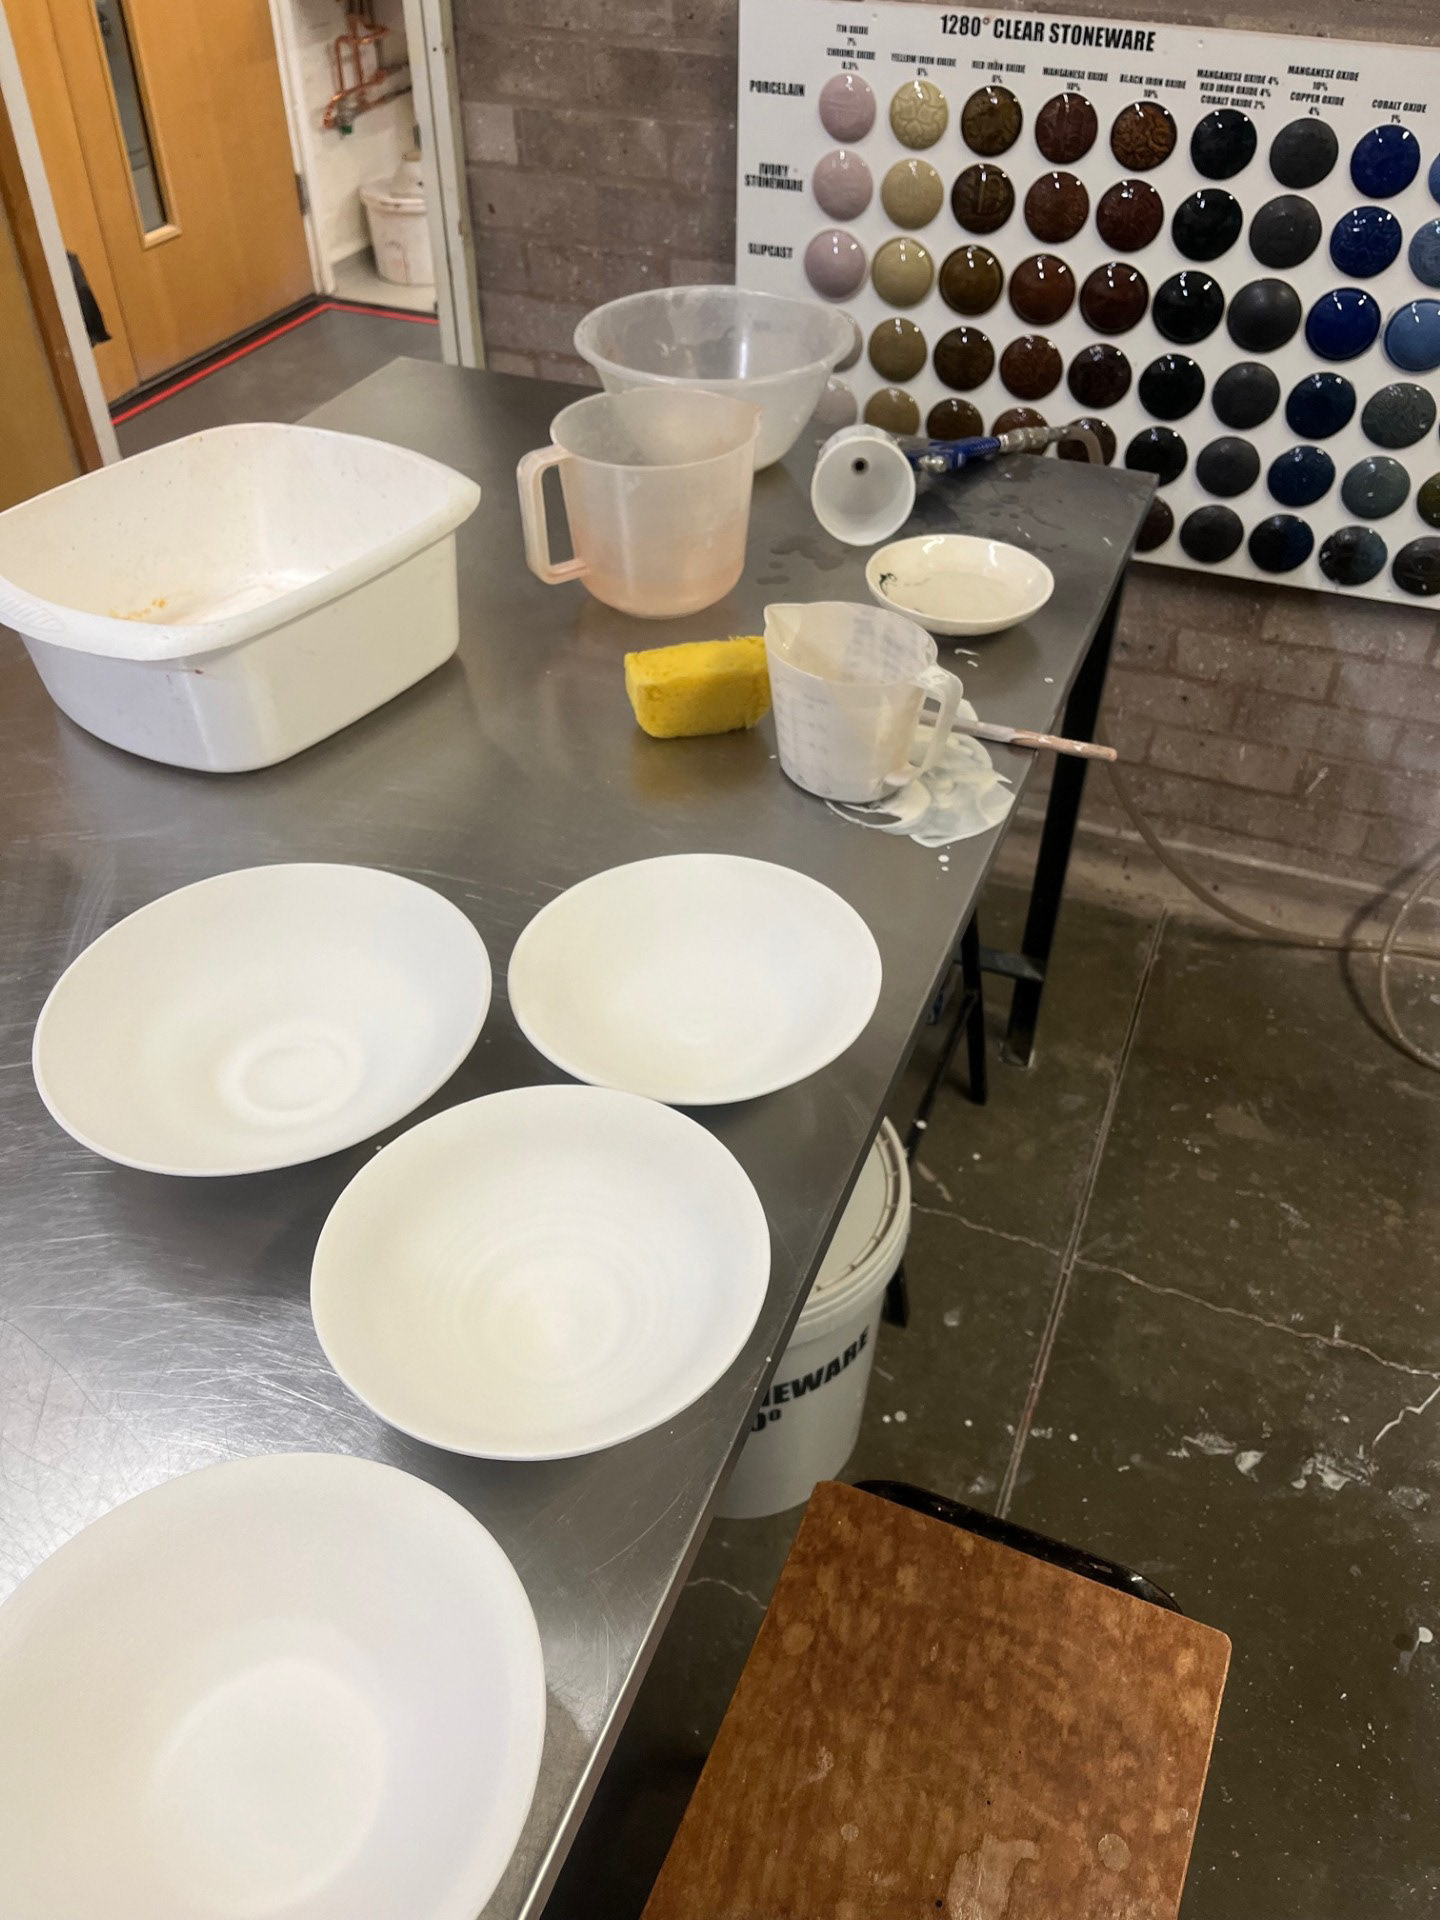
3 initial pieces + previous bowl once out the kiln:
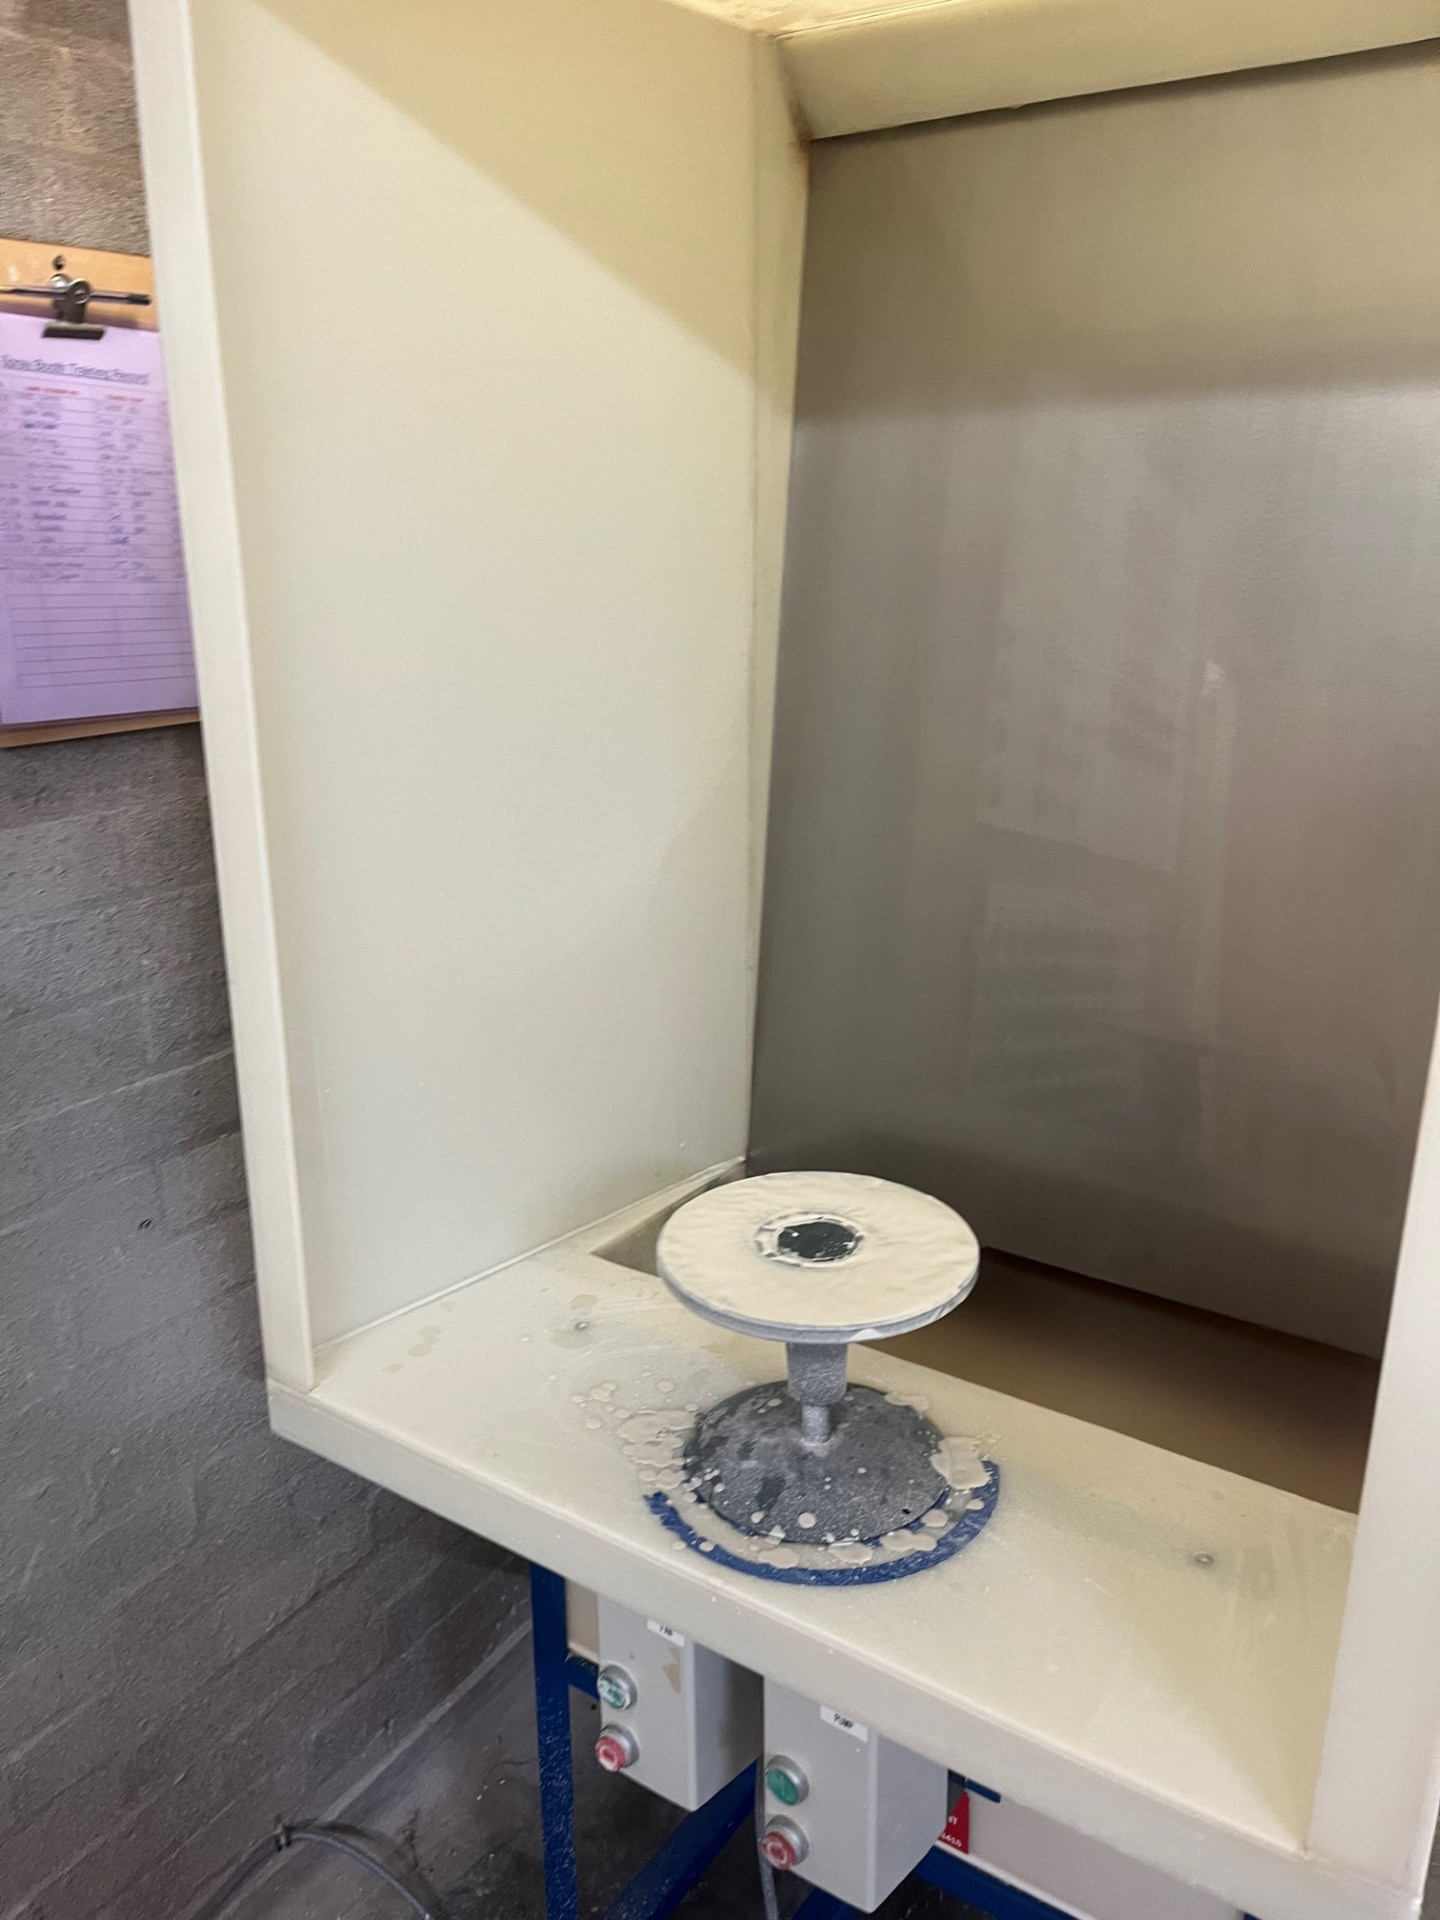
Glazing Final Pieces with clear glaze using a spray gun:
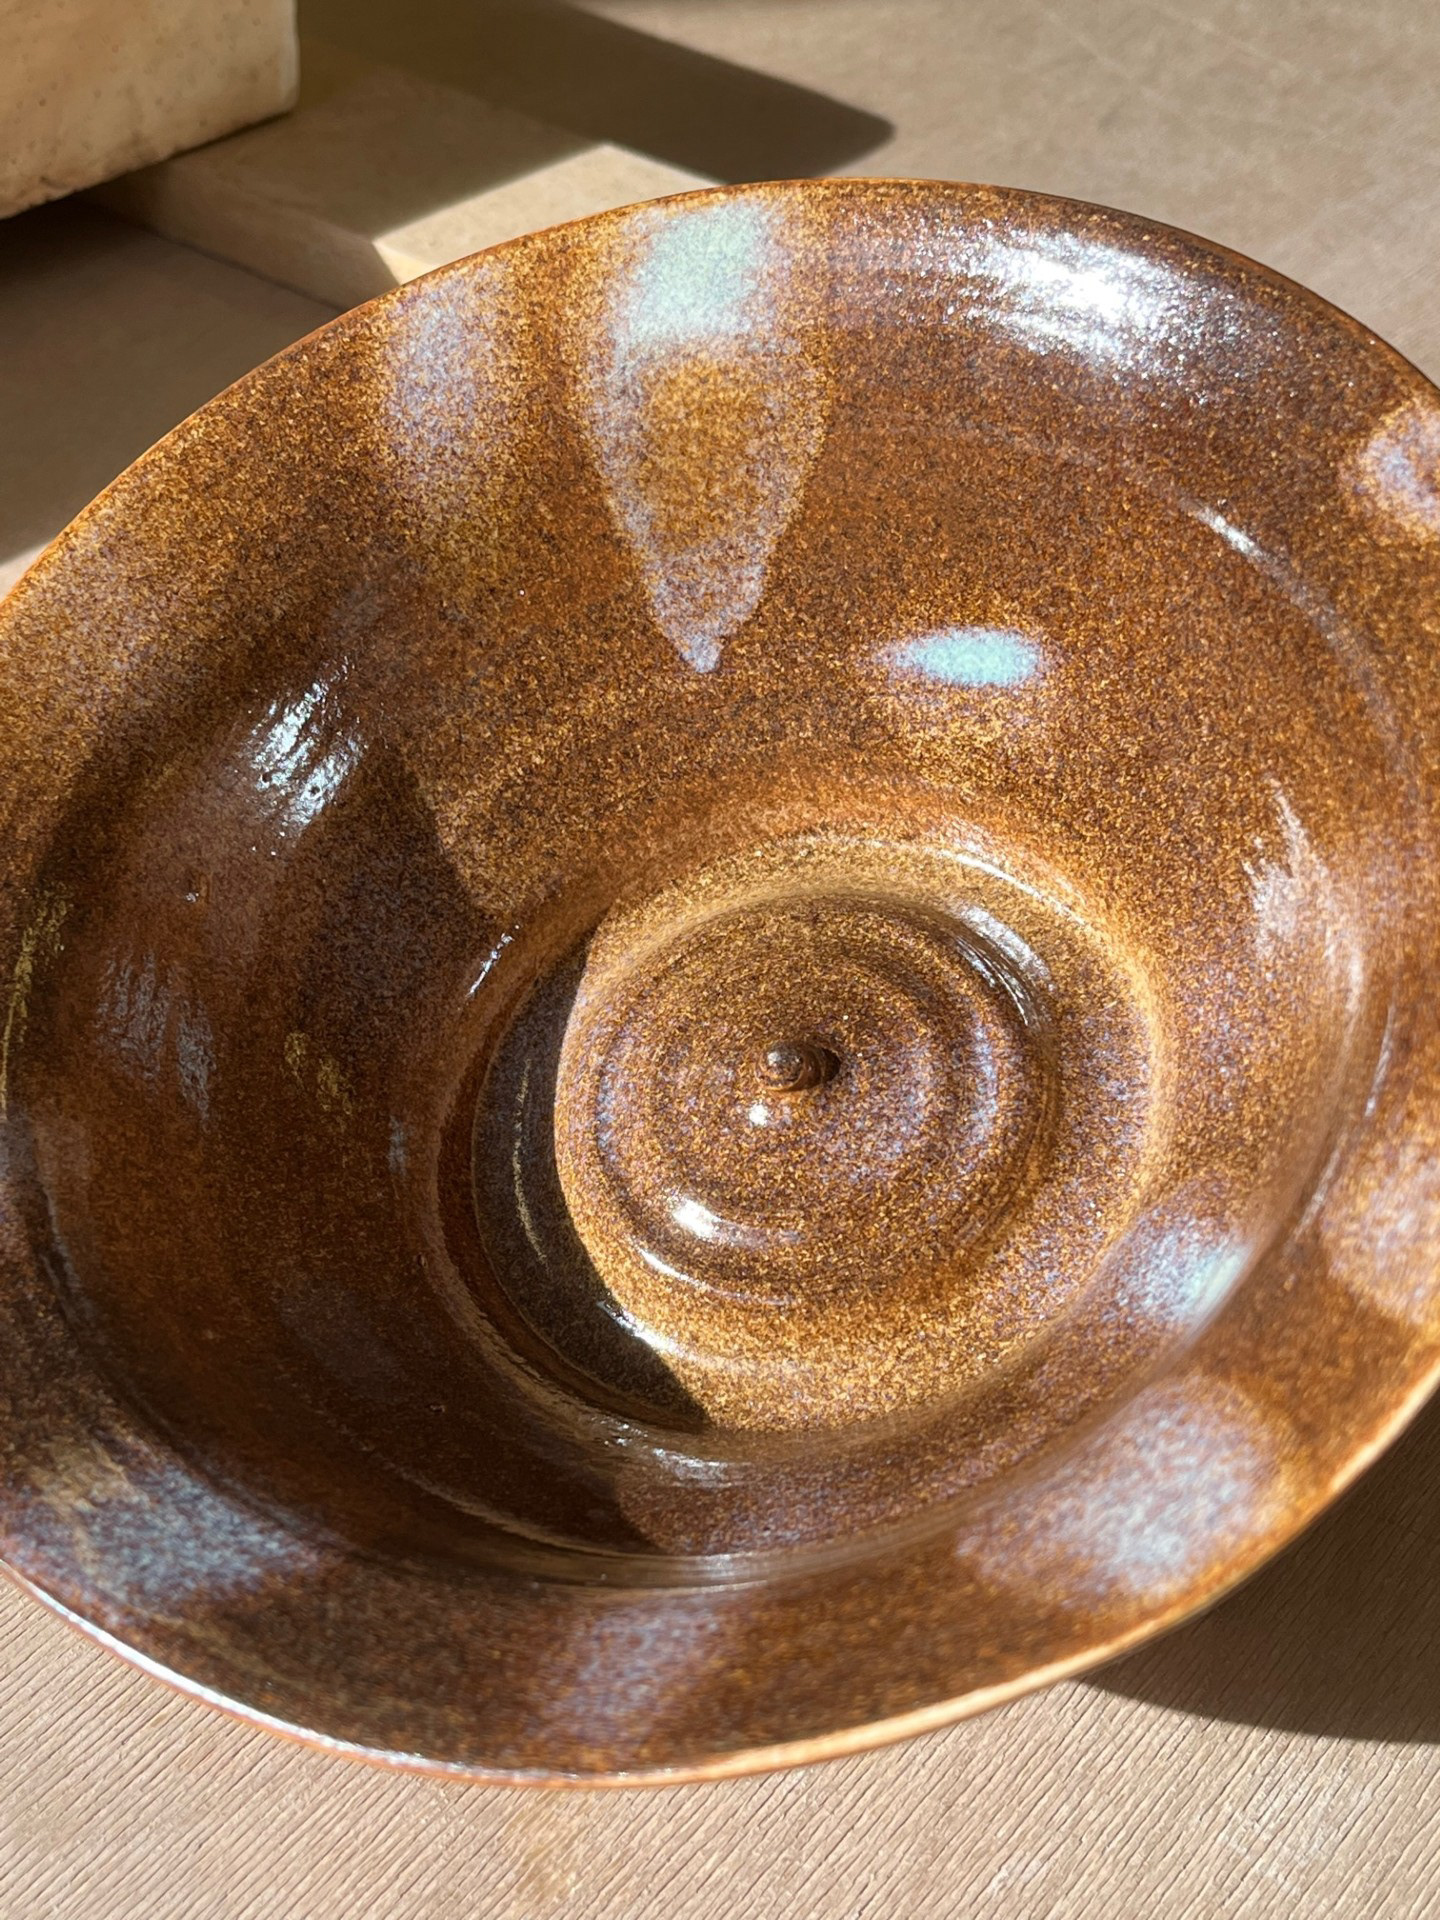
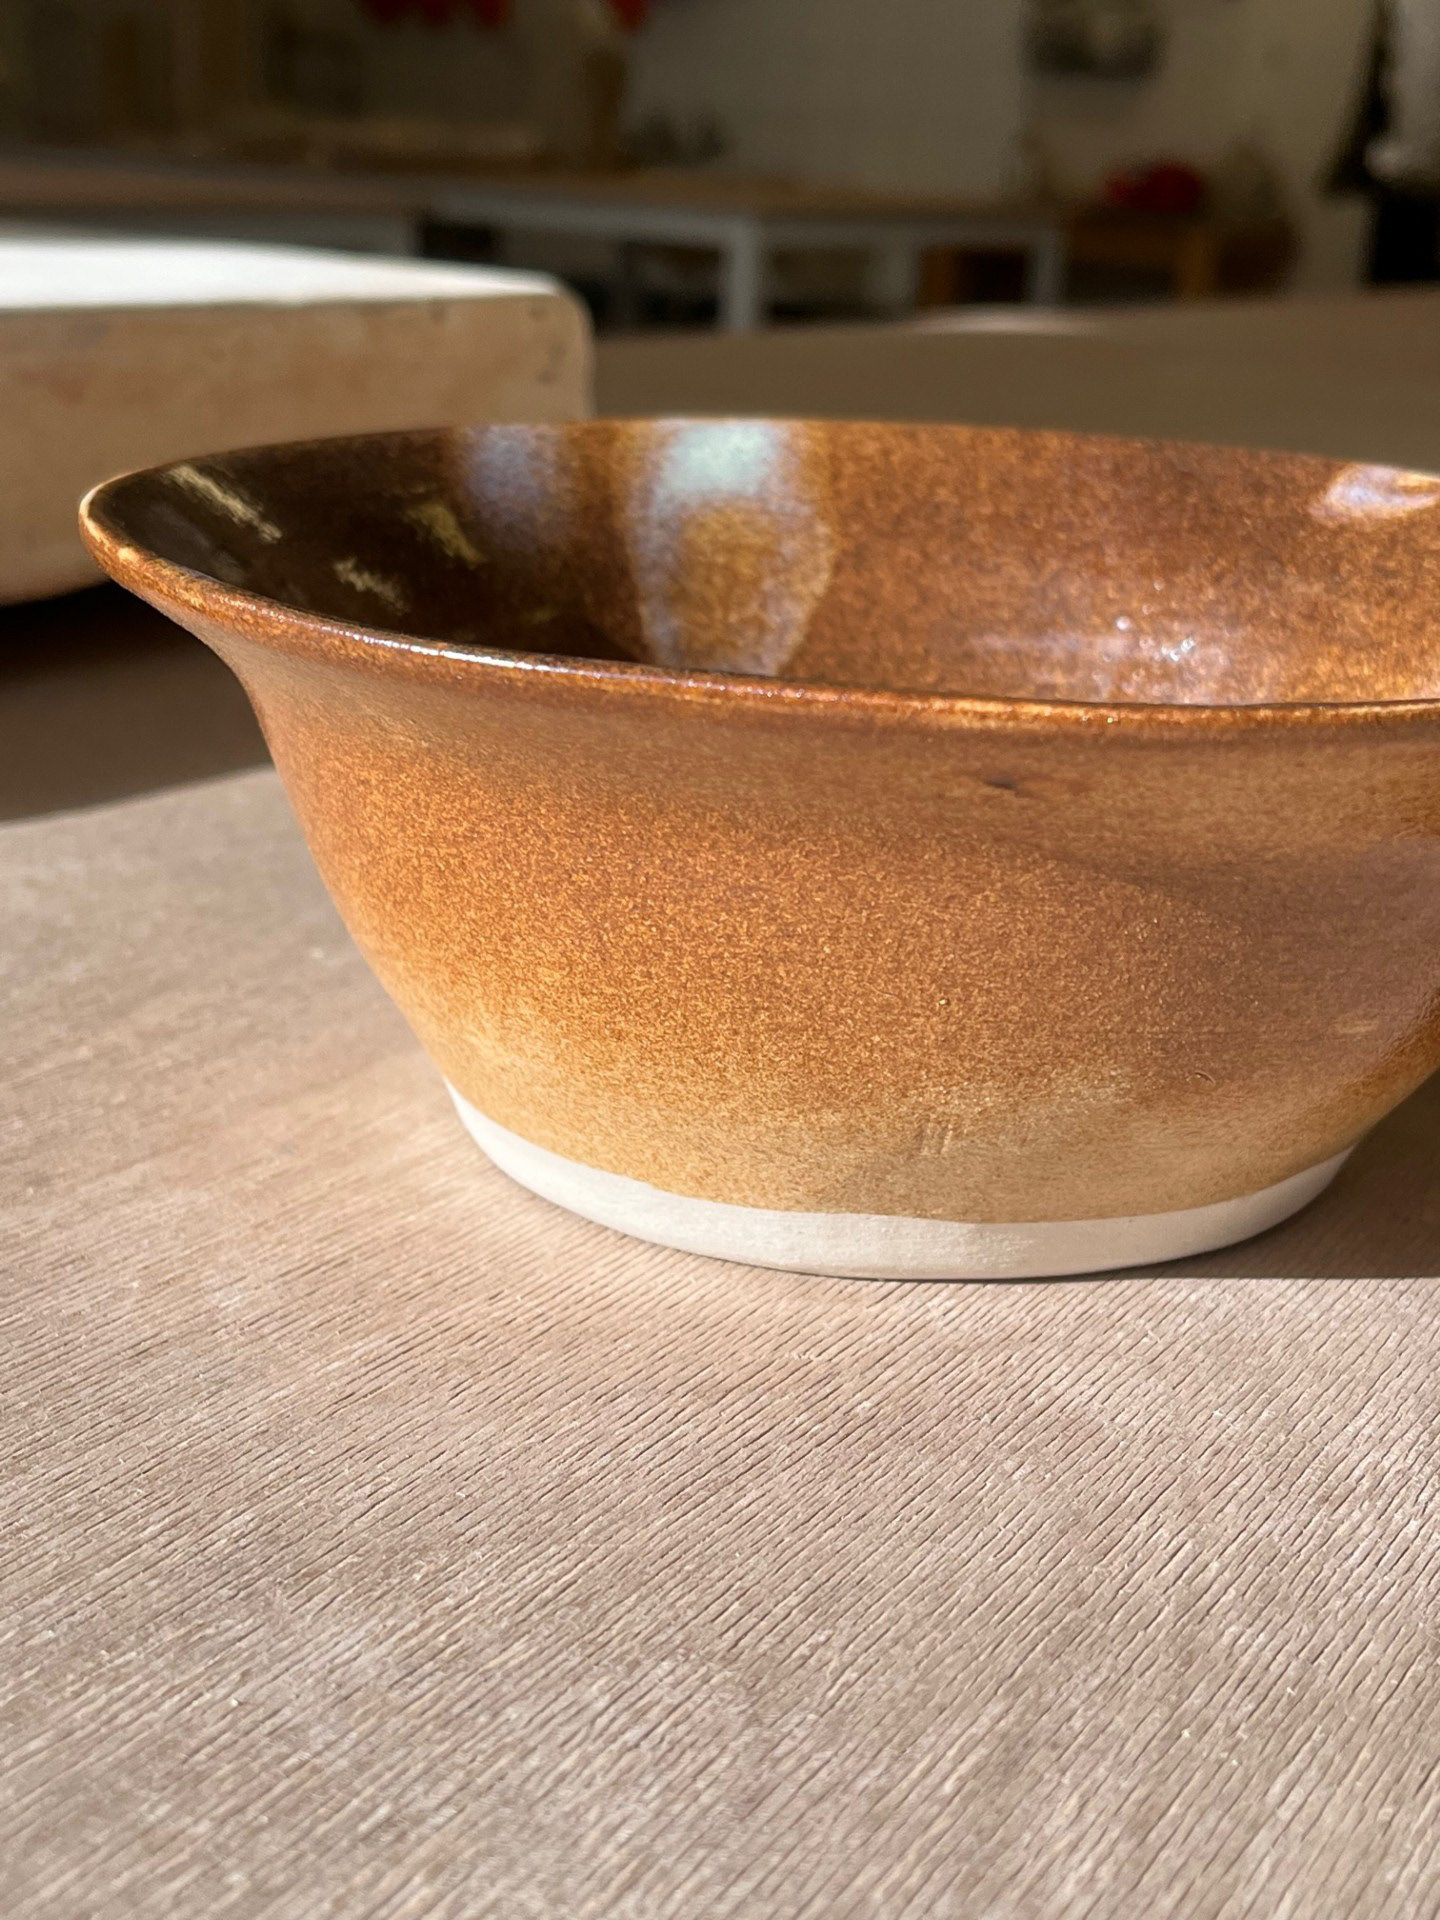
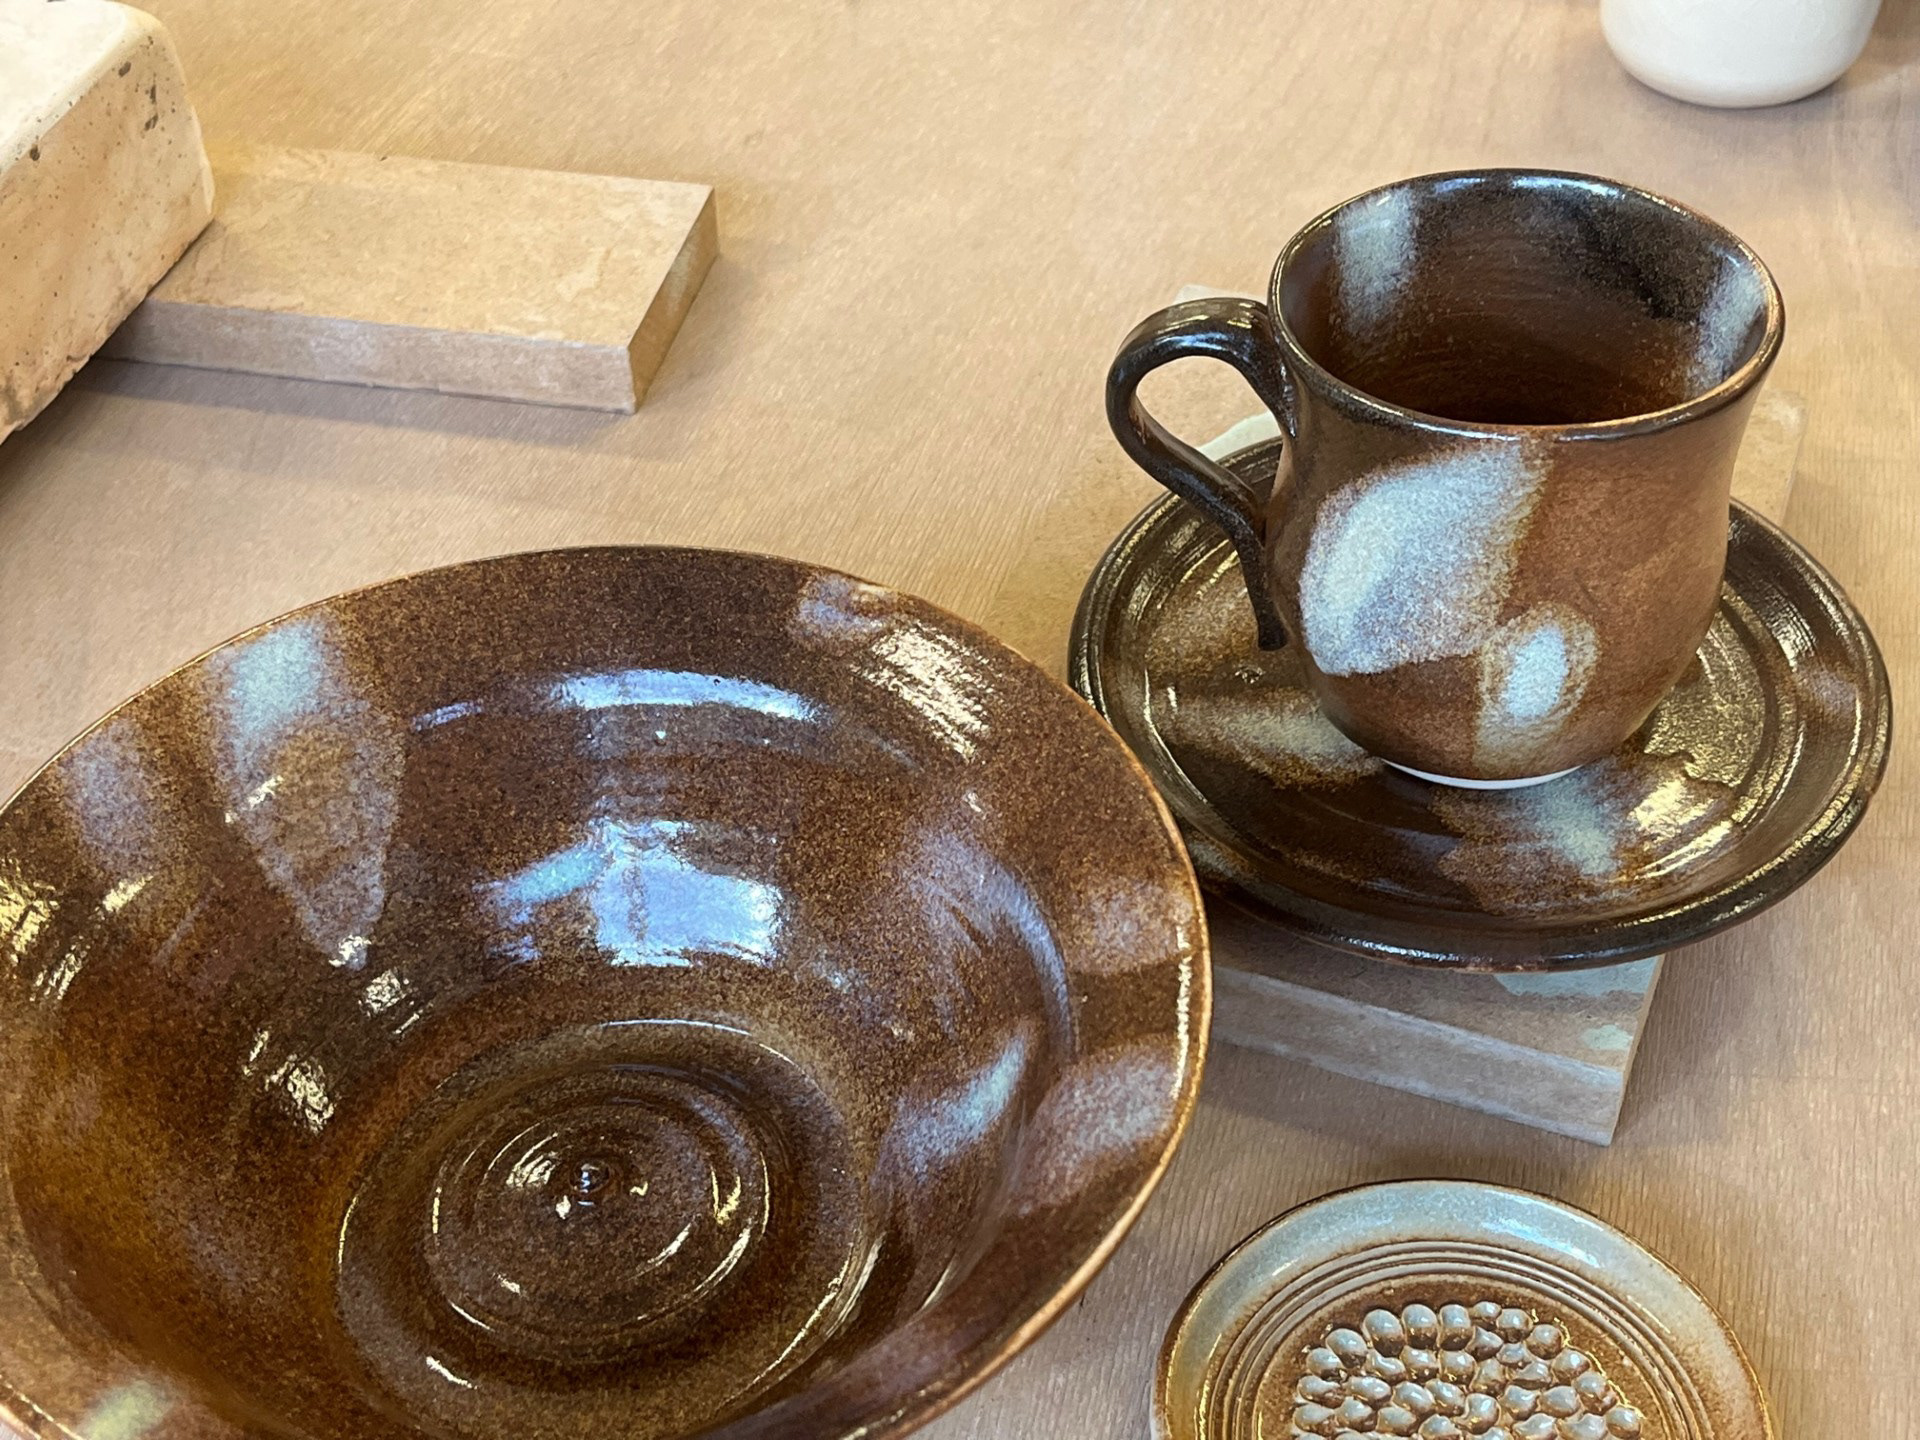
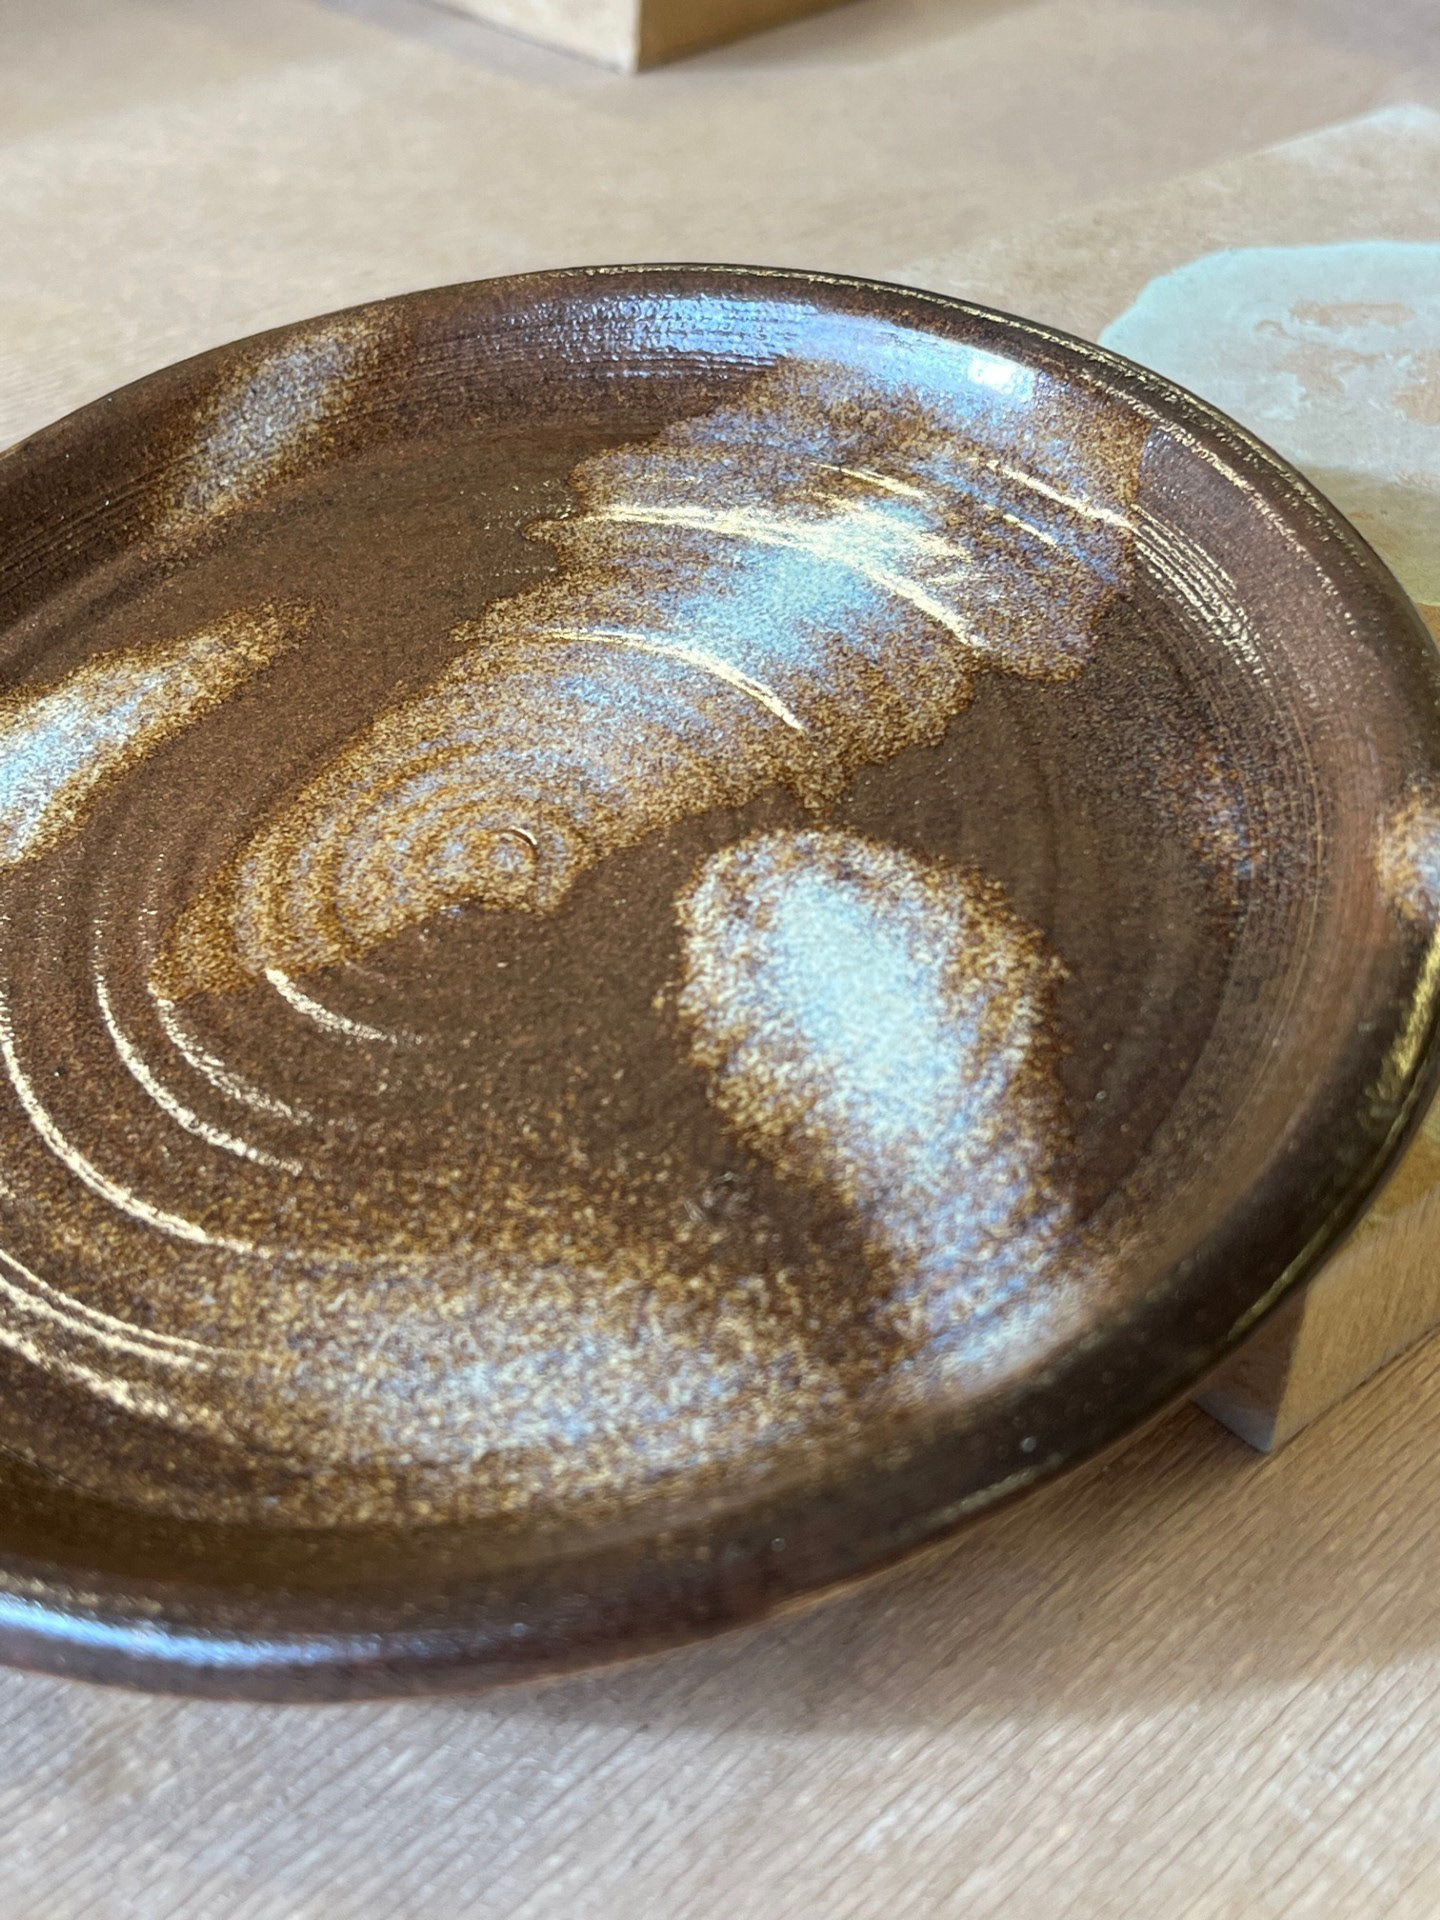
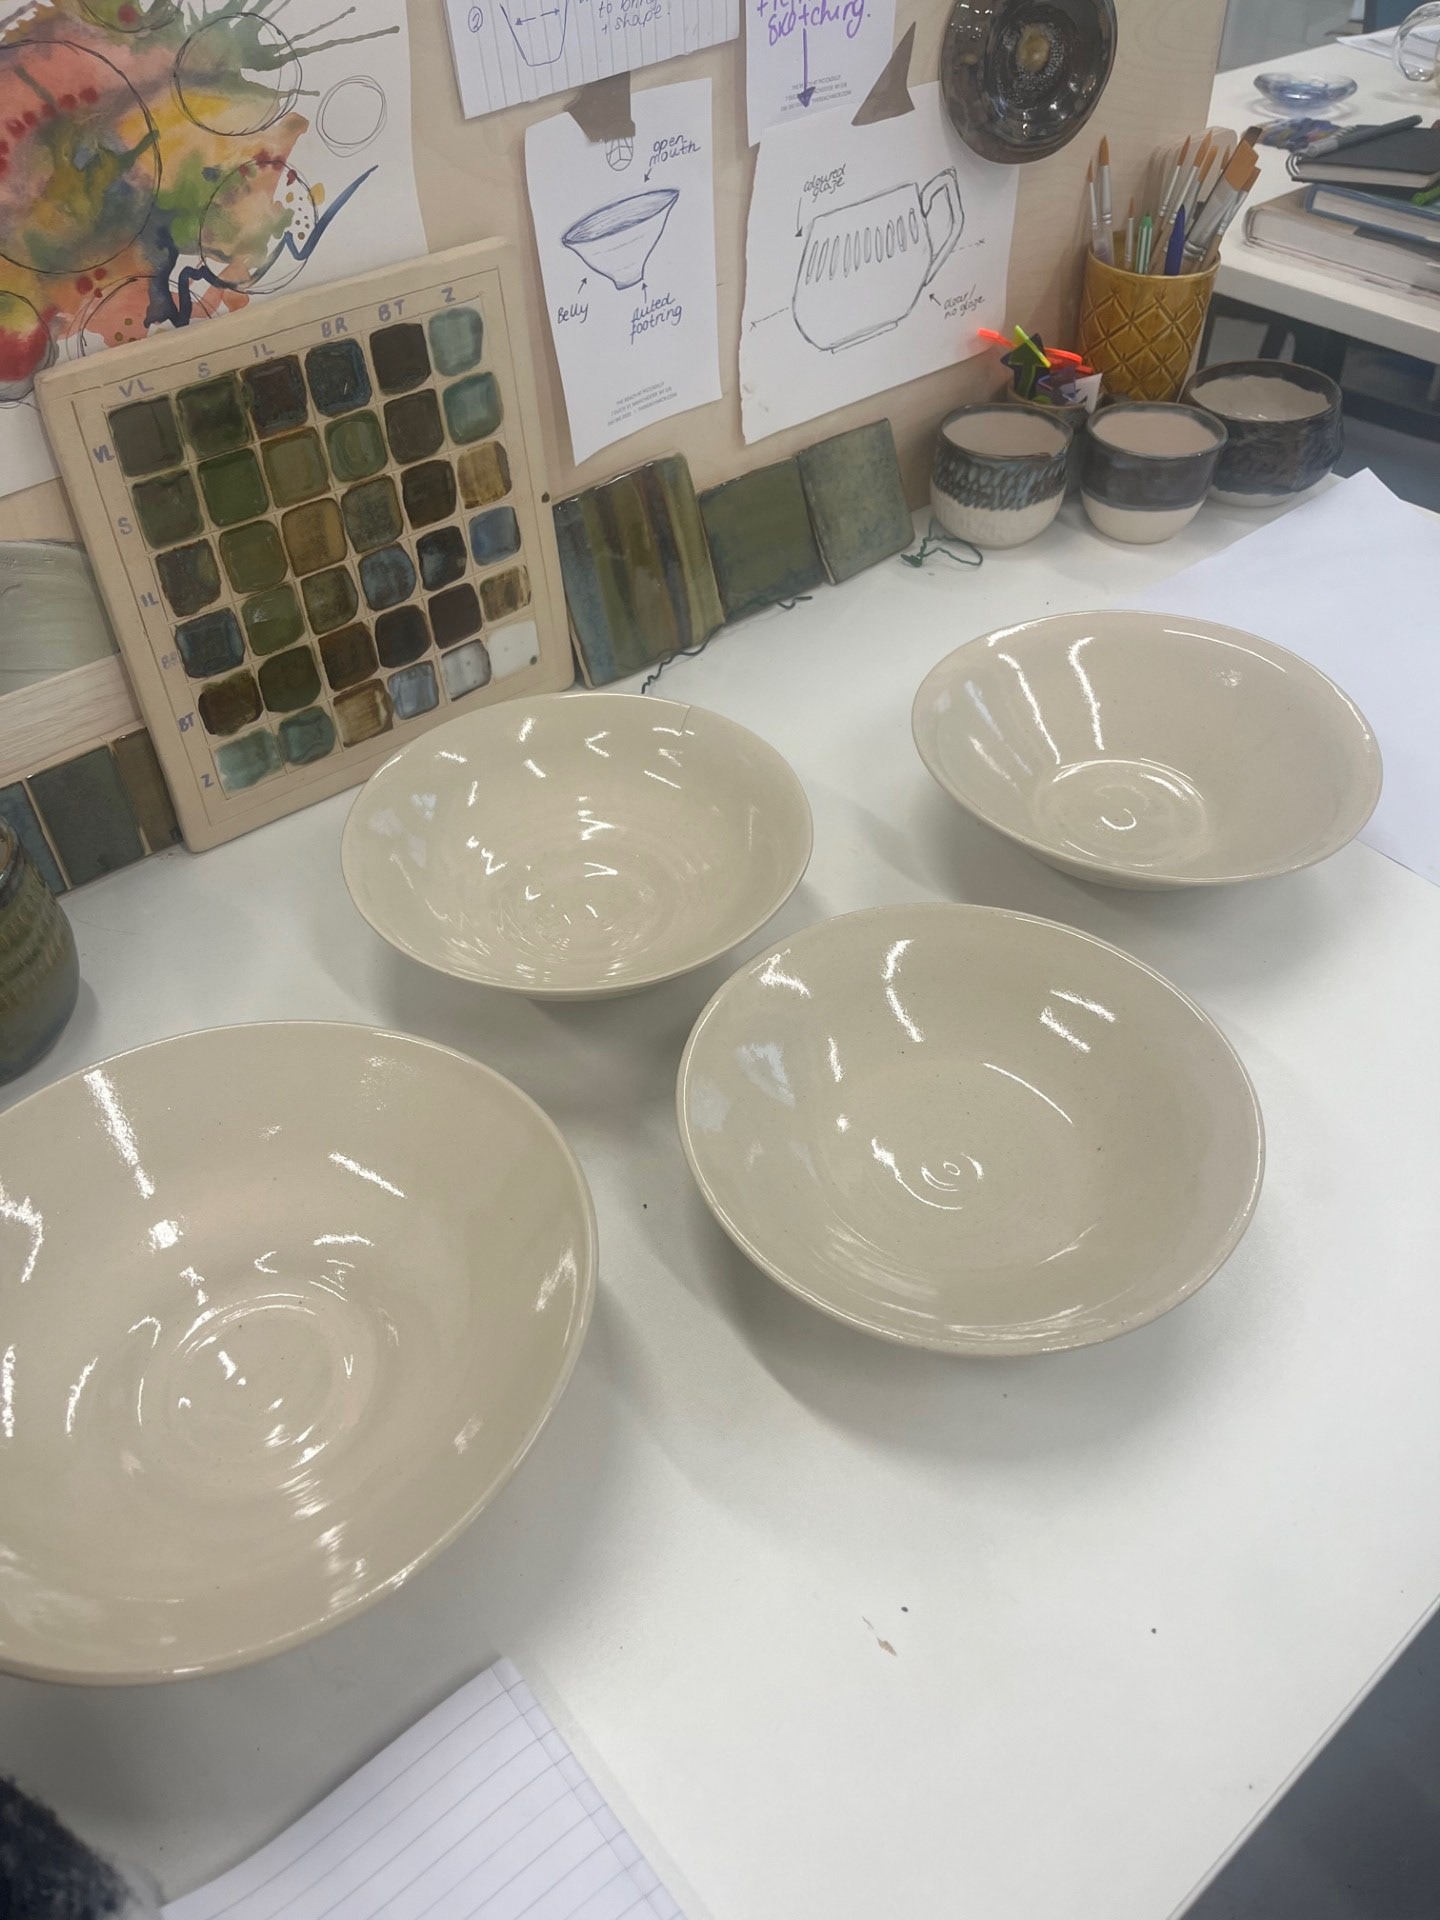
Final Outcomes:
Reflection:
The pieces themselves are something I am very proud of, as I have never created work to such a high standard before. However, one of the pieces has a stress crack in the rim because it dried too quickly. This is an issue that can be easily resolved by making the walls more even and properly covering the pieces to ensure they dry evenly. Another challenge I encountered is that one of the pots is significantly heavier than the others. This, too, is an easy fix—I simply need to focus on trimming the entire pot rather than just the foot ring. In terms of individual pieces, I feel they could have been more cohesive overall. That said, for this module, the pots themselves were not my main priority, as they primarily served as a canvas for the projection. Ideally, they would have been more refined, but my journey toward practical refinement is ongoing and remains my main focus as I move into synthesis and resolution. Despite these challenges, I am proud of how far I have come—especially considering that at the end of my second year, I could only make pieces the size of my palm!